
Save Document in MS Word
In this tutorial, we’ll talk about how you save documents in MS Word. As you read, you will understand the simple steps to save your document.
When creating a new document in Word, you must know how to save it so that you can access and update it later. You can save files to your computer, similar to prior versions of Word. Alternatively, you can save files to the cloud using OneDrive.
Table of contents
Why Saving Document in MS Word is Important?
Saving a document in MS word is a very important step that should be done as soon as you add something to it. This is done to keep data from being lost if the power goes out or the system breaks down. Moreover, it is essential to save your documents anytime you begin a new project or modify an existing one. Early and frequent backups can protect your work from being lost.
You must also pay particular attention to the location where you save the document so that it will be easier to locate in the future.
Save and Save As
The two ways to save a file in Word are “Save“ and “Save As.” Both of these choices work in similar ways, but there are a few key differences between them.
Save
The Save command is used to store the current version of the file when a file is created or edited. This is the primary command that you will utilize. It is only necessary to select a name and location for a file once. After that, you may save it under the same name and in the same place by selecting the Save option.
Save As
Using Save As you can make a copy of a document if you want to save a different version but keep the original. For example, if you have a file called “MS Word,” you could save it as “MS Word2” so that you can make changes to the new file while still being able to refer to the old one.
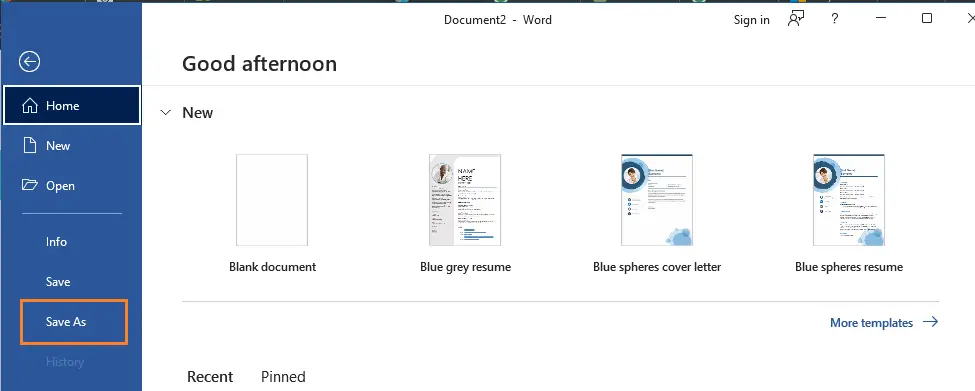
To do this, go to Backstage view and click the Save As button. Just like when you first save a file, you will have to choose where to save it and give it a new name.
How Do you Save Document in MS Word
Here are the ways on how you save document in MS Word.
- Make sure your document is open. You can open MS Word by double-clicking the Word icon or by double-clicking a Word document.

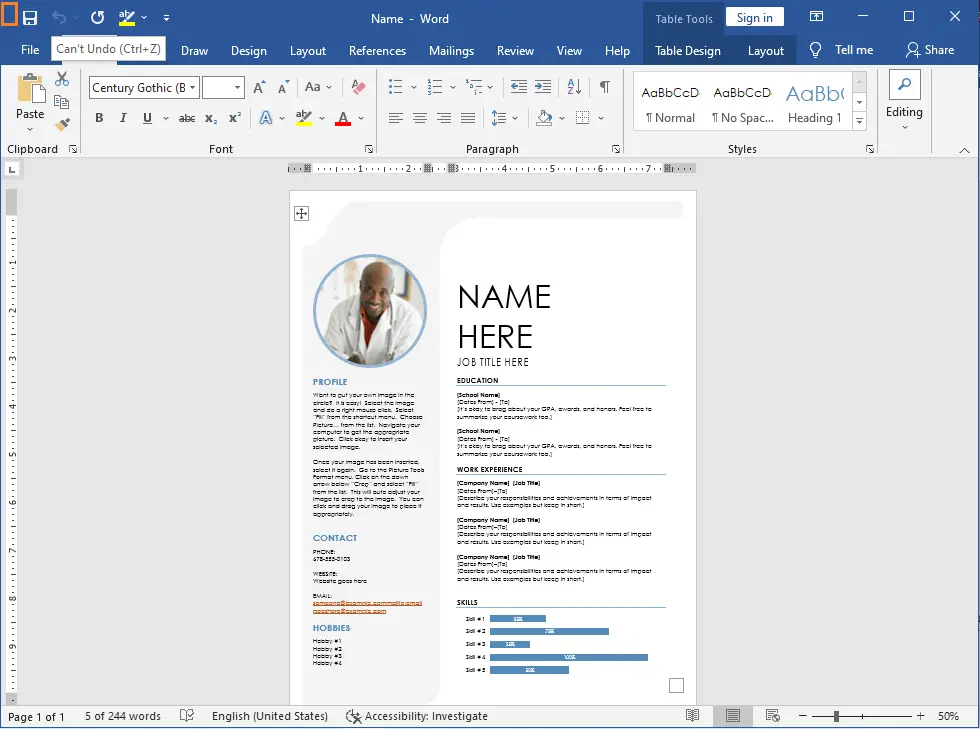
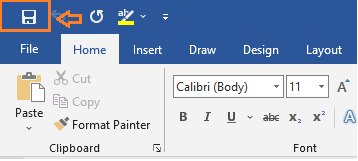
- Locate and select the Save command on the Quick Access Toolbar.

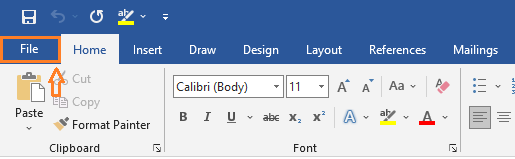
- Find the File tab and Click on the File Menu.
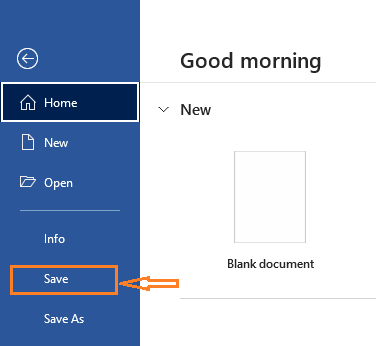
To save a document using the options provided by MS Word in its File menu.

- Find the Save button provided.
If the document has been previously saved, you won’t have to select a save destination (e.g., desktop) or a file name–the existing file will simply be updated. If you click “Save” on an unsaved document, you will be redirected to the “Save As” menu.

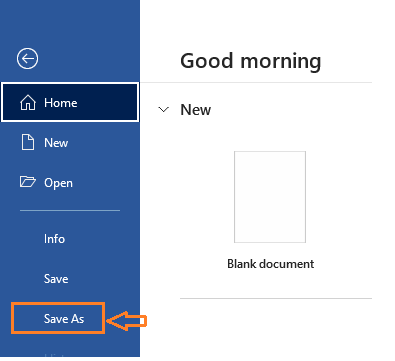
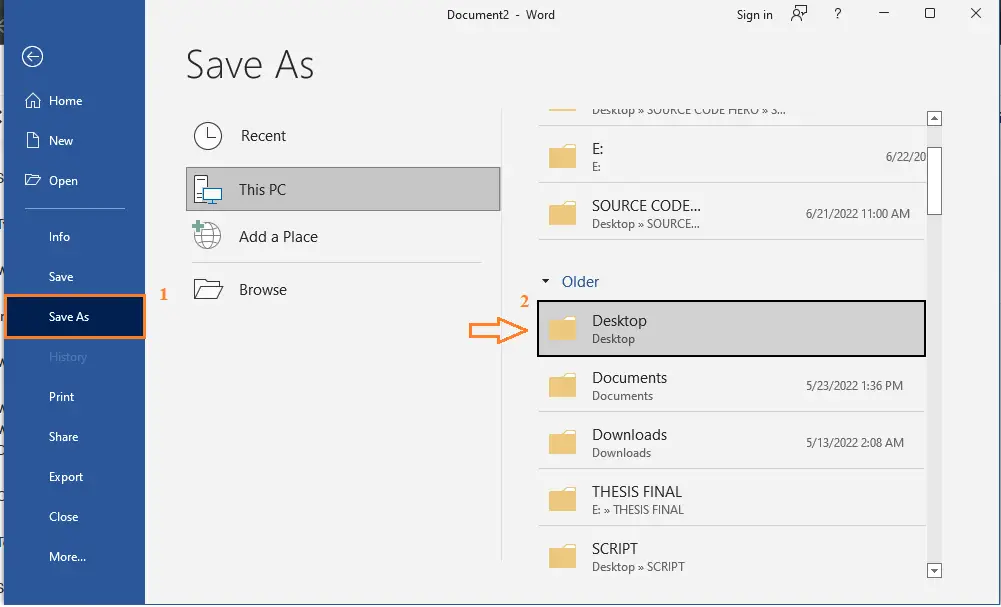
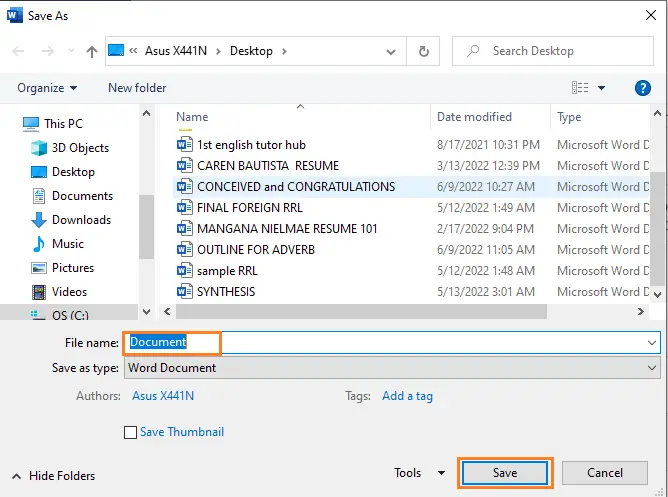
- If you’re saving the file for the first time, the Save As pane will appear in Backstage view.
Click Save As Button.

- Choose your saving location under Save As. OneDrive and “This PC” are typical choices, but you can also click “Browse” to choose a different one.
You’ll then need to choose where to save the file and give it a file name.

- Provide a name to the file or use the default one.
In the “File Name” field, type in your preferred file name. Then, click on the Save button.

- Verify that your file was saved before closing your document.
If your file is in your chosen save location, your file was successfully saved!


How To Save Document in MS Word Online
Saving your document online lets you access them from anywhere and makes it easy to share them with family and friends. Additionally, saving document online is the best way to use Microsoft Word’s new features, starting with the auto-save feature.
OneDrive, a cloud-based file-hosting service, is used for this purpose. Make sure you are signed into Word with your Microsoft account before attempting to access OneDrive. Your files are saved online at OneDrive.com and also to your OneDrive folder on your computer. Take a look at our training module on mastering OneDrive
1. Go to the File menu (top left) then choose Save As.
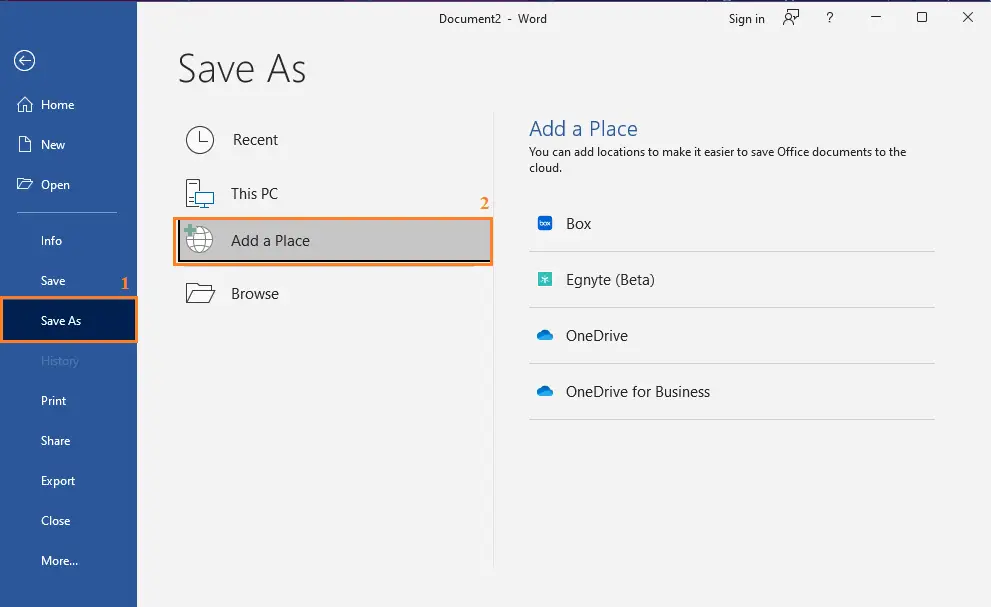
If Microsoft Word is not synchronized with an account, we must add one in order to save online. We can click the Add a Place link and log in with our credentials. Once we have linked an account, we may navigate among the folders or create a new one in order to choose where to keep our content.
This will launch a new window where you can add OneDrive, OneDrive for Business, and SharePoint online services.
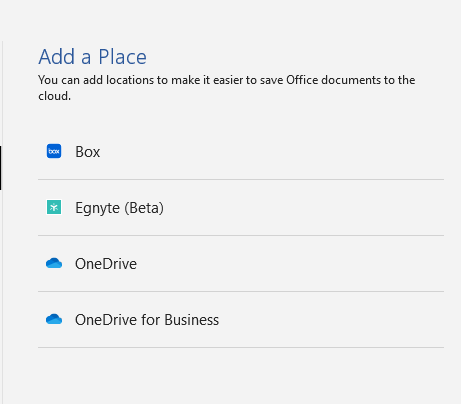
- OneDrive is the personal cloud-based file storage and management by Microsoft. We can get this service for free with our Microsoft email account.
- OneDrive for Business is the same service as OneDrive, but with more storage capacity. We can access this one if we have access to an Office 365 subscription.
- Finally, SharePoint, also included an with Office 365 subscription, is a teamwork platform that also lets us store documents and edit online.
What are the shortcut key to save a document?
This table contains the shortcut keys for saving a document and renaming Office files using the File menu, Save page, and Save As page, which can be accessed in normal or editing view.
| To do this | Press |
|---|---|
| To save a file quickly | Ctrl+S. |
| Save a document with the default settings. When the AutoSave option is not used, this option is available. | S |
| Navigate to the Save or Save As page. | A |
| On the Save or Save As page, use the following shortcuts: | |
| Add a cloud storage location for your file. | A, A |
| Rename a file. | A, Y, 3 |
| Save a copy of the file to your computer’s Documents folder. | A, C, Y, 8 to move the location to Documents. Then press Alt+A, Y, 5 to save. |
| Open the Save As dialog box to give your file a new name or save it somewhere else. | A, 1 or A, O |
Summary
In this tutorial, we’ve talked about the ways how to save documents using Save and Save As command as well as what those terms mean. We also gain insight why it’s important to save document online. Further, we also picked up some skills on what are the short cut keys in saving document.
We hope this tutorial helps you as you plan to create a document in MS Word.
PREVIOUS
NEXT
2026 saving: AutoSave, Version History, and cloud-first defaults
The manual Ctrl+S and File > Save methods covered in this tutorial still work. In Word 2026 there are three important saving improvements worth knowing so you do not accidentally lose work.
- AutoSave (toggle at top-left corner): when a document is stored on OneDrive or SharePoint, AutoSave saves every change in real time (usually every 2-3 seconds). No more Ctrl+S panic when Word crashes. To enable, save the file to OneDrive first, then the AutoSave toggle in the top-left corner appears blue and On.
- Version History (File > Info > Version History): OneDrive-stored Word documents keep the last 25+ versions automatically. You can restore any earlier version without losing the current one. Extremely useful for capstone thesis chapters where you might delete a paragraph and need it back a week later.
- Cloud-first Save As default: Word 2026 defaults the Save As dialog to OneDrive locations, not your Documents folder. To save locally, click Browse and navigate to your local drive manually. This is a Microsoft push toward cloud storage.
- Recover unsaved changes (File > Info > Manage Document > Recover Unsaved Documents): even without AutoSave, Word keeps temporary versions of unsaved documents for 4 days by default. If Word crashed before you saved, this is where you find your work.
For capstone drafts, save to OneDrive from the start. AutoSave + Version History together mean you basically cannot lose work, even if your laptop dies overnight.

Glay Eliver
Programmer & Technical Writer at PIES IT Solution
Glay Eliver is a programmer and writer at PIES IT Solution, author of over 600 tutorials at itsourcecode.com. Specializes in JavaScript tutorials, Microsoft Office how-tos (Excel, Word, PowerPoint), and Python error debugging covering ImportError, TypeError, AttributeError, ModuleNotFoundError, and JavaScript ReferenceError. Authored several of the site’s highest-traffic Excel and MS Office reference articles.
Expertise: JavaScript · MS Excel · MS Word · MS PowerPoint · Python · Python ImportError · Python TypeError · Python AttributeError · ModuleNotFoundError · JavaScript ReferenceError · Pygame · View all posts by Glay Eliver →