
In this chapter, we will discuss how to add page numbers in MS Word. Microsoft Word automatically assigns page numbers on the pages of your document.
Typically, page numbers are printed either in the header or footer, but you have the option of displaying the page number in the left or right margin at the top or bottom of a page. To learn more about header and footer, see our previous tutorial.
Table of contents
What is Page Number in MS Word?
A page number is the particular page number within a document, often abbreviated as page no. The document may be printed or electronic, such as a Microsoft Word document or an e-book.
Furthermore, they came in many different ways to show numbers and changed them to fit your needs. Page numbering lets you start over with page numbering if you need to number some pages differently.
In addition, you can automatically number each page of your document using page numbers. They are available in a variety of numerical formats, and they could be done to your specifications.
Page numbers typically appear in the header, footer, or side margin. Read our article to learn more about header and footer and how to adjust the page margin.
What is the purpose of page number?
The purpose of page numbers is it helps you keep your document organized, makes it easy to refer back to specific parts of your paper, and make things look more professional and well-done.
So, if you want your table of contents and introduction to be numbered differently than the main body of your document, you would have to put them in a separate section at the beginning.
Moreover, most documents use Arabic numerals in the main body, but some use Roman numerals for different parts like the table of contents, introduction, and glossary. Word also lets you set up your document this way.
How to Simply Insert Page Number
Here is the simple way How to Insert Page Numbers in an MS Word document.
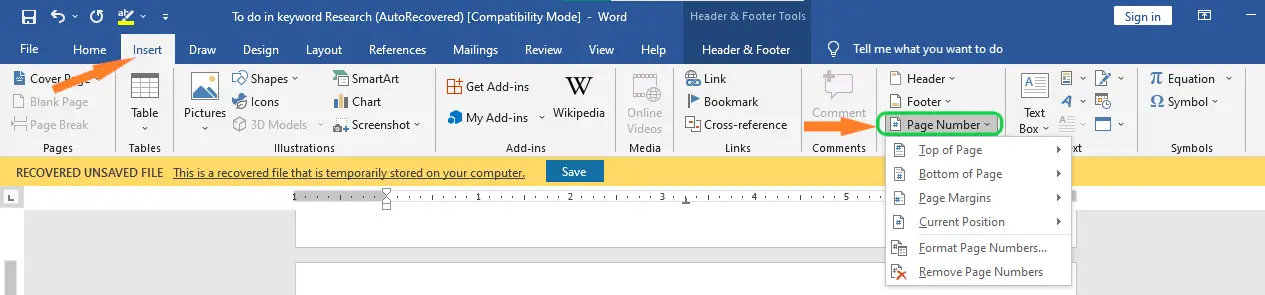
- Start by Clicking the “Page Number” button in the “Header & Footer” section of the “Insert” tab on the Ribbon.

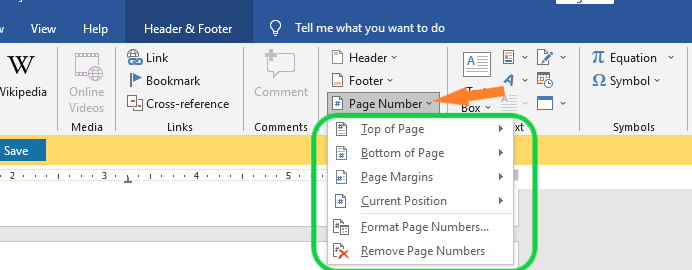
- A drop-down menu displays various possibilities for where you would like the page numbers to appear, such as at the top, bottom, etc.
The final two options allow you to format page numbers more accurately.

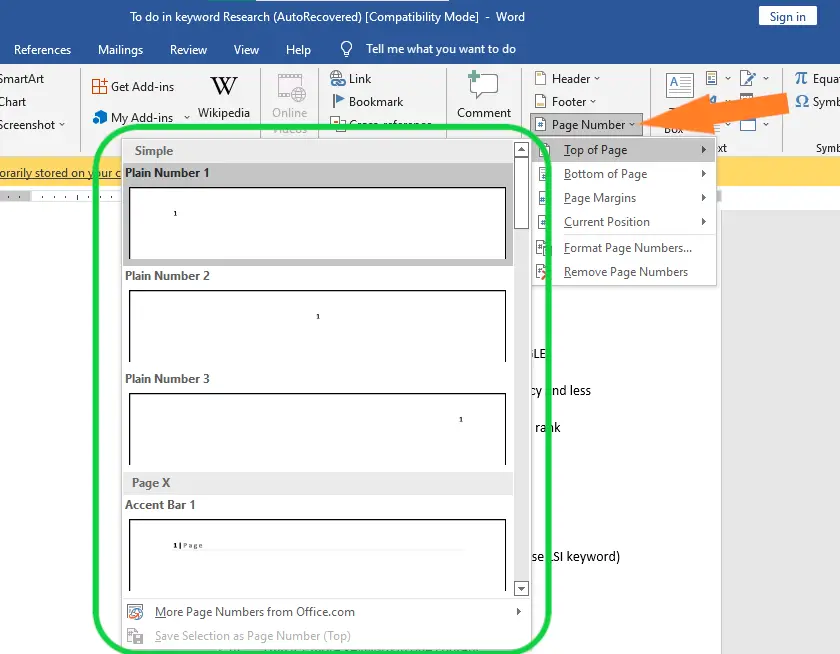
- When you hover over one of the first four options, a gallery of page numbers appears.
Each choice in the gallery provides a broad representation of how your page’s page numbers will appear.

- Click the desired option to have Word automatically number all of your document’s pages in that format.
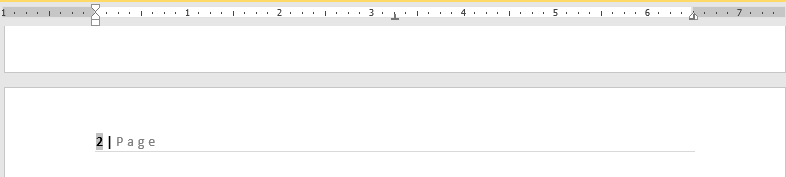
In this example, the “Accent Bar” style has been applied to the “Page X” format.

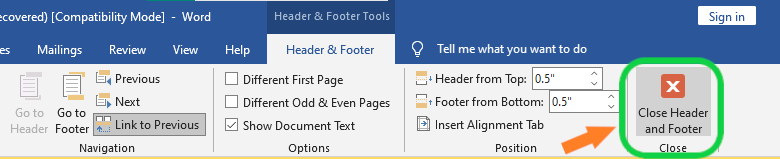
- Tap the “Close Header & Footer” button on the Ribbon or double-click outside the header or footer section to return to your document.
If you place page numbers at the top or bottom of the page, the header or footer of your document opens so you can add whatever around them.

That’s the easy way to add page numbers, and it works fine if you have a simple document in which you want all the pages to be numbered and numbered in the same way.
How to Add Different Page Number
In adding Different Page Number in MS Word, you will need to divide your document into distinct sections for each component.
To do this, put your insertion point at the very beginning of your document or right before the first page of your main content if you haven’t already made that preliminary content.
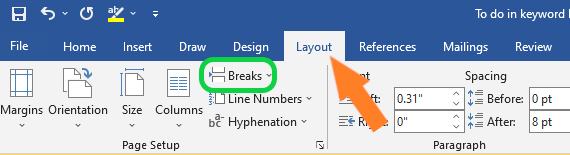
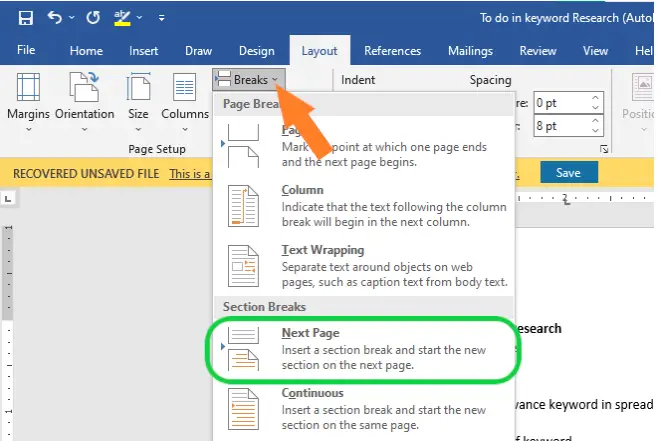
- Start on the Ribbon, click the “Breaks” button on the “Layout” tab.

- Then, click “Next Page” in the drops down menu. This makes a new section start on the next page.

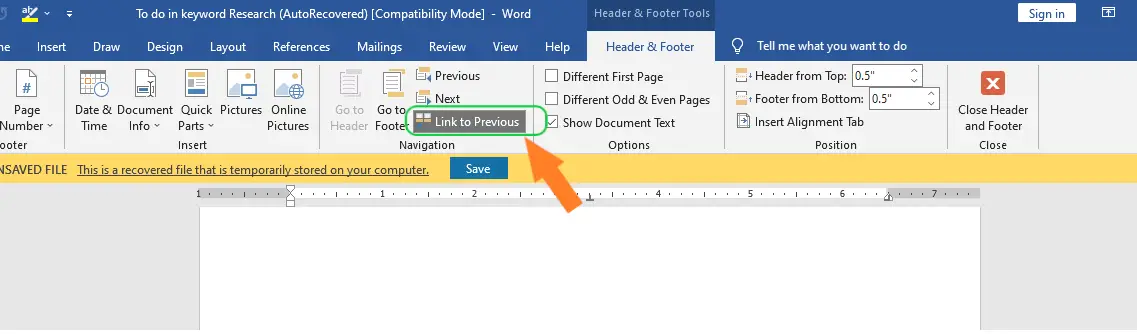
- Break the link between your new introduction and the main body of your work. To do so, open your document’s header or footer where page numbers reside.
- On the Ribbon’s “Header and Footer” tab, Click “Link to Previous” to break the link to the previous section’s header and footer.

- Now that you’ve broken the link, you can change the page numbers to how you want them.
- Next, open the header and footer area of any page in that first section. You’ll see the same page numbers before you made the new section break.
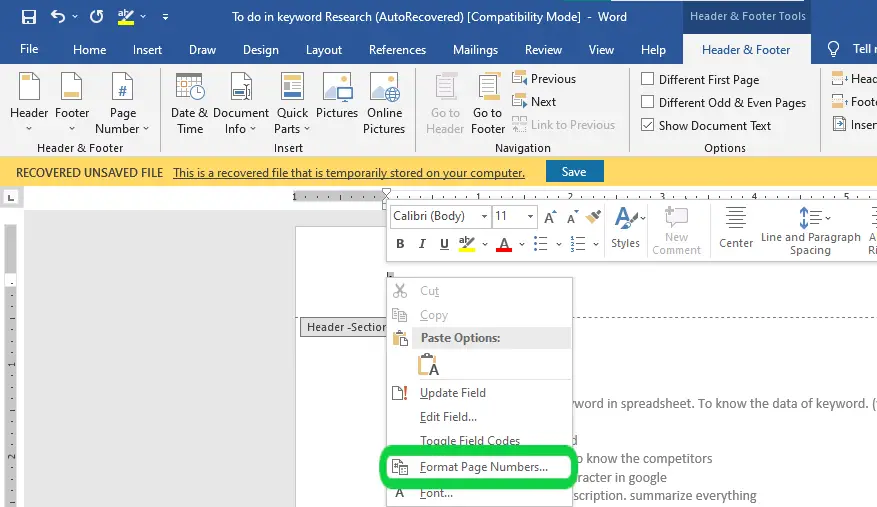
- Right-click on the page number and select “Format Page Numbers” from the menu that appears.

- In the Page Number Format window, use the “Number Format” drop-down menu to choose the type of numbers you want to use for the section.
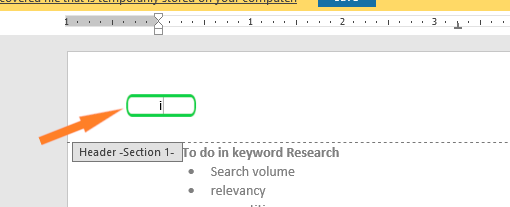
- Here, we’ve used standard Roman numerals with lowercase letters. When you’re done, click “OK.”

- As you can see that the Roman numerals have been used to number the pages in that section.

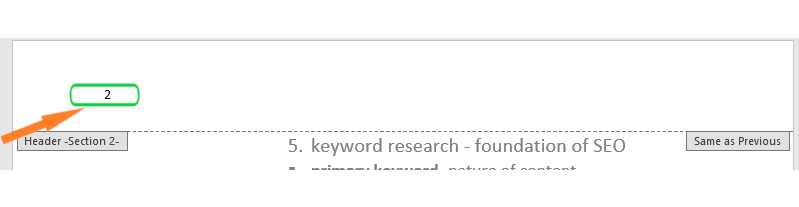
- Next page below you’ll notice that page numbering doesn’t start at 1. It kept the same numbering before you added the section.

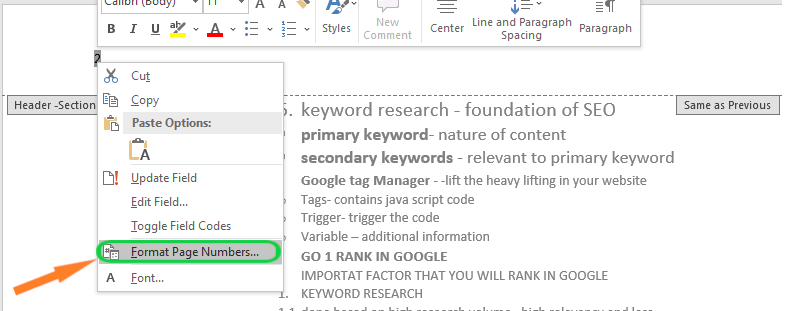
- But it’s easy to fix. Right-click on the page number and select “Format Page Numbers” from the menu.

- Select “Start At” in the Page Number Format window and type “1” in the box to the right to start the section on page one.

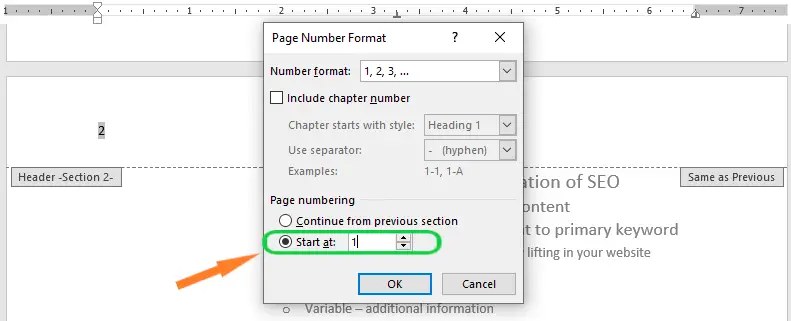
That concludes the discussion. You should now have two parts with distinct numbering and formatting.
Steps to Hide the Page number on the first Page
In some documents, you may not want the first page to show the page number. You can hide the first page number without affecting the rest of the pages. Here are the steps to do it.
- Double-click the header or footer to unlock it.
- From the header and footer tab, place a checkmark next to Different First Page. The header and footer will disappear from the first page. If you want, you can type something new in the header or footer, which will only affect the first page.
If you’re unable to select Different First Page, it may be because an object within the header or footer is selected. Click an empty area within the header or footer.
How To Add Page Number to an Existing Header or Footer
If you already have a header or footer and you want to add a page number to it, Word has an option to automatically insert the page number into the existing header or footer. In our example, we’ll add page numbering to our document’s header.
- Double-click anywhere on the header or footer to unlock it.
- On the Header and Footer tab, click the Page Number command. In the menu that appears, hover the mouse over Current Position and select the desired page numbering style.
- Page numbering will appear.
- When you’re finished, press the Esc key.
How to Insert page number from Current Position
Step-by-Step Instructions:
- Go to the first page for which you want to have numbered pages.
- At the top of the page, before the first line/word, click on the document to place your curser.
- Then choose Layout from the top menu. Next select Breaks – Next Page.
- Now choose Insert from the top menu and then select Page Numbers and then choose how you want them to appear in the document.
- Now highlight the page number at which you want to start the numbering. From the Header & Footer Tools menu, unclick Link to Previous.
- With the number still highlighted, choose Page Number from the top menu, then select Format Page Numbers. Under Page Numbering, choose Start At and then select a starting number.
- The last step is to go to the top of the document and click on the first page number, and then hit delete. This will remove the beginning numbering sequence, and you will be left with the numbering sequence you created later in the document.
Summary
In summary, we’ve learned how to add page numbers in a word document as well as what those terms mean. In addition, we know why we need a page number in our document to look presentable and creative. Furthermore, we have many options to apply for page numbers in different ways.
Meanwhile, if you want to learn more about formatting text, see the previous tutorial on how to add header and footer and how to adjust page margin in Microsoft Word, which are still part of formatting your documents. You can browse those guides if you are having a hard time exploring your documents.
We hope this tutorial helps you as you format your documents in MS Word.
PREVIOUS

NEXT

Glay Eliver
Programmer & Technical Writer at PIES IT Solution
Glay Eliver is a programmer and writer at PIES IT Solution, author of over 600 tutorials at itsourcecode.com. Specializes in JavaScript tutorials, Microsoft Office how-tos (Excel, Word, PowerPoint), and Python error debugging covering ImportError, TypeError, AttributeError, ModuleNotFoundError, and JavaScript ReferenceError. Authored several of the site’s highest-traffic Excel and MS Office reference articles.
Expertise: JavaScript · MS Excel · MS Word · MS PowerPoint · Python · Python ImportError · Python TypeError · Python AttributeError · ModuleNotFoundError · JavaScript ReferenceError · Pygame · View all posts by Glay Eliver →