
This chapter describes what header and footer are in MS Word and how to add a header and footer in Word. Headers and footers are sections of a document that contain special information, such as page numbers and the total number of pages, the title of the document, the company logo, and any images. The header and footer appear at the top and bottom of each page, respectively.
Table of contents
What is the header and footer in MS Word?
Headers and footers are handy for including information on each page of a document, such as your name, the document’s title, and page numbers.
Header
Text that goes at the top of a page is called a header. Most of the time, this is where you put information about the document, like its name, the chapter heading, page numbers, the date it was made, and so on.
Footer
A footer is a section at the bottom of a document page that contains information shared with other pages. Footers may contain page numbers, creation dates, copyrights, or references that occur on a single page or all pages.
Why header and footer used in MS Word
Header and footer are typically used in Word documents because they include additional information such as page numbers, dates, an author’s name, and footnotes, which can aid in the organization and readability of lengthy publications. Text supplied in the document’s header or footer will appear on each page.
By utilizing the header and footer sections, you can make your document look professional and polished. The header is a piece of the document that appears at the top margin, whereas the footer is a section that appears at the bottom margin.
Advantages of header and footer in MS Word
One of the advantages of header and footer in Word document is that they repeat important information on every page or section. This makes it easier for people to find what they need quickly in a long document. This is shown by page numbers, which are important in any long document.
Header and footer are helpful because they give quick information about your document or data in a predictable way and set up different parts of a document. Simply, they make it much easier to read and understand calculations, graphs, and pivot tables.
The main difference between a header and a footer is their placement inside the document. Thus, what functions for the header also functions for the footer. Therefore, let’s begin by placing anything into the Word header.
How to Use Header and Footer in MS Word
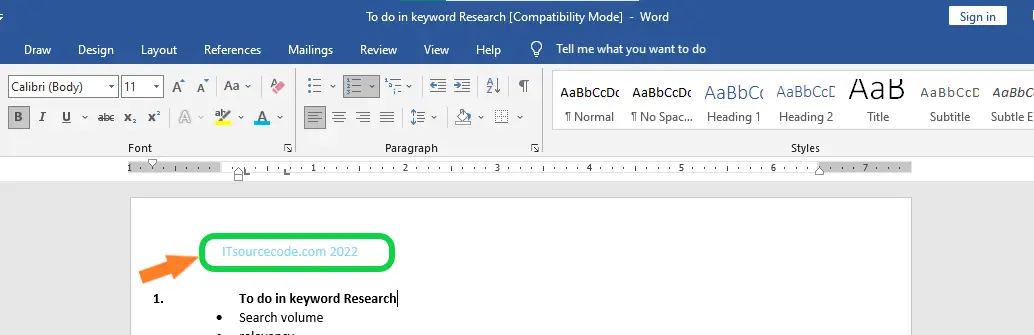
Steps on How to Use Header and Footer in MS Word. In this example, we want the actual article to appear at the top of each page, so we will include it in the header.
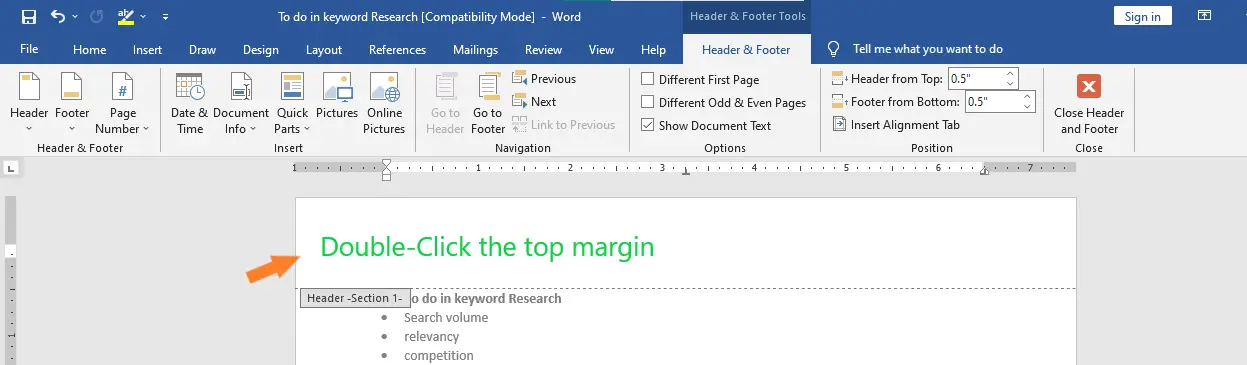
- Step 1: Double-click anywhere on the document’s top or bottom margins. Here we will double-click the upper margin in our example.

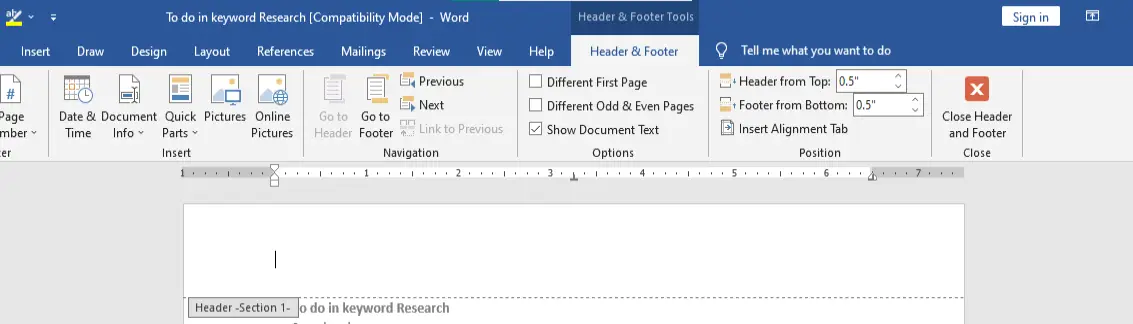
- Step 2: The header or footer tab will be displayed. The insertion point will be displayed in either the header or footer.

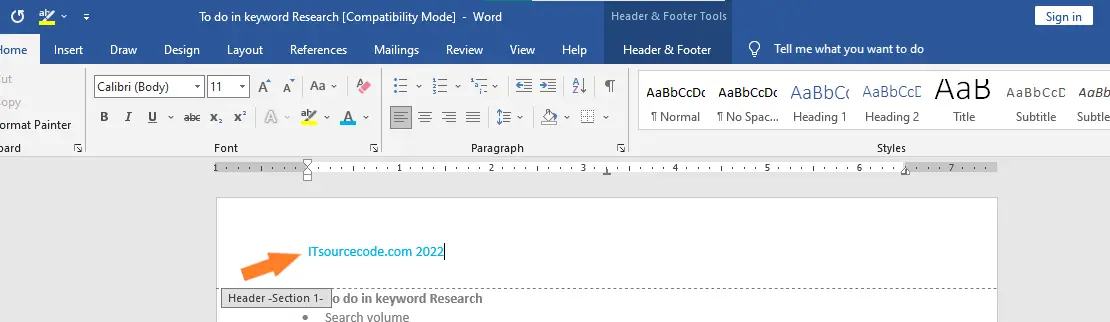
- Step 3: Fill in the blanks with the required information in the header or footer. We’ll type the website name and the date in our example.

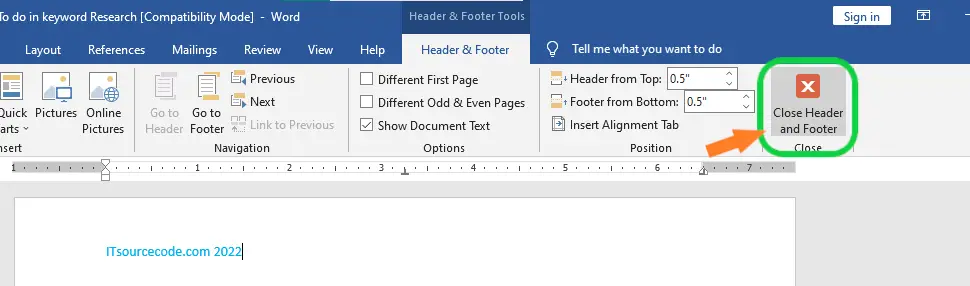
- Step 4: Close the Header and Footer when you’re finished. Alternatively, press the Esc key.

- Step 5:The text of the header or footer will load.

Different Headers for Different Sections
Additionally, here are the instructions to have Different Headers for Different Sections. To accomplish this, you must first create sections in your document. To make sectioning:
- Select the location where you wish to create a section by positioning the cursor there.
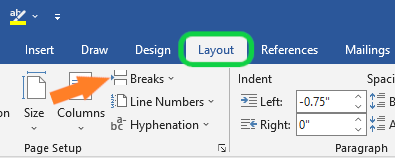
- Select the Layout tab, then click Breaks.

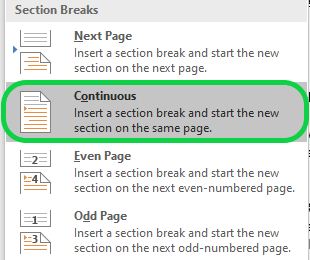
- In the bottom half of the menu, the Section Breaks are displayed.
- Choose “Continuous” from the list. This will make a Section Break right where the cursor was.

Once you divide your document into sections, you can give each section a different header.
To have different section headings:
- Go to the Header & Footer Tools tab by double-clicking on the header.
- Click the Link to Previous button to turn it off. If you keep this option turned on, this section will use the same header and footer as the last one.
So there you go! With these, each page in your document can have its own header.
How to Remove Header and Footer in Word
The following are Remove Header and Footer from the first page of word document.
- Double-click the first page header or footer area.
- Check Different First Page to see if it’s selected. If not:
- Select Different First Page.
- Content of the header or footer on the first page is removed.
- Add your new content into the header or footer.
- Select Close Header and Footer or press Esc to exit.
How do I change single-page header or footer of Word
Breaks between pages and between sections are different. If you want to change single-page header or footer of Word there is already a page break before the page where you want to change the header or footer, remove the page break and replace it with a section break, as shown below.
- Click or press where you want a new page to begin without a header or footer.
- To make a section break, go to Layout > Breaks > Next Page.
- To open the Header & Footer tab, double-click the header or footer section.
- Select Link to Previous to disable the connection between parts.
- Choose Header or Footer and do one of these:
- Choose Remove Header or Remove Footer .
- Change or add to the information in the header or footer. If you want to delete or change both the header and the footer, you’ll need to repeat steps 3 through 5.
- To get back to your document’s body, choose Close Header and Footer or press ESC.
Shortcut key for header and footer in MS Word
The table shows the Shortcut key for header and footer in MS Word.
| Shortcut Key | Description |
| Alt+N, H, E. | To open the Header & Footer ribbon, You can add a header or footer picture or modify their location with the Header & Footer ribbon. |
| Alt+V, H. | Hold down the Alt key and press the V key at the same time. You can hold down the Alt key while you press H, or you can let go of it. |
| Alt+N, O | Press it to make a footer. |
Summary
In summary, we’ve learned what is header and footer in MS Word are and how to add header and footer in a document, as well as what those terms mean. In addition, we know why we need a header and footer to make our document presentable and creative.
Meanwhile, if you want to learn more about formatting text, see the previous tutorial on how to check and change lines and paragraphs as well as how to adjust page margin in Microsoft Word, which are still part of formatting your documents. You can browse those guides if you are having a hard time exploring your documents.
We hope this tutorial helps you as you format your documents in MS Word.
PREVIOUS


Different First Page Header/Footer
The single most-asked Word question after “how do I insert a header” is “how do I make the first page not have a header?“, usually because the first page is a cover or title page that shouldn’t show the page number or document title.
The fix is one checkbox:
- Double-click the header or footer area to enter editing mode.
- On the contextual Header & Footer tab, find the Options group.
- Check the box labeled Different First Page.
- Word immediately gives you a separate “First Page Header” and “First Page Footer” on page 1, leave them empty if you want page 1 blank, or fill them with cover-specific content (e.g., a publisher’s imprint or a confidentiality stamp).
- Pages 2 onward continue to use the main header/footer.
This is also how you handle page numbering on cover pages. If your title page is page 1 but you want page numbering to start at “1” on the second page (the actual content), use the Different First Page checkbox to suppress the page number on the cover, then click Page Number → Format Page Numbers → Start at: 0. Page 1 (cover) is “0” (hidden), page 2 displays as “1”, the way every printed book on your shelf does it.
For a multi-page front matter (cover, table of contents, abstract, all unnumbered or numbered with Roman numerals) and then a numbered body, Different First Page isn’t enough. You’ll need section breaks: covered two sections below.
Different Odd and Even Page Headers/Footers
If you’re laying out a document that will be printed and bound like a book, capstone defense, thesis, training manual, novel, internal report, you’ll want different headers on left-hand (even) and right-hand (odd) pages. The convention from book publishing: chapter title on the left, section name on the right; or author name on the left, book title on the right. Page numbers go on the outer edge of each page.
To enable this:
- Double-click any header or footer to enter editing mode.
- Contextual Header & Footer tab → Options group → check Different Odd & Even Pages.
- Word splits the header into two, “Odd Page Header” (right-hand pages) and “Even Page Header” (left-hand pages). The same split applies to the footer.
- Click into an odd-page header and design it with right-aligned page number and content (the outer edge of a right-hand book page is the right side).
- Use the Next button on the contextual tab to jump to the even-page header, and design it as a mirror (left-aligned page number, content shifted accordingly).
Tip: turn on Mirror Margins (Layout → Margins → Custom Margins → Multiple pages → Mirror margins) at the same time. This automatically swaps the left and right margins on alternating pages so that the inner (gutter) edge is always wider for binding, the gold standard for any document going to a print shop.
Section-Specific Headers and Footers (Chapter Headers)
The most powerful, and most misunderstood, header feature is the ability to have completely different headers and footers in different parts of the same document. This is essential for any document that has chapters with distinct names, mixes Roman-numeral front matter with Arabic-numeral body, or transitions between landscape and portrait pages.
The mechanism is section breaks. A Word document is divided into one or more sections, and every section has its own header and footer settings (height, content, page numbering, even orientation). By default a new document has one section, but you can split it into many.
To insert a section break:
- Place the cursor where you want the new section to start (typically the beginning of a new chapter).
- Layout tab → Breaks → under Section Breaks, choose Next Page (starts the new section on a fresh page, most common), Continuous (new section starts immediately, no page break, used for column changes), Even Page, or Odd Page.
- The cursor jumps to a new section. You can verify this by clicking in the new section’s header, the label at the top-left will read “Section 2” (or 3, 4…) instead of “Section 1.”
The critical step that trips everyone up: by default, new sections inherit the previous section’s header via a “Link to Previous” setting. So when you change the new chapter’s header, the previous chapter’s header changes too, because they’re linked.
To break the link:
- Click into the header of the new section (Section 2).
- On the contextual Header & Footer tab → Navigation group → Link to Previous is highlighted (active). Click it to turn it off.
- The “Same as Previous” label that was on the right edge of the header disappears. You can now edit Section 2’s header without affecting Section 1.
- Repeat for the footer if you also want a different footer per section.
Once unlinked, type your new chapter name in the Section 2 header. Repeat the section-break + unlink pattern for every chapter. This is the workflow every published book and every well-formatted thesis uses, and once you’ve done it twice, it becomes second nature.
⚠️ Common gotcha: Word has separate “Link to Previous” toggles for the header and the footer, and for odd vs even pages if you’ve enabled Different Odd & Even Pages. If you unlink the header but forget the footer, you’ll wonder why the page number style won’t change. Always check both, and if you have odd/even enabled, check all four.
Common Header & Footer Problems and Fixes
Five issues account for nearly every Google search about Word headers and footers. Here’s how to fix each one in under a minute.
1. Header or footer disappears on certain pages
Quick fix: Usually caused by Different First Page being checked when you didn’t want it. Double-click any header → contextual tab → Options group → uncheck Different First Page. If that’s not it, check whether a section break is splitting the document, a new section with an empty (unlinked) header will look like the header “vanished.”
2. Page numbers restart unexpectedly mid-document
Quick fix: A section break is forcing a restart. Click into the section where numbering resets → Insert → Page Number → Format Page Numbers → change Page numbering from “Start at: 1” to “Continue from previous section.” Numbering will now flow correctly across the break.
3. Can’t edit the header: it’s locked or grayed out
Quick fix: Three possible causes. (a) You’re in Read Mode, switch to View → Print Layout. (b) The document is protected, Review → Restrict Editing → Stop Protection (you’ll need the password if one was set). (c) The document is in Protected View from an email attachment, click Enable Editing in the yellow bar at the top of the window.
4. Different formatting unexpectedly across sections
Quick fix: Someone broke a “Link to Previous” link in an earlier section, so the formatting diverged. Click into each affected section’s header → on the contextual tab → if you want them to match, click Link to Previous to re-link. Word will warn that the current header will be replaced, accept, and the section inherits the previous section’s formatting.
5. Header is too big or too small
Quick fix: On the contextual Header & Footer tab → Position group → adjust Header from Top (default 0.5″) or Footer from Bottom (default 0.5″). Decrease the value to bring the header closer to the body text; increase it to push it higher into the margin. Note: if your header has more than one line of content, the body text auto-pushes down to make room, increase the top margin (Layout → Margins) if you want a tighter look.
💡 Common gotcha: If your header or footer looks fine on screen but prints differently, check File → Options → Display → Printing options: make sure “Print drawings created in Word” and “Print background colors and images” are both checked if your header includes a logo or color band.
For a tour of the entire Word workspace where headers and footers live, see our parts of the MS Word window guide.
Frequently Asked Questions
What is a header and footer in MS Word?
How do I insert a header or footer in Word 365?
How do I make a different header on the first page only?
How do I add page numbers in MS Word?
How do I have different headers in different chapters of the same document?
Why does my header keep disappearing on some pages?
What is Different Odd and Even Pages used for?
How do I remove a header or footer in MS Word?
Can I put images or a company logo in the header?
Why is my page number restarting in the middle of the document?

Glay Eliver
Programmer & Technical Writer at PIES IT Solution
Glay Eliver is a programmer and writer at PIES IT Solution, author of over 600 tutorials at itsourcecode.com. Specializes in JavaScript tutorials, Microsoft Office how-tos (Excel, Word, PowerPoint), and Python error debugging covering ImportError, TypeError, AttributeError, ModuleNotFoundError, and JavaScript ReferenceError. Authored several of the site’s highest-traffic Excel and MS Office reference articles.
Expertise: JavaScript · MS Excel · MS Word · MS PowerPoint · Python · Python ImportError · Python TypeError · Python AttributeError · ModuleNotFoundError · JavaScript ReferenceError · Pygame · View all posts by Glay Eliver →
Looking for similar projects or tutorials?
Search for more source code, capstone projects, or programming tutorials