
In this chapter, we’ll talk about How to add rows and columns in MS Word. As we talked about in the last chapter, a table is made up of columns on the left and rows on the right, with a cell at each intersection. This chapter will show you how to add and remove rows and columns from a table.
Table of contents
What is row and column in MS Word?
A Word table can have up to 63 columns in a Word document. This is the maximum number of columns that can be in a Word document. In addition, you can have as many rows as you want. Word Document, specifically, allows you to put 32, 767 rows in one table.
How To Add Rows and Columns in MS Word
The following are the simple steps to add rows to a table in a word document. Once you create a table in a Word document, you will be able to add additional rows to your table based on your requirements.
- Step 1: Place cursor in the table where you want to add a row.
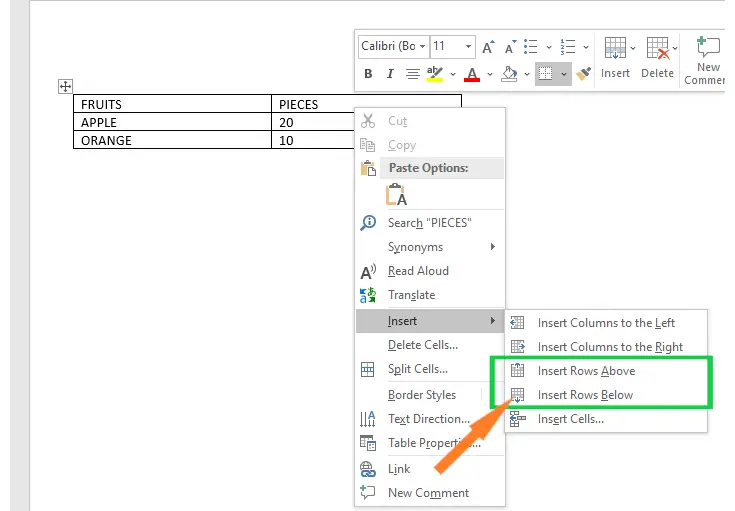
- Step 2: Right-click on the selected area, the following dialog box will appear on the screen. Click on the drop-down menu associated with the Insert button.
Click on the Insert Rows Above option to add a row above the selected row.
Click on the Insert Rows Below option to add a row below the selected row.
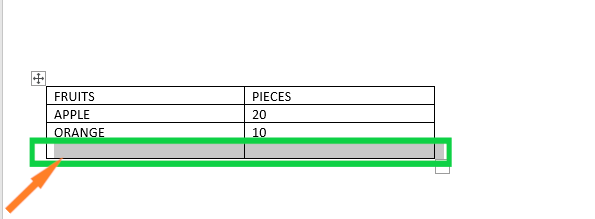
- The screenshot below shows that a new row is added to the table.

Add Table Rows Using Tab
Adding rows to your table is easiest if you put your cursor in the cell in the bottom-right corner of your table and then press Tab on your keyboard.
This will add a new row. When you want to add a row, you can choose the cell at the bottom right and press Tab again. If you choose another cell and press Tab, the cursor will move to the next cell. A new row is only automatically added to the last cell.

Add a column to the table
Adding more columns to a Word document is not hard for you to do. To add a column to the table, follow the steps below.
Step 1: Place the cursor where you want to add a column to the table.
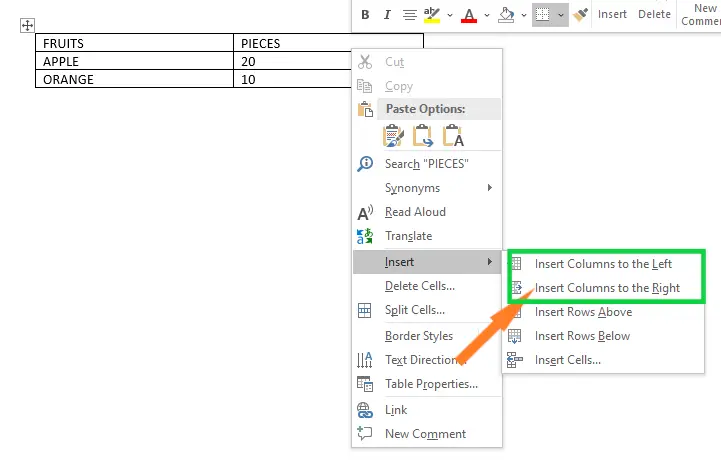
Step 2: Right-click on the table, a list of options will show up. Click the drop-down arrow next to the Insert icon.
- Click on the Insert Columns to the Left to add the column left side of the table.
- Click on the Insert Column to the Right to add the column right side of the table.

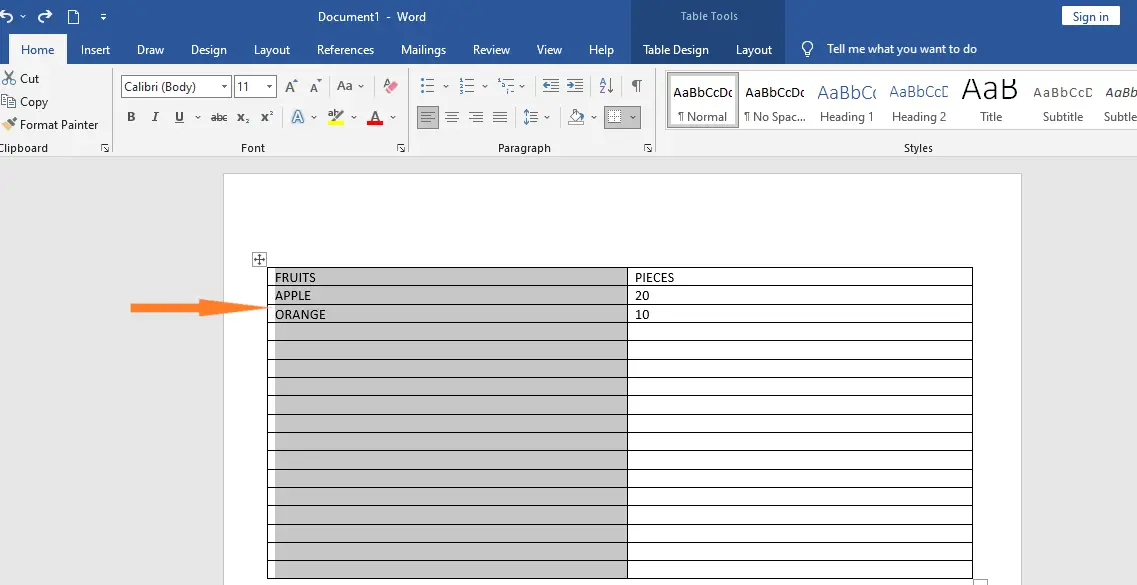
- Step 3: The screenshot below shows that column is added to the table.

Use the Ribbon Menu to Add Rows or Columns
If you have a table in a Word document, you can use the ribbon menu to see more ways to add rows and columns.
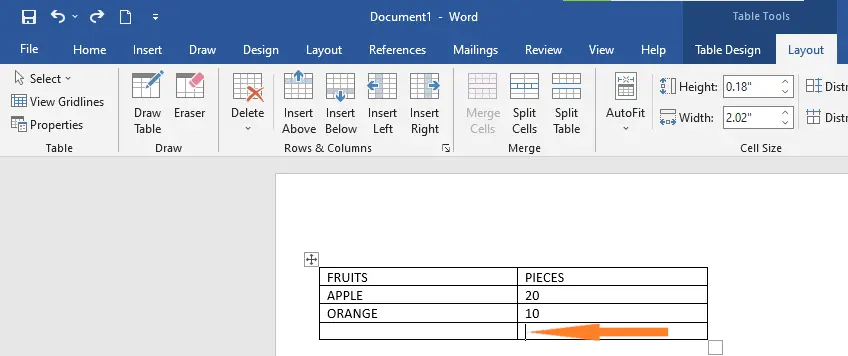
Use the Layout tab in the top ribbon menu to get to these options. The only thing that’s not clear is why there are two tabs called Layout in the menu bar. You need to click the “Layout” tab, which is next to “Table Design” on the right.

When you choose this, you’ll see a list of table-related options here. Since our goal is to add rows and columns, we’ll pay attention to the “Rows & Columns” command group.

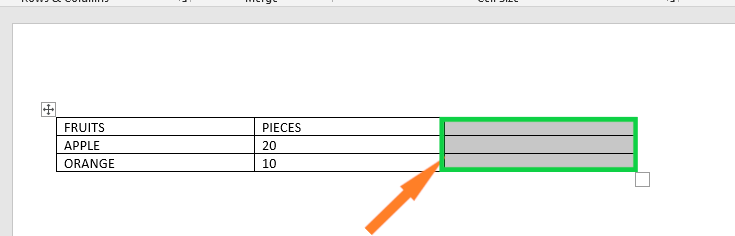
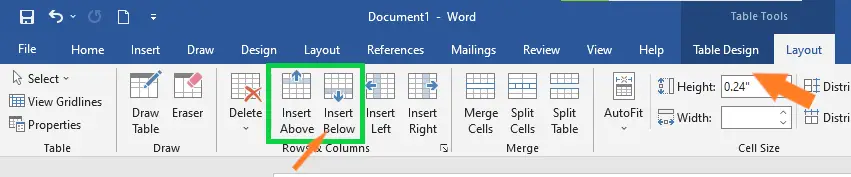
If you want to add a row above the cell you’ve chosen in your Microsoft Word table, click “Insert Above.” To add a row below the cell you’ve chosen, click “Insert Below.” Here, we will add a row to the bottom of the cell.
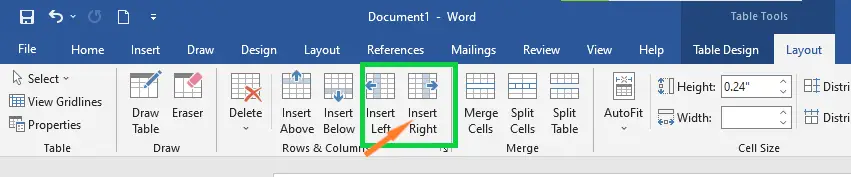
You can also quickly add columns with the buttons here. If you click “Insert Right,” a column will be added to the right of the cell. In the same way, “Insert Left” will add a column to the left of the cell that is currently selected. In our example, we are going to add a column to the right.
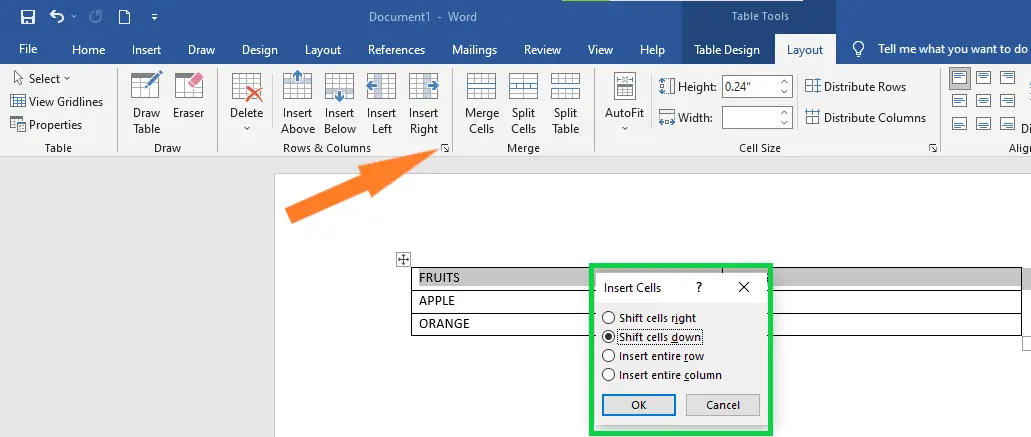
You can also click the arrow icon that’s to the right of the “Rows & Columns” command group to reveal a few more options.
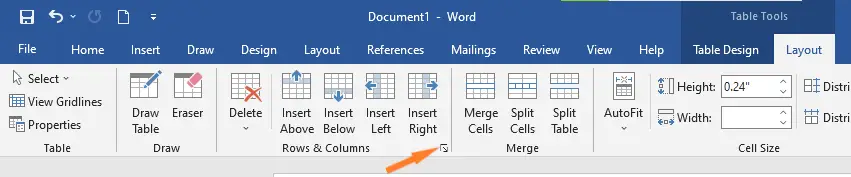
Here, you can add rows or columns by clicking “Insert entire row” or “Insert entire column.”
Use Delete Key to Remove Rows and Columns
The following steps are using Delete key to remove rows and columns in word document.
- Step 1: You can also quickly delete rows and columns by pressing the Delete key on your keyboard. Pick a row or column first. Click the area just to the left of the first cell on the left to quickly choose a row. You’ll notice that the mouse pointer has moved.

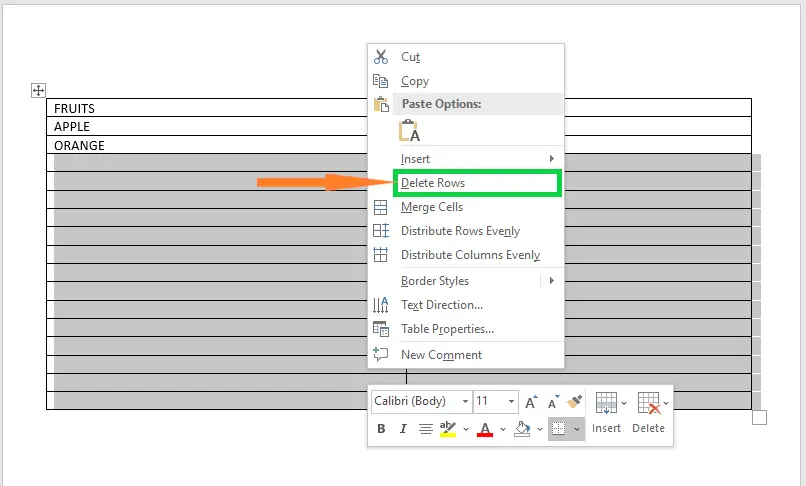
- Step 2: If the pointer is in the wrong place, you can click to select the whole row. Now, press the Delete key on your keyboard to get rid of the whole row. You can also right-click on the row you want to delete and click “Delete rows.”

- Step 3: To choose a column, move your mouse pointer over the first cell of any column. The pointer will change into a pointing down arrow. Now, click the column to pick up everything in it.

- Step 4: To get rid of a column in a table, press the Delete key on your keyboard. You can also right-click on the column you want to delete and click “Delete Columns.”


Summary
In the end, we’ve learned how to add rows and columns to a table in MS Word and what those terms mean. We also know that there are different ways to add rows and columns to a table, which we can use in our document to make it look more professional and presentable.
Meanwhile, if you want to learn more about working on tables, see the previous tutorial on how to create tables in Microsoft Word. In our format text and pages tutorial, you’ll also learn how to change page orientation and cover page etc. You can browse those guides if you are having a hard time formatting your documents.
We hope this tutorial helps you as you format your documents in MS Word.
PREVIOUS

NEXT


Glay Eliver
Programmer & Technical Writer at PIES IT Solution
Glay Eliver is a programmer and writer at PIES IT Solution, author of over 600 tutorials at itsourcecode.com. Specializes in JavaScript tutorials, Microsoft Office how-tos (Excel, Word, PowerPoint), and Python error debugging covering ImportError, TypeError, AttributeError, ModuleNotFoundError, and JavaScript ReferenceError. Authored several of the site’s highest-traffic Excel and MS Office reference articles.
Expertise: JavaScript · MS Excel · MS Word · MS PowerPoint · Python · Python ImportError · Python TypeError · Python AttributeError · ModuleNotFoundError · JavaScript ReferenceError · Pygame · View all posts by Glay Eliver →