This chapter will go over how to adjust the margins between pages in Word. The margin is the space between the text and the edge of the paper. We will learn how you can change the margins on the right, the left, the top, and the bottom of your document.
In addition, we will discuss the different types of margin that can be used in formatting our pages of documents.
Page formatting is how you format pages with margins and page breaks. It is probably one of the most important things you can learn in Microsoft Word. When you format your pages, they look better and are easier to read.
Table of contents
Page Margin in Word
The space between the text and the edge of your page is called a margin. The margins of a new document are set to Normal by default. This means that there is a one-inch space between the text and each edge. Word lets you change the margin size of your document to fit your needs.
MS Word’s standard margins are 1 inch on each side of the page, but you can change them to meet the needs of your document.
Page Size in Word
Paper size refers to the size of the paper you will be printing your document on. Normally, letter which is the standard size for a page, would be the default format (8.5 x 11 inches). This size is easy to work with and print because any printer or copier can handle it.
Why Adjust Margins in Word?
Adjusting margins in Word is important because it helps a document look neat and professional. In Word, margins are a powerful way to change how your document looks. In essence, they decide how far away from the edge of each page text and numbers are placed.
Moreover, Microsoft Word sets the margins on all four sides of a page to one inch. This means that the beginning and end of each character is one inch from the side of the page. In many situations, this is the best way to measure. After all, it’s the one you’ll see most often on all kinds of documents.
Additionally, Word’s margins are surprisingly easy to adjust. Many reasons exist to do so. Change the margins to customize how each page looks. Depending on your project, you may need to change Word’s margins to adjust page layout.
Finally, click the Margins button on the Page Layout tab to change the margins. Word has a list of pre-formatted options, but you can also choose “Custom Margins” at the bottom of the Margins list to make your own margins.
3 Different Ways to Adjust Page Margins in Word
There are three ways to set the margins of a page in Microsoft Word:
- Adjust page margins with the ruler
- Use preset margins
- Create custom margins
In addition, there are four types of margins; they are left, right, top, and bottom margins.
How To Adjust Page Margin In Word Using Ruler
Here are the steps on How To Adjust Page Margin In Word Using Ruler. Meanwhile, only short documents should be written this way. See the preset and custom margin methods below if your document is long or has more than one part.
Note: If your ruler is already visible, you can skip to step 3.
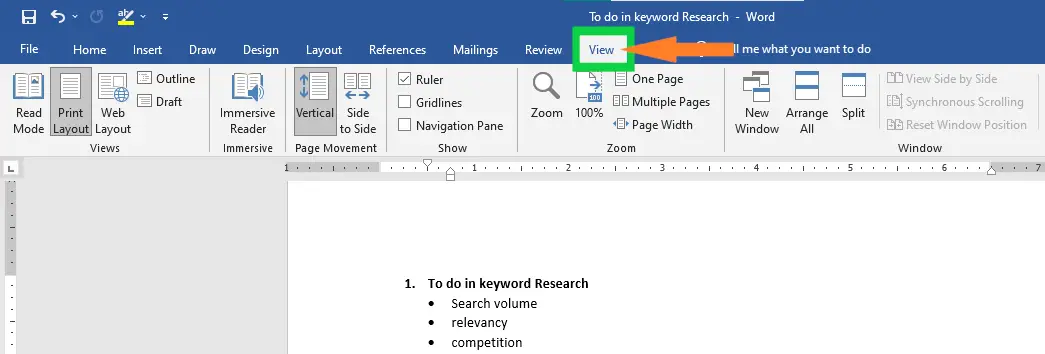
- Step 1: Select the View tab in the ribbon.

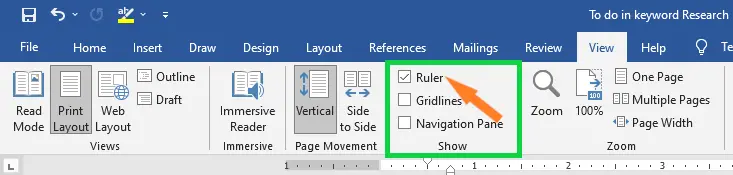
- Step 2: Select Ruler in the Show group.

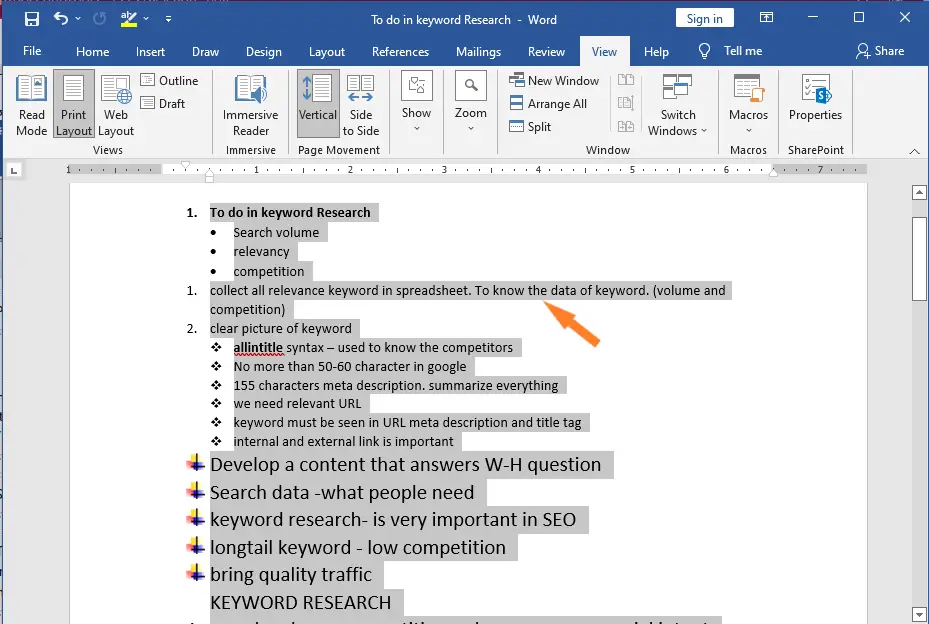
- Step 3: Press Ctrl + A on your keyboard to select the entire document.

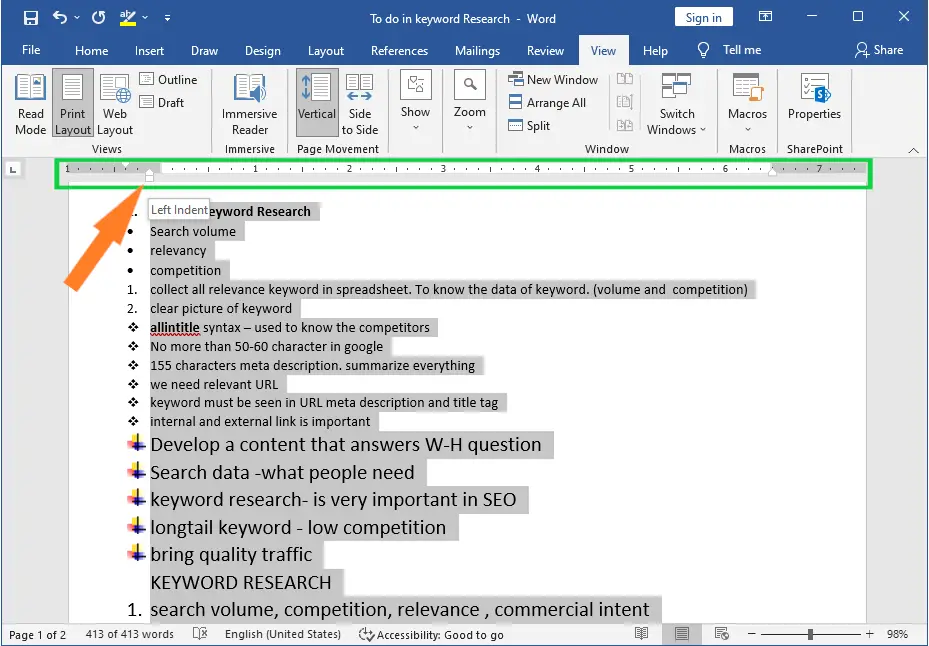
- Step 4: Hover your cursor over the inner border of the gray area on the horizontal ruler’s left or right end until it becomes a double arrow. A tooltip that says “Left margin” or “Right margin” should appear.

- Step 5: To change the margin, move the double-arrow cursor to the left or right.

- The below-shown preset method and custom method give you better control over margins.
Adjust Margins Page with the Ruler Marker
The horizontal ruler’s square ruler marker allows you to move to the left edge of the text. But this method just puts your text indented; it doesn’t change the margin.
Furthermore, even though the look is the same, making unnecessary indents can mess up other formatting in longer documents. To learn how to indent paragraph, read our article on Different Ways to Indent a Paragraph in Word.
How To Use Preset Page Margins
Here are the following methods to use preset margins. In addition, you need to keep in mind that preset margins only affect the current section you’re working on.
If you want to apply a preset to a whole document that has more than one section, press Ctrl + A to select the whole document first.
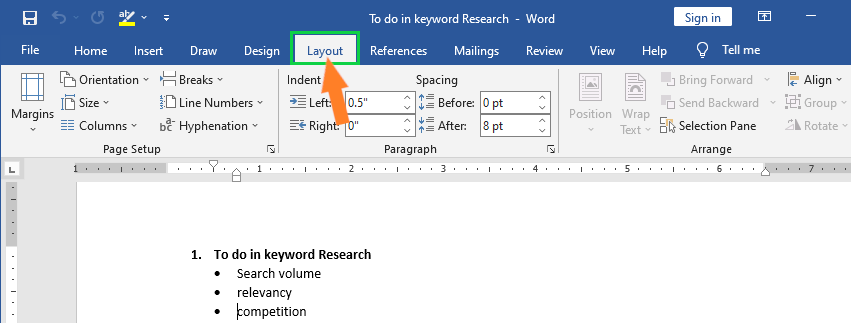
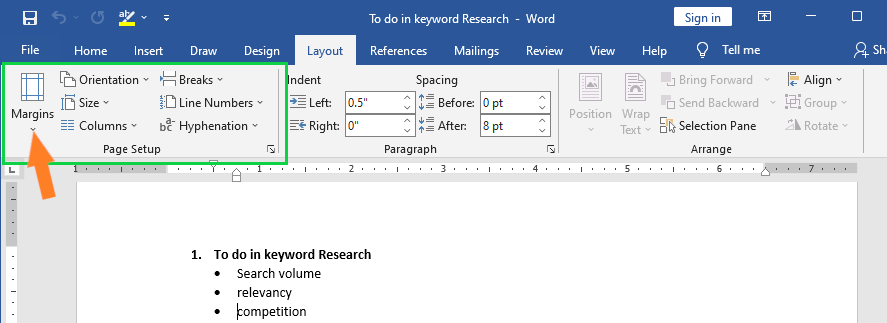
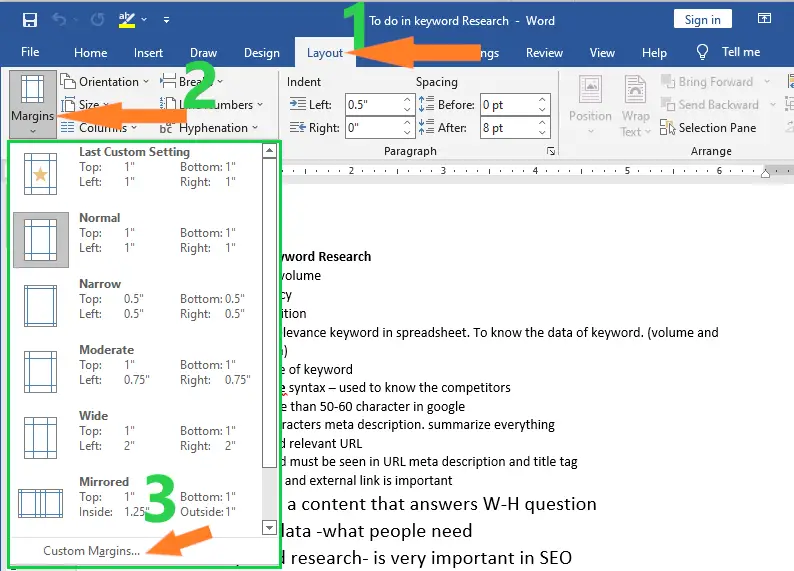
- Select Layout from the ribbon.

- In the Page Setup group, click the Margins button.

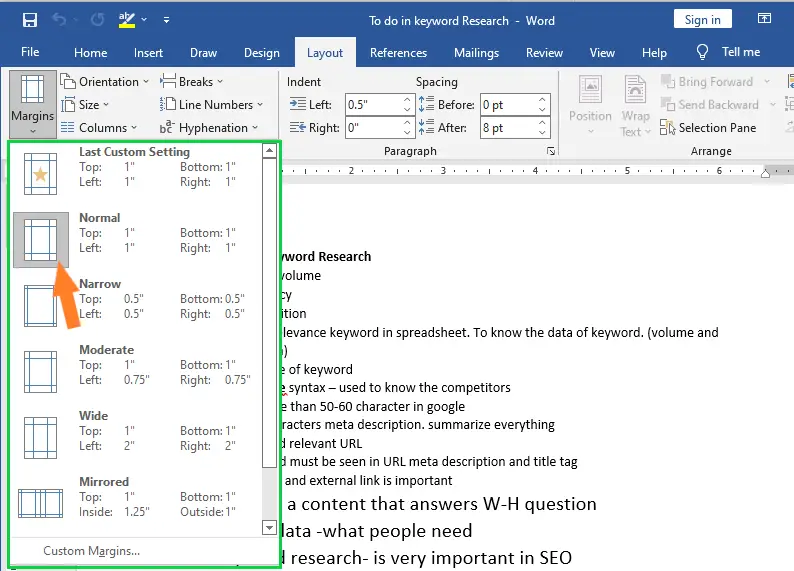
- Use any of the margins that are already set from the drop-down menu:

- After you choose, the drop-down menu for Margins will close, and your margins will change right away.

Note: You can also find the preset menu in the backstage view on the Print tab.
What is Custom Margin?
The Custom Margins feature is a powerful feature in Word that lets you change the margins to a specific size. No margin is out of reach, and that lets you work on documents that are completely unique.
In many cases, preset Microsoft Word margins give you the control you need over your page layout. But there may be times where you need more detailed control. In those cases, Microsoft Word has you covered.
In Word, you can customize or choose predefined margin settings, set margins for facing pages, allow extra margin space to allow for document binding, and change how margins are measured.
How to Apply Custom Margins
Here are the ways on how to apply custom margin in MS word document. The Custom Margins button is next to the list of options that have already been made. When you click this, Word opens a menu called Document.
- Click the Margins button on the Layout tab.
- Choose Custom Margins from the list of options.
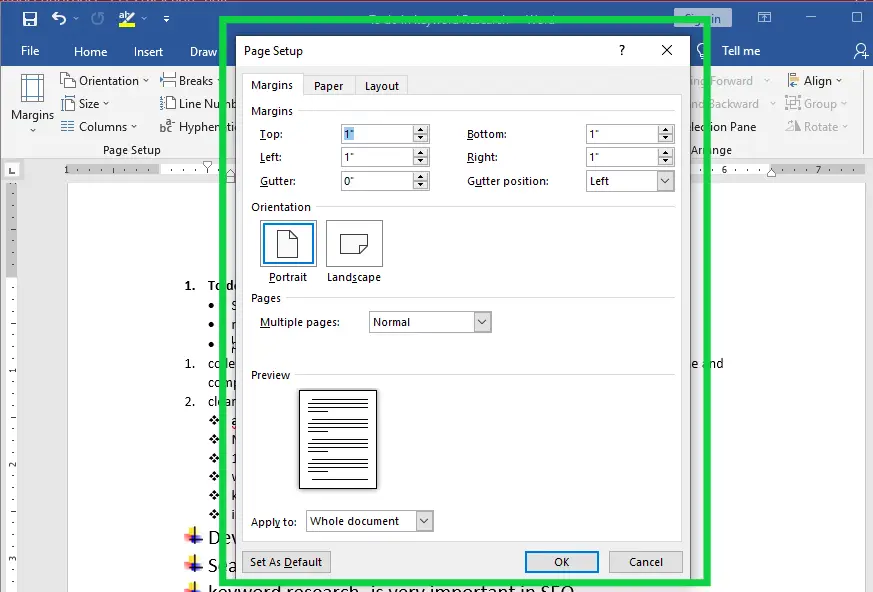
- The “Page Setup” box will show up.

- Adjust the numbers for each margin, and then click the OK button.

- The document’s margins will be changed.

You can also open the Page Setup dialog box by clicking the small arrow in the bottom-right corner of the Page Setup group on the Layout tab.
Using the Set as Default feature in Word, you can save all of the formatting changes you’ve made and have them automatically applied to new documents.
Summary
In summary, we’ve talked about how to adjust page margin in Word, as well as the different types of margin and page size in a document and what those terms mean. In addition, we know why need to adjust page margins of Microsoft Word that makes our document presentable and creative.
Meanwhile, if you want to learn more about formatting text, see the previous tutorial on how to check and change lines and paragraphs as well as how to use borders and shading in Microsoft Word, which are still part of formatting your documents. You can browse those guides if you are having a hard time exploring your documents.
We hope this tutorial helps you as you format your documents in MS Word.


Glay Eliver
Programmer & Technical Writer at PIES IT Solution
Glay Eliver is a programmer and writer at PIES IT Solution, author of over 600 tutorials at itsourcecode.com. Specializes in JavaScript tutorials, Microsoft Office how-tos (Excel, Word, PowerPoint), and Python error debugging covering ImportError, TypeError, AttributeError, ModuleNotFoundError, and JavaScript ReferenceError. Authored several of the site’s highest-traffic Excel and MS Office reference articles.
Expertise: JavaScript · MS Excel · MS Word · MS PowerPoint · Python · Python ImportError · Python TypeError · Python AttributeError · ModuleNotFoundError · JavaScript ReferenceError · Pygame · View all posts by Glay Eliver →