In this chapter, we will discuss How To Create Table In MS Word Step By Step. A table is made up of columns that go up and down and rows that go across and down, with a cell at each intersection.
You can put text or pictures in each cell, and you can set up the table any way you want. Most of the time, the top row of a table is kept as a table header, where you can put some instructions.
This tutorial shows how to create a table in MS Word. First, we’ll insert the table step by step. Then, we’ll convert existing text to a table and also learn to delete tables.
Table of contents
What is Table in MS Word?
A table is a grid with rows and columns of cells. Tables can be used for many different things, like showing text information and numbers.
In Word, you can make a blank table, turn text into a table, and change the styles and formats of tables that already exist. You can put text or pictures in each cell, and you can set up the table any way you want. Most of the time, the top row of a table is kept as a table header, where you can put some instructions.
What is the Use of Table in MS Word?
Tables are very useful tools when creating and formatting documents. For example, with a table you can:
- Align Text, Numbers, and Graphics: Many people use tables instead of tab stops to align text, numbers, and graphics because text in a table can wrap to more than one line.
- Create a Form: You can store phone numbers, clients, and employee in tables.
- Sharing Information: You can share information between programs by using tables. You can copy and paste information from a table into a Microsoft Excel worksheet or an Access database, for example.
- Create a Publication: Calendars, brochures, business cards, and many other kinds of publications are easier to make with tables.
How To Insert Table In MS Word Step By Step
The following steps will help you understand How To Create Table In MS Word Step By Step.
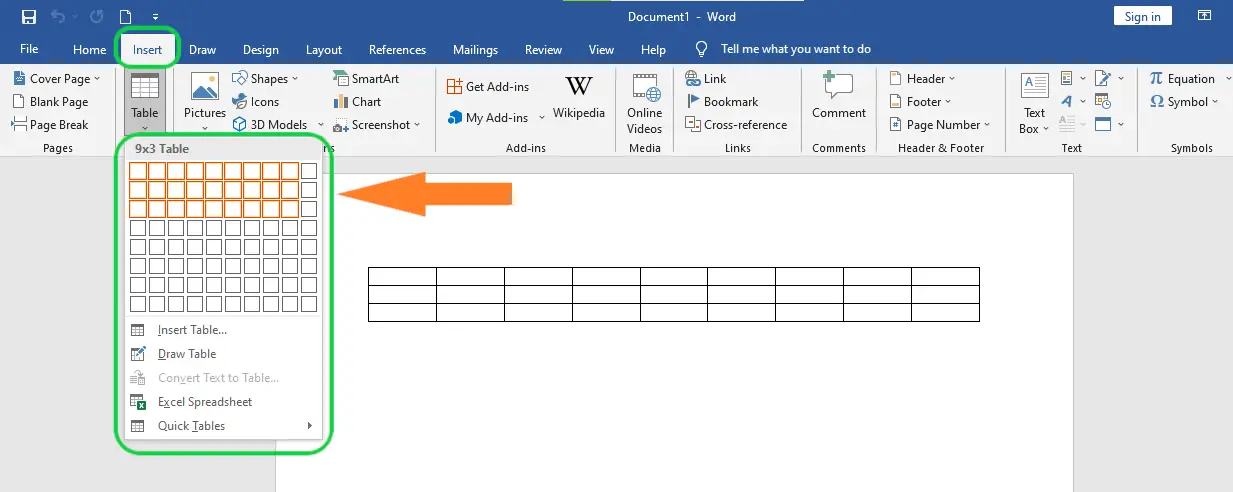
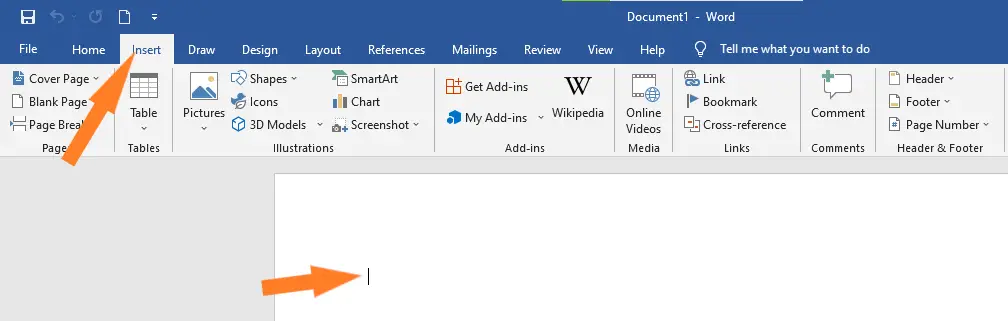
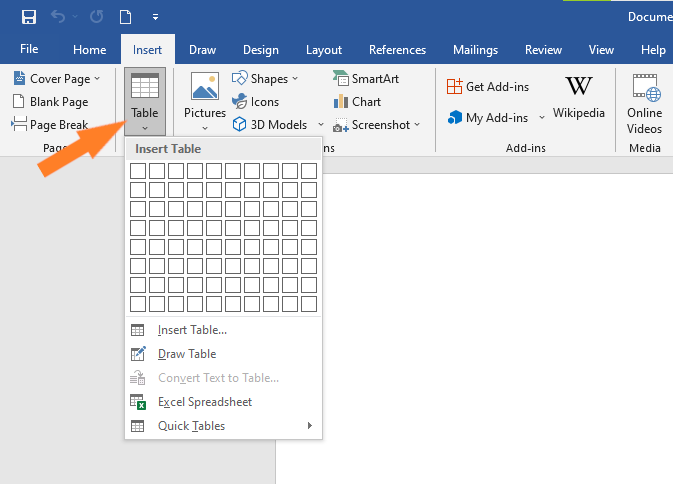
- Step 1: Select the Insert tab and then the Table button.
This will display a simple grid similar to the one shown below. When you move the mouse over the grid cells, a table is created within the document’s table. You can customize the number of rows and columns in your table.

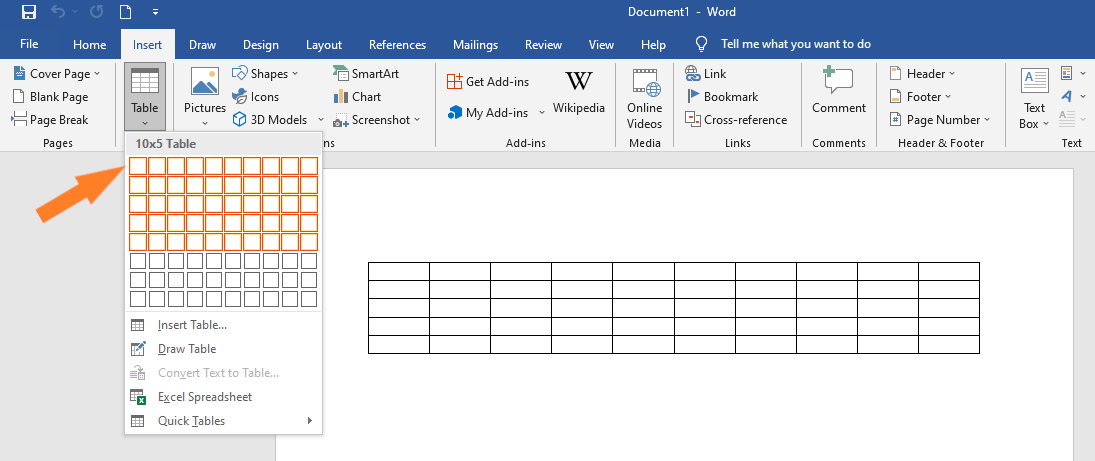
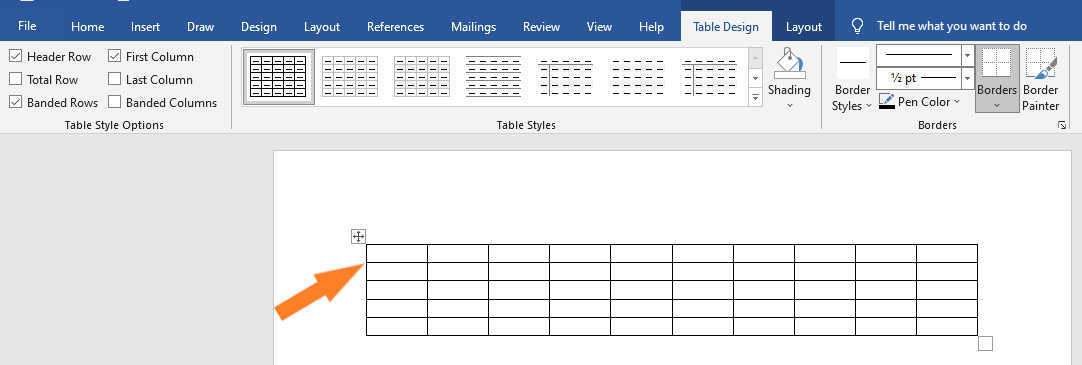
- Step 2: Click the square representing the lower-right corner of your table to insert a real table into your document and activate the table design mode in Microsoft Word.
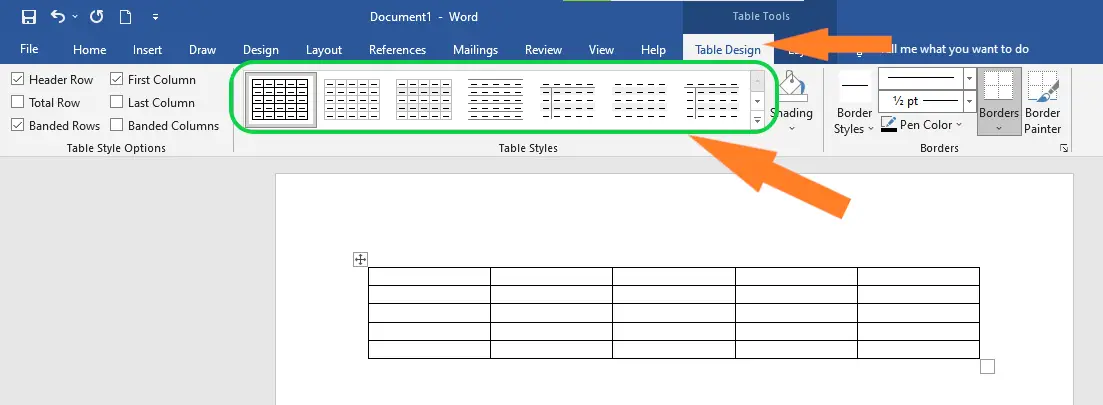
As shown in the table design mode, there are a variety of customizable options available.

- Step 3: You don’t have to do this step, but you can if you want a fancy table. .
When you click the Table Styles button, a gallery of table styles will appear. When you move your mouse over one of the styles, it shows a real-time preview of your table.
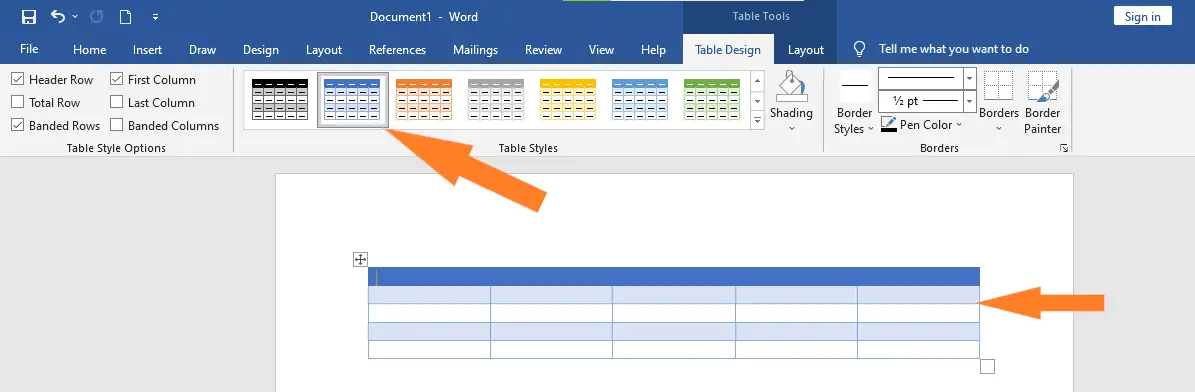
- Step 4: To select any of the styles, simply click the table’s built-in style, and you will notice that the selected style has been applied to your table.

Different Ways to create table in MS Word
- Place the insertion point where the table should appear, then click the Insert tab.

- Click the Table button.

- The drop-down menu will contain a grid of squares. Move the mouse over the grid to adjust the table’s number of columns and rows.

- With a single click, the table will appear in the document.

- To insert text, you can now position the insertion point anywhere within the table.
To move the insertion point to the next cell while typing, press the Tab key. If the insertion point is in the last cell, pressing Tab will create a new row automatically.
How to Convert Existing Text to a table
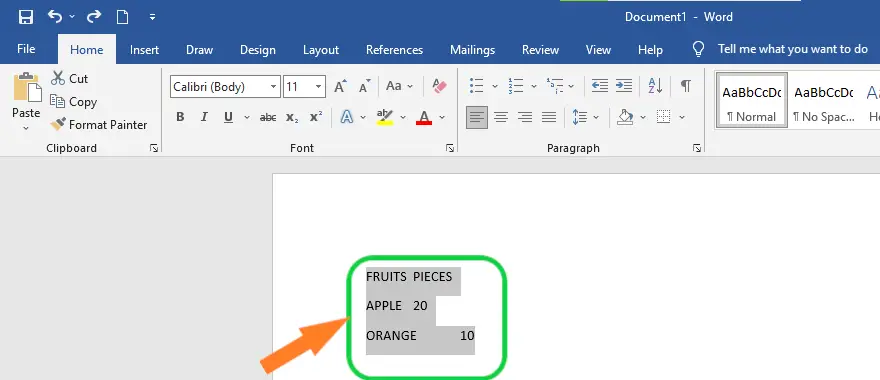
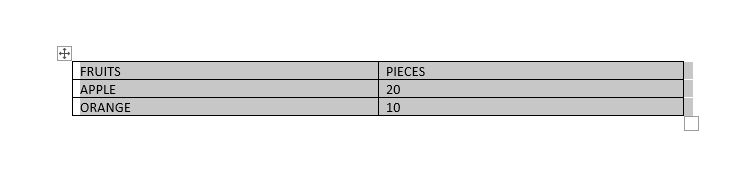
Each row of information in this example contains the item’s fruits and pieces, separated by tabs. This information can be converted into a table using tabs to separate the data into two columns.
- Select the text to be converted.

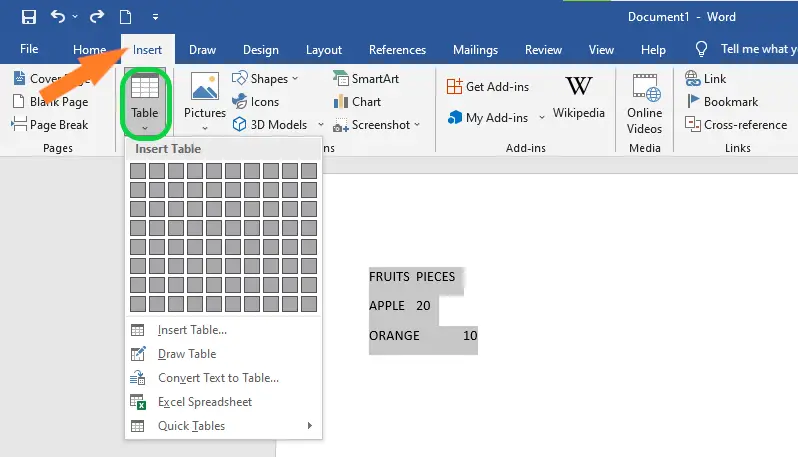
- On the Insert tab, click the Table button.

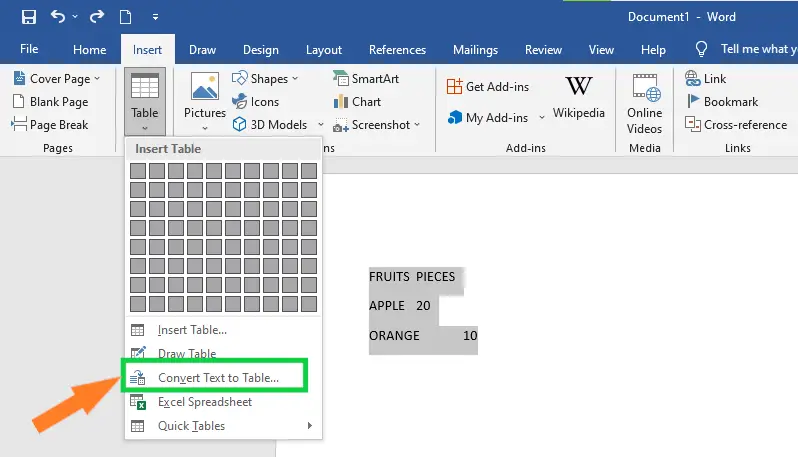
- Choose Convert Text to Table from the menu drop-down.
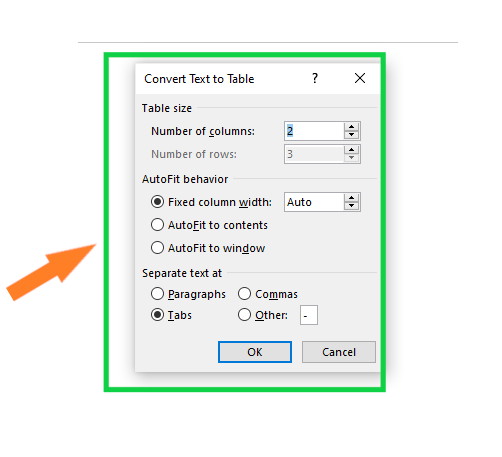
- A dialogue box appears. Choose one of the options listed under Separate text at: This is how Word determines the text to be placed in each column.

- Click OK. The text is presented in a table.

How to Delete a Table in Word
Here are the easy steps for getting rid of a table from a Word document.
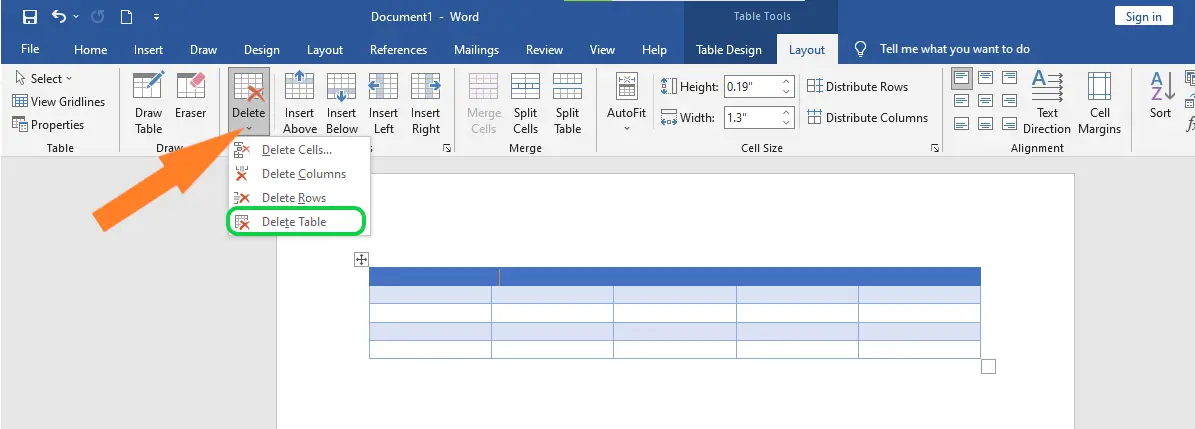
- Step 1: Click on the table you want to get rid of.
- Step 2: Click the Layout tab and then click the Delete Table option next to the Delete Table button to get rid of the whole table and all of its content from the document.

Shortcut Key to create table in MS Word
Clicking the Table icon on the Insert tab of the Ribbon is the first option. First, verify that the selected cell exists in the data set you wish to convert into a table. The keyboard shortcut for this is Ctrl + T.
To create a basic table, with one row and three columns for example, make sure the cursor is on a new line, then type four plus signs separated by spaces (plus, space, plus, space…) and press “Enter”.
Summary
In summary, we’ve learned how to create table in MS word step by step, as well as what those terms mean. Furthermore, we understand that there are different ways of making table that can be used in our document to make it more presentable and professional.
Meanwhile, if you want to learn more about formatting pages, see the previous tutorial on what is page orientation and what is cover page and how to create it in Microsoft Word, which are still part of formatting your documents. You can browse those guides if you are having a hard time formatting your documents.
We hope this tutorial helps you as you format your documents in MS Word.
PREVIOUS


Glay Eliver
Programmer & Technical Writer at PIES IT Solution
Glay Eliver is a programmer and writer at PIES IT Solution, author of over 600 tutorials at itsourcecode.com. Specializes in JavaScript tutorials, Microsoft Office how-tos (Excel, Word, PowerPoint), and Python error debugging covering ImportError, TypeError, AttributeError, ModuleNotFoundError, and JavaScript ReferenceError. Authored several of the site’s highest-traffic Excel and MS Office reference articles.
Expertise: JavaScript · MS Excel · MS Word · MS PowerPoint · Python · Python ImportError · Python TypeError · Python AttributeError · ModuleNotFoundError · JavaScript ReferenceError · Pygame · View all posts by Glay Eliver →