
This chapter describes how to merge table cells in MS Word. Microsoft Word permits the merging of multiple cells into a single large cell.
Frequently, you will be required to merge columns of the top row to create the table’s title. You can only merge cells horizontally or vertically; you cannot merge cells diagonally. This chapter explains how to combine multiple rows or columns.
Microsoft Word allows splitting a cell into multiple cells. We will understand how to split a cell into multiple smaller sub-cells.
Table of contents
Why Merge Cells in Word?
The reason why cells in a table are merged is if you want your table’s title to be on a single row that takes up the whole width of the table at the top. You might also want different combinations of rows and columns that you can’t make with the table’s default settings.
When you make a table in Word, it will have the same number of rows and columns in each row and column.
Putting cells together is the easiest way to do this. In a 3×3 table, for example, you can combine the three cells in the top row into one full-width row and make a 2×3 grid below it.
When making tables in Word, you can be much more creative once you know how to merge cells.
Why Split Cells in Word?
The most obvious reason to split cells in Word is to undo any merging you’ve already done, but you can do this with any cell you already have.
If, for example, you no longer want a single full-width cell at the top of your table, you could break those cells apart again. If you want to add one more column to a single table row, you can do so by splitting one of the cells in that row.
By splitting cells, you can change the look of your table until it looks just the way you want it to. Adding a row or column is similar to splitting a cell, but everything happens in one cell instead of a group of cells. Merging cells, on the other hand, is like deleting a cell and then connecting it to a nearby cell.
How to Merge Cells in Word
Time needed: 1 minute
Merging cells in Word is fairly simple, and there are a few ways to do it.
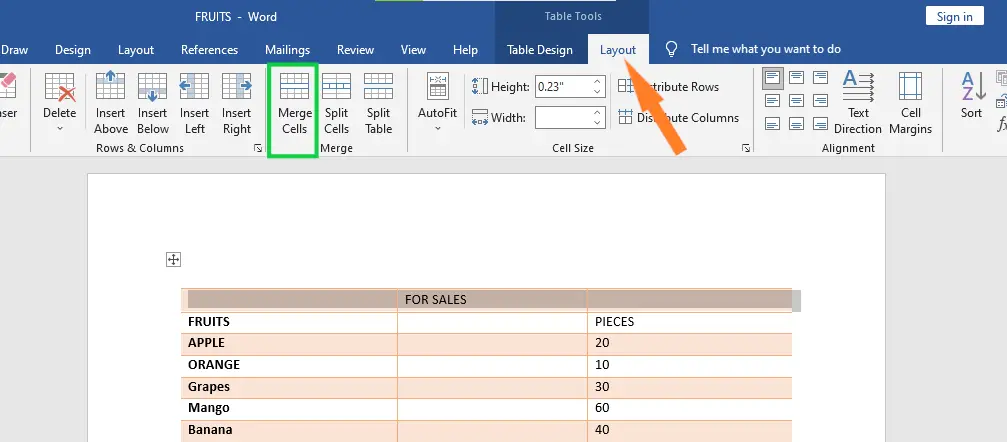
- To use the Merge Cells button, first find or create the table that you want to edit, then highlight those cells.
These cells must be adjacent, but you can select multiple cells both horizontally and vertically.

- In the Layout menu, click the Merge Cells button.
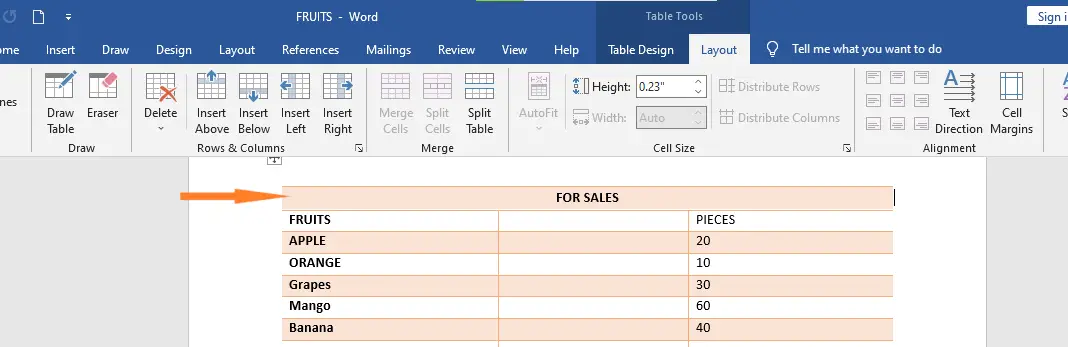
- The cells you selected will now be merged together.

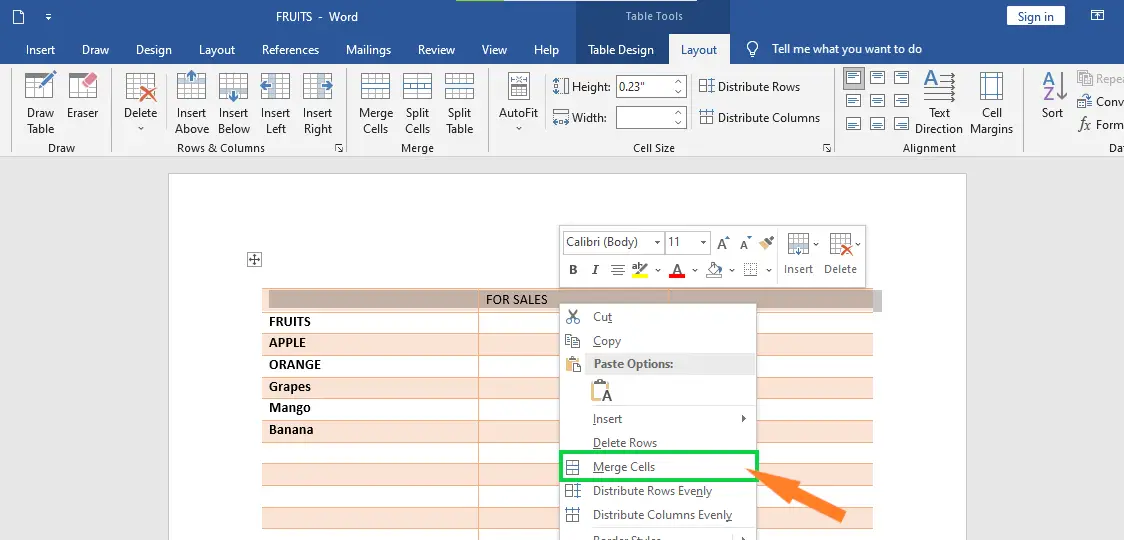
- You can also merge cells using the context menu, which appears when you right-click your table.

- To do this, select the cells you want to merge, then right-click them once they’re highlighted. From the context menu that appears, click the Merge Cells option.
As with the method above, your cells will now appear merged after selecting this option.

How to Split Cells in a Microsoft Word Table
To split cells, you again have two options. You can use either method, both will split your table cells successfully.
Using the Split Cells Button
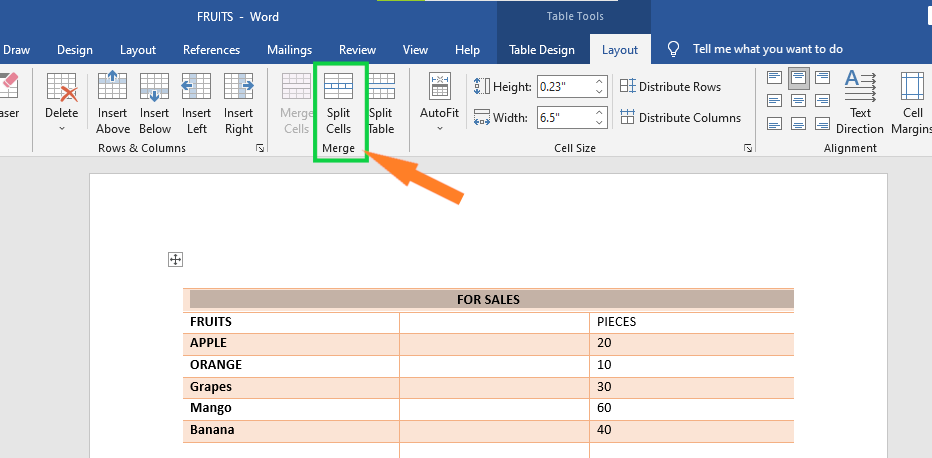
- To use the Split Cells button on the ribbon bar, you’ll first need to select the cell (or merged cells) you wish to split.

- Once your cells are selected, click the Split Cells button in the Layout tab of the main ribbon bar.

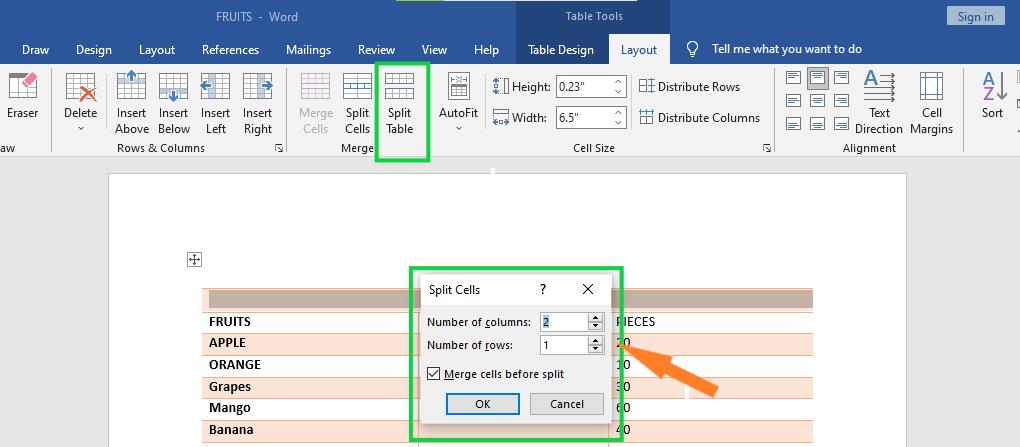
- This will bring up a dialog box, giving you further options to choose from.

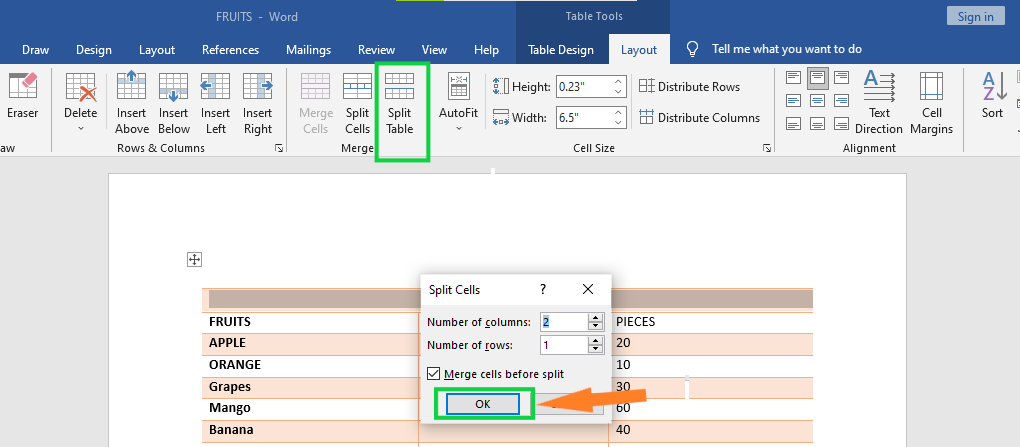
- Enter the values for the number of rows and columns that you want to split the cell (or cells) into, and then click OK to confirm your choice.
- Your cells will now be split using the values you selected in the Split Cells dialog box.

Split a Table
Following are the simple steps to split a table into two tables in a Word document.
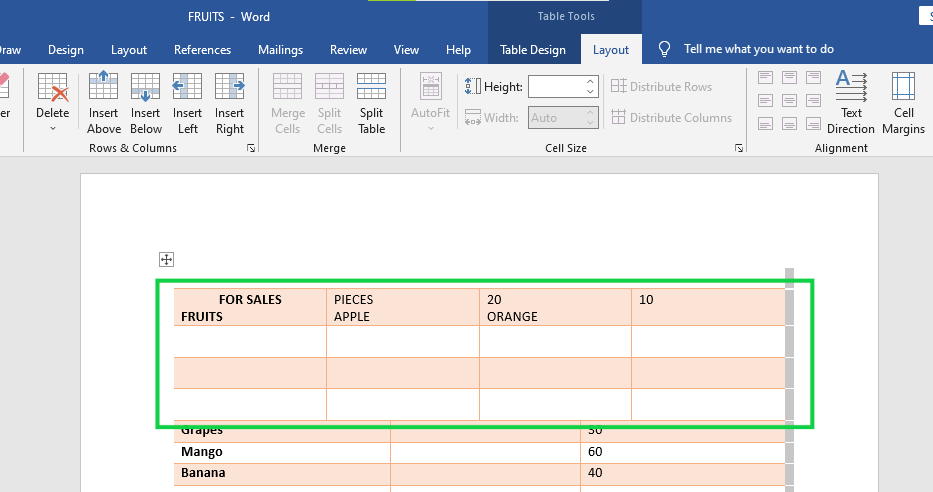
Step 1 − Bring your mouse pointer position anywhere in the row that should appear as the first row of the new table.
Step 2 − Now click the Layout tab and then click the Split Table button, which will split the table into two tables, and the selected row will become the first row of the lower table.
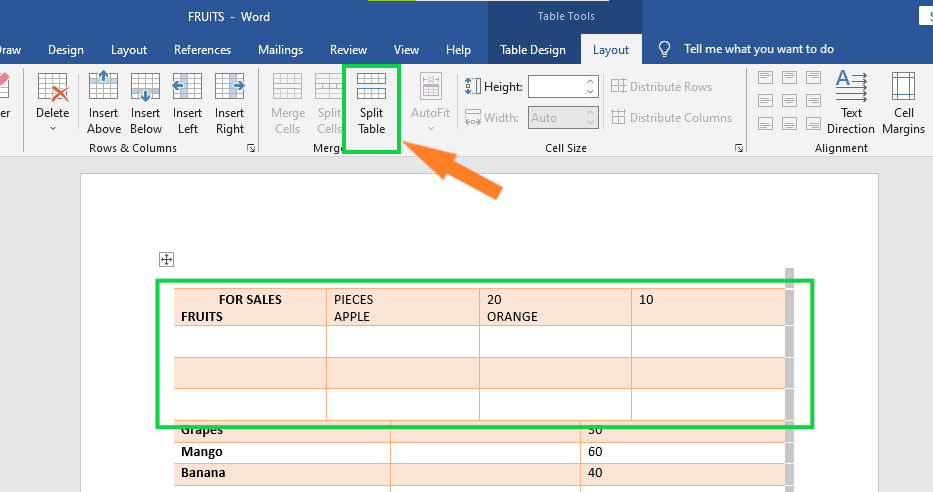
After splitting the table into two tables, you can further divide it into two parts, and you can continue dividing the Word tables as long as a table has more than one row.

Summary
In summary, we’ve learned How to Merge Table Cells in MS Word and what those terms mean. Furthermore, we understand that there are different ways of merging able. It can be used in our document to make it more presentable and professional.
Meanwhile, if you want to learn more about working on tables, see the previous tutorial on how to resize tables and how to move tables in Microsoft Word. You can browse those guides if you are having a hard time working with your tables in a document.
We hope this tutorial helps you as you format your documents in MS Word.
PREVIOUS


Glay Eliver
Programmer & Technical Writer at PIES IT Solution
Glay Eliver is a programmer and writer at PIES IT Solution, author of over 600 tutorials at itsourcecode.com. Specializes in JavaScript tutorials, Microsoft Office how-tos (Excel, Word, PowerPoint), and Python error debugging covering ImportError, TypeError, AttributeError, ModuleNotFoundError, and JavaScript ReferenceError. Authored several of the site’s highest-traffic Excel and MS Office reference articles.
Expertise: JavaScript · MS Excel · MS Word · MS PowerPoint · Python · Python ImportError · Python TypeError · Python AttributeError · ModuleNotFoundError · JavaScript ReferenceError · Pygame · View all posts by Glay Eliver →