This chapter will show you how to make an automatic table of contents in Word. A table of contents, also known as a TOC, is a list of headers in the sequence they appear in the text.
You can make a list of headings that should be in the table of contents. Let’s find out how to put together a table of contents. A table of contents makes it easier to move around in a Word document by giving page numbers and links to the different headings on those pages.
Table of contents
What is in the table of contents?
A table of contents, which is usually called just “Contents” or “TOC,” is a list of a written work’s chapter or section titles or short descriptions with the page numbers where they start. This list is usually found on the page before the first page of the work.
The table of contents is a snapshot of your document’s headings and page numbers. It does not update itself as you make changes. If you right-click on it and choose “Update field,” you can change it at any time.
Further, the table of contents should list all front matter, main content and back matter, including the headings and page numbers of all chapters and the bibliography. Also, table of contents use tab leader to adds a row of dots, dashes, or underscores between them.
There are two reasons to insert a table of contents in a document: It tells users what the document is about and how it is put together. It lets people go straight to a certain part of an online document.
What are advantages of table of contents?
In particular, a well-plan TOC can help:
- Put your best foot forward. A table of contents makes a document look more professional than without one.
- Arrange your material.
- Take care of what readers expect.
- Provide a road map.
- Make it easier to talk about the document.
- Complement your training outline.
Create Automatic Table of Contents
Time needed: 1 minute
The following will help you to create Table of Contents in your Microsoft Word using various levels of headings.
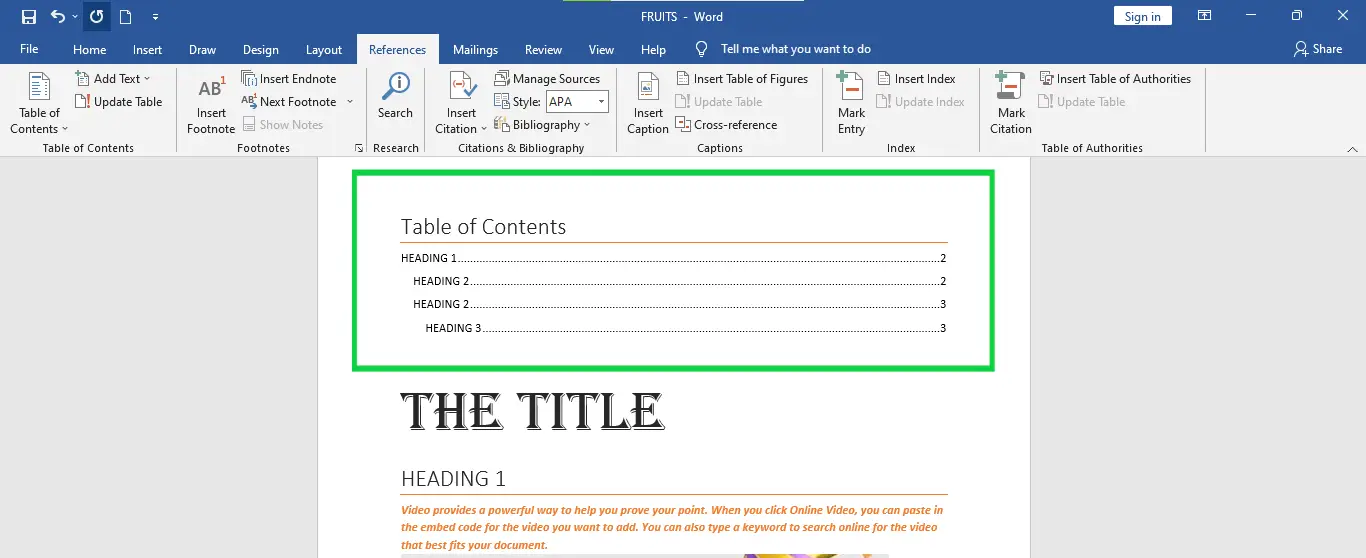
- Step 1 − Consider a document having applied heading styles such as heading 2 and heading 3 style.
- Step 2 − You can put a table of contents anywhere in the document, but it’s best to put it at the beginning.
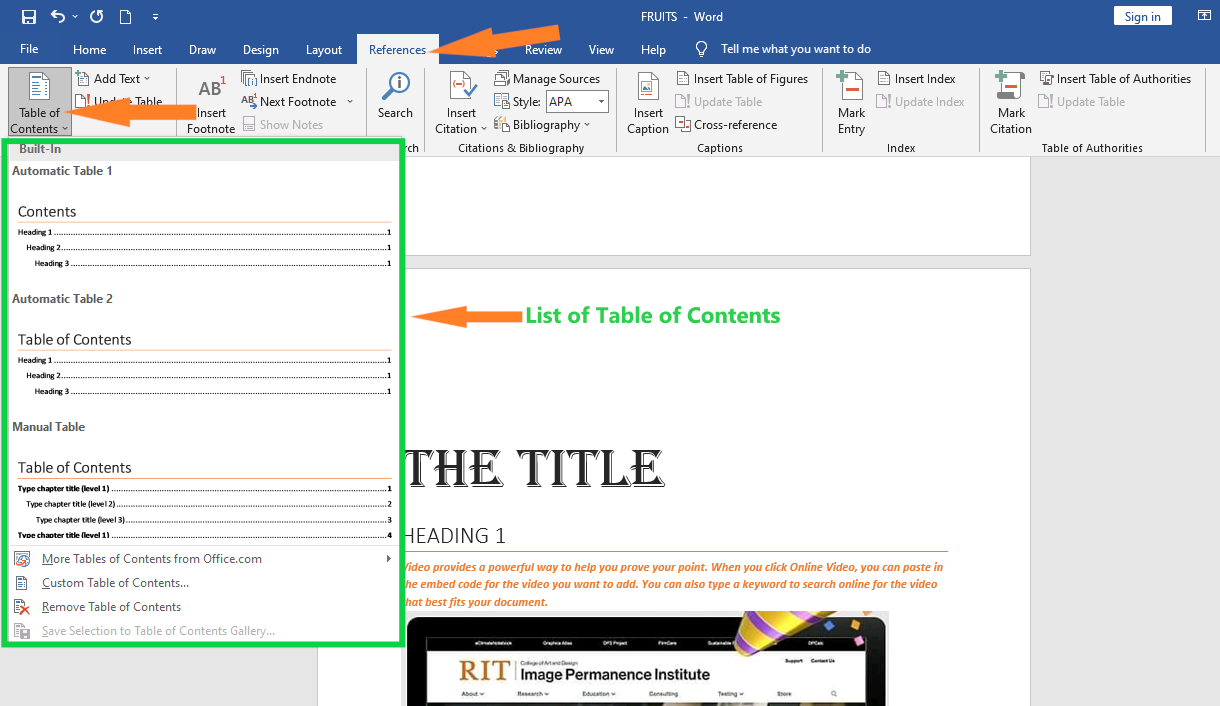
Then put the insertion point at the beginning of the document and click the References tab. Finally, clicking the Table of Contents button will bring up a list of Table of Contents styles.

- Step 3 − Select any of the displayed options by simply clicking on it. A table of content will be inserted at the selected location.

- Step 4: Now, if you hold down the Ctrl key and click on any link in the table of contents, it will take you straight to the page that link goes to.
Note: You could create and customize a table of contents manually with the names of the sections and page numbers, but it would be hard to do. Moreover, if you ever want to change the order of your sections or add more information, you’ll have to update everything all over again. But with the right formatting, Word can create a table of contents automatically and keep it up-to-date.
How to Automatically Update Table of Contents
When you work on a Word document and update the Table of Contents, it will update the page numbers, too. Here are the easy steps to update the Table of Contents you already have in Microsoft Word.
Step 1 − As you can see above, you already have a table of contents. When you click the References tab and then the Update Table button, the Update Table of Contents dialog box will show up with two options.
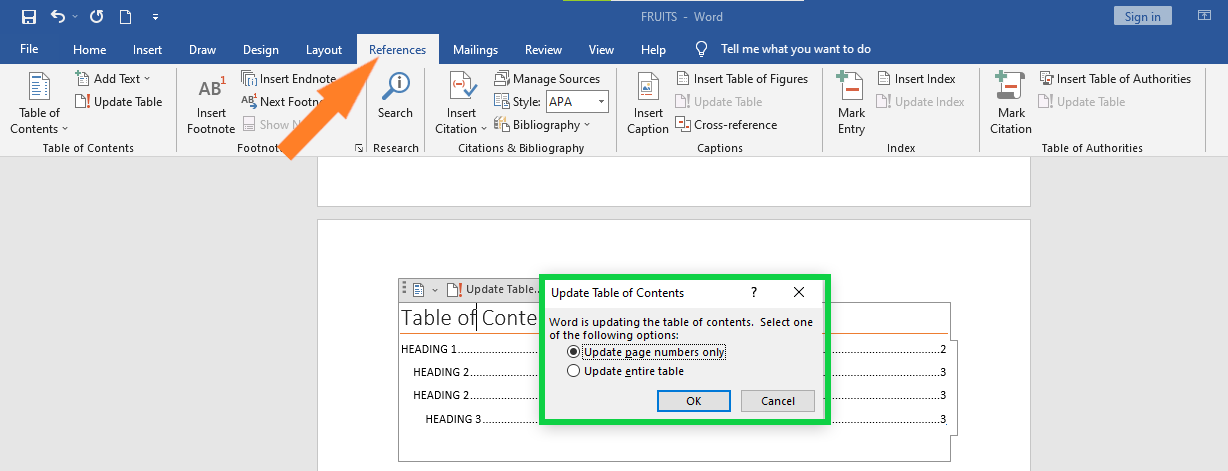
Step 2 − If you only want to change the page numbers, choose the first option. In the dialog box, you can only change the page numbers, but if you want to update the whole table, click Update the entire table, and your table of contents will be up to date with all the changes.
How to Delete Table of Contents
The following steps will help you delete an existing Table of Contents from Microsoft Word.
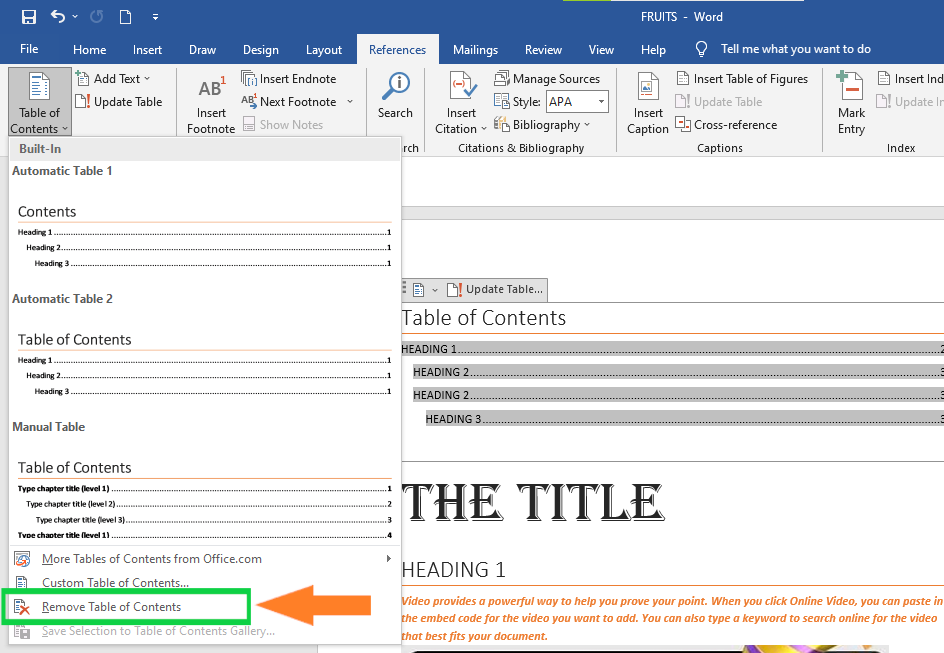
- Step 1 − As you can see above, you already have a table of contents. When you click the References tab and then select the Table of Contents button, a list of Table of Contents options will appear, along with the Remove Table of Contents option at the bottom.

- Step 2 − Click over the Remove Table of Contents option to delete the existing table of contents.
Summary
In the end, we’ve learned how to create automatic table of contents in Word 2019 and what those terms mean. We also know that there are different ways to make and update a table of content, which we can use in our document to make it look more professional and presentable.
Meanwhile, if you want to learn more about working on tables, see the previous tutorial on how to resize tables and how to merge and split table in Microsoft Word. You can browse those guides if you are having a hard time working with your tables in a document
We hope this tutorial helps you as you format your documents in MS Word.
PREVIOUS

NEXT

Glay Eliver
Programmer & Technical Writer at PIES IT Solution
Glay Eliver is a programmer and writer at PIES IT Solution, author of over 600 tutorials at itsourcecode.com. Specializes in JavaScript tutorials, Microsoft Office how-tos (Excel, Word, PowerPoint), and Python error debugging covering ImportError, TypeError, AttributeError, ModuleNotFoundError, and JavaScript ReferenceError. Authored several of the site’s highest-traffic Excel and MS Office reference articles.
Expertise: JavaScript · MS Excel · MS Word · MS PowerPoint · Python · Python ImportError · Python TypeError · Python AttributeError · ModuleNotFoundError · JavaScript ReferenceError · Pygame · View all posts by Glay Eliver →