Medical ML capstones are a panel-favorite when framed correctly. They’re also a panel-killer when framed wrong.
The students who get medical capstones rejected aren’t the ones with weak code. They’re the ones who title their proposal “AI System for Diagnosing Heart Disease” and walk into a panel that knows diagnosis is a regulated medical profession in the Philippines and India both. Five minutes later, the title gets rejected and the team starts over.
The students who get medical capstones approved title theirs “Heart Disease Risk Assessment System for Pre-Screening Use.” Same code. Same model. Different five words. Approved on first defense.
This guide builds the second version. The framing is half the project.
What you’ll build
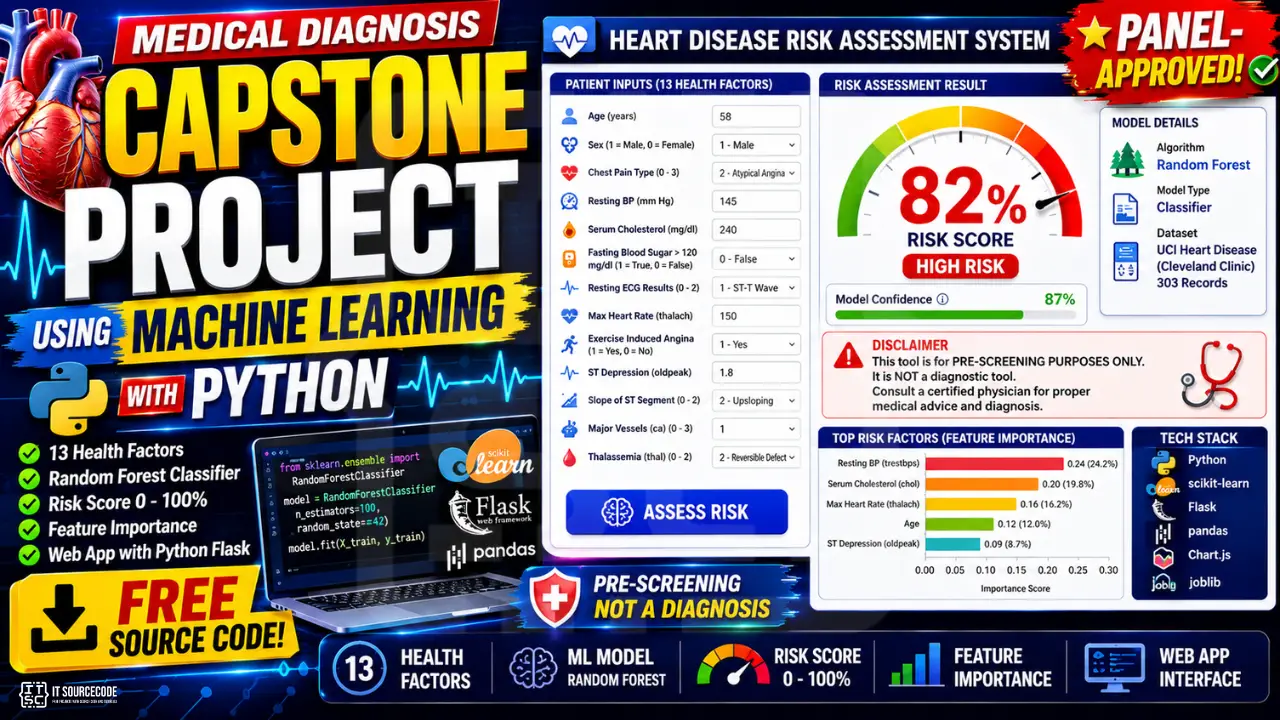
A heart disease risk assessment tool (not a diagnostic tool), with the right disclaimers, the right model choice, and the right interface for someone using it as a pre-screening aid before a real medical consultation.
Features
- Web form with 13 health factors as inputs (age, blood pressure, cholesterol, etc.)
- Random Forest classifier trained on the UCI heart disease dataset
- Risk score from 0 to 100% with model confidence
- Feature importance breakdown: which factors contributed most to this user’s score
- Prominent disclaimer that this is NOT a diagnostic tool
- About 200 lines of code total
Tech stack
- Python 3.10 or higher
- scikit-learn (Random Forest)
- pandas (data handling)
- Flask (web app)
- Chart.js (feature importance chart)
- Joblib (model persistence)
No deep learning. No external APIs. Runs entirely on a laptop. Trains in 5 seconds.
The disclaimer reality: why most medical ML capstones fail
You cannot diagnose disease in the Philippines unless you are a licensed physician. The same is true in India, Vietnam, Indonesia, and most countries your readers are from. This is not a technical limitation. It is a legal one.
When you submit a capstone proposal titled “Heart Disease Diagnosis System,” the panel reads “we plan to practice medicine without a license.” That gets rejected on ethics review before anyone reads the methodology.
Three framings that work:
- Risk assessment: calculates a risk score, recommends consultation if elevated
- Pre-screening tool: flags candidates for further evaluation by a doctor
- Patient education aid: helps users understand which factors affect their risk
What you put in your disclaimer is non-negotiable. The version below is what we recommend for any medical ML capstone in 2026:
This system is a risk assessment tool for educational and pre-screening purposes only. It is NOT a substitute for professional medical diagnosis, advice, or treatment. The predictions are generated by a machine learning model trained on a public dataset and may not accurately reflect your actual health status. Always consult a licensed physician for any health concerns or before making any medical decisions.
This disclaimer goes at the top of your app, the bottom of your app, in your README, and in Chapter 3 of your documentation. Panels look for it specifically.
The good news: this framing isn’t a workaround. It’s actually the more honest and useful version of the project. A real risk assessment that says “your risk factors suggest you should see a cardiologist” is more useful than a model that pretends to be a doctor.
Why classical ML beats deep learning for medical capstones
If you’ve read posts about deep learning for healthcare, you might be tempted to use a neural network. Don’t, at least not for your first defensible version.
Three reasons.
Explainability is non-negotiable. When a doctor sees a risk score of 78%, the first question is “why?” A Random Forest can answer that with feature importance. “Blood pressure and cholesterol drove most of this score.” A neural network cannot, without extra tooling like SHAP that adds complexity and confusion.
Small dataset. The UCI heart disease dataset has 303 records. Deep learning needs thousands. Classical ML works well with hundreds. You’ll get higher accuracy with a Random Forest than with any neural network on this data.
Defensibility. When the panel asks “why should a doctor trust this model?”, “because I can show which features drove each prediction” is a better answer than “because the loss function converged.”
Build the classical version first. Add deep learning as a Chapter 5 (Recommendations) extension if you have time. Don’t lead with deep learning.
Before you start
You need:
- Python 3.10 or higher
- The UCI heart disease dataset (we’ll download it in Step 2)
- About 45 minutes for the first full run
- Ideally: a doctor or nurse you can interview for Chapter 3 (this strengthens your defense significantly)
If you can interview just one healthcare worker (a barangay health worker, a school nurse, a relative who is a doctor) for 30 minutes about which risk factors matter most, you have an unbeatable Chapter 3 section.
The dataset: UCI Heart Disease
The standard dataset for cardiovascular ML capstones. 303 patient records collected at the Cleveland Clinic, 14 features, well-documented. Free on UCI ML Repository and on Kaggle.
The 13 input features:
- age: age in years
- sex: 1 = male, 0 = female
- cp: chest pain type (0-3)
- trestbps: resting blood pressure (mm Hg)
- chol: serum cholesterol (mg/dl)
- fbs: fasting blood sugar > 120 mg/dl (1 = true, 0 = false)
- restecg: resting ECG results (0-2)
- thalach: maximum heart rate achieved
- exang: exercise-induced angina (1 = yes, 0 = no)
- oldpeak: ST depression induced by exercise
- slope: slope of peak exercise ST segment (0-2)
- ca: number of major vessels colored by fluoroscopy (0-3)
- thal: thalassemia (0 = normal, 1 = fixed defect, 2 = reversible defect)
Target: 0 (no heart disease present) or 1 (heart disease present).
Class balance is roughly 54% no-disease and 46% disease, already balanced enough for a stratified split, no resampling needed.
Project file structure
medical-diagnosis-capstone/
├── train.py
├── predictor.py
├── app.py
├── heart.csv
├── model/
│   ├── model.pkl
│   └── feature_names.json
├── templates/
│   └── index.html
├── static/
│   └── style.css
└── requirements.txt
Step 1: Install the dependencies
pip install flask scikit-learn pandas numpy joblibCreate requirements.txt:
flask==3.0.0
scikit-learn==1.4.0
pandas==2.2.0
numpy==1.26.0
joblib==1.3.2
Step 2: Get the dataset
Download heart.csv from Kaggle (search “heart disease uci”). Standardize the column names if needed so they match the features list above. Place the file in your project root.
Quick check in Python:
import pandas as pd
df = pd.read_csv('heart.csv')
print(df.shape)
print(df['target'].value_counts())
print(df.isnull().sum())
You should see (303, 14), a roughly balanced target distribution, and zero missing values. If the columns are named differently, rename them to the standard names before continuing.
Step 3: Train the model (train.py)
Create train.py:
import os
import json
import joblib
import pandas as pd
from sklearn.ensemble import RandomForestClassifier
from sklearn.model_selection import train_test_split, cross_val_score
from sklearn.metrics import classification_report, confusion_matrix

os.makedirs('model', exist_ok=True)

df = pd.read_csv('heart.csv')
print(f"Loaded {len(df)} records")
print(df['target'].value_counts())

feature_cols = ['age', 'sex', 'cp', 'trestbps', 'chol', 'fbs', 'restecg',
                'thalach', 'exang', 'oldpeak', 'slope', 'ca', 'thal']
X = df[feature_cols]
y = df['target']

X_train, X_test, y_train, y_test = train_test_split(
    X, y, test_size=0.2, random_state=42, stratify=y
)

model = RandomForestClassifier(
    n_estimators=200,
    max_depth=8,
    min_samples_leaf=4,
    class_weight='balanced',
    random_state=42
)
model.fit(X_train, y_train)

y_pred = model.predict(X_test)
print("\nClassification Report:")
print(classification_report(y_test, y_pred, target_names=['no_disease', 'disease']))

print("\nConfusion Matrix:")
print(confusion_matrix(y_test, y_pred))

cv_scores = cross_val_score(model, X, y, cv=5)
print(f"\n5-fold CV accuracy: {cv_scores.mean():.3f} (+/- {cv_scores.std():.3f})")

importances = sorted(
    zip(feature_cols, model.feature_importances_),
    key=lambda x: x[1],
    reverse=True
)
print("\nFeature Importances (top 8):")
for feature, importance in importances[:8]:
    print(f"  {feature}: {importance:.3f}")

joblib.dump(model, 'model/model.pkl')
with open('model/feature_names.json', 'w') as f:
    json.dump(feature_cols, f)

print("\nModel saved to model/model.pkl")
Run it:
python train.pyYou’ll get a classification report, confusion matrix, 5-fold cross-validation score, and feature importance ranking. Screenshot all four. Chapter 4 gold.
The 5-fold CV score is what panels look at for “is this overfitted?”. If your test accuracy is 90% but CV mean is 75%, you’ve overfit. Real Random Forest on this dataset typically gets 80-87% CV accuracy.
Note the class_weight='balanced'. This matters for medical models. False negatives (predicting “no disease” when there is one) are usually worse than false positives, and balanced weighting helps the model take the minority class seriously.
Step 4: Build the predictor with feature importance (predictor.py)
Create predictor.py:
import json
import joblib

class RiskAssessmentSystem:
    def __init__(self, model_path='model/model.pkl', features_path='model/feature_names.json'):
        self.model = joblib.load(model_path)
        with open(features_path, 'r') as f:
            self.feature_names = json.load(f)
        self.importances = dict(zip(self.feature_names, self.model.feature_importances_))

    def predict(self, inputs):
        features = [float(inputs.get(name, 0)) for name in self.feature_names]

        probs = self.model.predict_proba([features])[0]
        risk = float(probs[1])

        contributions = []
        for name, value in zip(self.feature_names, features):
            contribution = float(self.importances[name] * value)
            contributions.append({
                'feature': name,
                'value': value,
                'importance': round(float(self.importances[name]), 3),
                'contribution': round(contribution, 3)
            })

        contributions.sort(key=lambda x: x['contribution'], reverse=True)

        if risk < 0.3:
            risk_level = 'low'
            color = '#2D6A4F'
        elif risk < 0.6:
            risk_level = 'moderate'
            color = '#C9A961'
        else:
            risk_level = 'elevated'
            color = '#b94a48'

        return {
            'risk_score': round(risk * 100, 1),
            'risk_level': risk_level,
            'color': color,
            'top_factors': contributions[:5],
            'disclaimer': 'This is a risk assessment for pre-screening purposes only. Not a diagnostic tool. Consult a licensed physician for any health concerns.'
        }
The contribution math (importance × value) is a simplified version of SHAP. It gives a directional sense of which factors pushed the risk up for this specific user. Real SHAP is more rigorous; this version is fine for a BSIT capstone and far easier to defend.
Step 5: Build the Flask app (app.py)
Create app.py:
from flask import Flask, render_template, request, jsonify
from predictor import RiskAssessmentSystem

app = Flask(__name__)
assessor = RiskAssessmentSystem()

@app.route('/')
def index():
    return render_template('index.html')

@app.route('/predict', methods=['POST'])
def predict():
    try:
        inputs = request.json
        result = assessor.predict(inputs)
        return jsonify(result)
    except (ValueError, TypeError) as e:
        return jsonify({'error': 'Invalid input: ' + str(e)}), 400

if __name__ == '__main__':
    app.run(debug=True, port=5000)
Step 6: Build the UI
Create templates/index.html:
<!DOCTYPE html>
<html lang="en">
<head>
  <meta charset="UTF-8" />
  <title>Heart Disease Risk Assessment</title>
  <link rel="stylesheet" href="/static/style.css" />
</head>
<body>
  <div class="container">
    <div class="disclaimer">
      <strong>Disclaimer:</strong> This tool provides risk assessment for educational and pre-screening purposes only. It is NOT a diagnostic tool. Always consult a licensed physician for any health concerns.
    </div>

    <header>
      <h1>Heart Disease Risk Assessment</h1>
      <p>Fill in the health factors below to get a risk score and see which factors contributed most.</p>
    </header>

    <form id="form" class="grid">
      <label>Age <input type="number" name="age" required min="20" max="100" value="50" /></label>
      <label>Sex <select name="sex"><option value="0">Female</option><option value="1">Male</option></select></label>
      <label>Chest Pain Type <select name="cp">
        <option value="0">Typical angina</option><option value="1">Atypical angina</option>
        <option value="2">Non-anginal</option><option value="3">Asymptomatic</option>
      </select></label>
      <label>Resting BP <input type="number" name="trestbps" required min="80" max="220" value="120" /></label>
      <label>Cholesterol <input type="number" name="chol" required min="100" max="600" value="200" /></label>
      <label>Fasting BS > 120 <select name="fbs"><option value="0">No</option><option value="1">Yes</option></select></label>
      <label>Resting ECG <select name="restecg">
        <option value="0">Normal</option><option value="1">ST-T abnormal</option><option value="2">LV hypertrophy</option>
      </select></label>
      <label>Max Heart Rate <input type="number" name="thalach" required min="60" max="220" value="150" /></label>
      <label>Exercise Angina <select name="exang"><option value="0">No</option><option value="1">Yes</option></select></label>
      <label>ST Depression <input type="number" name="oldpeak" required min="0" max="10" step="0.1" value="1.0" /></label>
      <label>ST Slope <select name="slope">
        <option value="0">Upsloping</option><option value="1">Flat</option><option value="2">Downsloping</option>
      </select></label>
      <label>Vessels Colored <select name="ca"><option>0</option><option>1</option><option>2</option><option>3</option></select></label>
      <label>Thalassemia <select name="thal">
        <option value="0">Normal</option><option value="1">Fixed defect</option><option value="2">Reversible defect</option>
      </select></label>
      <button type="submit" class="submit-row">Assess Risk</button>
    </form>

    <div id="result" class="result hidden">
      <h2 id="risk-score"></h2>
      <p id="risk-level"></p>
      <h3>Top Contributing Factors</h3>
      <ul id="factors"></ul>
      <div class="disclaimer">
        <strong>Reminder:</strong> This is not a diagnosis. Please consult a licensed physician for any health concerns.
      </div>
    </div>
  </div>

  <script>
    const form = document.getElementById('form');
    const result = document.getElementById('result');
    const scoreEl = document.getElementById('risk-score');
    const levelEl = document.getElementById('risk-level');
    const factorsEl = document.getElementById('factors');

    form.addEventListener('submit', async (e) => {
      e.preventDefault();
      const formData = new FormData(form);
      const inputs = {};
      for (const [k, v] of formData.entries()) inputs[k] = v;

      const res = await fetch('/predict', {
        method: 'POST',
        headers: { 'Content-Type': 'application/json' },
        body: JSON.stringify(inputs)
      });
      const data = await res.json();

      scoreEl.textContent = 'Risk Score: ' + data.risk_score + '%';
      scoreEl.style.color = data.color;
      levelEl.textContent = 'Risk Level: ' + data.risk_level.toUpperCase();
      factorsEl.innerHTML = '';
      data.top_factors.forEach(f => {
        const li = document.createElement('li');
        li.textContent = f.feature + ' (value ' + f.value + ', importance ' + f.importance + ')';
        factorsEl.appendChild(li);
      });
      result.classList.remove('hidden');
    });
  </script>
</body>
</html>
Create static/style.css:
* { box-sizing: border-box; }
body {
  font-family: system-ui, -apple-system, sans-serif;
  margin: 0;
  background: #fafafa;
  color: #2c3e50;
}
.container {
  max-width: 800px;
  margin: 40px auto;
  background: white;
  border-radius: 12px;
  box-shadow: 0 4px 20px rgba(0,0,0,0.06);
  padding: 28px;
}
.disclaimer {
  background: #fdfaf2;
  border-left: 4px solid #C9A961;
  padding: 12px 16px;
  border-radius: 6px;
  font-size: 13px;
  margin-bottom: 20px;
  line-height: 1.5;
}
header h1 { margin: 0 0 4px; color: #1F3A5F; }
header p { margin: 0 0 24px; color: #5a6a7a; }
.grid {
  display: grid;
  grid-template-columns: 1fr 1fr;
  gap: 14px;
}
.grid label {
  display: flex;
  flex-direction: column;
  font-size: 13px;
  font-weight: 600;
  color: #5a6a7a;
  gap: 4px;
}
.grid input, .grid select {
  padding: 10px;
  border: 1px solid #ddd;
  border-radius: 6px;
  font-size: 14px;
  font-weight: normal;
  color: #2c3e50;
}
.submit-row {
  grid-column: 1 / -1;
  background: #1F3A5F;
  color: white;
  border: none;
  padding: 14px;
  font-size: 16px;
  border-radius: 8px;
  cursor: pointer;
  margin-top: 8px;
}
.submit-row:hover { background: #163049; }
.result { margin-top: 24px; padding-top: 24px; border-top: 1px solid #eee; }
.result.hidden { display: none; }
.result h2 { margin: 0 0 4px; font-size: 28px; }
.result p { margin: 0 0 16px; font-weight: 600; color: #5a6a7a; }
.result h3 {
  color: #1F3A5F;
  font-size: 14px;
  text-transform: uppercase;
  letter-spacing: 0.5px;
  margin: 16px 0 8px;
}
.result ul { list-style: none; padding: 0; margin: 0 0 16px; }
.result li {
  background: #f0f3f7;
  padding: 10px 14px;
  border-radius: 6px;
  margin-bottom: 6px;
  font-size: 13px;
}
Step 7: Run it
python train.py
python app.py
Open http://localhost:5000. Try inputting a healthy 30-year-old (low risk) and a 65-year-old with high cholesterol and exercise-induced angina (high risk). Watch the risk score change. Look at the top contributing factors. They should match medical intuition.
Show the disclaimer banner in your defense screenshot. Panels look for it.
How to defend a medical diagnosis capstone
Five questions. The fifth one is the one most students miss.
“Are you claiming this diagnoses heart disease?” No. The system is a risk assessment tool for pre-screening purposes. The disclaimer makes this explicit. We do not claim diagnostic capability. The system recommends consultation with a licensed physician for any user with elevated risk.
“What dataset did you use?” The UCI heart disease dataset, Cleveland subset, 303 patient records with 13 clinical features. The dataset is publicly available from the UCI Machine Learning Repository and Kaggle. We documented the data source and the feature definitions in Chapter 3.
“What model and why?” Random Forest classifier with 200 trees and max depth 8. We chose Random Forest for explainability. Every prediction can be broken down into feature contributions, which is essential for medical applications where the user (or their doctor) needs to understand which factors drove the score. We compared with Logistic Regression and the Random Forest had better macro F1 on our validation set. Comparison table is in our appendix.
“What’s your accuracy?” Test accuracy is X%, 5-fold cross-validation accuracy is Y%. More importantly, our false negative rate is Z%. In healthcare, false negatives (predicting no disease when there is one) are typically worse than false positives. We used class-balanced training weights specifically to reduce false negatives.
“What about ethics and privacy?” Three things. First, we used only a public dataset, no real patient data was collected during this project. Second, the disclaimer makes clear this is not a diagnostic tool. Third, our methodology in Chapter 3 includes an explicit ethics statement and references the Philippine Data Privacy Act of 2012 regarding any future use with real patient data. If your school has an IRB, mention you discussed the project with your adviser to confirm it didn’t require formal review.
That fifth answer is what separates approved medical capstones from rejected ones.
How to customize for other health domains
Same code, different dataset. Some popular options:
- Diabetes risk: Pima Indians Diabetes dataset (Kaggle), 8 features, well-studied
- Stroke prediction: Kaggle stroke dataset, 11 features including some categorical
- Breast cancer pre-screening: Wisconsin Diagnostic Breast Cancer dataset (UCI), 30 features
- Chronic kidney disease: UCI CKD dataset, 24 features, real-world messy
- Mental health screening: OSMI mental health surveys (be extra careful with disclaimers)
- COVID-19 severity from symptoms: Kaggle COVID datasets (heavy disclaimers, data is dated)
- Maternal health risk: Kaggle maternal health dataset, low-feature-count
- Pneumonia risk from clinical features: clinical inputs only, not chest X-rays
For each dataset, you’ll need to adjust the feature list in train.py and the form fields in index.html. The Random Forest training code stays the same. The disclaimers and ethical framing stay the same.
Common errors and how to fix them
Test accuracy is 100%: overfitting. Your model is memorizing the training data, probably because you forgot to use the test split. Re-check that you trained on X_train and evaluated on X_test.
Risk score is always between 40-60%: the model isn’t confident. Either too few features, or your features have low predictive power. Check the feature importance ranking. If the top feature is below 0.1, your features are not strong enough.
ValueError: could not convert string to float: your CSV has a categorical column you didn’t encode. Add df = pd.get_dummies(df) or manually encode categoricals before training.
Model predicts the same class for every user: class imbalance is worse than you thought. Re-check df['target'].value_counts(). Use SMOTE or oversample the minority class if needed.
Feature importance ranking doesn’t match medical intuition: your features have correlations the doctor wouldn’t expect. Sometimes this is the model finding real patterns. Sometimes it’s data leakage. Investigate before defending.
KeyError when predicting: your form field names don’t match the model’s feature names. Print assessor.feature_names and check against the form.
How to extend this project
- Add SHAP for rigorous explainability.
pip install shapand replace the simplified contribution math with proper SHAP values. - Multi-disease platform. Heart, diabetes, stroke, kidney: all using the same UI but different models behind the scenes.
- Longitudinal tracking. Save user inputs over time, show how their risk changes.
- Doctor review workflow. When risk is elevated, flag the case for a doctor to review. Add a doctor login.
- Compare with deep learning. Train a small neural network as a baseline. Show that classical ML matches it.
- SMS notifications. When a user’s risk crosses a threshold, send an SMS recommending a check-up.
- Mobile app deployment. Bundle the joblib model with Kivy or a webview-based mobile shell.
Free download: source code + sample dataset
UML diagrams you’ll need for documentation
Medical AI capstones have specific diagram needs panels look for:
- Use Case Diagram. actors: user (patient or health worker), admin (manages model), doctor (reviewer of flagged cases); main use cases include risk assessment and result review.
- Activity Diagram. input → preprocess → predict → explain → display + disclaimer + recommended action.
- Sequence Diagram. request → assessor → model → feature importance → response with citations.
- Class Diagram. RiskAssessmentSystem, FeatureImportance helper, Flask routes.
- Data Flow Diagram. patient input data + model + recommendations flow, with disclaimer points marked.
We have detailed guides on each. Pay extra attention to where the disclaimer appears in your Activity Diagram. Panels will check that the disclaimer is shown before and after the prediction, not just buried in a footer.
Official documentation
Frequently Asked Questions
Is medical diagnosis a good capstone project for IT students?
Do I need real patient data for a medical ML capstone?
What disclaimers should my medical capstone include?
What machine learning model is best for medical predictions?
Can my medical capstone help real doctors?
We are hoping this guide helps you build a defensible medical risk assessment capstone that passes ethics review. If you hit a Random Forest training, class imbalance, or feature importance bug while building yours, drop the error in the comments below and we will help you debug it. Thank you for reading itsourcecoders.
Build the assessor. Disclaim properly. Defend with ethics.
Medical ML capstones live or die by their framing. Get the disclaimers right, choose explainable models, document your ethical considerations, and the panel will reward you.
The model in this guide is straightforward. The disclaimers are mandatory. The “risk assessment, not diagnosis” framing is the project.
For more applied AI capstone ideas, see 100 AI Capstone Project Ideas for IT Students 2026. For a related computer vision project that also addresses real-world deployment, see our Crop Disease Detection Capstone Tutorial. If you haven’t picked your capstone topic yet, browse 150 Best Capstone Project Ideas for IT Students 2026. For other Python AI source code to study, see our Python projects library. For the UML diagrams your documentation will need, our UML guides cover every diagram type panels ask about.
Now download UCI heart disease. Train your first model. Write your disclaimer paragraph tonight.
More capstone project ideas to browse
Looking for more ideas to pitch your panel? Browse our capstone idea collections:

Adrian Mercurio
Full-Stack Developer at PIES IT Solution
Specializes in building complete capstone projects with full documentation. Strong background in PHP/MySQL development and database design. Has personally built and tested over 30 capstone-ready projects with ER diagrams, DFDs, and chapter-by-chapter thesis documentation.
Expertise: PHP · Laravel · Database Design · Capstone Projects · C# · C · C++ · Python · AI Projects · View all posts by Adrian Mercurio →