
Forwarding email in Gmail is a two-part skill. First, forwarding a single message manually. Second, setting up auto-forwarding rules so future emails from certain senders or subjects go somewhere else automatically. Both are useful but they solve different problems.
Here is the complete 2026 guide for both approaches on desktop and mobile.
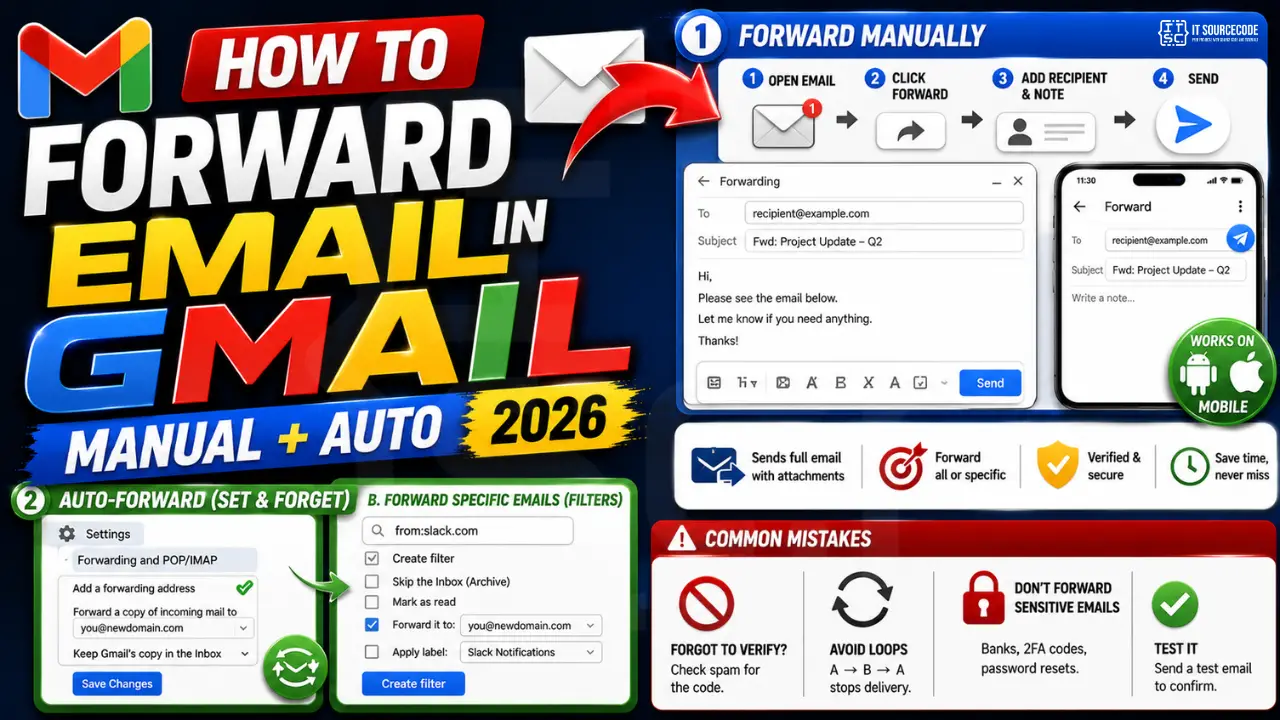
Forward a single email manually on desktop
- Open Gmail at
mail.google.com. - Open the email you want to forward.
- Click the Forward button at the bottom of the message (or press
Fkeyboard shortcut). - Type the recipient’s email address in the To field.
- Add a note above the forwarded content if you want to explain context.
- Click Send.
The recipient receives the full email including original sender, subject, and any attachments.
Forward an email on Gmail mobile (Android or iPhone)
- Open the Gmail app on your phone.
- Tap the email to open it.
- Tap the three dots in the top-right corner of the message.
- Tap Forward.
- Enter the recipient’s address.
- Tap the send arrow icon at the top-right.
Set up auto-forwarding for ALL new emails
This is useful when you switch to a new email address and want everything routed automatically for a period of time.
- Open Gmail on desktop. Click the gear icon in the top-right.
- Click See all settings.
- Go to the Forwarding and POP/IMAP tab.
- Click Add a forwarding address.
- Type the destination address and click Next.
- Confirm by clicking Proceed. Google sends a verification code to the destination address.
- Open the destination inbox, get the verification code, and enter it back in the original Gmail settings.
- Once verified, return to Forwarding and POP/IMAP and select “Forward a copy of incoming mail to [destination]”.
- Choose what to do with the Gmail copy: keep, mark as read, archive, or delete.
- Click Save Changes at the bottom of the page.
Set up auto-forwarding for SPECIFIC emails only (filter-based)
This is the more powerful option because you decide exactly which emails get forwarded.
- First, complete the “Add a forwarding address” verification above.
- Open Gmail. Click the search bar at the top.
- Click the Show search options icon on the right side of the search bar.
- Fill in the criteria: sender, subject, has words, has attachment, etc.
- Click Create filter at the bottom.
- Check “Forward it to” and select your verified destination address from the dropdown.
- Optionally add other actions like “Mark as read” or “Apply label”.
- Click Create filter.
Common auto-forwarding recipes
- Forward all invoices to accounting: search
subject:(invoice OR receipt)and forward to your accountant’s address. - Forward all Slack notifications to a secondary inbox: search
from:slack.comand forward. - Forward large attachments to Drive-linked account: search
has:attachment larger:10Mand forward. - Forward emails from a specific domain: search
from:@companyname.comand forward.
Turn off auto-forwarding when you no longer need it
- Go to Settings → Forwarding and POP/IMAP.
- Select “Disable forwarding”.
- Click Save Changes.
For filter-based forwarding, delete the filter from Settings → Filters and Blocked Addresses.
Common mistakes when forwarding email in Gmail
- Forgetting to verify the destination address. Gmail requires verification before it forwards anywhere. Check spam if the code does not arrive.
- Auto-forward loops. If Address A forwards to Address B and B forwards back to A, Gmail detects the loop and stops delivery. Set up one-way forwarding only.
- Forwarding sensitive emails. Bank statements, password resets, and 2FA codes should NOT be auto-forwarded. Anyone with access to the destination inbox sees them.
- Not testing after setup. Send yourself a test email to confirm forwarding works before relying on it.
Official documentation
Recommended email productivity resources
The links below are affiliate links. We may earn a commission at no extra cost to you when you buy or sign up. See our affiliate disclosure.
Common Gmail forwarding mistakes to avoid
Gmail forwarding looks simple but has quirks that cause missed emails. Here are the four most common mistakes and their fixes for 2026.
- Forwarding without confirming the destination address. Gmail sends a verification email to the target address. Miss it and forwarding never activates. Check the destination inbox spam folder if you did not see the code.
- Setting auto-forward but keeping the original in Inbox. Under Forwarding settings, choose “keep Gmail copy in Inbox” if you want to retain access, or “archive Gmail copy” to keep your inbox clean.
- Forwarding sensitive emails to shared accounts. Forward rules do not respect confidentiality mode. Verify the destination address is not a shared inbox before enabling auto-forward for financial or medical emails.
- Not scoping forward rules with filters. Forward everything and you flood the destination. Combine forwarding with a filter (e.g., forward only emails matching “invoice”) to keep the destination inbox useful.
When to use manual forward versus auto-forward
Both methods have their place. Manual forwarding is best when you want to add context, edit the message, or forward only specific emails to different people. Auto-forwarding wins when you need every email of a certain type to reach a second inbox without your intervention.
For business use, auto-forward is essential for shared team inboxes, backup archives, or consolidating personal and work Gmail accounts. Set up filters that route specific types of emails (customer support, invoices, alerts) to the right team member automatically. This saves hours per week compared to manual forwarding.
For personal use, manual forwarding remains useful for sharing specific emails with family, forwarding a receipt to your accountant, or sending an interesting article to a friend. The two-second manual forward stays practical for these one-off cases.
Whichever method you use, always test forwarding with a test email before relying on it for critical workflows. Verify the destination received the email, check the formatting is preserved, and confirm attachments came through. A 30-second test saves hours of debugging missed emails later.
Quick step-by-step summary (click to expand)
- Open Gmail settings. Click the gear icon in the top right of Gmail and click “See all settings”.
- Go to Forwarding and POP/IMAP tab. Click “Forwarding and POP/IMAP” in the settings tabs.
- Click Add a forwarding address. Enter the email address you want to forward to and click Next.
- Verify the destination address. Google sends a confirmation code to the destination. Enter the code to confirm.
- Choose forwarding behavior. Pick “keep Gmail copy in Inbox” or “archive Gmail copy” based on your preference. Save changes.
Frequently Asked Questions
Can I forward Gmail to multiple addresses at once?
Yes but you must set up separate filters for each destination. The auto-forward setting only supports one destination at a time. Use filter-based forwarding for multi-destination routing.
Does auto-forwarding include attachments?
Yes. Full email content including attachments up to 25MB is forwarded. Larger attachments become Google Drive links which the destination inbox can still access if they have permission.
Can I forward emails from an alias to another Gmail?
Yes. If you have Gmail aliases set up via “Send mail as”, each alias can have its own filter that forwards to a different destination.
Will the recipient see it was forwarded?
For auto-forwarded emails, the recipient sees the original sender in the From field. Gmail adds a small “via forwarding” note in the email header details for transparency.
Can I forward from Gmail to Outlook or Yahoo?
Yes. Auto-forwarding works to any email service including Outlook, Yahoo, ProtonMail, and custom domains. Just complete the verification step from the destination inbox.

Caren Bautista
Technical Writer at PIES IT Solution
Caren Bautista is a technical writer at PIES IT Solution responsible for clear, beginner-friendly tutorials and error-fix guides.
Expertise: Technical Writing, JavaScript, Python, Python Errors, MS Excel, Gmail Productivity