
Gmail filters automate the boring 20% of email work, sorting, labeling, archiving, forwarding so you can focus on the 80% that needs your judgment.
This 2026 guide covers the full filter system: how to create them, the most useful templates to copy, how to chain filters together, and the rare cases where filters cause problems.
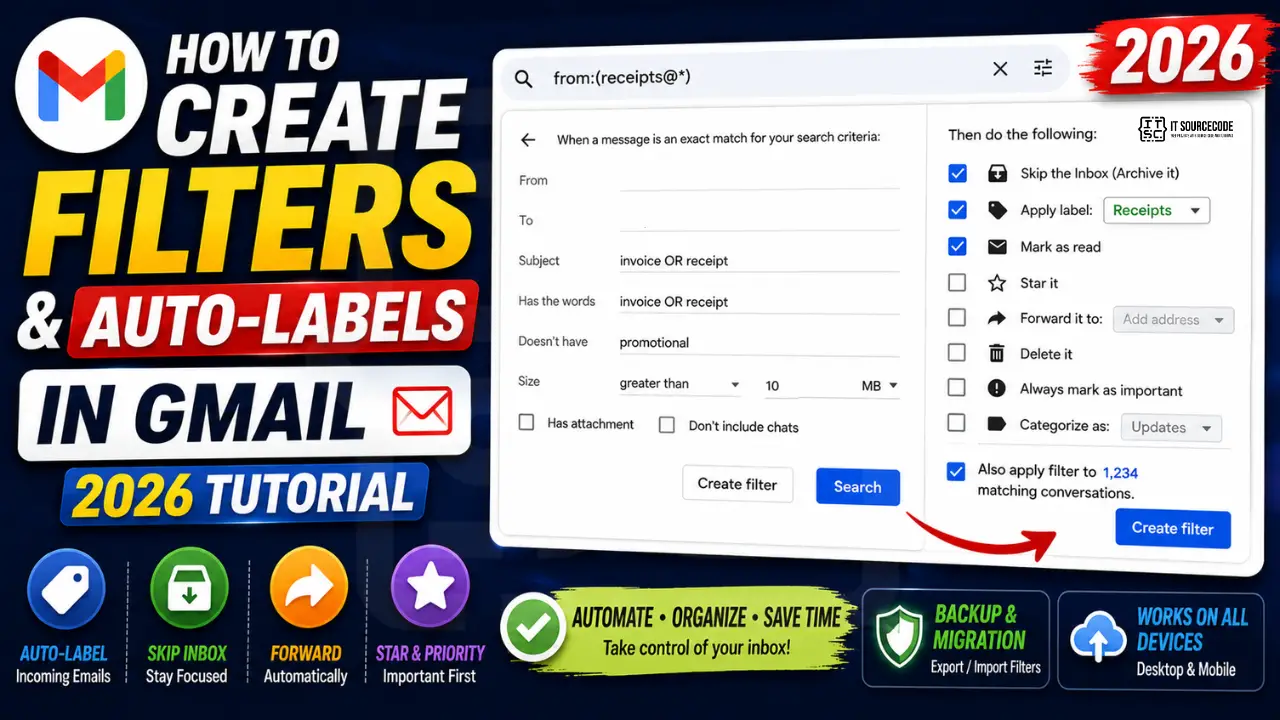
What Gmail filters can do
For every incoming email matching your conditions, a filter can:
- Skip the inbox (archive immediately)
- Mark as read
- Star
- Apply one or more labels
- Forward to another address
- Delete (send to Trash)
- Never send to Spam (whitelist sender)
- Always mark as important
- Categorize (Promotions, Social, Updates, Forums)
Method 1: Create a filter from an existing email (easiest)
- Open any email that matches what you want to filter (for example, a newsletter from a specific sender).
- Click the three-dot menu in the email toolbar (next to the time stamp).
- Click “Filter messages like this.”
- Gmail opens the filter creator with the sender already filled in.
- Adjust conditions (add subject keywords, has attachment, size, etc.) if needed.
- Click “Create filter” (bottom of the dialog).
- Choose actions: Skip inbox, Apply label, Mark as read, etc. Check multiple if needed.
- Optionally check “Also apply filter to N matching conversations” to retroactively sort old emails.
- Click “Create filter.”
Method 2: Create a filter from scratch (more control)
- Open Gmail > gear icon > See all settings > “Filters and Blocked Addresses” tab.
- Click “Create a new filter.”
- Fill in conditions (any combination):
- From: specific sender or domain (use
@domain.comfor whole domain) - To: specific recipient (useful if you have aliases)
- Subject: keywords in subject line
- Has the words: body content keywords (supports operators like OR, AND, parentheses)
- Doesn’t have: exclude emails containing these words
- Size: greater than X MB
- Has attachment: checkbox
- Don’t include chats: checkbox
- From: specific sender or domain (use
- Click “Search” to preview matching emails before saving.
- Click “Create filter” to set actions.
- Pick actions and save.
10 most useful filter templates to copy
| # | Conditions | Actions |
|---|---|---|
| 1 | From: receipts@*, *invoice* in subject | Apply label “Receipts”, skip inbox |
| 2 | From: noreply@*, no-reply@*, donotreply@* | Apply label “Automated”, skip inbox, mark as read |
| 3 | From: @linkedin.com OR @facebook.com OR @x.com | Apply label “Social”, skip inbox |
| 4 | From: @[your-boss-domain].com | Star, mark important, never spam |
| 5 | Subject contains “unsubscribe” OR “newsletter” | Apply label “Newsletters”, skip inbox |
| 6 | Has attachment, size > 10 MB | Apply label “Large Attachments” (helps with Drive cleanup) |
| 7 | To: your-alias+project@gmail.com | Apply label “Project X”, skip inbox |
| 8 | From: @capstone-team-member.com | Apply label “Capstone Team”, star |
| 9 | Subject contains “URGENT” OR “ASAP” | Apply label “Priority”, mark important, star |
| 10 | From: @amazon.com OR @shopee.com OR @lazada.com.ph | Apply label “Shopping”, skip inbox |
Create a label first (or use a nested label)
Filters can apply existing labels or create new ones on the fly. To prepare labels in advance:
- Open Settings > Labels tab.
- Scroll to “Labels” section > click “Create new label.”
- Type label name. Use a forward slash for nesting:
Work/Capstonecreates Work as parent, Capstone as child. - Optionally pick a color: hover over the label in the sidebar > click the 3-dot menu > Label color.
Color-coded labels make the inbox scannable: green for personal, red for urgent client, yellow for capstone team, blue for newsletters.
Chain filters: multi-step automation
Gmail processes filters in the order they were created. To chain logic (e.g., “label as Newsletter, then if also from boss, mark important”):
- Create filter A: From boss domain, Mark important.
- Create filter B: Subject contains “newsletter,” Apply label Newsletters, Skip inbox.
- When boss sends a newsletter, both filters match. Boss-domain filter runs first because created first, so the email IS marked important AND labeled Newsletters AND skips inbox.
To re-order filters: open Settings > Filters tab, you cannot drag-reorder, but you can delete and re-create in the order you want.
Filter exports and imports (backup or migration)
Export all your filters to share with team or back up before testing changes:
- Settings > Filters and Blocked Addresses.
- Scroll to bottom > “Export” all filters or “Select all” then “Export.”
- A .xml file downloads.
- To import on another account: same page > “Import filters” > choose the .xml file > “Open file” > review and “Create filters.”
This is the fastest way to set up filters on a new Gmail account or to share a filter set with team members.
Common filter mistakes
- “Skip the Inbox” + no label = lost emails: always pair Skip Inbox with at least one label, otherwise emails go to All Mail and you may never find them.
- Overly broad From: filters: filtering on
@gmail.comwill hit personal friends, not just spam. Always test with “Search” before saving. - Forwarding rules created by attackers: if a hacker briefly had access, they may have set up a forwarding rule. Check Settings > Forwarding and POP/IMAP regularly for any forwarding address you do not recognize.
- Conflicting actions: if filter A says Star and filter B says Delete, the email ends up in Trash (delete wins). Test edge cases.
Official documentation
Quick step-by-step summary (click to expand)
- Open Gmail Settings. Click the gear icon in the top-right of Gmail, then click “See all settings”.
- Go to the Filters and Blocked Addresses tab. Click the “Filters and Blocked Addresses” tab at the top of the settings page.
- Click Create a new filter. Scroll to the bottom and click “Create a new filter” to open the criteria form.
- Enter your filter criteria. Fill in sender, subject, keywords, or attachment rules. Then click “Create filter” to move to the action step.
- Choose actions and save. Pick actions: apply a label, archive, mark as read, forward, or delete. Click “Create filter” to save.
Frequently Asked Questions
What is the difference between a Gmail filter and a label?
A label is a tag you put on emails to organize them (like a folder, but emails can have multiple labels). A filter is an automated rule that does things (apply labels, skip inbox, mark read) when incoming emails match conditions. Filters create the automation; labels are the buckets.
How many Gmail filters can I have?
Gmail does not publish a hard limit. Practical experience: 200-500 filters work fine. Past 500, the Filters page becomes slow to load, and very complex filters with many OR conditions can occasionally miss matches under heavy account load.
Do Gmail filters apply to existing emails or only new ones?
By default, only new incoming emails. When you create a filter, Gmail offers a checkbox “Also apply filter to N matching conversations” to retroactively sort existing emails. Check this to clean up old inboxes; uncheck if you only want forward-looking automation.
Can a Gmail filter forward emails to another address?
Yes, but the destination address must first be verified. Add it under Settings > Forwarding and POP/IMAP > “Add a forwarding address.” Google sends a confirmation code to that address; once confirmed, it appears in the filter action dropdown as “Forward to.” For security, audit the Forwarding tab regularly for addresses you did not add.
How do I find filters that are no longer matching anything?
Open Settings > Filters tab. Each filter shows the conditions (From, Subject, etc.). Click the matching search query in Gmail search bar to see which emails it currently catches. Filters that return zero results are usually safe to delete, especially old ones tied to senders who no longer email you.
Do Gmail filters sync to mobile?
Yes. Filters run on Google’s servers, so they apply equally whether you check Gmail on desktop, iPhone, Android, or even POP/IMAP clients. There is no separate mobile filter set; what you configure on desktop affects every device that uses the account.

Caren Bautista
Technical Writer at PIES IT Solution
Responsible for crafting clear, well-structured, and beginner-friendly content across the platform. Handles the writing, proofreading, and editorial review of tutorials, guides, and documentation to ensure every article is accurate, readable, and easy to follow.
Expertise: Technical Writing · Content Creation · Documentation · Editorial Writing · JavaScript · TypeScript · Python · Python Errors · HTTP Errors · MS Excel · View all posts by Caren Bautista →