
HOW TO CREATE APPLE ID WITH GMAIL – An Apple ID serves as a central hub for accessing various Apple services and features across devices, facilitating seamless integration and personalized experiences within the Apple ecosystem.
Leveraging Gmail for an Apple ID brings additional benefits, enhancing device compatibility, email management, and security measures for users.
What are the different features of Apple ID
An Apple ID provides access to a range of Apple services and features across devices. This includes purchasing content from the App Store, iCloud storage for files and backups, and communication through iMessage and FaceTime.
Additionally, it enables subscriptions to services like Apple Music and Apple Arcade, as well as the use of features like Find My and Apple Pay. Family Sharing and Sign in with Apple are also supported functionalities tied to an Apple ID.
How to Create Apple ID With Gmail?
Time needed: 2 minutes
Here’s the step-by-step guide on how to create apple ID with Gmail.
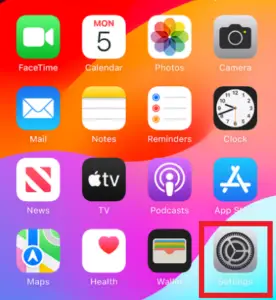
- Access the Settings application on your iPhone or iPad.

- Select the option to sign in to your device.
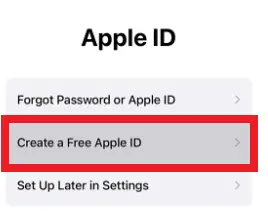
- Choose the option indicating that you do not possess an Apple ID.

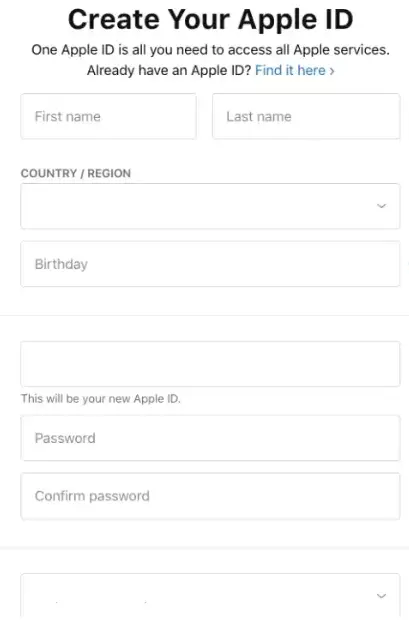
- Within the ensuing prompt titled “Create Apple ID,” input your personal details such as first name, last name, birthdate, and email address.
You have the option to utilize an existing email address from services like Gmail, Yahoo, Outlook, etc., or acquire a complimentary iCloud email address (@icloud.com). - Proceed with the instructions to confirm your email address. Establish a robust password for your Apple ID account.
Advantages of using Gmail for Apple ID
Using Gmail for your Apple ID offers several advantages:
- Integration: Gmail seamlessly integrates with Apple devices, allowing you to access your Apple services, such as iCloud, App Store, and Apple Music, across all your devices.
- Unified Email Experience: You can manage your Apple-related emails along with your regular emails in one inbox, streamlining your communication process.
- Reliability: Gmail is known for its robust infrastructure and reliable service, ensuring that your Apple ID emails are delivered and accessible when you need them.
- Security: Gmail provides advanced security features, such as two-factor authentication and robust spam filtering, enhancing the protection of your Apple ID and associated services.
- Storage: Gmail offers generous storage space, so you can store important emails related to your Apple ID without worrying about running out of space.
Overall, using Gmail for your Apple ID offers a convenient, reliable, and secure email experience tailored to your Apple ecosystem.
How to create an Apple ID using a phone number?
- Open the Settings app on your iPhone or iPad.
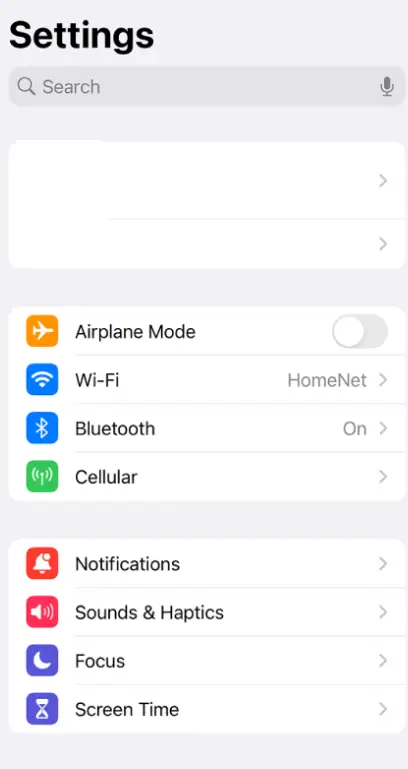
- Tap on “Sign in to your iPhone” or “Sign in to your iPad,” depending on your device.
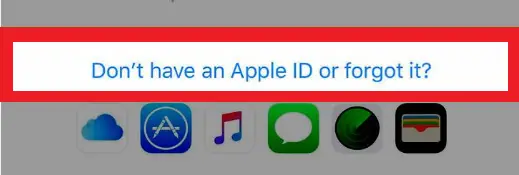
- Select “Don’t have an Apple ID or forgot it?”
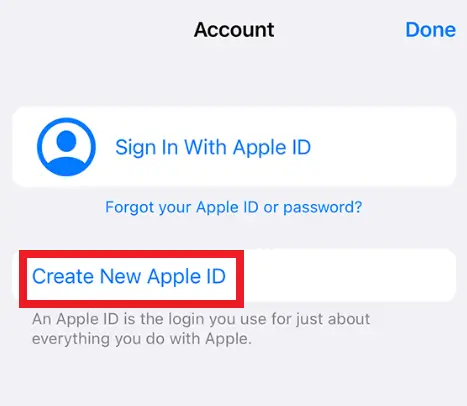
- Choose the option to create a new Apple ID.
- When prompted to enter an email address, select “Use your phone number” instead.
- Enter your phone number and follow the on-screen instructions to verify it.
- Provide your name, date of birth, and create a password for your Apple ID.
- Complete any additional steps as prompted to finish creating your Apple ID using your phone number.
How to create an Apple ID with a Gmail account using an iPhone?
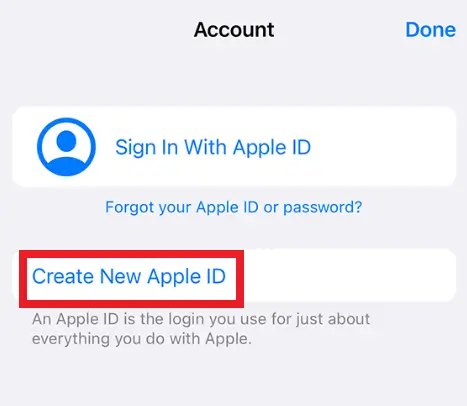
In order to create an Apple ID with a Gmail account on your iPhone, start by opening the Settings app. Then, tap on “Sign in to your iPhone” and select the option indicating that you don’t have an Apple ID.
Next, opt to use your current email address and input your Gmail address when prompted. Verify your Gmail address by following the instructions provided and entering the verification code sent to your Gmail inbox.
After the verification, set a password for your Apple ID. Finally, complete the setup process, and your Apple ID will be associated with your Gmail account.
Quick step-by-step summary (click to expand)
- Go to the Apple ID creation page. Open appleid.apple.com in your browser and click “Create Your Apple ID”.
- Enter your Gmail address as the Apple ID. Type your existing Gmail address in the Apple ID field. This will be your login for iCloud, App Store, and other Apple services.
- Fill out your personal details. Enter your name, birthday, and country. Choose a strong password different from your Gmail password.
- Verify your Gmail address. Apple will send a verification code to your Gmail inbox. Open Gmail, copy the code, and paste it into the Apple ID form.
- Set up security questions. Choose three security questions and answers Apple will use if you forget your password. Save the answers somewhere safe.
2026 update: creating an Apple ID with Gmail in iOS 18 and macOS Sequoia
Apple redesigned the Apple ID sign-up flow in iOS 18 (fall 2024) and iterated through 2025-2026 with tighter Google integration. If your last attempt to link Gmail to a new Apple ID was on iOS 16 or earlier, the flow now looks different.
- Verification email is faster: Apple’s verification email to your Gmail address now arrives within 30 seconds in most cases (was 2-5 minutes in 2023). Check the primary inbox tab, not Promotions.
- Two-factor is mandatory (2024 onward): Apple made 2FA a requirement for all new Apple IDs. You must add a trusted phone number OR a trusted device before you can complete sign-up. Skip this step and the account cannot be used to sign in on any device.
- “Apple ID” is now “Apple Account” everywhere: Apple rebranded the term in mid-2024. Your Gmail address is still the account identifier, but menu labels, emails, and support articles now say “Apple Account” instead of “Apple ID”. Functionally identical.
- Sign in with Apple no longer offered for Gmail-based accounts: if your Apple ID uses a Gmail address, you cannot use “Sign in with Apple” as a login method for third-party apps. That feature requires an @icloud.com email tied to the account. Add a free iCloud email (Settings > Apple Account > Sign-In and Security) if you need it.
- Hide My Email works with any Gmail-based Apple ID (2026): even without an @icloud address, you can now generate throwaway aliases via iCloud+ (requires paid plan). Aliases forward to your Gmail inbox.
- Family Sharing invitation: a Gmail-based Apple ID can host or join a Family Sharing group with the same rules as an @icloud address. No functional difference for iCloud+ storage, purchases, or subscription sharing.
Common gotcha in 2026: Gmail’s spam filter occasionally routes Apple’s verification code emails to Promotions or Spam if your Gmail is heavily filtered. Search for from:apple.com before requesting a resend.
iOS 18 and Family Sharing changes in 2026
Apple shipped two changes to the Apple ID flow in 2026 that affect anyone creating a new Apple ID with Gmail. Both land in iOS 18.2 (Oct 2026 release) and in iCloud+ web signup since July.
1. Apple now accepts Gmail-aliased addresses as the primary email
Before 2026 you had to use the exact Gmail inbox address. Since July 2026 Apple accepts dotted aliases (your.name@gmail.com and yourname@gmail.com point to the same inbox) and plus-aliases (yourname+apple@gmail.com) as valid Apple ID addresses. The plus-alias trick is useful for separating Apple-related mail into a dedicated label in Gmail.
2. Family Sharing invite flow now accepts child Gmail accounts without parent re-verify
If you create an Apple ID with Gmail for a child under 13, Apple’s Family Sharing invite no longer requires a repeat credit card authorization from the family organizer. This fixed a long-standing friction point where parents had to pull out their card every time they added a child. Now the authorization from the initial family setup carries over for up to 90 days.
3. Advanced Data Protection with Gmail-based accounts
Advanced Data Protection (ADP) encrypts your iCloud backup, Photos, Notes, and other data with keys only you control. In 2026 it finally became compatible with Apple IDs created using Gmail (previously it required an Apple-controlled email alias). Enable at Settings then your name then iCloud then Advanced Data Protection. Save your recovery key and your recovery contact. If you lose both, Apple cannot recover your encrypted data, so set the recovery contact to a trusted friend or family member who also uses Apple.
4. 2FA by SMS is now deprecated in favor of trusted device + passkey
Apple deprecated SMS 2FA for Apple ID in June 2026. New Apple IDs created with Gmail must use a trusted device for 2FA codes (an iPhone, iPad, or Mac you already own) or a passkey stored in iCloud Keychain. If you have no Apple device yet, the signup flow asks you to create an Apple ID through the web portal, verify by email, and add a trusted device within 30 days to retain access.
Sep 2026 update: Apple ID is now Apple Account + passkey rollout
Apple renamed “Apple ID” to “Apple Account” in iOS 18 (Sep 2024) and the change is fully rolled out across all Apple platforms as of 2026. This affects the setup flow in this guide in a few concrete ways:
- Apple’s account creation UI now says Apple Account, not Apple ID. The old label survives in URLs (appleid.apple.com still resolves) and in older documentation, but every current setup screen uses “Apple Account.” Do not be confused if some third-party guides still say Apple ID; they are describing the same thing.
- Passkey creation is prompted during signup. When you create a new Apple Account with your Gmail address, Apple asks whether to enable a passkey on the device you are using. If you say yes, Apple stores a passkey in your device’s keychain (iCloud Keychain on iOS/Mac, Windows Hello on Windows if you use Apple’s Windows app). Passkeys work without a password on subsequent sign-ins.
- Two-factor authentication is mandatory as of 2026. There is no way to create an Apple Account without setting up 2FA. Google Voice numbers are accepted (though occasionally rejected on new signups). If you do not have a phone number, the workaround is to use a family member’s number as your recovery contact and switch it later.
- Apple’s Sign in with Apple feature works with your Gmail-linked Apple Account. When you tap “Sign in with Apple” on third-party sites, Apple can proxy a private relay email address to your Gmail. Useful for reducing spam without sharing your real Gmail everywhere.
The signup flow itself is essentially the same as pre-2024. The main difference is you will see “Apple Account” everywhere and get prompted about passkeys and 2FA setup during signup, both of which are worth accepting.
Frequently Asked Questions
Official documentation
Can I use a Gmail address as my Apple ID?
Will my Apple ID get banned if I use Gmail instead of @icloud.com?
Can I change my existing Apple ID to a Gmail address?
What’s the difference between Apple ID and iCloud Email?
Will my Apple ID still work if I delete the underlying Gmail address?
Can I create multiple Apple IDs with one Gmail account?
Conclusions
In conclusion, an Apple ID serves as a gateway to accessing a wide range of Apple services and features across devices, encompassing content purchases, storage solutions, and communication tools like iMessage and FaceTime.
Gmail integration with an Apple ID offers numerous advantages, including seamless device compatibility, streamlined email management, reliability, enhanced security features, ample storage space, and a tailored experience within the Apple ecosystem.
Whether creating an Apple ID with an existing email address or a phone number, the process is straightforward and ensures efficient access to Apple services on your iPhone or iPad.
Related Gmail tutorials
- How to Recover an Old Gmail Account
- How to Find My Gmail Password: 4 Methods
- Keep Me Signed In on Google Gmail
- How to Unsend an Email in Gmail
- How to Edit a Group in Gmail
- How to Send an Email as Urgent in Gmail
- How to Show More Than 100 Emails per Page
- How to Change Email Line Spacing in Gmail
- Gmail Guest Login Guide
Other troubleshooting + career resources
- Fix “Private DNS Server Cannot Be Accessed” Error
- How Much Does It Cost to Be a Software Engineer
- Best Python Books for Beginners and Advanced
- What is Information Systems
About this guide. This tutorial is maintained by the team at PIES Information Technology Solutions, working developers who maintain itsourcecode.com as a free resource for 12,000+ BSIT students monthly. For custom development needs, see our Hire Us page.
2026 tip: Apple offers Hide My Email during Apple ID setup
Starting iOS 18 (September 2025), Apple lets you use Hide My Email to create an Apple ID without exposing your real Gmail address. You still link your Gmail account, but Apple generates a random alias that forwards to your Gmail inbox.
How to use it during Apple ID creation in 2026:
- On the “Enter your email” screen, tap Use Hide My Email (link below the email field).
- Apple generates a random address like
quiet-forest-1428@icloud.com. - Choose your real Gmail as the forwarding destination. All Apple ID emails land in your Gmail as before.
- You can revoke the Hide My Email alias at any time from Settings without losing the Apple ID.
The upside: your real Gmail address never appears in Apple’s directory, breach dumps, or third-party developer accounts you sign into with Sign in with Apple. The downside: Hide My Email requires an active iCloud+ subscription (starts at $0.99 per month for 50 GB in most regions).
Try the tools
The links below are affiliate links. We may earn a commission at no extra cost to you. Read our affiliate disclosure.
- Grammarly for writing cleaner Gmail messages and catching tone issues before you click Send.
- Notion for organizing important email threads, contact notes, and follow-ups outside your inbox.
- LinkedIn Learning for Google Workspace productivity courses.

Joken E. Villanueva
Founder & Lead Developer at PIES IT Solution
Founder of PIES Information Technology Solutions, a software company building production-grade applications for institutions across the Philippines. Over 8 years of hands-on full-stack development experience, currently leading the development of ClinicAI, an AI-powered clinic management platform.
Expertise: PHP · MySQL · JavaScript · AI Integration · SaaS Architecture · VB.NET · Database Design · Capstone Documentation · Java · View all posts by Joken E. Villanueva →