
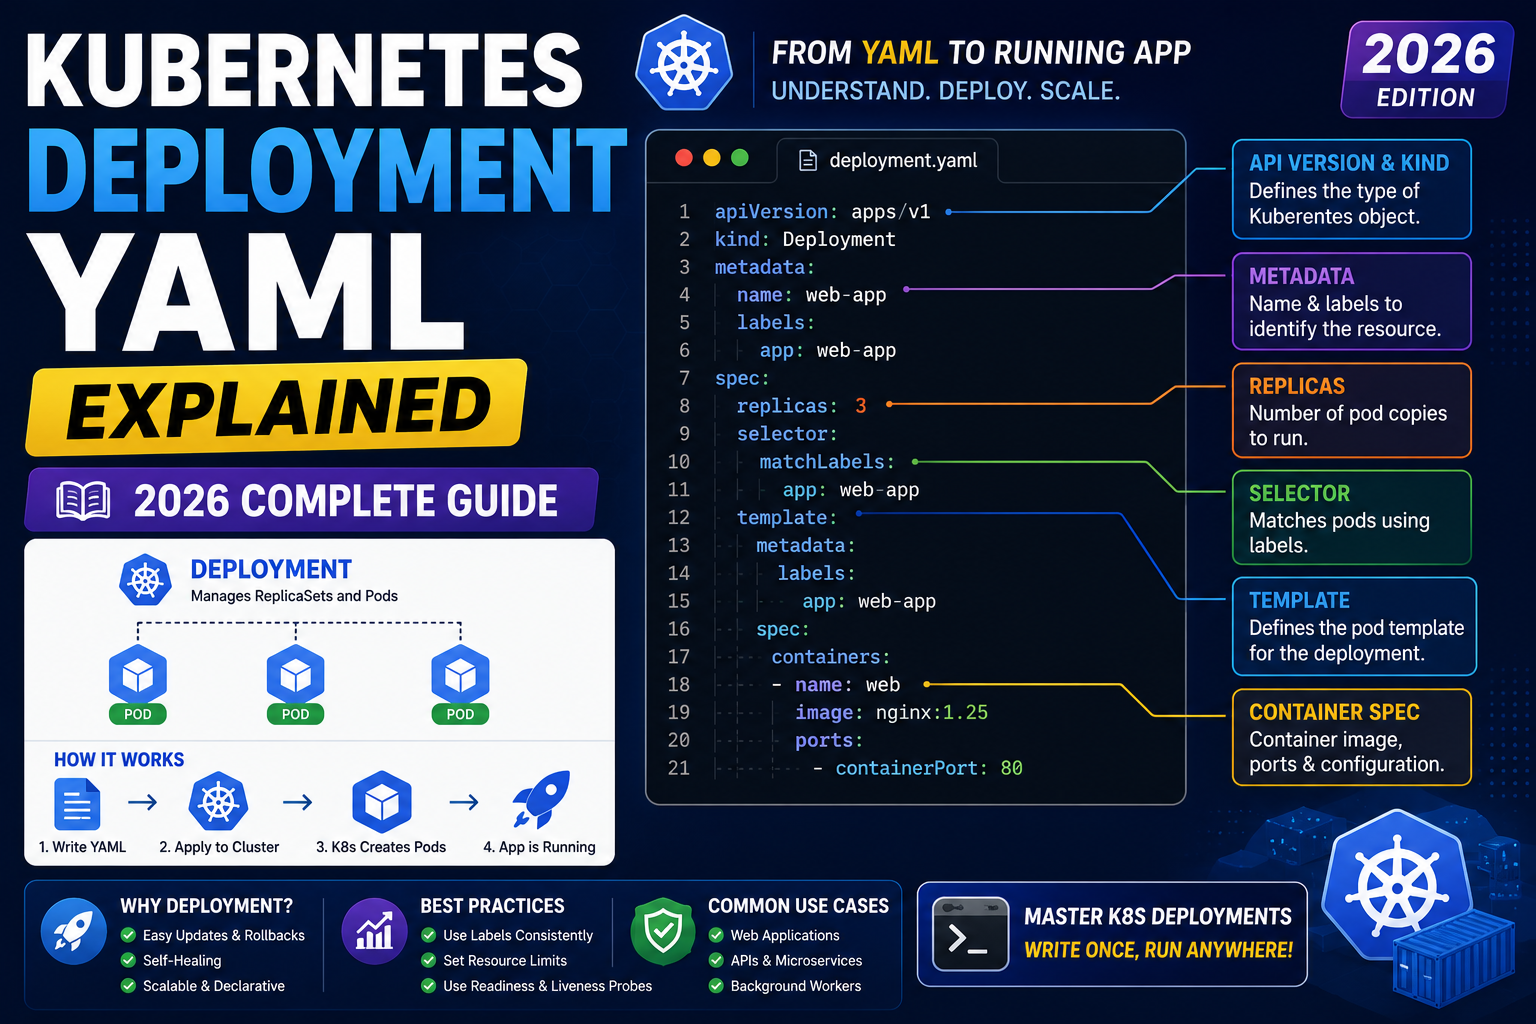
A Kubernetes Deployment YAML is the most common Kubernetes object you will write. It tells Kubernetes: “I want N copies of this container running, and if any crash, restart them; when I update the image, roll out the change without downtime.” Once you understand a Deployment YAML field by field, you can read and write most Kubernetes configurations. This guide walks through a real example line by line and shows you the production-quality patterns to use.
A minimal Deployment YAML (the smallest thing that works)
apiVersion: apps/v1
kind: Deployment
metadata:
  name: nginx-app
spec:
  replicas: 3
  selector:
    matchLabels:
      app: nginx
  template:
    metadata:
      labels:
        app: nginx
    spec:
      containers:
      - name: nginx
        image: nginx:1.27
        ports:
        - containerPort: 80
Apply with kubectl apply -f deployment.yaml. Kubernetes creates 3 pods, each running the nginx:1.27 image.
Every field explained
- apiVersion: apps/v1: Which Kubernetes API group and version. For Deployments, always
apps/v1. - kind: Deployment: The type of resource. Other kinds: Pod, Service, ConfigMap, Ingress.
- metadata.name: The name of the Deployment. Must be unique per namespace.
- metadata.namespace: Optional; defaults to “default”. Use to separate environments (dev, staging, prod).
- metadata.labels: Optional; key-value pairs on the Deployment itself. Useful for filtering (like
env: prod). - spec.replicas: How many pod copies you want. Kubernetes maintains this count.
- spec.selector.matchLabels: Tells the Deployment which pods it owns. Must match the pod template’s labels.
- spec.template: The pod template. Everything under this is the pod definition Kubernetes will create.
- spec.template.metadata.labels: Labels on each pod. Must include the labels in matchLabels above.
- spec.template.spec.containers: List of containers in each pod. Usually one per pod (sidecar patterns are exceptions).
- containers[].name: The container’s name within the pod. Any string works.
- containers[].image: The Docker image to run, with an optional tag like
:1.27. - containers[].ports: Ports the container exposes internally. Not required but improves readability.
Add environment variables
containers:
- name: app
  image: myapp:1.0
  env:
  - name: DATABASE_URL
    value: postgres://user:pass@db:5432/mydb
  - name: LOG_LEVEL
    value: info
For sensitive values (passwords, API keys), use Secrets instead of hardcoded values:
env:
- name: DATABASE_PASSWORD
  valueFrom:
    secretKeyRef:
      name: db-credentials
      key: password
- name: STRIPE_KEY
  valueFrom:
    secretKeyRef:
      name: api-keys
      key: stripe-secret
Add resource requests and limits
Always specify CPU and memory. Kubernetes uses these for scheduling and to prevent one container from starving others:
containers:
- name: app
  image: myapp:1.0
  resources:
    requests:
      cpu: "100m"        # 0.1 CPU
      memory: "128Mi"    # 128 megabytes
    limits:
      cpu: "500m"        # 0.5 CPU max
      memory: "512Mi"    # 512 megabytes max
Requests = minimum guaranteed. Limits = maximum allowed. Kubernetes schedules pods based on requests. Containers hitting the memory limit get killed (OOMKilled). Containers hitting the CPU limit get throttled.
Add health probes (essential for production)
containers:
- name: app
  image: myapp:1.0
  livenessProbe:
    httpGet:
      path: /healthz
      port: 8080
    initialDelaySeconds: 30
    periodSeconds: 10
  readinessProbe:
    httpGet:
      path: /ready
      port: 8080
    initialDelaySeconds: 5
periodSeconds: 5- livenessProbe: Kubernetes checks if the container is still healthy. Failed check = restart the container.
- readinessProbe: Kubernetes checks if the container is ready to receive traffic. Failed check = temporarily remove from load balancer, but do not restart.
Both are HTTP GET checks in this example. You can also use TCP or shell command checks.
Configure rolling updates
Kubernetes updates Deployments by rolling out new pods gradually. Configure the rollout strategy:
spec:
  replicas: 10
  strategy:
    type: RollingUpdate
    rollingUpdate:
      maxSurge: 2           # Can have 2 extra pods during rollout
      maxUnavailable: 1     # Can have 1 pod unavailable during rollout
  template:
    # ... rest of the pod spec
Alternative strategy: Recreate, which kills all old pods before starting new ones. Fast but causes downtime. Use RollingUpdate for anything user-facing.
Add volume mounts
Mount ConfigMaps as files, or attach persistent storage:
spec:
  template:
    spec:
      containers:
      - name: app
        image: myapp:1.0
        volumeMounts:
        - name: config
          mountPath: /etc/config
        - name: data
          mountPath: /var/data
      volumes:
      - name: config
        configMap:
          name: app-config
      - name: data
        persistentVolumeClaim:
          claimName: app-data-pvc
A production-ready Deployment YAML
apiVersion: apps/v1
kind: Deployment
metadata:
  name: api-server
  namespace: production
  labels:
    app: api-server
    env: production
spec:
  replicas: 5
  selector:
    matchLabels:
      app: api-server
  strategy:
    type: RollingUpdate
    rollingUpdate:
      maxSurge: 1
      maxUnavailable: 0
  template:
    metadata:
      labels:
        app: api-server
        env: production
    spec:
      containers:
      - name: api
        image: myregistry.io/api-server:v1.2.3
        imagePullPolicy: IfNotPresent
        ports:
        - name: http
          containerPort: 8080
        env:
        - name: LOG_LEVEL
          value: info
        - name: DATABASE_URL
          valueFrom:
            secretKeyRef:
              name: db-credentials
              key: url
        resources:
          requests:
            cpu: "200m"
            memory: "256Mi"
          limits:
            cpu: "1000m"
            memory: "1Gi"
        livenessProbe:
          httpGet:
            path: /healthz
            port: 8080
          initialDelaySeconds: 30
          periodSeconds: 15
        readinessProbe:
          httpGet:
            path: /ready
            port: 8080
          initialDelaySeconds: 5
          periodSeconds: 5
This example includes namespace, labels for monitoring, rolling update strategy that guarantees no downtime, resource requests/limits, secrets-based env vars, and both probes. Copy this as a starting template for real production work.
Common mistakes
- Forgetting selector.matchLabels. If it doesn’t match your pod template labels, the Deployment cannot find its pods and hangs.
- Using the “latest” image tag. Pin specific versions like
nginx:1.27notnginx:latest. Latest breaks unpredictably. - Skipping resource requests. Kubernetes cannot schedule properly. You may over-pack nodes or waste resources.
- Only using livenessProbe, skipping readinessProbe. Traffic hits your pod before it’s ready = user errors. Always use both.
- Skipping the initialDelaySeconds on probes. Probes hit the container before it starts and Kubernetes decides it’s dead. Give at least 15-30 seconds for slow-start containers.
- Setting maxUnavailable to a high value in production. During rollouts you can lose too much capacity. Set to 0 or 1 for critical services.
How to apply and manage Deployments
kubectl apply -f deployment.yaml           # apply the YAML
kubectl get deployments                     # list Deployments
kubectl get pods -l app=nginx               # list pods matching label
kubectl describe deployment nginx-app       # detailed info + events
kubectl rollout status deployment nginx-app # watch rollout progress
kubectl rollout undo deployment nginx-app   # roll back last change
kubectl scale deployment nginx-app --replicas=5   # change replica count
kubectl delete deployment nginx-app         # delete Deployment
Official documentation
Frequently asked questions
What’s the difference between a Deployment and a Pod in Kubernetes?
A Pod is a single instance of a container (or a small group of containers). A Deployment manages multiple Pods: it ensures the desired number is always running, handles updates, and restarts failed Pods. In production, you almost never create Pods directly; you create Deployments.
Should I always pin image versions with a tag?
Yes. Always use specific tags like myapp:v1.2.3 or SHA digests like myapp@sha256:abc123. Never use :latest in production. Latest breaks unpredictably when the registry updates it. Pinned versions are reproducible and safe to roll back to.
Why do I need both liveness and readiness probes?
Liveness detects a permanently broken container (memory leak, deadlock) and restarts it. Readiness detects a temporarily overloaded container and removes it from the load balancer until it recovers, without restarting. Both address different failure modes.
Should I set both requests and limits for resources?
Set requests always. Setting limits is debated: memory limits prevent OOM situations but can cause OOMKills. CPU limits cause throttling. Best practice: set both, but consider setting only requests for memory and letting CPU be unbounded when contention is low.
How do I roll back a bad Deployment?
Use kubectl rollout undo deployment/name. Kubernetes keeps recent revision history so you can revert quickly. For older rollbacks, specify: kubectl rollout undo deployment/name --to-revision=3. Check history with kubectl rollout history deployment/name.
Can one Deployment run multiple containers per pod?
Yes but rarely done in isolation. Multi-container pods (sidecar pattern) are used for logging agents, service meshes (Istio proxy), or shared caches. In most cases, each service gets its own single-container Deployment for cleaner separation.