The OpenCV Python Text Detection was developed using Python OpenCV, in this tutorial you will learn how to use OpenCV to detect text in real-time using web-camera.
OpenCV Python is a deep learning model, based on a novel architecture and training pattern.
In this OpenCV Text Detection Python, you will learn how to use OpenCV’s EAST detector to automatically detect text in both images and video streams.
Also, you will learn how to use OpenCV to detect text in images using the EAST text detector.
The EAST text detector requires that we are running OpenCV on our systems, if you do not already have OpenCV or better installed, please refer to my OpenCV install guides and follow the one for your respective operating system.
Project Information
| Project Name: | OpenCV Python Text Detection With Source Code |
| Language/s Used: | Python (OpenCV) |
| Python version (Recommended): | 2.x or 3.x |
| Database: | None |
| Type: | Deep Learning Project |
| Developer: | IT SOURCECODE |
| Updates: | 0 |
About The Project
This Python OpenCV Project also includes a downloadable Python Project With Source Code for free, just find the downloadable source code below and click to start downloading.
By the way, if you are new to Python programming and don’t know what Python IDE to use, I have here a list of the Best Python IDE for Windows, Linux, and Mac OS that will suit you.
I also have here How to Download and Install the Latest Version of Python on Windows.
To start executing Real-Time Text Detection OpenCV Python With Source Code, make sure that you have installed Python 3.9 and PyCharm on your computer.
Steps On How To Run The Real-Time Text Detection OpenCV Python With Source Code
Time needed: 5 minutes
These are the steps on how to run Real-Time Text Detection OpenCV Python With Source Code
- Step 1: Download the given source code below.
First, download the given source code below and unzip the source code.

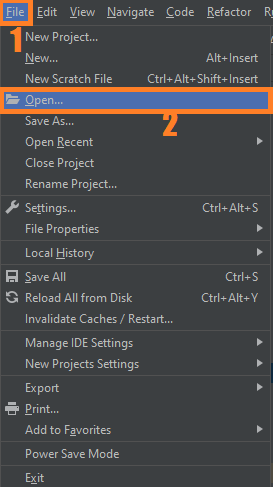
- Step 2: Import the project to your PyCharm IDE.
Next, import the source code you’ve downloaded to your PyCharm IDE.

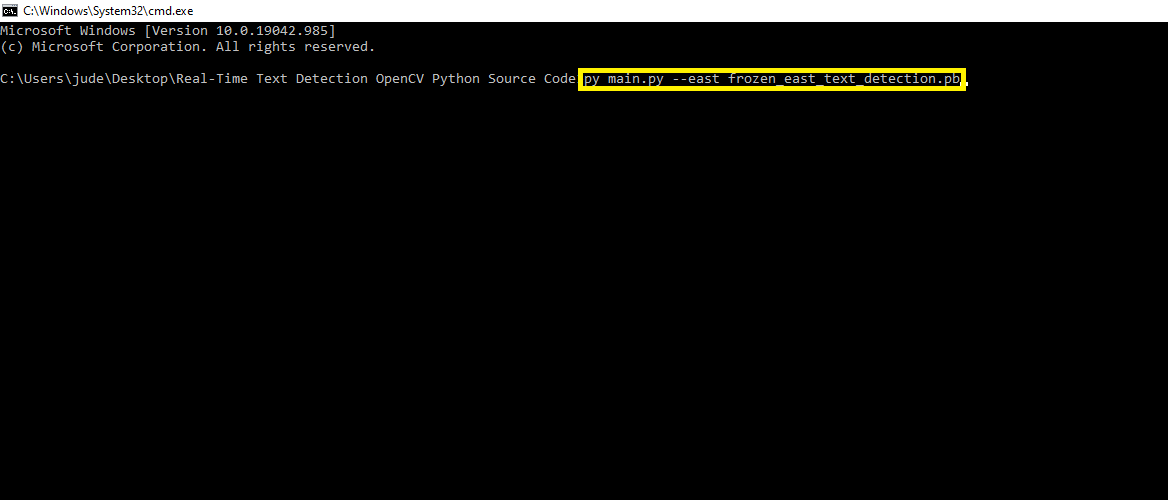
- Step 3: Run the project.
Lastly, run the project with the command “py main.py”


Installed Libraries
from imutils.video import VideoStream
from imutils.video import FPS
from imutils.object_detection import non_max_suppression
import numpy as np
import argparse
import imutils
import time
import cv2
Complete Source Code
# USAGE
# python text_detection_video.py --east frozen_east_text_detection.pb
# import the necessary packages
from imutils.video import VideoStream
from imutils.video import FPS
from imutils.object_detection import non_max_suppression
import numpy as np
import argparse
import imutils
import time
import cv2
def decode_predictions(scores, geometry):
# grab the number of rows and columns from the scores volume, then
# initialize our set of bounding box rectangles and corresponding
# confidence scores
(numRows, numCols) = scores.shape[2:4]
rects = []
confidences = []
# loop over the number of rows
for y in range(0, numRows):
# extract the scores (probabilities), followed by the
# geometrical data used to derive potential bounding box
# coordinates that surround text
scoresData = scores[0, 0, y]
xData0 = geometry[0, 0, y]
xData1 = geometry[0, 1, y]
xData2 = geometry[0, 2, y]
xData3 = geometry[0, 3, y]
anglesData = geometry[0, 4, y]
# loop over the number of columns
for x in range(0, numCols):
# if our score does not have sufficient probability,
# ignore it
if scoresData[x] < args["min_confidence"]:
continue
# compute the offset factor as our resulting feature
# maps will be 4x smaller than the input image
(offsetX, offsetY) = (x * 4.0, y * 4.0)
# extract the rotation angle for the prediction and
# then compute the sin and cosine
angle = anglesData[x]
cos = np.cos(angle)
sin = np.sin(angle)
# use the geometry volume to derive the width and height
# of the bounding box
h = xData0[x] + xData2[x]
w = xData1[x] + xData3[x]
# compute both the starting and ending (x, y)-coordinates
# for the text prediction bounding box
endX = int(offsetX + (cos * xData1[x]) + (sin * xData2[x]))
endY = int(offsetY - (sin * xData1[x]) + (cos * xData2[x]))
startX = int(endX - w)
startY = int(endY - h)
# add the bounding box coordinates and probability score
# to our respective lists
rects.append((startX, startY, endX, endY))
confidences.append(scoresData[x])
# return a tuple of the bounding boxes and associated confidences
return (rects, confidences)
# construct the argument parser and parse the arguments
ap = argparse.ArgumentParser()
ap.add_argument("-east", "--east", type=str, required=True,
help="path to input EAST text detector")
ap.add_argument("-v", "--video", type=str,
help="path to optinal input video file")
ap.add_argument("-c", "--min-confidence", type=float, default=0.5,
help="minimum probability required to inspect a region")
ap.add_argument("-w", "--width", type=int, default=320,
help="resized image width (should be multiple of 32)")
ap.add_argument("-e", "--height", type=int, default=320,
help="resized image height (should be multiple of 32)")
args = vars(ap.parse_args())
# initialize the original frame dimensions, new frame dimensions,
# and ratio between the dimensions
(W, H) = (None, None)
(newW, newH) = (args["width"], args["height"])
(rW, rH) = (None, None)
# define the two output layer names for the EAST detector model that
# we are interested -- the first is the output probabilities and the
# second can be used to derive the bounding box coordinates of text
layerNames = [
"feature_fusion/Conv_7/Sigmoid",
"feature_fusion/concat_3"]
# load the pre-trained EAST text detector
print("[INFO] loading EAST text detector...")
net = cv2.dnn.readNet(args["east"])
# if a video path was not supplied, grab the reference to the web cam
if not args.get("video", False):
print("[INFO] starting video stream...")
vs = VideoStream(src=0).start()
time.sleep(1.0)
# otherwise, grab a reference to the video file
else:
vs = cv2.VideoCapture(args["video"])
# start the FPS throughput estimator
fps = FPS().start()
# loop over frames from the video stream
while True:
# grab the current frame, then handle if we are using a
# VideoStream or VideoCapture object
frame = vs.read()
frame = frame[1] if args.get("video", False) else frame
# check to see if we have reached the end of the stream
if frame is None:
break
# resize the frame, maintaining the aspect ratio
frame = imutils.resize(frame, width=1000)
orig = frame.copy()
# if our frame dimensions are None, we still need to compute the
# ratio of old frame dimensions to new frame dimensions
if W is None or H is None:
(H, W) = frame.shape[:2]
rW = W / float(newW)
rH = H / float(newH)
# resize the frame, this time ignoring aspect ratio
frame = cv2.resize(frame, (newW, newH))
# construct a blob from the frame and then perform a forward pass
# of the model to obtain the two output layer sets
blob = cv2.dnn.blobFromImage(frame, 1.0, (newW, newH),
(123.68, 116.78, 103.94), swapRB=True, crop=False)
net.setInput(blob)
(scores, geometry) = net.forward(layerNames)
# decode the predictions, then apply non-maxima suppression to
# suppress weak, overlapping bounding boxes
(rects, confidences) = decode_predictions(scores, geometry)
boxes = non_max_suppression(np.array(rects), probs=confidences)
# loop over the bounding boxes
for (startX, startY, endX, endY) in boxes:
# scale the bounding box coordinates based on the respective
# ratios
startX = int(startX * rW)
startY = int(startY * rH)
endX = int(endX * rW)
endY = int(endY * rH)
# draw the bounding box on the frame
cv2.rectangle(orig, (startX, startY), (endX, endY), (0, 255, 0), 2)
# update the FPS counter
fps.update()
# show the output frame
cv2.imshow("Text Detection", orig)
key = cv2.waitKey(1) & 0xFF
# if the `q` key was pressed, break from the loop
if key == ord("q"):
break
# stop the timer and display FPS information
fps.stop()
print("[INFO] elasped time: {:.2f}".format(fps.elapsed()))
print("[INFO] approx. FPS: {:.2f}".format(fps.fps()))
# if we are using a webcam, release the pointer
if not args.get("video", False):
vs.stop()
# otherwise, release the file pointer
else:
vs.release()
# close all windows
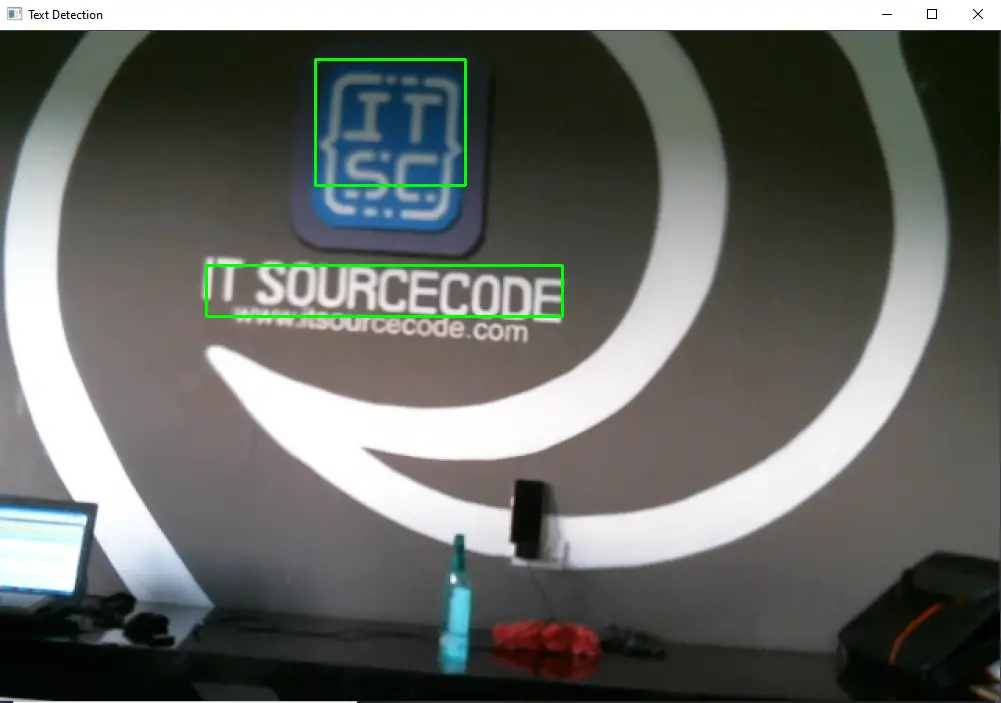
cv2.destroyAllWindows()Output:
Download the Source Code below
Summary
In this article, Text detection deals with detecting the presence of the text in the input image or real-time, whereas text localization localizes the position of the text and forms groups of text regions by eliminating the maximum of the background.
Text detection and localization process is performed using connected component analysis or region-based methods.
Related Articles
- Code For Game in Python: Python Game Projects With Source Code
- Best Python Projects With Source Code FREE DOWNLOAD
- How to Make a Point of Sale In Python With Source Code
- Python Code For Food Ordering System | FREE DOWNLOAD
- Inventory Management System Project in Python With Source Code
Inquiries
If you have any questions or suggestions about Real-Time Text Detection OpenCV Python With Source Code, please feel free to leave a comment below.
Official documentation
Frequently Asked Questions
How does OpenCV text detection work?
Uses the pretrained EAST (Efficient and Accurate Scene Text Detector) deep-learning model loaded via OpenCV’s DNN module. EAST returns rotated bounding boxes around text regions in any image (street signs, billboards, document photos). Output boxes can then be passed to Tesseract or EasyOCR for actual text recognition. Foundation for any OCR-heavy pipeline (document scanners, license-plate readers, sign translation apps).
What Python and library versions do I need?
Python 3.10, 3.11, or 3.12 (avoid 3.13 until all DL wheels catch up). Install with: pip install opencv-python numpy. For deep learning models add: tensorflow keras (CPU build is fine for most demos), torch torchvision (PyTorch alternative), mediapipe (for face/hand/pose). Some projects also need: pytesseract for OCR, pyzbar for barcode, dlib for legacy face-landmark predictor.
Do I need a GPU to run this deep learning project?
For inference on a pretrained model: no, CPU runs at 10-30 FPS for most computer-vision tasks. For TRAINING a custom model: GPU strongly recommended (CPU works but slow). Free GPU options for training: Google Colab Free (12-hour sessions, sufficient for most BSIT capstones), Kaggle Notebooks Free. Buying a $1000+ GPU just for capstone is overkill.
Can I use this deep learning project for a BSIT or CSE capstone?
Yes, but extend it. A single OpenCV deep-learning demo (face detection, object detection alone) is too narrow for full capstone scope. Combine with a real domain wrapper: an attendance system using face recognition, a traffic monitoring system using vehicle detection, a wildlife camera using object detection, a driver-monitoring app using drowsiness detection. Add database logging, simple UI, and Chapter 1-5 manuscript.
Why does my model give wrong predictions or low accuracy?
Three most common causes: (1) Input preprocessing mismatch: the model expects 224×224 RGB normalized to [0,1] or [-1,1]; using BGR (OpenCV default) or wrong size produces garbage. (2) Insufficient training data: if you trained your own model on under 1,000 samples per class, accuracy plateaus low. Augment with cv2.flip, rotate, brightness shifts. (3) Lighting and angle drift between training and live use: train on data that matches the deployment environment.
Where can I find more deep learning project ideas with source code?
Browse our Deep Learning Projects hub for 19+ vision demos. For broader AI / ML / RAG / NLP capstones see 100+ AI Capstone Project Ideas. For pure ML (no deep learning) see Machine Learning Projects.

Angel Jude Suarez
Full-Stack Developer at PIES IT Solution
Focuses on Python development, machine learning, and AI integration. Has built production AI systems including OpenAI Whisper integration for medical transcription and GPT-4o-powered diagnosis assistance. Strong background in pandas, scikit-learn, and TensorFlow.
Expertise: Python · PHP · Java · VB.NET · ASP.NET · Machine Learning · AI Integration · OpenCV · Django · CodeIgniter · View all posts by Angel Jude Suarez →
Hi sir,
Myself Nayana R
I have referred your source code for my project .So can I get report regarding text detection project . If you send the report it may be very much helpful to us .So ,that I can perform better in my seminars that will help me alot .
Hi sir ,
Myself Nayana R from Bangalore
I have referred Your project source code of text detection .So can I get the report regarding to this project ,it will helpful to me alot.
So far we don’t have a report for this project