
Installing Python on Windows in 2026 should take about five minutes — if you know which method to pick and how to dodge the one checkbox that breaks everything. This guide walks you through all four working methods (python.org installer, Microsoft Store, winget, and pyenv-win for multiple versions), with screenshots, verification steps, and the fixes for every common error you’ll hit.
You’ll install Python 3.13, the current stable release as of mid-2026 (Python 3.14 is in development and expected later this year — stick with 3.13 for class and capstone work). Whether you’re on Windows 11 or still running Windows 10 on a shared lab PC, every method here works on both.
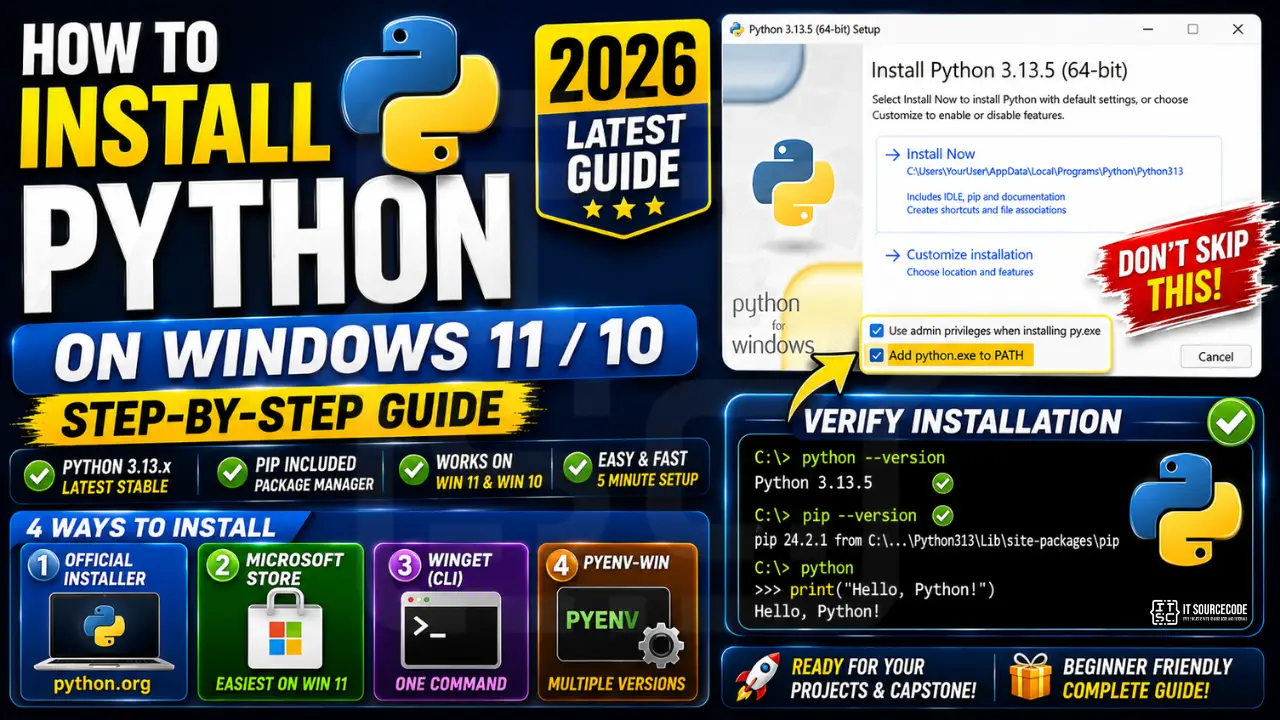
📌 Quick answer: Download Python 3.13 from python.org/downloads/windows, run the installer, and tick “Add python.exe to PATH” on the first screen. Click Install Now, wait 60 seconds, then open Command Prompt or PowerShell and run python --version. If you see Python 3.13.x, you’re done.
Before You Start — What You Need
A quick checklist before installing — saves you from restarting halfway through:
- Windows 11 or Windows 10 (64-bit). Python 3.13 dropped support for Windows 8.1 and earlier. Check yours with
winverin the Run dialog (Win+R). - Administrator rights if installing for “All users.” For “Just me” installs you don’t need admin — handy on shared lab PCs.
- About 150 MB free disk space. The installer is ~30 MB; the full Python install with pip and standard library is ~110 MB.
- An active internet connection for the download and for installing pip packages afterward.
- No old Python on PATH (optional but cleaner — uninstall any Python 2.x or stale 3.x from Settings → Apps first).
Pick your install method below. If you’re new to Python, use Method 1. If you live in the terminal, use Method 3. If you need to switch between Python versions for different projects, use Method 4.
Method 1 — Official python.org Installer (Recommended for Beginners)
This is the canonical install. It’s what python.org ships, it works on every Windows version Python supports, and it gives you the most control over what gets installed. If you’re a BSIT student installing Python for the first time, start here.
Step 1 — Download the installer
Open your browser and go to python.org/downloads/windows. Click the yellow Download Python 3.13.x button at the top of the page — that gives you the 64-bit Windows installer for the current stable release.
[Screenshot: python.org downloads page with the yellow “Download Python 3.13.x” button highlighted]
The file is named something like python-3.13.5-amd64.exe (the exact patch version may differ — any 3.13.x is fine). Save it to your Downloads folder.
Step 2 — Run the installer and tick “Add to PATH”
Double-click the downloaded .exe file. The installer opens with two checkboxes at the bottom. This screen is the single most important moment of the install:
- ✅ Use admin privileges when installing py.exe — recommended if you have admin rights
- ✅ Add python.exe to PATH — CRITICAL — tick this checkbox
[Screenshot: Python 3.13 installer first screen with both checkboxes ticked and “Add python.exe to PATH” highlighted in gold]
⚠ Warning: If you skip the “Add python.exe to PATH” checkbox, the python command will not work in Command Prompt or PowerShell. This is the #1 cause of “python is not recognized” errors — see the troubleshooting section below to fix it without reinstalling.
Step 3 — Choose Install Now or Customize
You have two paths:
- Install Now (recommended) — installs Python, pip, IDLE, documentation, and file associations into
C:\Users\<you>\AppData\Local\Programs\Python\Python313\. No admin needed. - Customize installation — gives you per-component control and lets you change the install path. Use this if you want to install for All users (puts Python in
C:\Program Files\Python313\, requires admin, useful for shared/lab PCs).
For most students: click Install Now. It takes about 60 seconds. When you see Setup was successful, click Disable path length limit (it removes the legacy 260-character Windows path limit — handy for deep node_modules-style folders) and then Close.
[Screenshot: “Setup was successful” screen with “Disable path length limit” button highlighted]
Install all users vs current user — which to pick
If it’s your personal laptop, “Just me” (the default for Install Now) is fine. If it’s a shared lab PC where multiple students log in, “All users” (via Customize) means everyone gets Python without reinstalling per account — but you need admin rights.
Method 2 — Microsoft Store (Windows 11 Easiest)
On Windows 11, opening Microsoft Store and installing Python 3.13 takes two clicks. It updates automatically, doesn’t need admin rights, and stays sandboxed in your user profile.
To install: Open the Microsoft Store app, search “Python 3.13” (the official one is published by the Python Software Foundation — verify the publisher), and click Get.
[Screenshot: Microsoft Store showing Python 3.13 by Python Software Foundation with “Get” button]
When to use it
- You’re on Windows 11 and want the easiest possible install
- You’re on a locked-down PC where you don’t have admin rights
- You only need to run simple scripts and don’t care about heavy package installs
When NOT to use it
The Store version is sandboxed — it can’t access certain folders (C:\Windows, the global registry) and some Python packages with native C extensions (numpy with MKL, certain GUI toolkits, low-level Windows APIs) misbehave or fail to install. For capstone projects, machine learning, GUI apps, or anything beyond simple scripts, use Method 1 instead.
Also watch out for the “stub” Python — Microsoft ships a placeholder python.exe in Windows 11 that just opens the Store when you run it. Confusing for beginners. Fix covered in the troubleshooting section.
Method 3 — winget (Modern Command-Line)
If you’re already comfortable with the terminal, winget (Windows Package Manager, built into Windows 11 and modern Windows 10) is the fastest way to install Python. One command, no installer dialogs, no checkboxes to remember — and PATH is set automatically.
Open PowerShell (Win+X → Terminal on Windows 11, or Windows PowerShell on Windows 10) and run:
winget install Python.Python.3.13
Accept the source agreement if prompted, wait for the download, and you’re done. Close and reopen PowerShell so the updated PATH takes effect, then verify:
python --version
# Python 3.13.5
Why developers prefer winget in 2026
- One command — no GUI clicks, scriptable, repeatable across machines
- Automatic PATH — winget handles it correctly; no checkbox to forget
- Easy upgrades —
winget upgrade Python.Python.3.13when a new patch ships - Easy uninstall —
winget uninstall Python.Python.3.13 - Pairs with dotfiles / setup scripts — you can include it in a one-line “new machine setup” script
If winget isn’t installed (rare on Windows 10 builds older than 1809), grab it from Microsoft Store as “App Installer.”
Method 4 — Multiple Python Versions with pyenv-win
Sometimes your capstone needs Python 3.11 (because a library hasn’t updated yet), your class uses 3.12, and your personal project is on 3.13. Installing three Pythons side-by-side and switching between them cleanly is what pyenv-win is built for — a Windows port of the popular pyenv tool from macOS/Linux.
Quick install
Open PowerShell (not Command Prompt) and run:
Invoke-WebRequest -UseBasicParsing -Uri "https://raw.githubusercontent.com/pyenv-win/pyenv-win/master/pyenv-win/install-pyenv-win.ps1" -OutFile "./install-pyenv-win.ps1"; &"./install-pyenv-win.ps1"
If you get an execution policy error, run this first and accept with Y:
Set-ExecutionPolicy -Scope CurrentUser -ExecutionPolicy RemoteSigned
Close and reopen PowerShell. Then install whichever Python versions you need:
pyenv install 3.13.5
pyenv install 3.12.7
pyenv install 3.11.10

# Set a global default
pyenv global 3.13.5

# Or set a per-folder version (creates .python-version file)
cd C:\Projects\old-capstone
pyenv local 3.11.10
Verify with pyenv versions (lists installed Pythons) and python --version (shows the active one).
Heads up: a modern alternative gaining popularity in 2026 is uv from Astral — a single Rust-built tool that installs Python versions, manages virtual environments, and replaces pip. If you’re starting fresh and curious, look at it. For most students, pyenv-win is still the smoother on-ramp.
Verifying Your Python Installation
Whichever method you used, verify it the same way. Open Command Prompt (search “cmd” in Start) or PowerShell (Win+X → Terminal on Windows 11) and run:
python --version
# Expected: Python 3.13.5  (or your installed 3.13.x)

pip --version
# Expected: pip 24.x.x from C:\...\Python313\Lib\site-packages\pip (python 3.13)
If both commands return version numbers, Python is installed and on PATH correctly. Open the interactive shell with just python:
python
Python 3.13.5 (main, ...) on win32
Type "help", "copyright", "credits" or "license" for more information.
>>> print("Hello, Python on Windows!")
Hello, Python on Windows!
>>> exit()
That’s it. You have a working Python install.
Installing Your First Package with pip
Python’s package manager pip is bundled with every install method above. Try it by installing the popular requests library (used for HTTP calls):
pip install requests
You’ll see download progress and a success message. Test it in the Python shell:
python
>>> import requests
>>> r = requests.get("https://itsourcecode.com")
>>> print(r.status_code)
200
>>> exit()
If you see 200, pip works, your install is healthy, and you’re ready to learn Python properly. Best practice: from here on, use virtual environments (python -m venv .venv) for each project to keep package versions isolated — we cover this in our Python tutorial series.
Troubleshooting Common Install Errors
Real fixes for the errors you’ll actually hit. If your problem isn’t here, the steps for each are searchable — but these six cover 95% of student install issues.
“python is not recognized as an internal or external command”
Cause: You skipped the “Add python.exe to PATH” checkbox during install (Method 1), or you opened the terminal before completing install.
Fix without reinstalling: Press Win → search “Edit the system environment variables” → click Environment Variables → under User variables, select Path → Edit → New → add these two lines (adjust your username):
C:\Users\<YourUsername>\AppData\Local\Programs\Python\Python313\
C:\Users\<YourUsername>\AppData\Local\Programs\Python\Python313\Scripts\
Click OK on every dialog, close and reopen your terminal, and try python --version again.
SSL certificate errors during pip install
Symptom: SSL: CERTIFICATE_VERIFY_FAILED when running pip install.
Cause: Outdated certificate bundle, school/office network with TLS interception, or system clock is wrong.
Fix: Upgrade pip and the certificates package first:
python -m pip install --upgrade pip
python -m pip install --upgrade certifi
On school networks that intercept TLS (common in PH university Wi-Fi), use the trusted-host flag as a temporary workaround:
pip install --trusted-host pypi.org --trusted-host files.pythonhosted.org requests
Permission denied during install or pip
Cause: Installing for “All users” without admin, or trying to install a package globally without write access.
Fix: For the installer, right-click the .exe → Run as administrator. For pip, install per-user instead of system-wide:
pip install --user requests
Better long-term fix: use a virtual environment so you never need admin to install packages.
Multiple Python versions conflict
Symptom: python --version shows 3.10 when you just installed 3.13, or different terminals show different versions.
Cause: Old Python entries on PATH outranking the new one. Windows scans PATH top-to-bottom and uses the first match.
Fix: Use the bundled py launcher to be explicit:
py -0           # list all installed Pythons
py -3.13        # run Python 3.13 specifically
py -3.13 -m pip install requests
Or open the PATH editor and move the Python 3.13 entries above the older ones, then close/reopen your terminal.
Microsoft Store “stub” Python opens the Store instead of running
Symptom: You type python and the Microsoft Store opens instead of a Python shell.
Cause: Windows 11 ships a placeholder python.exe in %LOCALAPPDATA%\Microsoft\WindowsApps\ that exists only to nudge you to the Store. It’s on PATH ahead of your real install.
Fix: Open Settings → Apps → Advanced app settings → App execution aliases and toggle OFF both python.exe and python3.exe entries. Reopen your terminal — your real Python install will now be found.
pip is not recognized / pip not found
Cause: The Python Scripts\ folder isn’t on PATH (you only added the main Python folder).
Fix: Add the Scripts\ path as described in the “python is not recognized” fix above. Or just run pip through the Python interpreter directly — this always works regardless of PATH:
python -m pip install requests
This pattern (python -m pip) is actually the Python team’s recommended form — it guarantees pip runs against the same Python you’re calling.
What to Do Next
You have Python running. The next moves that pay off fastest:
- Install a real code editor. IDLE is fine for hello-world but you’ll outgrow it in a week. See our guide to the best Python IDEs and code editors — VS Code is the modern default for most students.
- Write your first real script. Open your editor, create
hello.py, pasteprint("Hello from Python 3.13"), save, then runpython hello.pyin the terminal. - Learn the basics properly. Work through our Python tutorial — variables, loops, functions, files. About 6-8 hours of reading to get comfortable.
- Build something real. Browse our best Python projects with source code for working capstone-grade examples you can clone, run, and modify.
- Get used to debugging. The first error every Python beginner sees is usually an IndexError — bookmark our list index out of range fix guide for when it hits.
Frequently Asked Questions
Which version of Python should I install on Windows in 2026?
Should I install Python from python.org or the Microsoft Store?
What does “Add Python to PATH” actually do?
python.exe when you type python in any terminal. Without PATH set, you’d have to type the full install path (something like C:\Users\you\AppData\Local\Programs\Python\Python313\python.exe) every single time. Skipping this checkbox is the #1 cause of “python is not recognized” errors. Always tick it during install — or fix it manually via Environment Variables after the fact.Why does “python” open the Microsoft Store instead of running?
python.exe stub in %LOCALAPPDATA%\Microsoft\WindowsApps\ whose only purpose is to push you toward the Store version. If your real Python install isn’t ahead of it on PATH, you’ll hit this. Fix: Settings → Apps → Advanced app settings → App execution aliases, then toggle OFF both python.exe and python3.exe. Reopen your terminal and your installed Python will be found.How do I install multiple Python versions on the same PC?
pyenv global 3.13.5, or pin a specific project to an older version with pyenv local 3.11.10 inside that folder. You can also use the bundled py launcher (py -3.11, py -3.13) to run specific versions without changing your default.Do I need administrator rights to install Python on Windows?
C:\Program Files\) or if you tick “Use admin privileges when installing py.exe.” On shared lab PCs without admin, stick with “Just me” install or use the Microsoft Store version (Method 2).How do I verify Python installed correctly on Windows?
python --version. You should see Python 3.13.x. Then run pip --version to confirm pip is also on PATH. If both work, type python alone to enter the interactive shell, run print("hello"), then exit() to leave. If any step fails, see the troubleshooting section — the fix is usually a missing PATH entry or the Microsoft Store stub.What is winget and is it safer than the python.org installer?
winget install Python.Python.3.13) that handles download, install, and PATH automatically. Many developers prefer it because it’s scriptable, easily upgradeable (winget upgrade Python.Python.3.13), and survives a fresh Windows install in seconds.How do I uninstall Python from Windows cleanly?
C:\Users\<you>\AppData\Local\Programs\Python\ and remove any Python paths from your Environment Variables (Edit the system environment variables → Path → delete Python entries). Restart your terminal afterward.Final Recommendation
If you take one thing from this guide: tick “Add python.exe to PATH” during the python.org installer. That single checkbox prevents the most common install error and saves you a trip into Windows Environment Variables. For everything else — picking between Store, winget, or pyenv-win — match the method to your situation: Store for sandboxed simplicity, winget for terminal-first workflows, pyenv-win when you need multiple versions side-by-side.
Once Python is running, your next investment is a real code editor (not IDLE), then a real project. We’ve done the curation for both — see the next steps below.
- Verify with
python --version— should show3.13.x - Pick an editor from our best Python IDEs and code editors guide
- Work through our Python tutorial to learn the basics properly
- Build something real — browse our best Python projects with source code
- Bookmark the IndexError fix guide — you’ll need it within your first week of coding
Hit an install error not covered above? Drop the exact error message in the comments — we’ll help you debug it and add it to the troubleshooting section if it’s common.

Mary Grace G. Patulada
Programmer & Technical Writer at PIES IT Solution
Mary Grace G. Patulada (pen name ‘Nym’) is a programmer and writer at PIES IT Solution with a BSIT background from Carlos Hilado Memorial State College, Binalbagan Campus. Authored 370+ UML diagram tutorials and capstone documentation guides at itsourcecode.com. Specializes in UML (class, use case, activity, sequence, component, deployment), DFD, and ER diagrams for BSIT capstone projects.
Expertise: UML Diagrams · DFD · ER Diagrams · Use Case Diagrams · Activity Diagrams · Capstone Documentation · PHP · View all posts by Mary Grace G. Patulada →