
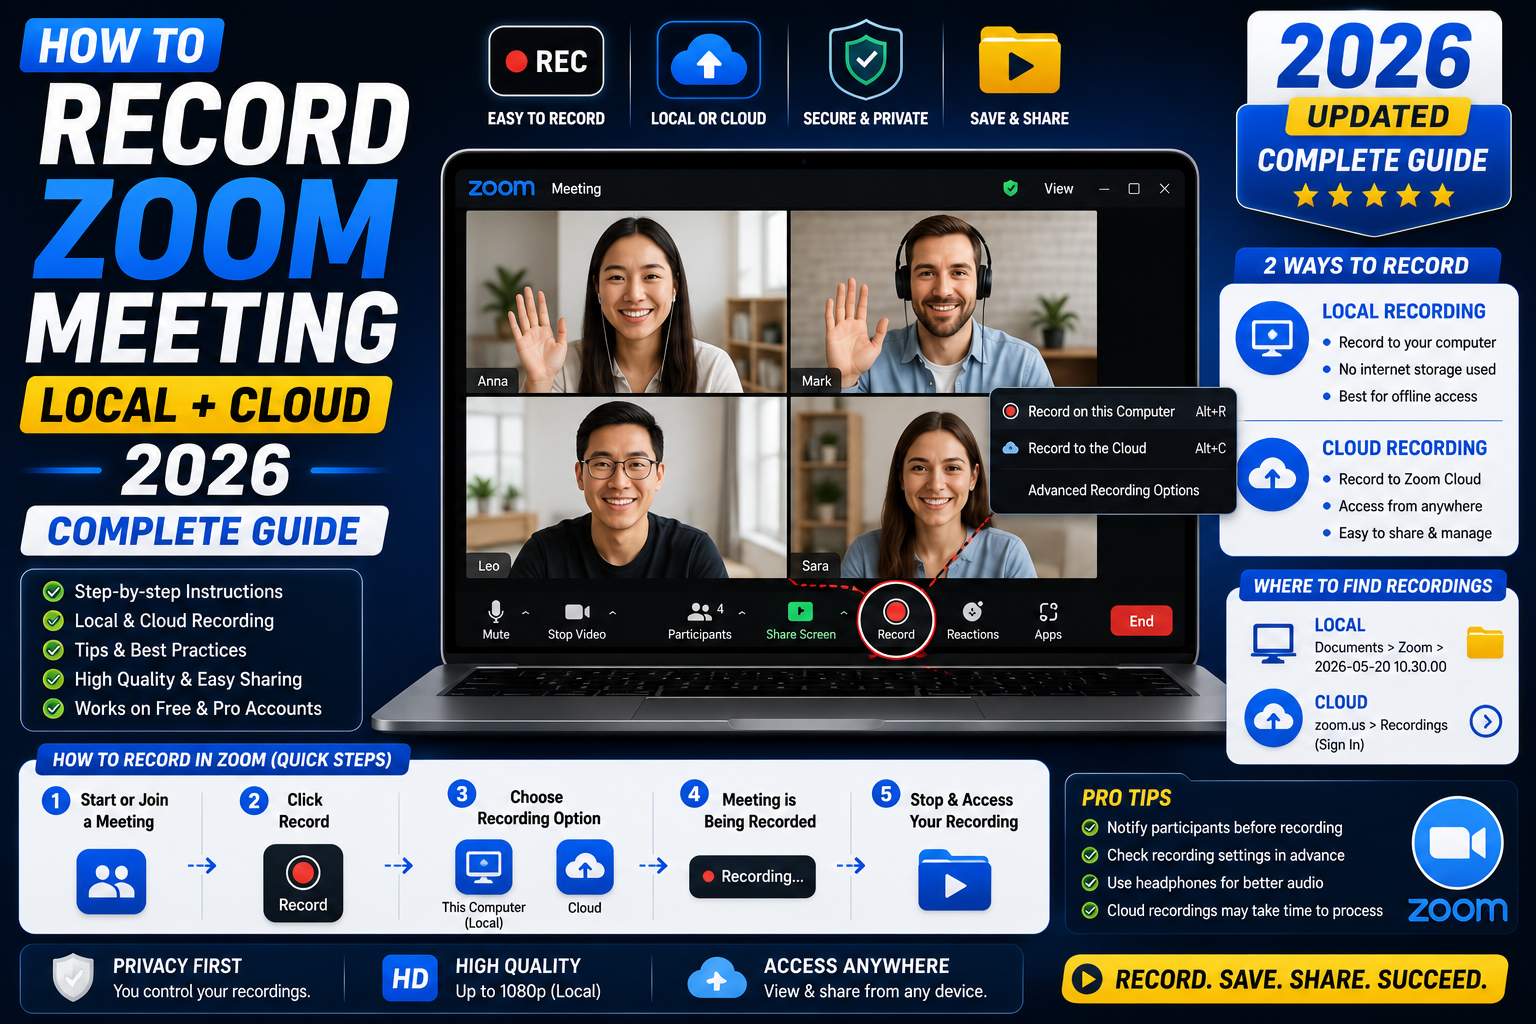
Quick step-by-step summary (click to expand)
- Start or join a meeting as host. Only hosts and co-hosts can record by default.
- Click the Record button. Located in the Zoom toolbar at the bottom.
- Choose Local or Cloud. Local saves to your computer. Cloud saves to Zoom’s servers (paid plans only).
- Verify the red REC indicator. Top-left of the meeting window shows “Recording”.
- Pause or stop as needed. Pause and Stop buttons appear next to REC.
- End the meeting. Local recordings process on your computer. Cloud recordings process on Zoom’s servers.
- Access the recording. Local: Documents/Zoom folder. Cloud: zoom.us > Recordings.
Who can record a Zoom meeting
By default, only the meeting host can start a recording. Co-hosts also have permission. Regular participants can request permission from the host, who can grant it via the Participants panel.
If you are not the host and cannot see the Record button:
- Ask the host to grant recording permission through the Participants panel.
- Or, ask the host to record on your behalf and share the file.
- Do NOT try to record via a screen-capture tool without notifying the host. Most jurisdictions require consent from all parties for recording.
Enable recording permissions in your Zoom account
Before you can record, recording must be enabled at the account level. Free Zoom accounts have local recording ON by default. For business/education accounts, check with your admin:
- Sign in to zoom.us as an admin.
- Go to Settings > Recording.
- Toggle “Local recording” ON for local file saves.
- Toggle “Cloud recording” ON for cloud saves (paid plans only).
- Configure sub-settings: record active speaker, gallery view, shared screen, audio-only, etc.
Record a Zoom meeting to your local computer
- Start or join the meeting as the host.
- Click the “Record” button in the Zoom toolbar at the bottom of the meeting window.
- If you have both local and cloud options, choose “Record on this Computer”.
- A “Recording…” indicator appears at the top-left of the meeting window (red REC dot).
- Use the Pause and Stop buttons as needed. Pause lets you skip a section (multiple pauses are joined into one file). Stop finalizes the recording.
- When you end the meeting, Zoom automatically processes the recording. This takes 30 seconds to several minutes depending on meeting length.
- The processed file opens in your file explorer. Default location: Documents/Zoom/[YYYY-MM-DD HH.MM.SS Meeting Name]/.
The output folder contains: an MP4 video file, an M4A audio-only file, and optionally a chat transcript text file.
Record a Zoom meeting to the cloud (paid plans)
Cloud recording is available on Pro, Business, and Enterprise Zoom plans. The recording saves directly to Zoom’s servers and is accessible via zoom.us:
- Start the meeting as host.
- Click “Record” and choose “Record to the Cloud”.
- The cloud recording indicator appears (red REC with a cloud icon).
- End the meeting when done.
- Zoom processes the recording on its servers. You receive an email when it is ready (usually 5-30 minutes after meeting end).
- Access the recording at zoom.us > Recordings > Cloud Recordings.
Cloud recordings include additional features: audio transcript (auto-generated), viewer analytics, and shareable links. You can also set expiration dates and password-protect the recording.
Cloud recording storage limits
- Pro plan: 5 GB per license
- Business plan: 5 GB per license
- Enterprise plan: unlimited (Enterprise Plus: unlimited)
- Additional storage: add-on packages available at zoom.us billing
If you exceed the storage limit, new cloud recordings automatically overwrite the oldest ones (unless you enable “Never delete cloud recordings” in settings). Download important recordings to local storage before the auto-delete triggers.
Record a Zoom meeting on mobile (Android / iPhone)
Mobile Zoom only supports cloud recording, not local. And you need a paid plan:
- Start or join the meeting as host on the Zoom mobile app.
- Tap “More” (three dots) at the bottom-right of the meeting screen.
- Tap “Record to the Cloud”.
- The recording indicator appears at the top.
- Tap “More” > “Stop Recording” when done, or just end the meeting.
- Access the recording later at zoom.us > Recordings on any device.
If you need local recording on mobile: use a screen-capture tool at the OS level (iOS Screen Recording, Android built-in Screen Recorder). This captures video and audio directly on your device. Make sure to notify all participants first.
Get a transcript from your recording
Cloud recordings auto-generate transcripts. Local recordings do not have this built-in feature, but you can generate transcripts with other tools:
- Cloud transcript: Auto-enabled if you turn on “Audio transcript” in Zoom Recording settings. Available in zoom.us > Recordings within an hour of meeting end.
- Local transcript with Zoom AI Companion: Turn on AI Companion for local recordings if your plan includes it. It generates transcripts alongside the video file.
- Third-party transcript tools: Otter.ai, Rev, and Fireflies.ai can join Zoom meetings as a bot and provide transcripts. Grant them access at zoom.us > Integrations.
Share a Zoom recording
For local recordings:
- Upload the MP4 file to Google Drive, OneDrive, or Dropbox and share the link.
- Upload to YouTube (private or unlisted) and share the video link.
- Attach directly in email (files under 25 MB) or WeTransfer/SwissTransfer (larger files).
For cloud recordings:
- Go to zoom.us > Recordings > Cloud Recordings.
- Click the meeting you want to share.
- Click “Share” and choose the sharing options: internal only, password-protected, viewer authentication required.
- Copy the share link and send to viewers.
Legal and consent notes
- Zoom automatically notifies participants when a recording starts (via audio message and visual indicator). This meets most jurisdictions’ consent requirements.
- Some jurisdictions (California, Florida, several EU countries) require explicit consent from all parties. Announce the recording verbally at the start of the meeting as a best practice.
- For sensitive meetings (HR, legal, therapy), always confirm in writing that participants consent to recording. Save the confirmation.
- For meetings with external customers or clients, check any NDA or contract clauses about recording before starting.
Troubleshooting
- Record button is grayed out or missing. Recording is disabled at the account level. Contact your Zoom admin. If you are the admin, enable it at zoom.us > Settings > Recording.
- Local recording fails to save. Not enough disk space on your computer. Free up 5-10 GB and try again. Also check that your Documents/Zoom folder is writable.
- Cloud recording takes hours to process. Long meetings (over 2 hours) or peak times (weekday mornings ET) create queue delays. Recording will eventually process; you get an email when ready.
- Recording cuts off before meeting end. Zoom may hit the maximum session length (24 hours) or lose connection. If loss of connection, the recorded portion is preserved up to the disconnect.
- No audio in the recording. The recording captured only speakers with active mics. If someone had mute on, they are silent in the recording. Cannot fix retroactively.
- Cloud recording exceeded storage. Delete old recordings at zoom.us > Recordings, or buy add-on storage.
Official documentation
Frequently asked questions
Can free Zoom users record meetings?
Yes, but only local recording (to your own computer). Cloud recording is a paid feature (Pro, Business, Enterprise plans). Free users also get the 40-minute time limit on group meetings, which applies to recordings too.
How much disk space does a Zoom recording use?
Rough estimates: 200 MB per hour for standard video quality, 500 MB per hour for HD 720p, 1 GB per hour for HD 1080p. Audio-only (M4A) is much smaller at 30 MB per hour. Check available disk space before recording long sessions.
Can I record a Zoom meeting without the host knowing?
No, not through Zoom’s built-in recording. Zoom notifies all participants when a recording starts. You could use an OS-level screen recorder to bypass this, but doing so without notifying the host may violate consent laws in your jurisdiction. Always ask first.
Where does Zoom save local recordings by default?
Default location: Documents/Zoom/ on Windows and Mac. Each meeting gets its own subfolder with the date and meeting name. Change the location in Zoom Desktop > Settings > Recording > Store my recordings at.
Can I download a cloud recording to my computer?
Yes. Go to zoom.us > Recordings > Cloud Recordings, click a meeting, then click Download. You get the MP4 file, audio, transcript, and any shared chat as separate files. Do this before cloud auto-delete kicks in on plans with limited storage.
Does Zoom record breakout rooms?
Only the main room by default. Breakout rooms are not recorded unless a participant in the breakout room starts a local recording (with host permission). To record breakout rooms centrally, assign a co-host in each room to start local recording.