If you’re encountering a “413 Request Entity Too Large” error, the silver lining is that resolving this issue is straightforward and swift.
It merely requires some server adjustments. Rest assured, you don’t need to be a tech guru.
Let’s delve into the process.
What does the “413 Request Entity Too Large” error mean?
The 413 Content Too Large or 413 Request Entity Too Large error is triggered when a client tries to send a file that’s too big for the server’s limit.
This is common when a client tries to upload a large file to a web server, and the server sends back a 413 error to let the client know that the file is too big.
To put it simply, the “413 HTTP error code” occurs when you’re trying to upload a file (like an image or video) that is too big.
Let’s put it in a scenario:
It’s like trying to fit a large sofa through a small door – it just won’t work! If you own the website, you can change the settings to accept larger files. If not, you might need to make your file smaller.
Root Causes of “413 Request Entity Too Large” error
Here are some situations where you might see this error:
- Big File Uploads:
When you’re trying to upload big files like photos, videos, or audio files.
- Large Form Submissions:
If you’re submitting a form with large file attachments, you might encounter this error.
- Hefty API Requests:
When you’re making requests to an API with a lot of data
- Content Management Systems:
If you’re using content management systems like WordPress that have set size limits, you might see this error.
- Server Settings:
The server might be set up to reject uploads that are too big.
For example, Nginx usually limits client requests to 1 MB.
Browser Cache:
Occasionally, the error can be caused by data cached in your browser.
Remember, you can only fix this error if you’re the owner of the website where the error occurred.
If it happened on a website or app you’re using, you might need to make your file smaller or contact their support team.
How to fix the “413 Content Too Large” Error?
Let’s discuss various methods to rectify the HTTP error 413. Initially, we’ll explore some strategies that are independent of the device, server, and hosting.
Following that, we’ll guide you on how to address a 413 error specifically on your WordPress site, as well as on Nginx and Apache servers.
Check File Permissions:
Make sure the file permissions on your server are set correctly. If they’re not, changing them might solve the problem.
Use FTP for Uploading:
If the file is too big to upload via the website, try uploading it directly using FTP.
Reach Out to Your Hosting Provider:
If you’re unsure about how to do the above or if they don’t work, your hosting provider can help.
Clear Your Browser’s Cache and Cookies:
Sometimes, this error can be fixed by simply clearing your browser’s cache and cookies.
If the error is caused by corrupted or expired cookies or cache, clearing them could help.
When you clear them, you get new info from the website’s server.
If you use Google Chrome, here’s how to clear its cache:
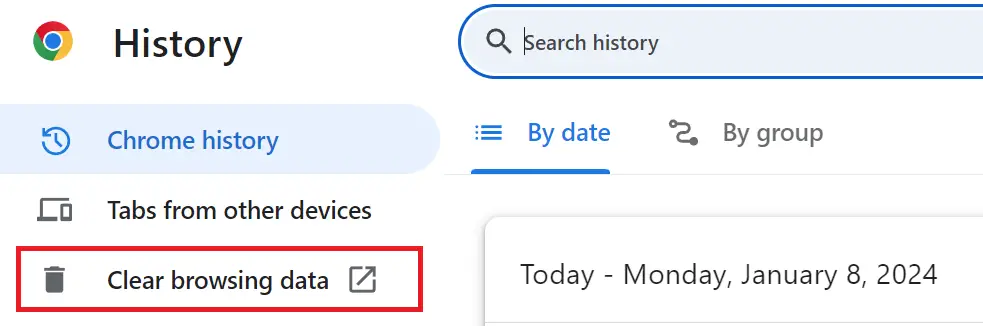
- Click the three dots in the top-right corner of your window. You can also use the keyboard shortcut (Ctrl + H).
- Go to History History.
- Click on Clear Browsing Data.
- A new window will appear. Choose the Time range, if you wish to erase all data, select All Time.
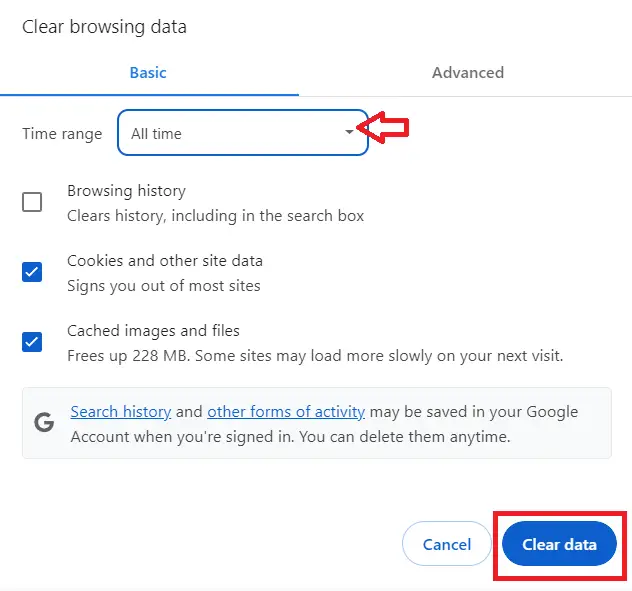
- Select what you’d like to clear- this could be browsing history, cookies, and other site data, or cached images and files.
- Then, hit the Clear Data button.
Increase the Server’s File Size Limit:
If you have access to the server settings, you can increase the maximum file size that the server will accept.
How to Fix 413 Content Too Large an Error in WordPress?
To address the 413 Content Too Large Error in WordPress, there are several strategies to tackle this issue in WordPress:
- Enhancing Upload File Size Limit Using WPCode:
The WPCode plugin can be utilized to augment the upload file size limit, eliminating the need to directly alter the functions.php file.
- Amplifying Upload File Size Limit via .htaccess File:
The upload file size limit can also be amplified by adjusting the .htaccess file.
- Uploading File Manually via FTP:
If the file exceeds the size limit for uploading through WordPress, it can be manually uploaded using an FTP client.
- Modify the functions.php File
Another method to consider is enhancing your size limit through the functions.php file of your active WordPress theme.
If you’re aiming for a long-term solution, it’s advisable to attempt the previously mentioned strategies first.
With this method, you’ll be required to modify the functions.php each time you update or switch your current theme.
How to Fix 413 Request Entity Too Large Error in Nginx?
The “413 – Request Entity Too Large” error signifies that the web server is set to limit large file sizes.
To rectify this, you need to modify your nginx.conf and augment the value of the client_max_body_size directive.
For instance, if you require 100MB then:
client_max_body_size 100M;How to Fix 413 Content Too Large Error in Apache?
To tackle the 413 error in Apache, data can be compressed prior to transmission.
If you’re utilizing Apache, mod_deflate can be enabled in your .htaccess file or Apache configuration file to automatically compress outgoing data.
An alternative solution is to augment the value of the LimitRequestBody directive in your Apache configuration file.
To alter the size limit on an Apache server by modifying your .htaccess file as follows:
- Navigate to File Manager under Files in your cPanel menu.
- Find .htaccess in your root WordPress directory (typically public_html). Note that the .htaccess file might be hidden based on your settings.
- Choose .htaccess and hit the Edit icon.
- Append the following code at the end of your .htaccess file:
php_value upload_max_filesize 64M
php_value post_max_size 64M
php_value max_execution_time 300
php_value max_input_time 300- Press Save and restart Apache.
By doing so, you’re setting the maximum permissible size of your WordPress uploads and posts to 64 megabytes and establishing the maximum file upload duration to 300 seconds. Feel free to adjust these values as per your needs.
Conclusion
In conclusion, the “413 Request Entity Too Large” error arises when a client attempts to send a file that exceeds the server’s size limit.
This error can occur in various situations such as uploading large files, submitting forms with large attachments, making hefty API requests, using content management systems like WordPress with set size limits, or due to server settings that reject large uploads. Occasionally, it can also be caused by data cached in your browser.
The good news is that you don’t need to be a tech expert to fix this error. There are several methods to rectify it.
Always remember to back up your data before making any changes to your server configuration.
By following the provided solutions above, you can rest assured that you’ll be able to resolve this issue.
For further learning, you can also check the following HTTP status code:
- 407 Proxy Authentication Required Error
- 408 Request Timeout Error
- 409 Conflict Error
- 411 Length Required Error
- 412 precondition failed
Frequently Asked Questions
What does an HTTP error status code mean?
HTTP status codes communicate request outcomes. 4xx codes mean the client did something wrong (404 not found, 403 forbidden, 429 too many requests). 5xx codes mean the server did something wrong (500 internal error, 502 bad gateway, 503 unavailable, 504 timeout). The exact code tells you where to look for the fix.
How do I fix HTTP 500 Internal Server Error?
500 means the server crashed processing your request. Three places to look: (1) Server logs (Apache error log, nginx error log, your Flask/Django console). (2) Database connection or query errors. (3) Unhandled exceptions in your application code. If you see 500 in production, check application logs first; the actual error message is usually clear.
How do I fix HTTP 502 Bad Gateway?
502 means the proxy (nginx/Apache) couldn’t reach your application server (gunicorn/uvicorn/PHP-FPM). Check: (1) Is your app server running? systemctl status gunicorn. (2) Is it listening on the port nginx expects? netstat -plnt. (3) Are there OOM crashes killing the worker? dmesg | grep -i oom. Restart the app service first as the quick fix.
What is the difference between HTTP 401 and 403?
401 Unauthorized: you’re not logged in (or your auth token is missing/expired). The fix: authenticate first. 403 Forbidden: you’re logged in but don’t have permission for this resource. The fix: check user roles/permissions. Two different fix paths despite similar-sounding names.
Where can I find more HTTP error fixes?
Browse the HTTP Errors reference hub for 35+ specific status code explanations and fixes. For backend troubleshooting see the Python Tutorial or PHP Tutorial hubs.

Caren Bautista
Technical Writer at PIES IT Solution
Responsible for crafting clear, well-structured, and beginner-friendly content across the platform. Handles the writing, proofreading, and editorial review of tutorials, guides, and documentation to ensure every article is accurate, readable, and easy to follow.
Expertise: Technical Writing · Content Creation · Documentation · Editorial Writing · JavaScript · TypeScript · Python · Python Errors · HTTP Errors · MS Excel · View all posts by Caren Bautista →