
What is the “407 Proxy Authentication Required” Error?
The “407 Proxy Authentication Required” error is a status code in HTTP that arises when the server can’t fulfill a request due to the absence of authentication credentials when a client and server are connected via a proxy server.
In essence, the client’s authentication by the proxy fails.
Causes of 407 Proxy Authentication Required Error
The triggers for the “407 Proxy Authentication Required” error could be:
Incorrect or absent credentials:
The client might have given wrong or no credentials while trying to authenticate with the proxy server.
Network setup:
Problems with the client’s network setup, like wrong proxy settings, can lead to a 407 status code.
Access limitations. Conflicts with third-party software.
How to fix the “407 Proxy Authentication Required” Error?
To fix the “407 Proxy Authentication Required” error, you could consider the following solutions.
On the Client Side:
If you encounter a 407 error on your computer but not on your phone, the problem might lie with the device’s digital ID or security software.
Verify the URL
You need to ensure that you’re inputting the correct URL.
While it might seem trivial, a small typo can trigger the HTTP 407 error.
Hence, it’s advisable to double-check the URL, clear your cache, and try accessing the website again.
Disable Your Plugins
If you’ve recently made changes that appear to coincide with the error, it’s worth investigating.
If the error is occurring on your website, you might want to inspect any plugins, themes, or extensions you’ve recently added or updated.
Examine and Revert Recent Changes
If you can’t identify any client-side issues that might be causing the problem, the final step before proceeding is to perform a restoration.
If you can roll back the site to a state prior to the error’s appearance, this will help determine if the problem was caused by a recent change or an external factor.
If feasible, create a backup before rolling back so you can restore the current version if the error continues. Otherwise, you might roll back and still face the same issue.
On the Server Side:
Verify proxy settings
Ensure that your proxy settings are correctly configured. This includes checking the proxy server address, port, and protocol used.
Supply correct credentials
Make sure you’re providing the correct username and password for the proxy server.
If you’re unsure, you can check with your network administrator or the person who provided you with the proxy details.
Debug the code or scripts
If you’re encountering this error while running a script or a piece of code, try to debug it.
Look for sections where proxy settings are defined or where HTTP requests are made, and ensure they are correct.
Deactivate third-party software
Some third-party software, like antivirus or firewall applications, can interfere with your network connections.
Try disabling these temporarily to see if the problem persists.
Review the network and firewall settings
Incorrect network or firewall settings can cause this error. Make sure your firewall is not blocking your access to the proxy server.
Clear your browser’s cache and cookies
If the error is caused by corrupted or expired cookies or cache, clearing them could help.
Sometimes, clearing your browser’s cache and cookies can resolve network-related errors.
When you clear them, you get new info from the website’s server.
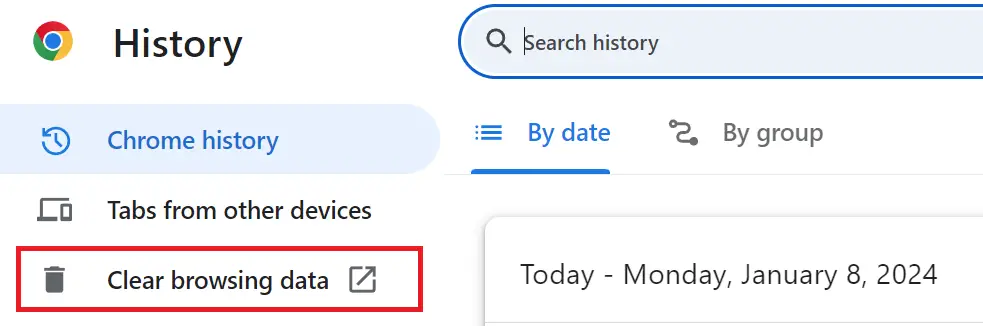
If you use Google Chrome, here’s how to clear its cache:
- Click the three dots in the top-right corner of your window. You can also use the keyboard shortcut (Ctrl + H).
- Go to History History.
- Click on Clear Browsing Data.
- A new window will appear. Choose the Time range, if you wish to erase all data, select All Time.
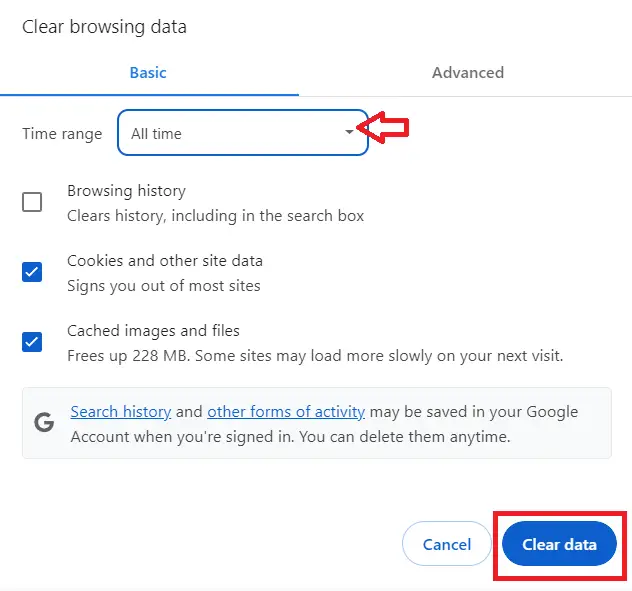
- Select what you’d like to clear- this could be browsing history, cookies, and other site data, or cached images and files.
- Then, hit the Clear Data button.
Reach out to the network administrator
If you’re in a managed network environment (like an office or university network), the network administrator may have specific settings or credentials you need to use.
Ubuntu-specific solutions:
If you’re using Ubuntu, you could consider:
Editing the apt configuration file
This file contains the APT tool’s configuration, including proxy settings.
Managing special characters in the username or password
If your username or password contains special characters, they might need to be escaped or encoded.
Adjusting proxy settings via the Linux Network wizard
This GUI tool lets you change network settings, including proxy settings easily.
Using the CNTLM tool for NTLM authentication:
If your proxy uses NTLM authentication, this tool can help.
Setting proxy environment variables:
You can set the http_proxy and https_proxy environment variables to define your proxy settings.
Using the Synaptic Package Manager:
This GUI package manager for Ubuntu also allows you to define proxy settings.
Remember, it’s always a good idea to back up your data before making significant changes to your system settings.
If you’re unsure about any step, seek help from a professional or someone with technical expertise.
Conclusion
In conclusion, the “407 Proxy Authentication Required” error is an HTTP status code that signifies the server’s inability to fulfill a request due to missing or incorrect authentication credentials when a client and server are connected via a proxy server.
This error can be triggered by various factors, including incorrect or absent credentials, issues with network setup, access limitations, and conflicts with third-party software.
To fix this error, several solutions can be considered.
On the client side, these include verifying the URL, disabling plugins, and examining and reverting recent changes.
If the error persists, it might be necessary to roll back the site to a state prior to the error’s appearance.
By following the provided solutions above on how to fix the 407 Not Acceptable error, you can rest assured that you’ll be able to resolve this issue.
For further learning, you can also check the following HTTP status code:
- 400 Bad Request Error
- 401 Unauthorized Error
- 404 Not Found Error
- 405 Method Not Allowed Error
- 406 Not Acceptable Error
Frequently Asked Questions
What does an HTTP error status code mean?
HTTP status codes communicate request outcomes. 4xx codes mean the client did something wrong (404 not found, 403 forbidden, 429 too many requests). 5xx codes mean the server did something wrong (500 internal error, 502 bad gateway, 503 unavailable, 504 timeout). The exact code tells you where to look for the fix.
How do I fix HTTP 500 Internal Server Error?
500 means the server crashed processing your request. Three places to look: (1) Server logs (Apache error log, nginx error log, your Flask/Django console). (2) Database connection or query errors. (3) Unhandled exceptions in your application code. If you see 500 in production, check application logs first; the actual error message is usually clear.
How do I fix HTTP 502 Bad Gateway?
502 means the proxy (nginx/Apache) couldn’t reach your application server (gunicorn/uvicorn/PHP-FPM). Check: (1) Is your app server running? systemctl status gunicorn. (2) Is it listening on the port nginx expects? netstat -plnt. (3) Are there OOM crashes killing the worker? dmesg | grep -i oom. Restart the app service first as the quick fix.
What is the difference between HTTP 401 and 403?
401 Unauthorized: you’re not logged in (or your auth token is missing/expired). The fix: authenticate first. 403 Forbidden: you’re logged in but don’t have permission for this resource. The fix: check user roles/permissions. Two different fix paths despite similar-sounding names.
Where can I find more HTTP error fixes?
Browse the HTTP Errors reference hub for 35+ specific status code explanations and fixes. For backend troubleshooting see the Python Tutorial or PHP Tutorial hubs.

Caren Bautista
Technical Writer at PIES IT Solution
Responsible for crafting clear, well-structured, and beginner-friendly content across the platform. Handles the writing, proofreading, and editorial review of tutorials, guides, and documentation to ensure every article is accurate, readable, and easy to follow.
Expertise: Technical Writing · Content Creation · Documentation · Editorial Writing · JavaScript · TypeScript · Python · Python Errors · HTTP Errors · MS Excel · View all posts by Caren Bautista →