
Shapes Detection OpenCV Python With Source Code
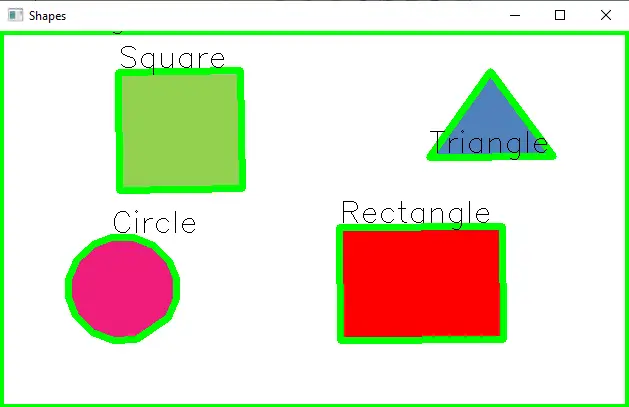
The Shapes Detection OpenCV Python was developed using Python OpenCV , In this Shape Detection OpenCV Python project I am taking an image that contains shapes like triangle, square, rectangle, and circle. The image is then converted to grayscale using the cvtColor() function.
What is OpenCV?
OpenCV (Open Source Computer Vision Library) is an open-source computer vision and machine learning software library.
OpenCV was built to provide a common infrastructure for computer vision applications and to accelerate the use of machine perception in commercial products.
The Grayscaled image is then Thresholded using the THRESH_BINARY Method. The Thresholded image is then taken and contours are found on that image.
The Contours obtained are then looped and the edges are counted using the approxPolyDP() function, which takes each contour. The edges of the Contour is then drawn on the image using drawContours() function.
In this Python OpenCV Project also includes a downloadable Python Project With Source Code for free, just find the downloadable source code below and click to start downloading.
By the way if you are new to python programming and you don’t know what would be the the Python IDE to use, I have here a list of Best Python IDE for Windows, Linux, Mac OS that will suit for you. I also have here How to Download and Install Latest Version of Python on Windows.
To start executing Shapes Detection OpenCV Python With Source Code, make sure that you have installed Python 3.9 and PyCharm in your computer.
Shapes Detection OpenCV Python With Source Code : Steps on how to run the project
Time needed: 5 minutes
These are the steps on how to run Shapes Detection OpenCV Python With Source Code
- Step 1: Download the given source code below.
First, download the given source code below and unzip the source code.

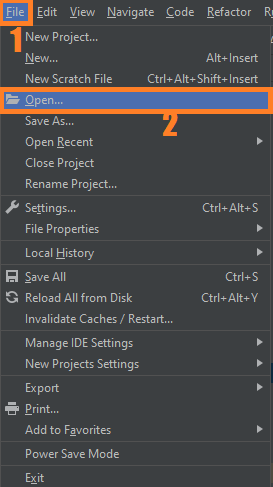
- Step 2: Import the project to your PyCharm IDE.
Next, import the source code you’ve download to your PyCharm IDE.

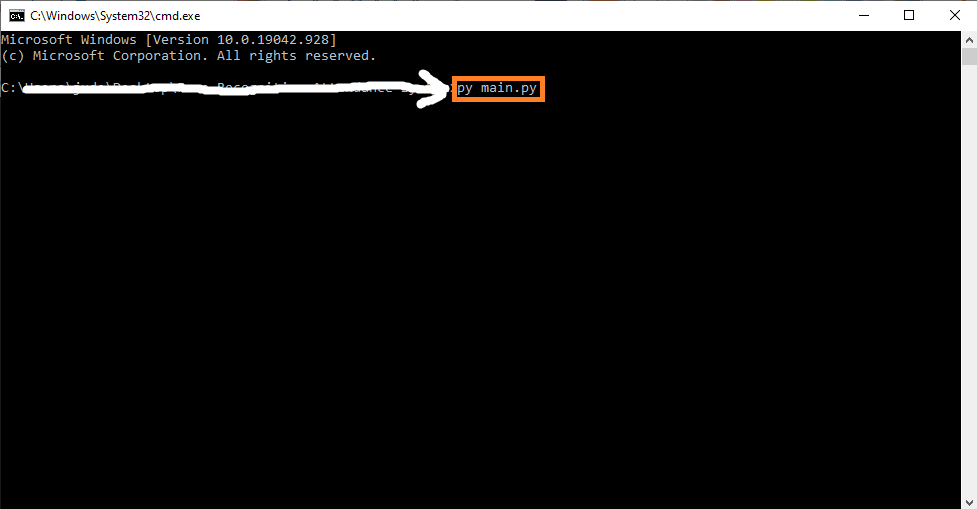
- Step 3: Run the project.
last, run the project with the command “py main.py”


Installed Libraries
import cv2 as cv
import numpy as np
from matplotlib import pyplot as plt
Complete Source Code
import cv2 as cv
import numpy as np
from matplotlib import pyplot as plt


def shapes():
    img = cv.imread('./img/shapess.jpg')
    img_gray = cv.cvtColor(img, cv.COLOR_BGR2GRAY)

    _, thresh = cv.threshold(img_gray, 240, 255, cv.THRESH_BINARY)
    contours, _ = cv.findContours(thresh, cv.RETR_TREE, cv.CHAIN_APPROX_NONE)

    white = np.ones((img.shape[0], img.shape[1], 3))

    for c in contours:
        approx = cv.approxPolyDP(c, 0.01*cv.arcLength(c, True), True)
        cv.drawContours(img, [approx], 0, (0, 255, 0), 5)
        x = approx.ravel()[0]
        y = approx.ravel()[1] - 5
        if len(approx) == 3:
            cv.putText(img, "Triangle", (x, y),
                       cv.FONT_HERSHEY_SIMPLEX, 1, (0, 0, 0), 1)
        elif len(approx) == 4:
            x1, y1, w, h = cv.boundingRect(approx)
            aspect_ratio = float(w) / float(h)
            print(aspect_ratio)
            if aspect_ratio >= 0.95 and aspect_ratio <= 1.05:
                cv.putText(img, "Square", (x, y),
                           cv.FONT_HERSHEY_SIMPLEX, 1, (0, 0, 0), 1)
            else:
                cv.putText(img, "Rectangle", (x, y),
                           cv.FONT_HERSHEY_SIMPLEX, 1, (0, 0, 0), 1)
        elif len(approx) == 5:
            cv.putText(img, "Pentagon", (x, y),
                       cv.FONT_HERSHEY_SIMPLEX, 1, (0, 0, 0), 1)
        elif len(approx) == 10:
            cv.putText(img, "Star", (x, y),
                       cv.FONT_HERSHEY_SIMPLEX, 1, (0, 0, 0), 1)
        else:
            cv.putText(img, "Circle", (x, y),
                       cv.FONT_HERSHEY_SIMPLEX, 1, (0, 0, 0), 1)

    cv.imshow("Shapes", img)
    cv.waitKey()
    cv.destroyAllWindows()


if __name__ == "__main__":
    shapes()
Output
Download Source Code below
Anyway, if you want to level up your programming knowledge, especially Python OpenCV, try this new article I’ve made for you Best OpenCV Projects With Source Code For Beginners 2021.
Summary
In today’s article, we learned how to perform shape detection with OpenCV and Python.
To accomplish this, we leveraged contour approximation, the process of reducing the number of points on a curve to a more simple approximated version.
Then, based on this contour approximation, we examined the number of vertices each shape has. Given the vertex count, we were able to accurately label each of the shapes.
Related Articles
- Code For Game in Python: Python Game Projects With Source Code
- Best Python Projects With Source Code 2020 FREE DOWNLOAD
- How to Make a Point of Sale In Python With Source Code 2021
- Python Code For Food Ordering System | FREE DOWNLOAD | 2020
- Inventory Management System Project in Python With Source Code
Inquiries
If you have any questions or suggestions about Shapes Detection OpenCV Python With Source Code, please feel free to leave a comment below.