YOUR ULTIMATE GUIDE TO GMAIL FILTERS – Gmail filters revolutionize inbox management by automating the organization of incoming emails, allowing users to efficiently prioritize and categorize messages.
With customizable criteria such as sender, recipient, or keywords, Gmail filters offer users a personalized approach to streamline their email workflow.

What is a Gmail filter?
A Gmail filter is a feature that allows users to automatically organize and manage their incoming emails based on predefined criteria.
Users can set up filters to perform actions such as labeling, archiving, forwarding, or deleting emails that meet specific conditions like sender, recipient, subject, or keywords.
This helps users streamline their inbox management process and ensures that important emails are prioritized and sorted efficiently.
How to Set up or Create Filters in Gmail?
Gmail filters are automated directives enabling you to reroute incoming emails upon arrival, thus eliminating the need for manual sorting and management.
Here are the techniques for creating Gmail filters.
Filtering emails in Gmail from the search bar

- Begin by initiating a filter via the search bar.
- Access the Gmail search bar, input a keyword or precise email address for filtering, and then select the filter symbol.

- Establish a filter using the search bar.
- Upon clicking the filter symbol, a dropdown menu will appear, providing the opportunity to enhance filter conditions. Once adjustments are made, proceed by clicking the “Create filter” option.
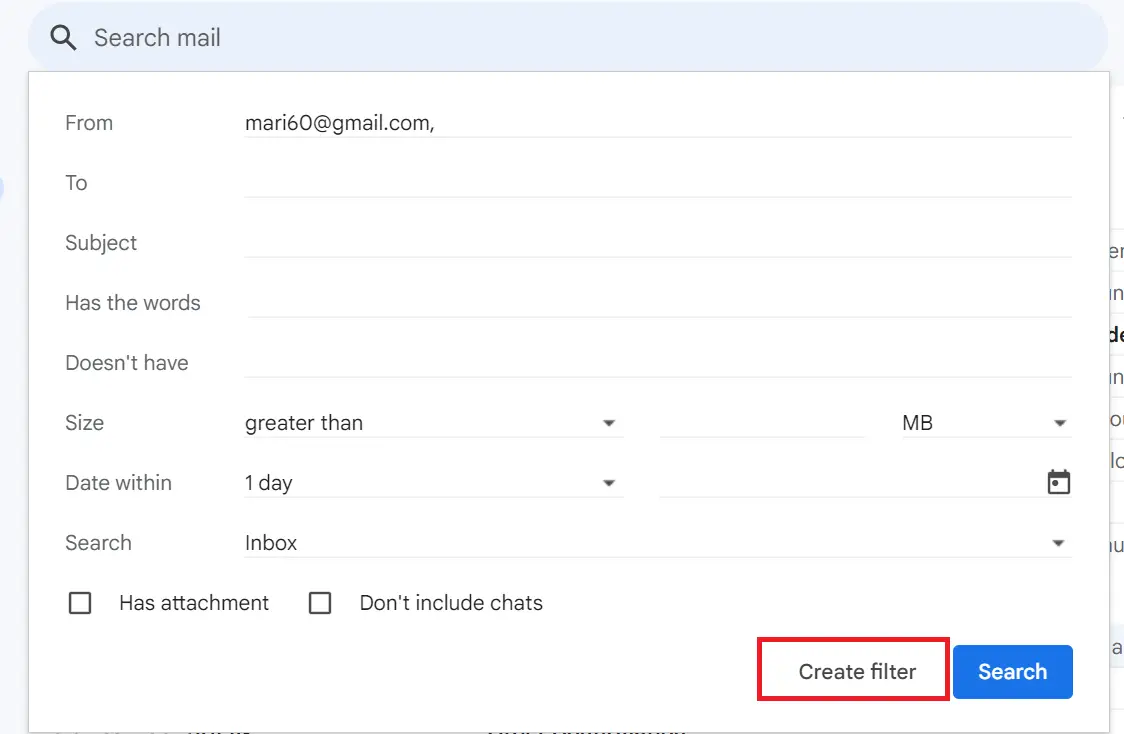
- Generate a filter utilizing the search bar.
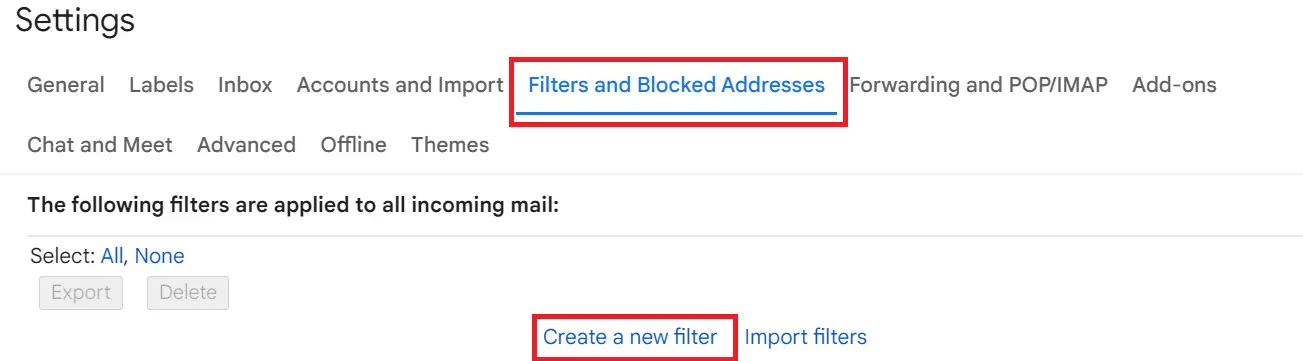
Filtering emails in Gmail from the settings
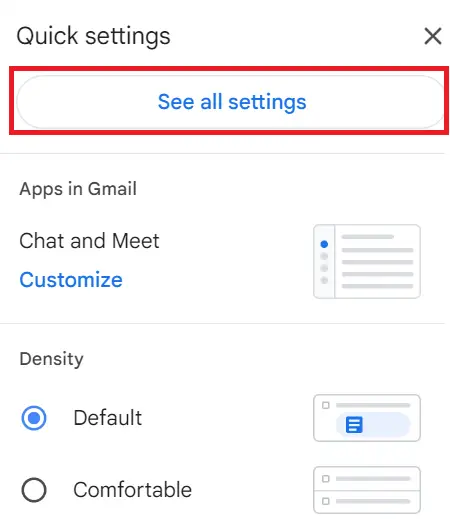
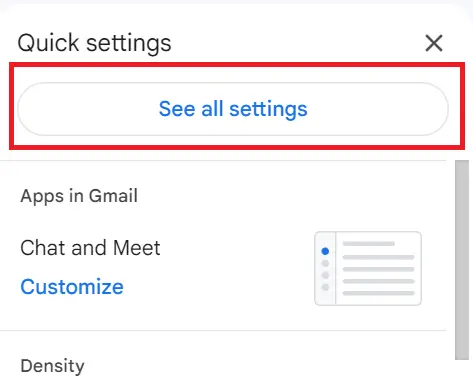
- Initiate a filter via the settings menu located in the top right corner.
- Navigate to “See all settings.”

- Access the “Filters and Blocked Addresses” section, displaying the current Gmail filters linked to your Google account.
- Proceed to “Filters and Blocked Addresses.”
- To generate a new filter, select the “Create a new filter” option.
Filtering emails in Gmail from an email
Time needed: 2 minutes
- Open Gmail and log in.
- Go to Settings.

- Click on “Filters and Blocked Addresses” and select “Create a new filter.”

- Set filter criteria (e.g., sender, subject).
- Click “Create filter” and choose action(s) (e.g., archive, label).
- Confirm the filter and test the filter with a relevant email.
How to edit and delete filters in Gmail?
To manage your Gmail filters, access the “Filters and Blocked Addresses” section in the settings menu. From there, you can edit existing filters to modify criteria or actions, and delete filters that are no longer needed.
Edit Filters in Gmail
- Step 1: Access Gmail settings.
- Step 2: Choose “Filters and Blocked Addresses.”
- Step 3: Find the filter to edit.
- Step 4: Click “edit” next to the filter.
- Step 5: Adjust criteria or actions.
- Step 6: Save changes.
Delete Filters in Gmail
- Step 1: Access Gmail settings.
- Step 2: Select “Filters and Blocked Addresses.”
- Step 3: Locate the filter to delete.
- Step 4: Click on the “delete” option next to the filter.
- Step 5: Confirm deletion when prompted.
- Step 6: The filter is removed from your Gmail account.
Gmail filters to boost your efficiency
These Gmail filters provide a personalized method for arranging your inbox, ensuring that crucial messages receive priority while minimizing distractions.
Indicate emails are read
- Establish a filter according to the sender’s email address or specific keywords, and direct Gmail to mark them as read.

Use a ready-made reply
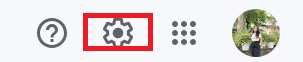
- Go to the gear icon at the top right of your inbox. Click “Settings” > “Advanced” tab.

- Activate “Templates” and click “Save Changes.”
- Compose an email in your inbox with a pre-written response, e.g., about pricing.
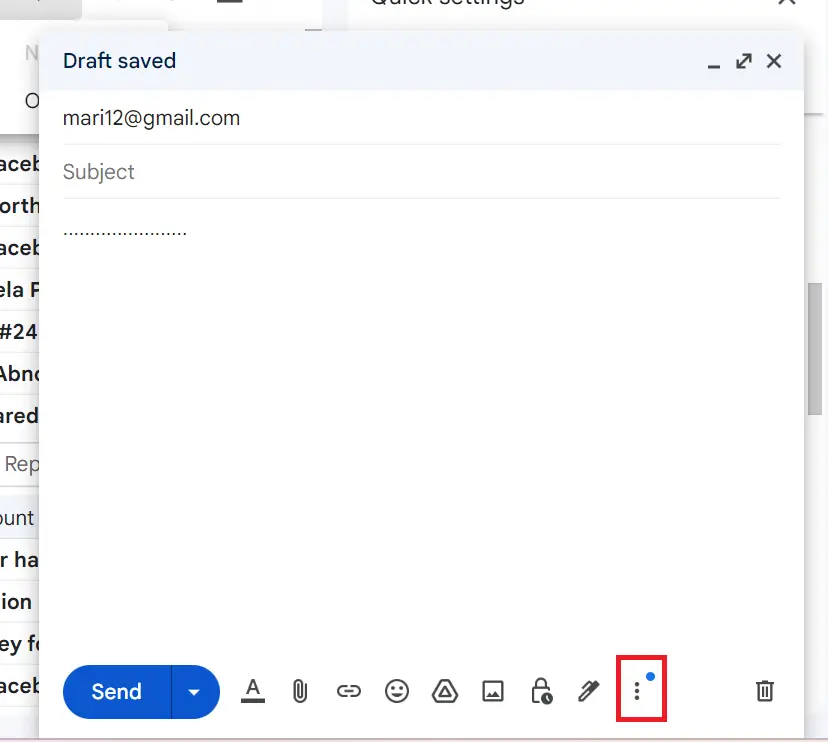
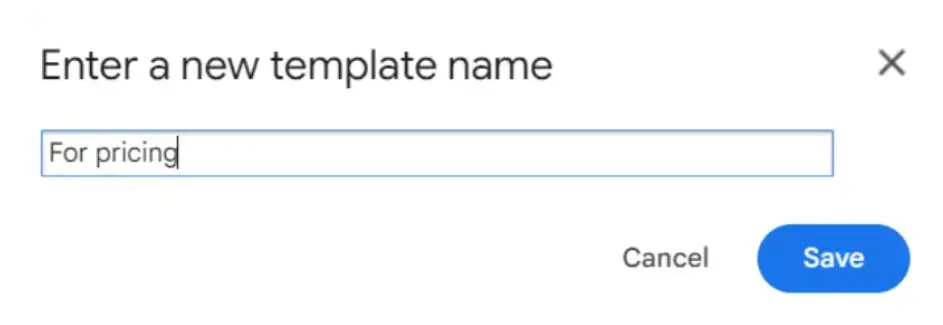
- Click the More button (three dots) > Templates > Save draft as template > Save as new template.
- Name your template, e.g., “For pricing.”
- Set up a filter: Search “pricing” > “Create filter.”
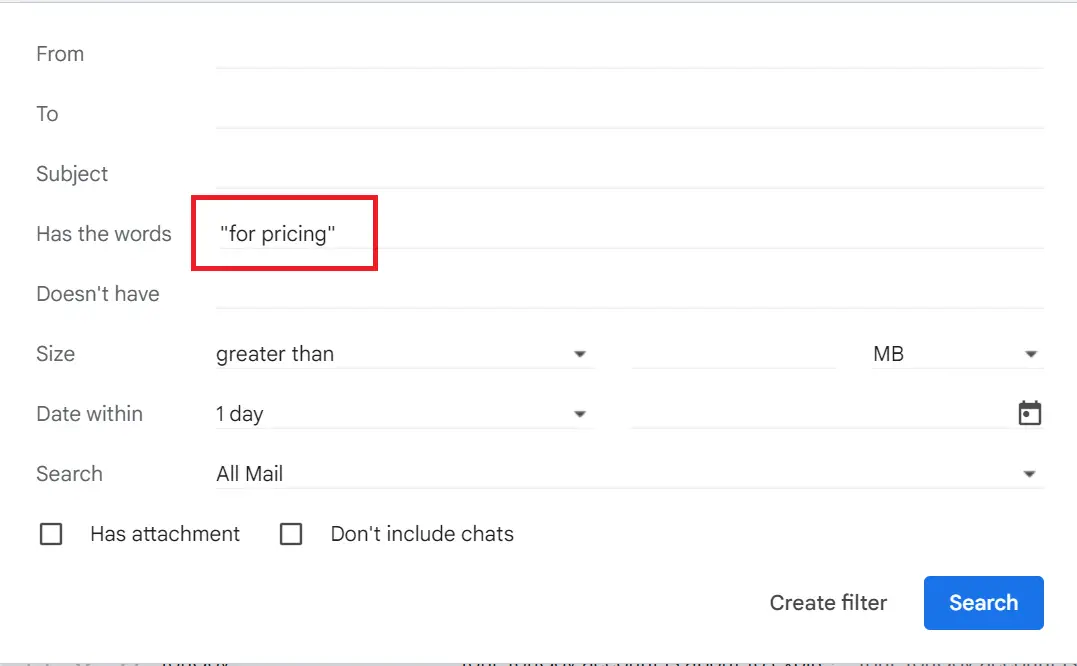
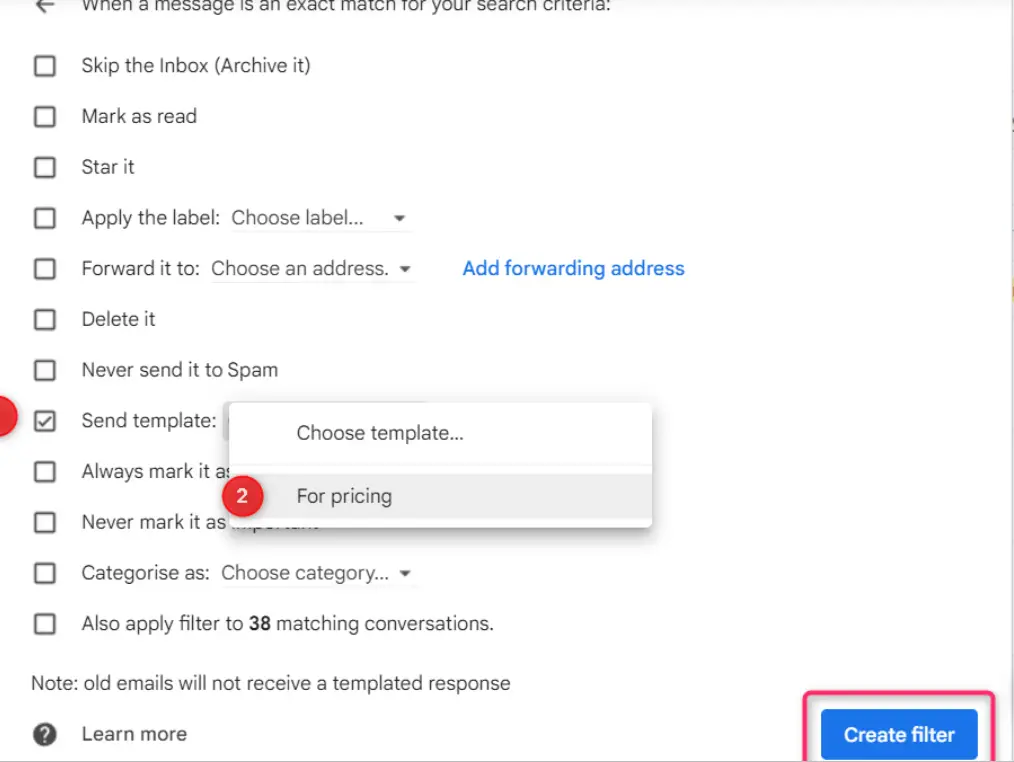
- Check “Send template:” and select the template. Click “Create filter.”
- Congratulations! Send canned responses with ease based on filters.
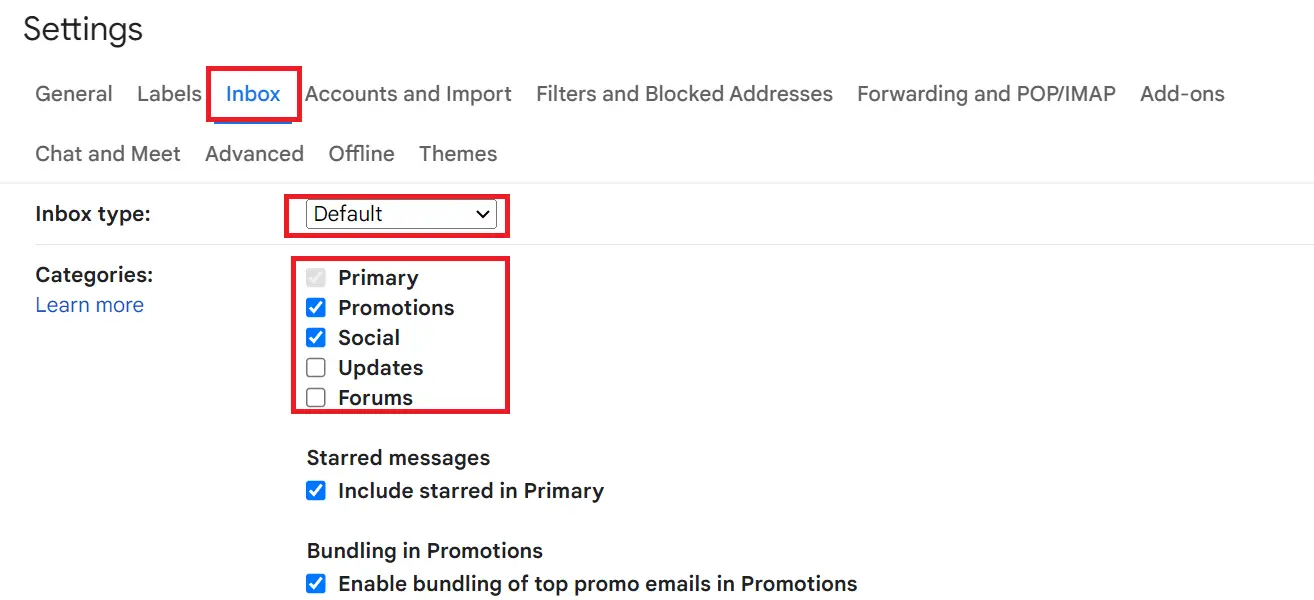
Redirect newsletters to a distinct directory
- Tap the gear icon located at the upper right corner.
- Choose “See all settings.”
- Pick the “Inbox” tab.
- Within “Inbox Type,” access the drop-down menu and opt for “Default.”
- You can select the tabs you wish to view in your inbox and deselect those you don’t.
Next, proceed to the search bar as usual and implement the filter to the categories you’ve selected.
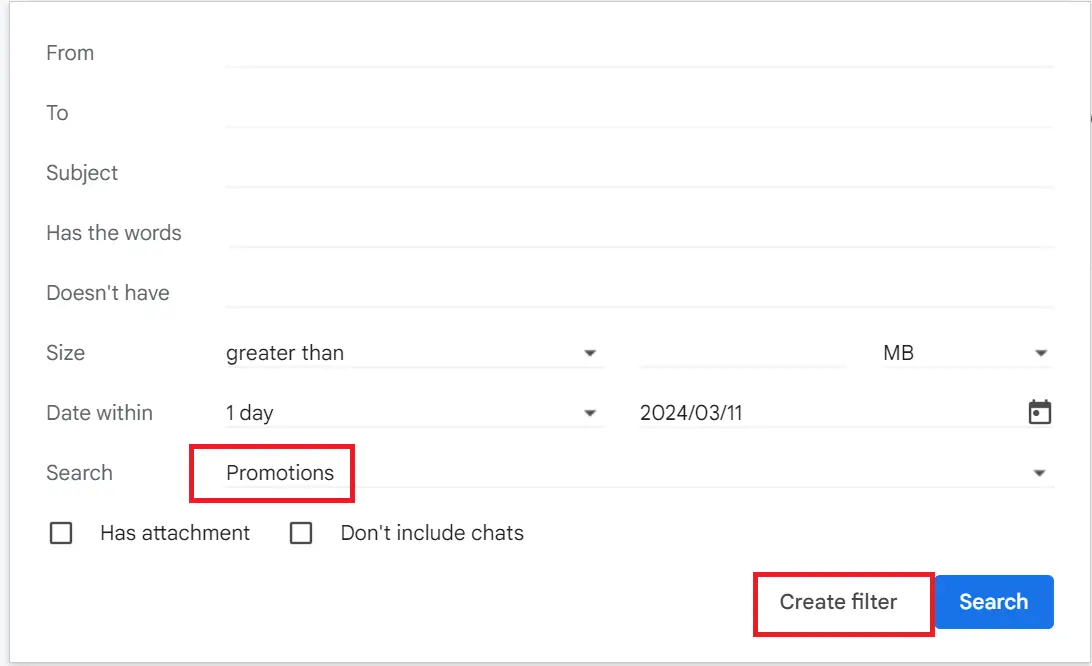
- Verify the “Categorize as:” filter. Choose the dropdown menu and pick the category where emails from the designated email ID should be stored. Press “Create filter.”
Search old emails by date + move folder
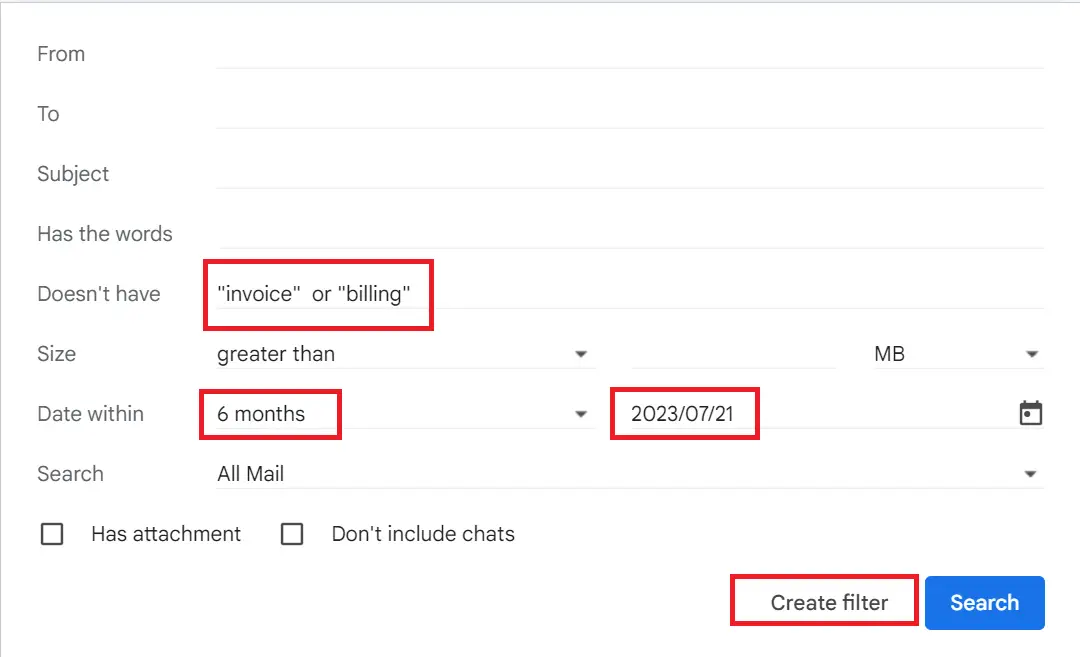
To illustrate, suppose I aim to relocate all invoices received within the past half-year to a fresh folder. Here’s the procedure:
- Navigate to the Gmail search bar and select the filter icon.
- Enter “invoice” OR “billing” into the “Includes the words” field. Set the timeframe to 6 months and specify July 21st, 2023, by clicking on the adjacent Calendar icon.
- Proceed to click on “Create filter.”
Consequently, this setup ensures retrieval of all email correspondence pertaining to billing and invoicing within the six months leading up to July 21st.
- Next, review the choices – “Skip the inbox,” “Apply the label:”, and choose the suitable folder from the menu.
- In my scenario, I’m opting for the label labeled “Invoice.”
- Lastly, ensure to select the “Also apply filter to matching conversations” option and hit “Create Filter.”
Conclusion
Gmail filters streamline email organization by automatically sorting incoming messages based on predefined criteria, like sender, recipient, or keywords.
This automation helps users prioritize important emails and reduces the need for manual management tasks.
By utilizing various methods such as the search bar, settings menu, or filter symbols, users can efficiently set up and customize filters to suit their inbox management preferences.