HOW TO CREATE, EDIT, AND DELETE A GMAIL ALIAS – Email aliases offer a convenient solution for managing communication by providing additional addresses linked to your main email.
This allows for enhanced privacy, organization, and flexibility in handling messages.

What is an email alias in Gmail?
An email alias is an extra address linked to your main email, allowing you to receive messages without revealing your primary address.
Messages sent to the alias are automatically forwarded to your main inbox. You can organize these messages using filters, such as labeling them for easy identification.
What are the Limitations of Gmail aliases?
- Email aliases typically only receive messages and can’t send them. Replies to messages sent to your alias show your main email address. Some platforms, like Gmail, might allow sending from an alias, but this varies.
- Email aliases aren’t Google accounts, so they can’t access apps like Google Docs. Use your primary email for that.
- One email alias can’t be shared among multiple users. For example, if your company has three employees, only one can receive emails sent to the alias.
- You can’t create an alias with the same name as an existing Google account in your Workspace.
- Email aliases don’t ensure complete privacy. Searches in Gmail might include messages sent to an alias.
How to Create a Google Workspace Alias in Gmail?
- Log in to your Google Admin console as an admin.
- In the Admin console, go to Directory > Users.
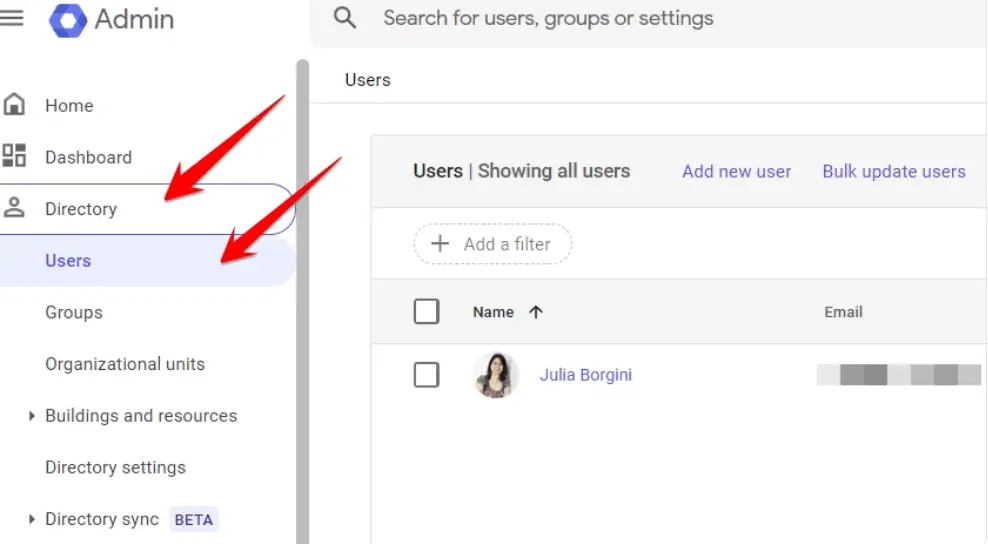
- Click on the user’s name you want to add the alias to.
- Below the user’s name, select Add alternate emails.
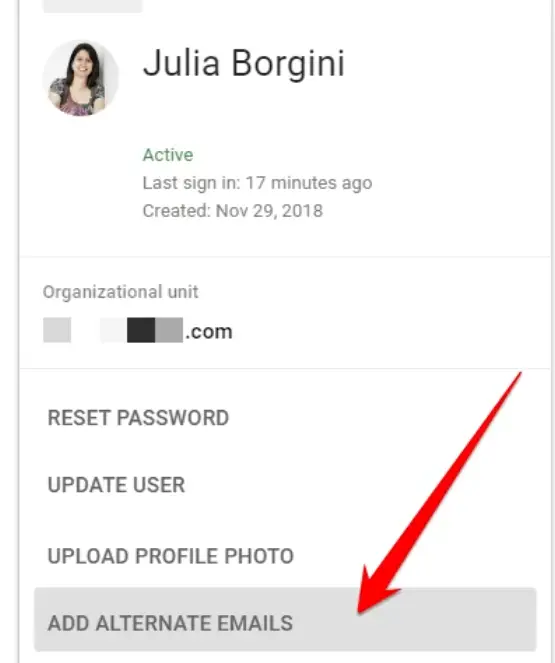
- Enter a name for the alias (the part before the @ sign). Choose the domain if you have multiple.

- Repeat the process for more aliases if needed.
- Save your changes.
How to Edit an Email Alias in Gmail?
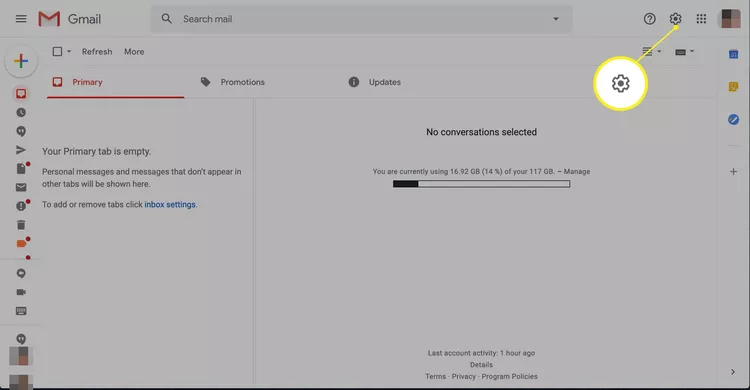
- Open Gmail.
- Click on the Settings gear icon.
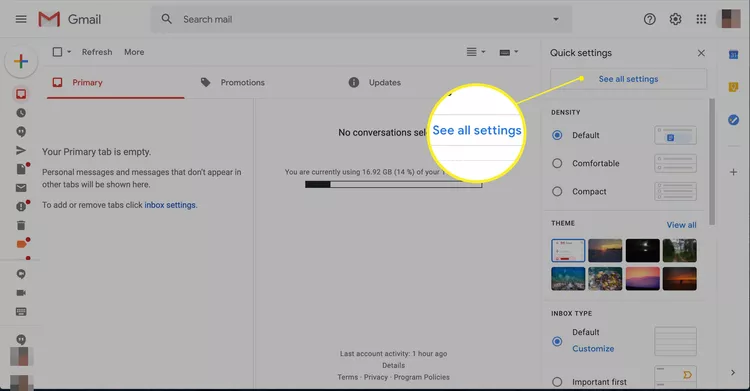
- Choose “See all settings.”
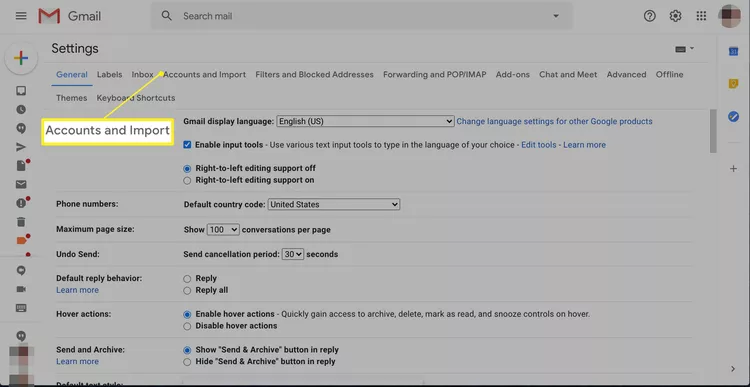
- Navigate to the “Accounts and Import” tab.
- Find the “Send mail as” section.
- Click “Edit info” next to the alias you want to modify.
- Make the desired changes.
- Save your changes.
How to Remove or Delete an Email Alias in Gmail?
Time needed: 2 minutes
- Log in to your Google Admin console using an admin account.
- Navigate to Directory > Users on the left side of the Admin console.
- Select the username you wish to modify or remove the alias for.
- Below the user’s name, choose Add alternate emails.
- To remove the alias, click the X next to it. To edit, click on the Alternate email field and make the necessary changes.

- Save your changes by clicking Save.

Frequently Asked Questions (FAQs)
How to create a Gmail Alias?
- Sign in to your Gmail account and go to “Settings” > “See all settings” > “Accounts and Import” tab. Choose “Add another email address” under “Send mail as” and follow the prompts to add your desired alias.
Can i edit Gmail Alias?
- Yes, you can edit a Gmail alias. Head to “Settings” > “See all settings” > “Accounts and Import” tab in your Gmail account. Find the alias under “Send mail as,” click “Edit info,” make the necessary changes, and save.
How to delete Gmail Alias?
- To delete a Gmail alias, go to “Settings” > “See all settings” > “Accounts and Import” tab in your Gmail account. Locate the alias under “Send mail as,” click “Delete” next to it, confirm the deletion, and the alias will be removed.
How to Add a Temporary Email Alias to Gmail?
- Step 1: Log in to your Gmail account.
- Step 2: Then go to Settings.
- Step 3: Choose “See all settings.”
- Step 4: Click on the “Accounts and Import.”
- Step 5: Under “Send mail as,” choose the “Add another email address.”
- Step 6: Enter the temporary alias.
- Step 7: Lastly follow the prompts in order to finish.
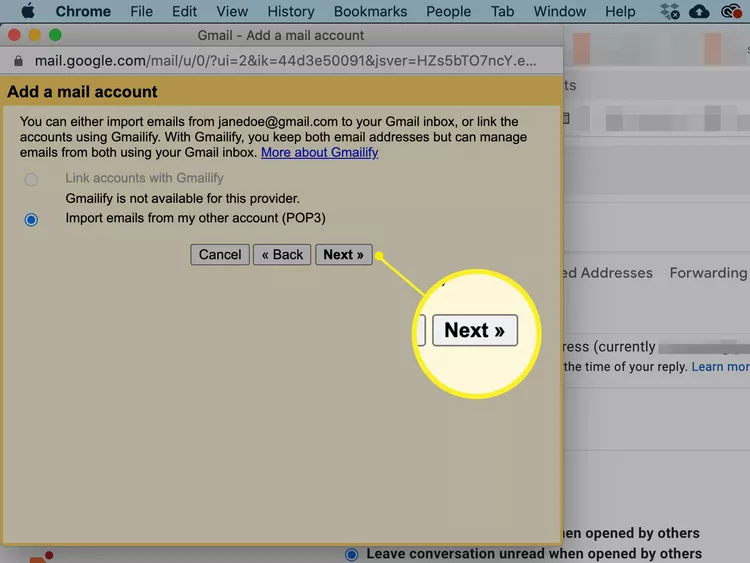
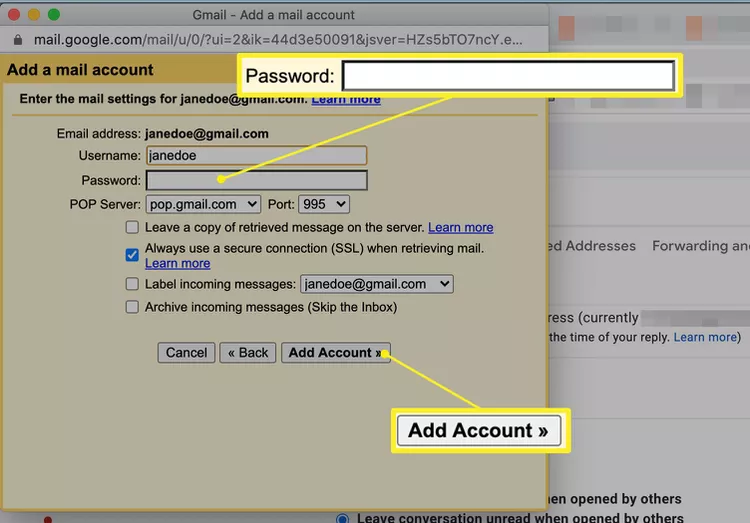
How to Permanently Add an Email Alias to Gmail?
- Step 1: Click the Settings gear icon at the top-right.
- Step 2: Choose “See all settings.”
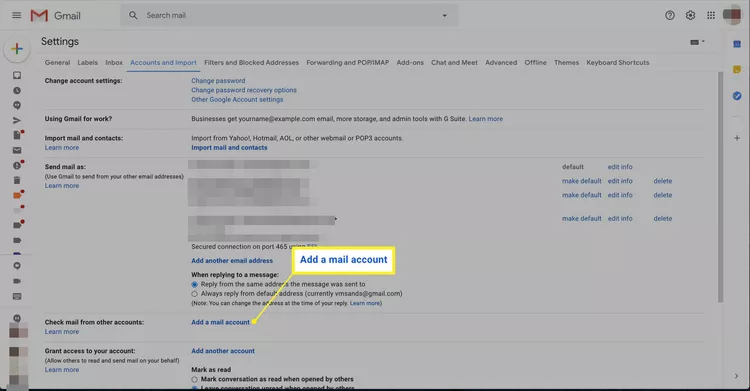
- Step 3: Then go to the “Accounts and Import” tab.
- Step 4: Scroll down and then click “Add a mail account” under the “Check mail from other accounts.”
- Step 5: Enter the desired email address.
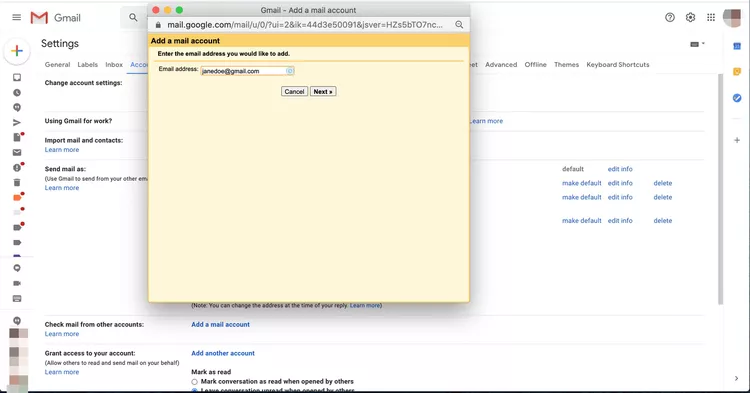
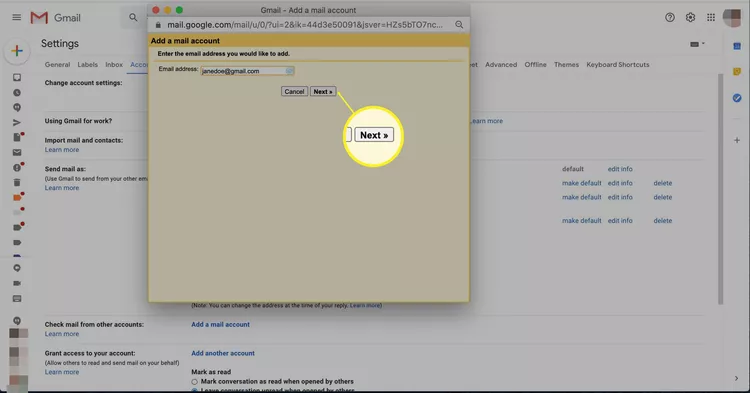
- Step 6: Click “Next” twice.
- Step 7: Input the password for the email address.
- Step 8: Lastly click “Add Account.”
How to change my alias name in Gmail?
- Go to Gmail settings.
- Choose “See all settings.”
- Navigate to “Accounts and Import.”
- Find your alias under “Send mail as” and click “Edit info.”
- Change the alias name.
- Save your changes.
Conclusion
In conclusion email aliases provide an extra address linked to your main email, enabling discreet message reception and organization through filters.
While primarily for receiving, some platforms like Gmail may allow sending from aliases, though this feature varies.