GMAIL FORWARDING: HOW TO FORWARD EMAILS IN GMAIL – Managing email forwarding efficiently in Gmail is essential for optimizing communication workflows.
By exploring different methods such as browser extensions and native Gmail features, users can streamline the process and enhance productivity.
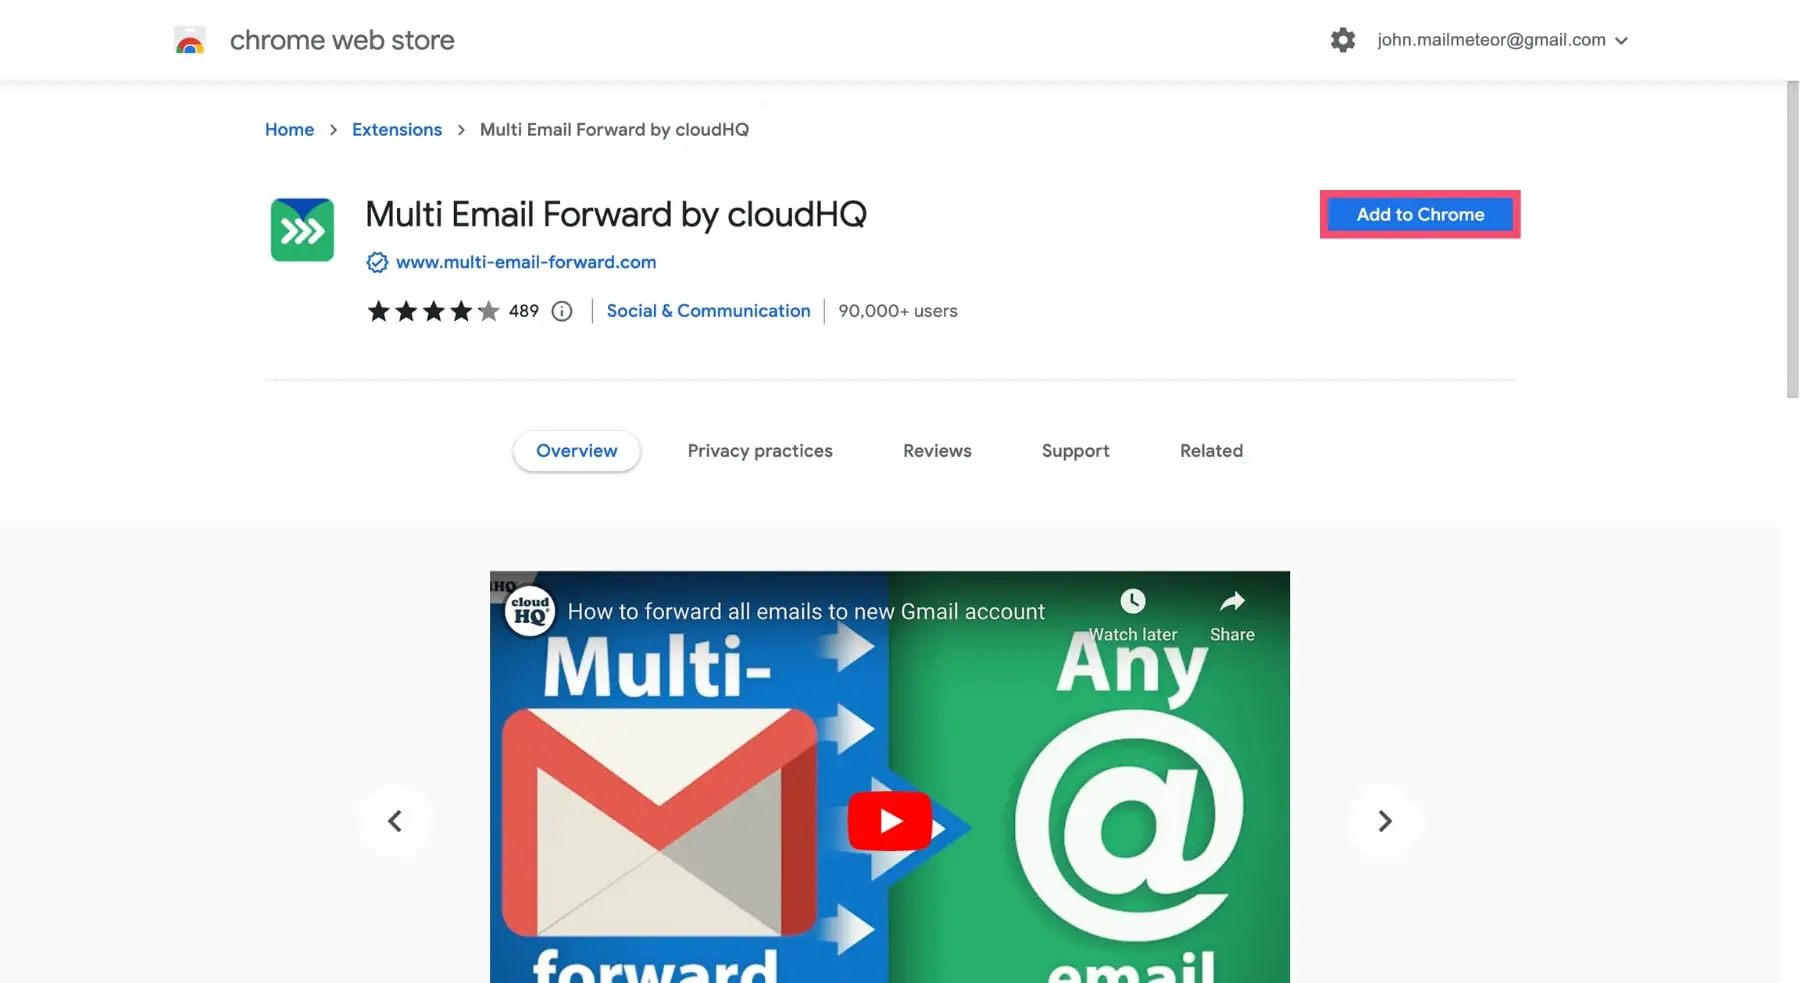
How to Forward Multiple Emails Gmail?
Time needed: 2 minutes
- Search on the Chrome Web Store.
- Then install “Multi Email Forward” this is by cloudHQ extension.

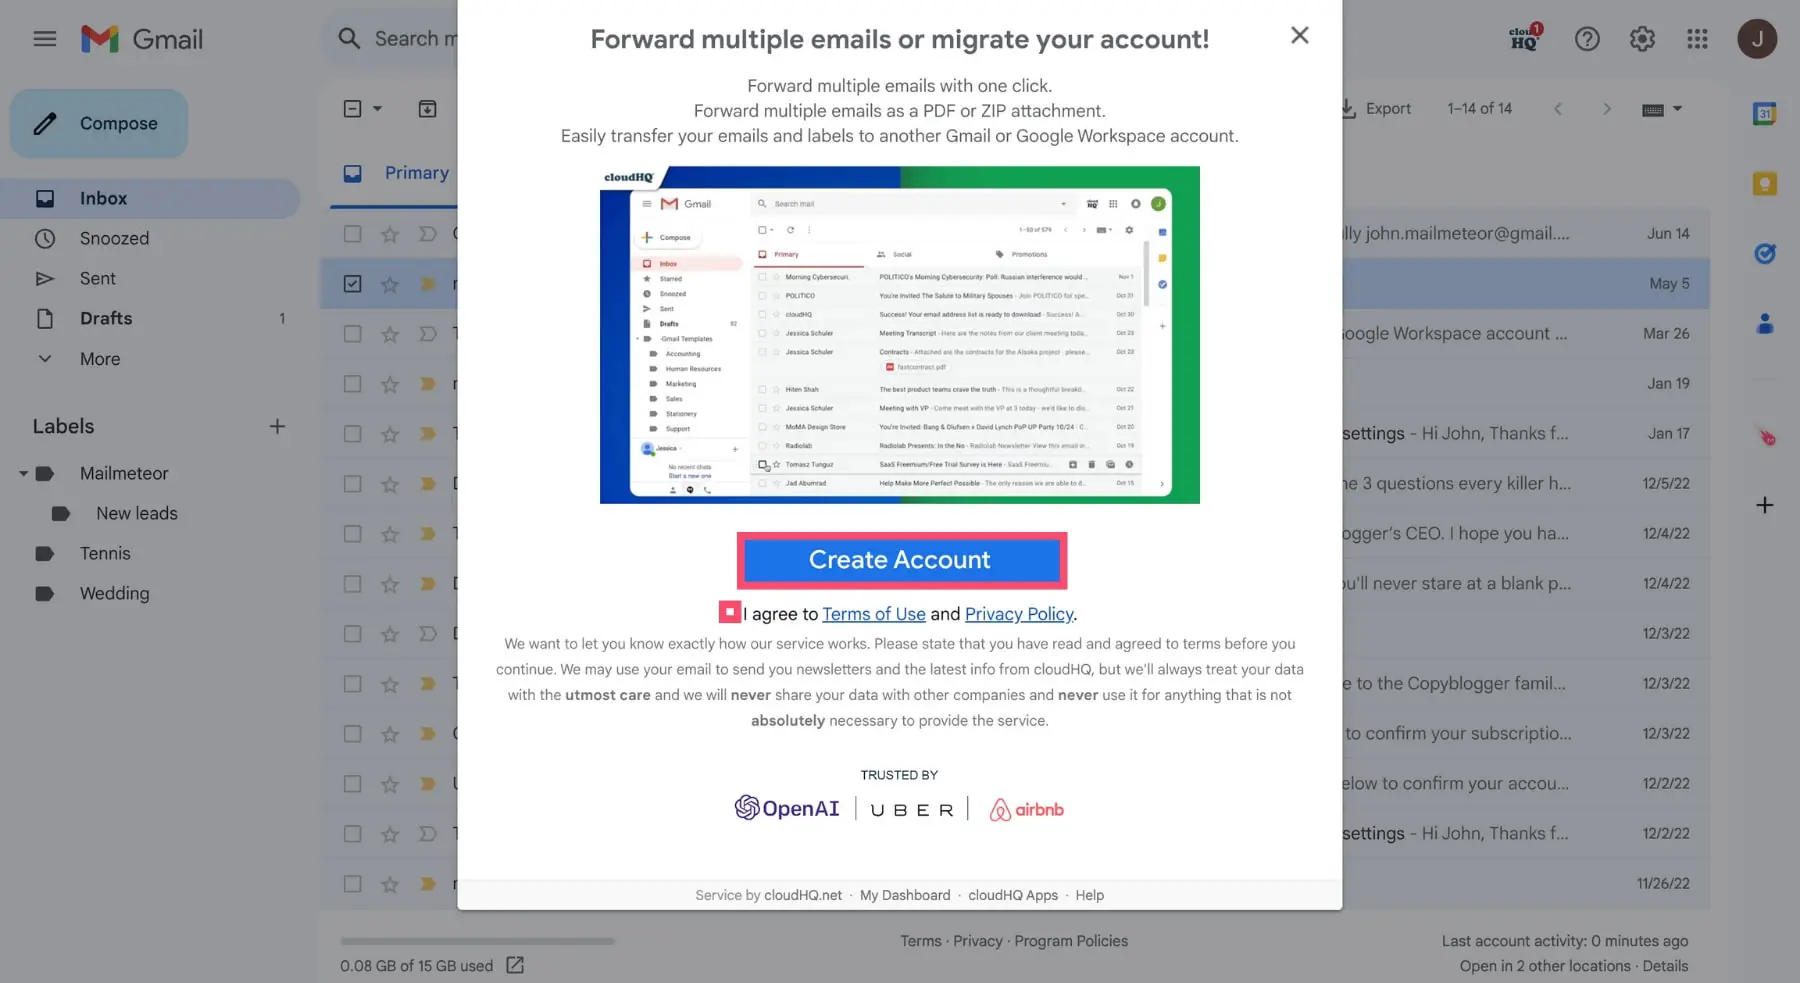
- Open Gmail, agree to terms, and then create a cloudHQ account.
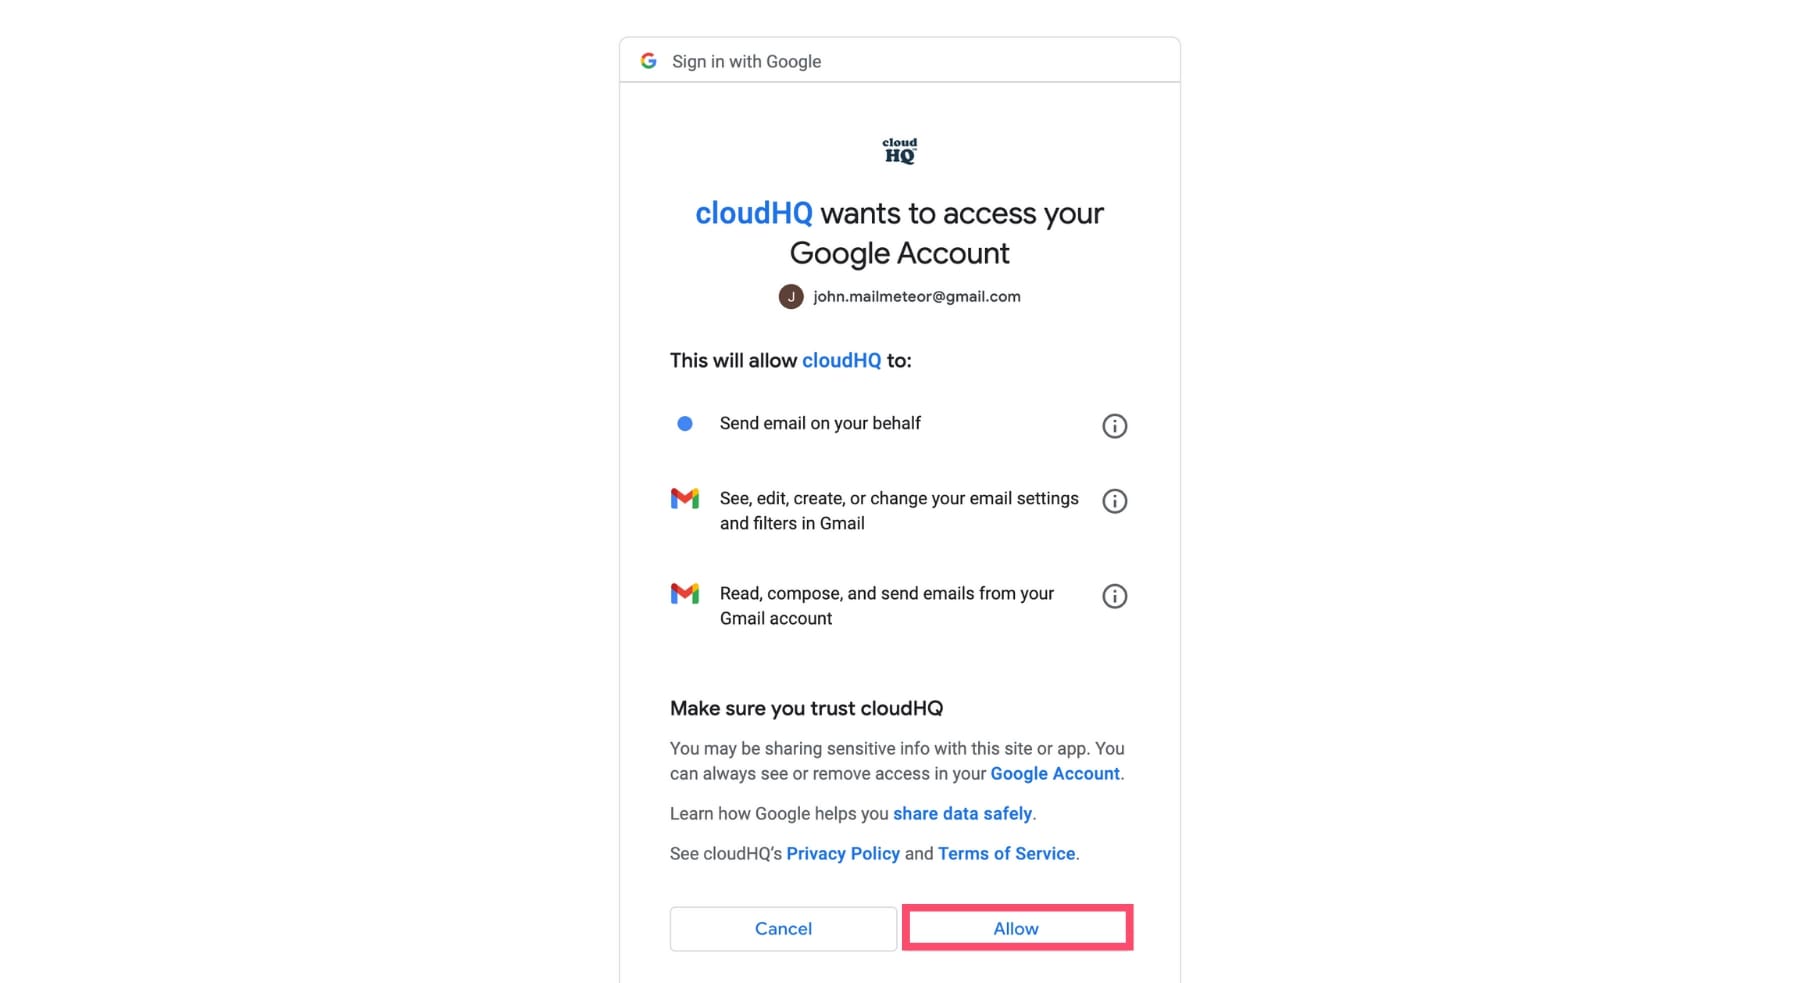
- This allows the cloudHQ to access your Google Account.
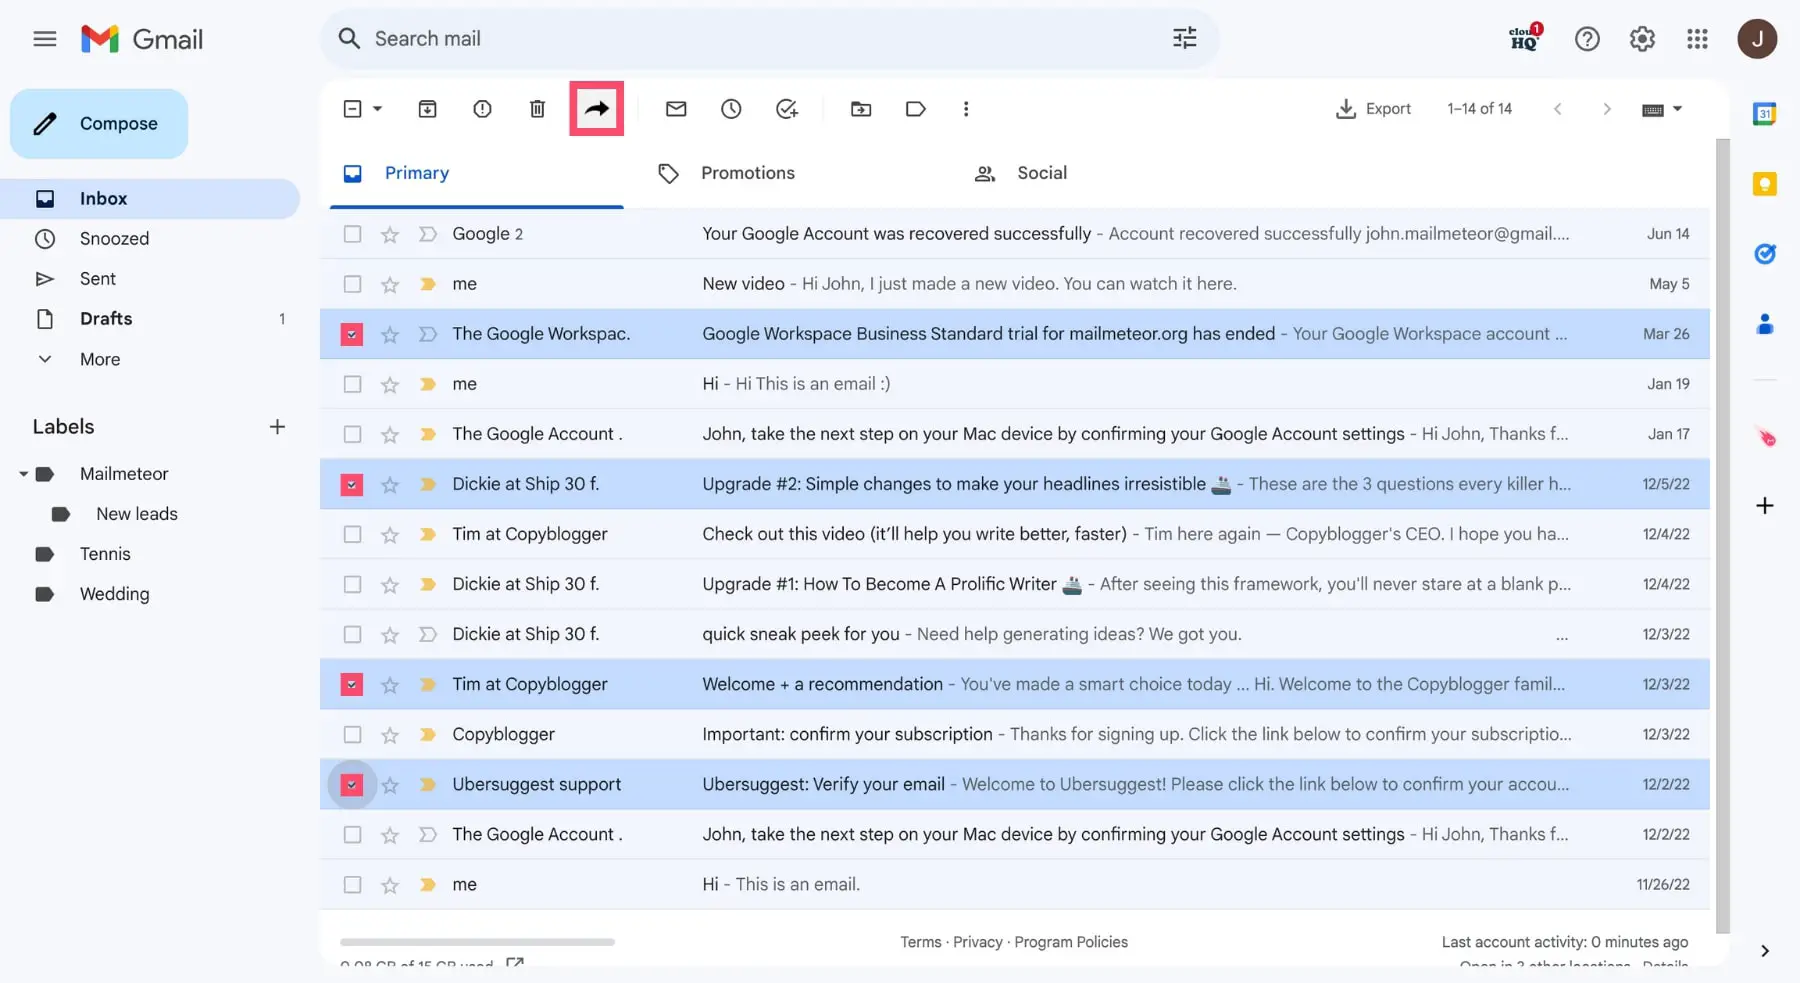
- Choose emails you wish to forward, then click on the “Multi Email Forward” button.
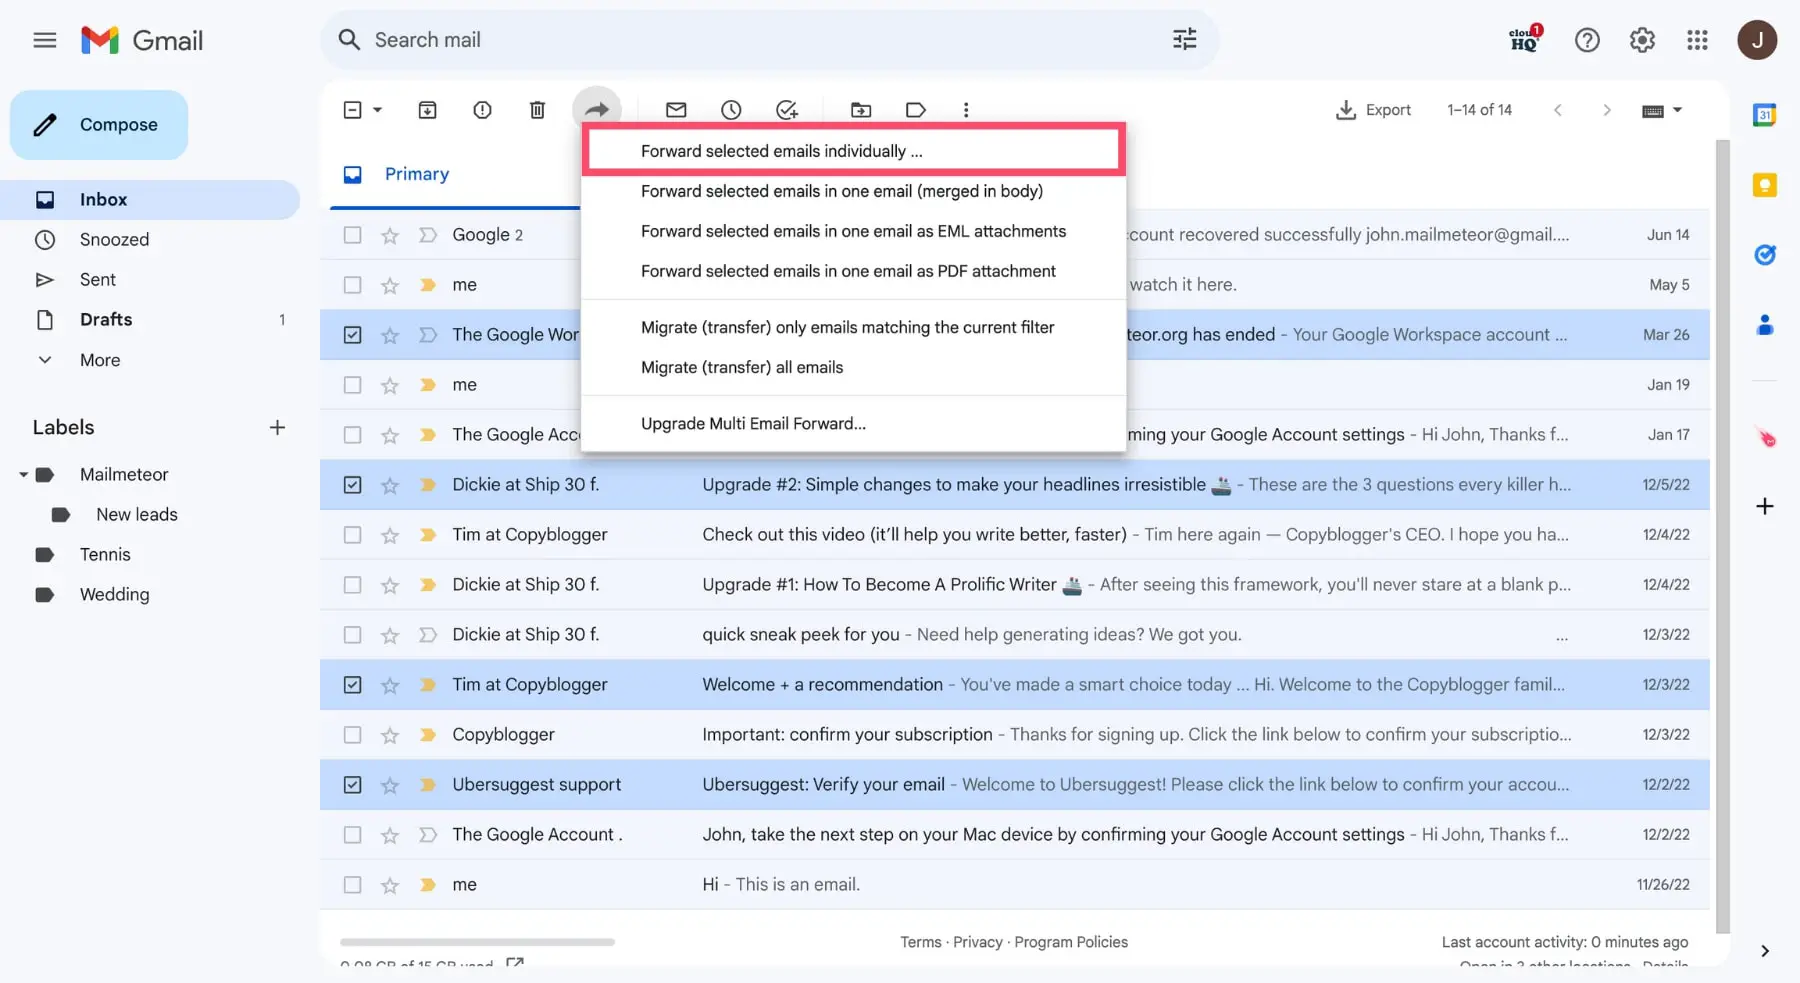
- Lastly select “Forward selected emails individually” from the dropdown menu.
How to forward a single email in Gmail
- Step 1: Log in to your Gmail account.
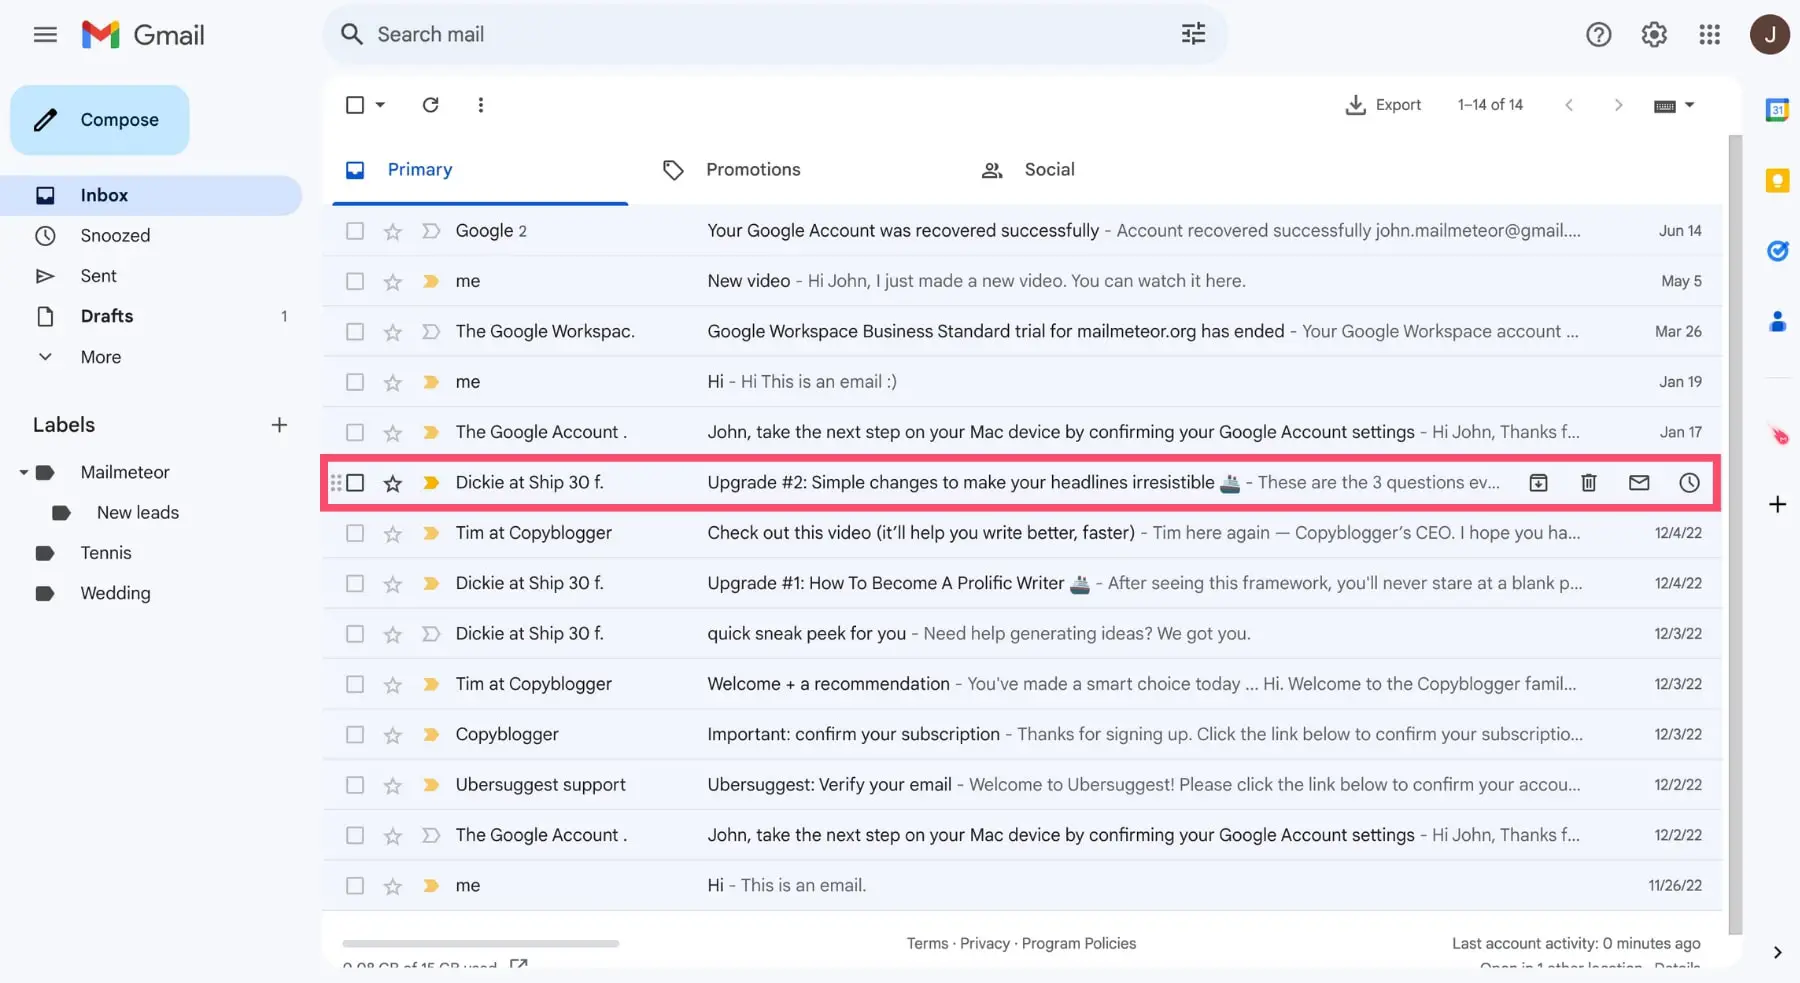
- Step 2: Then choose the message that you wish to forward to open it.
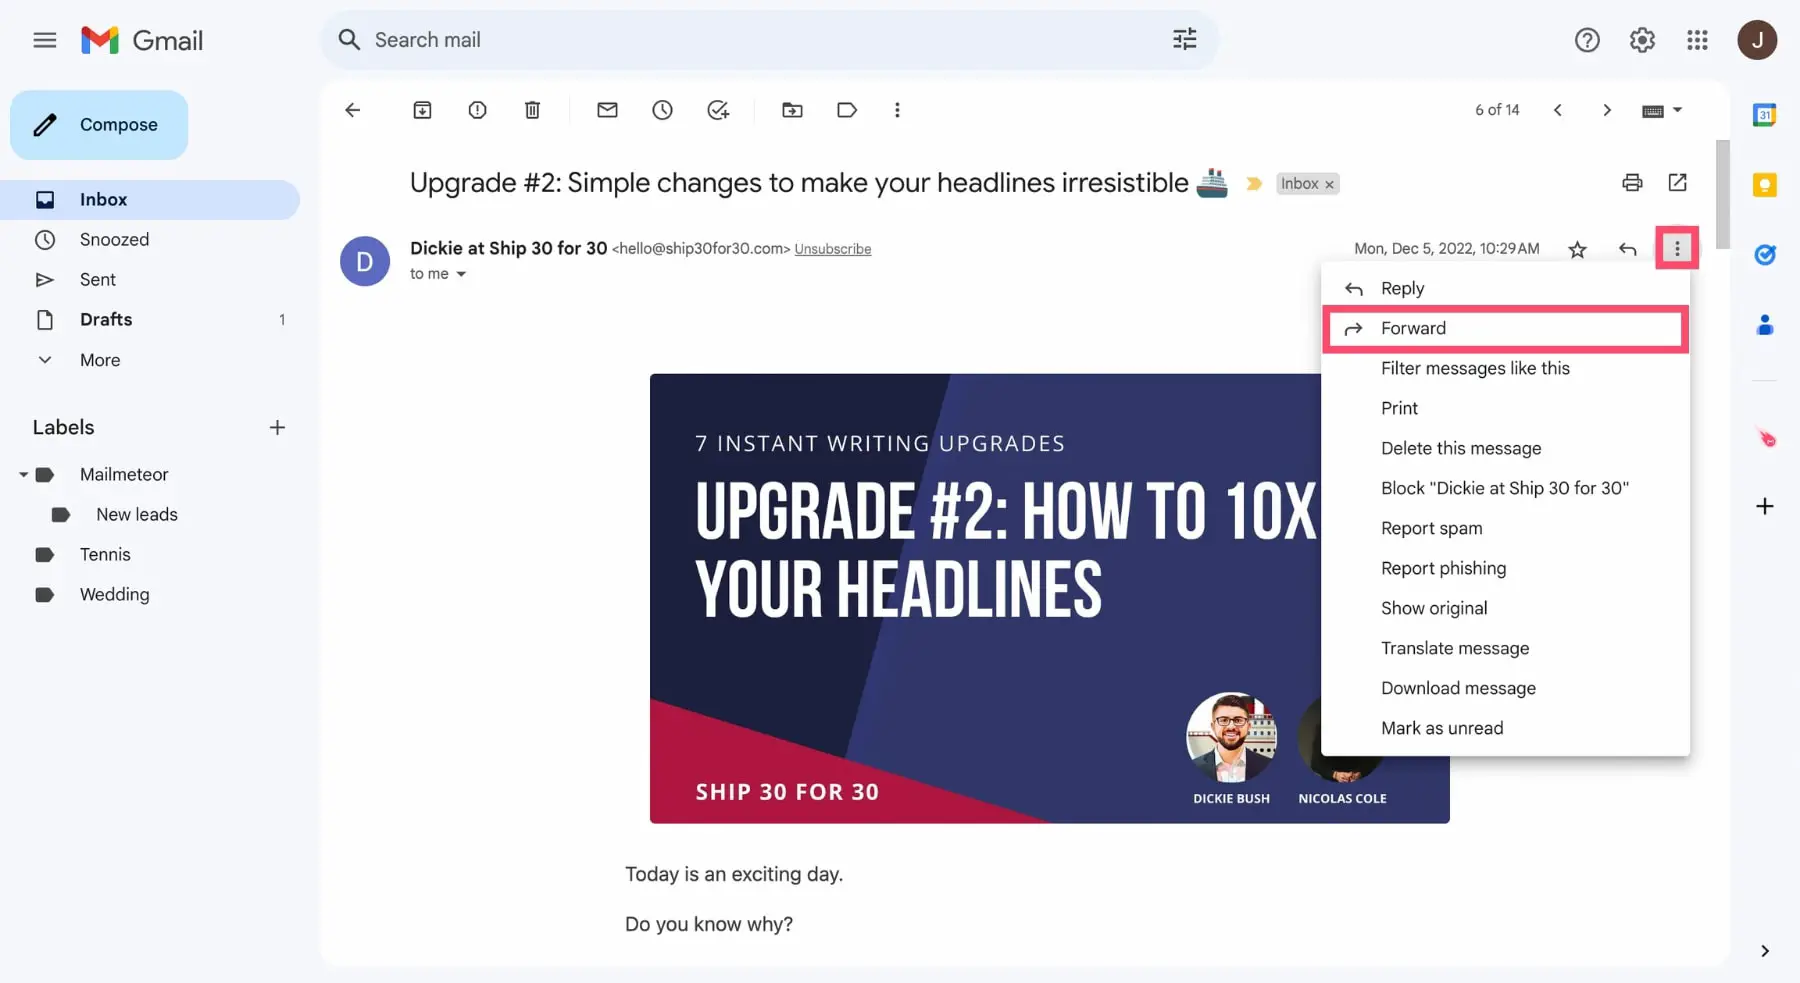
- Step 3: After opening the desired email, then click on the :three vertical dots” that is located at the top right corner, then choose “Forward”.
- Step 4: Lastly input the email address to which you wish to forward the selected message, and proceed by clicking the “Send” button.
How to set up emails automatically forwarding in Gmail?
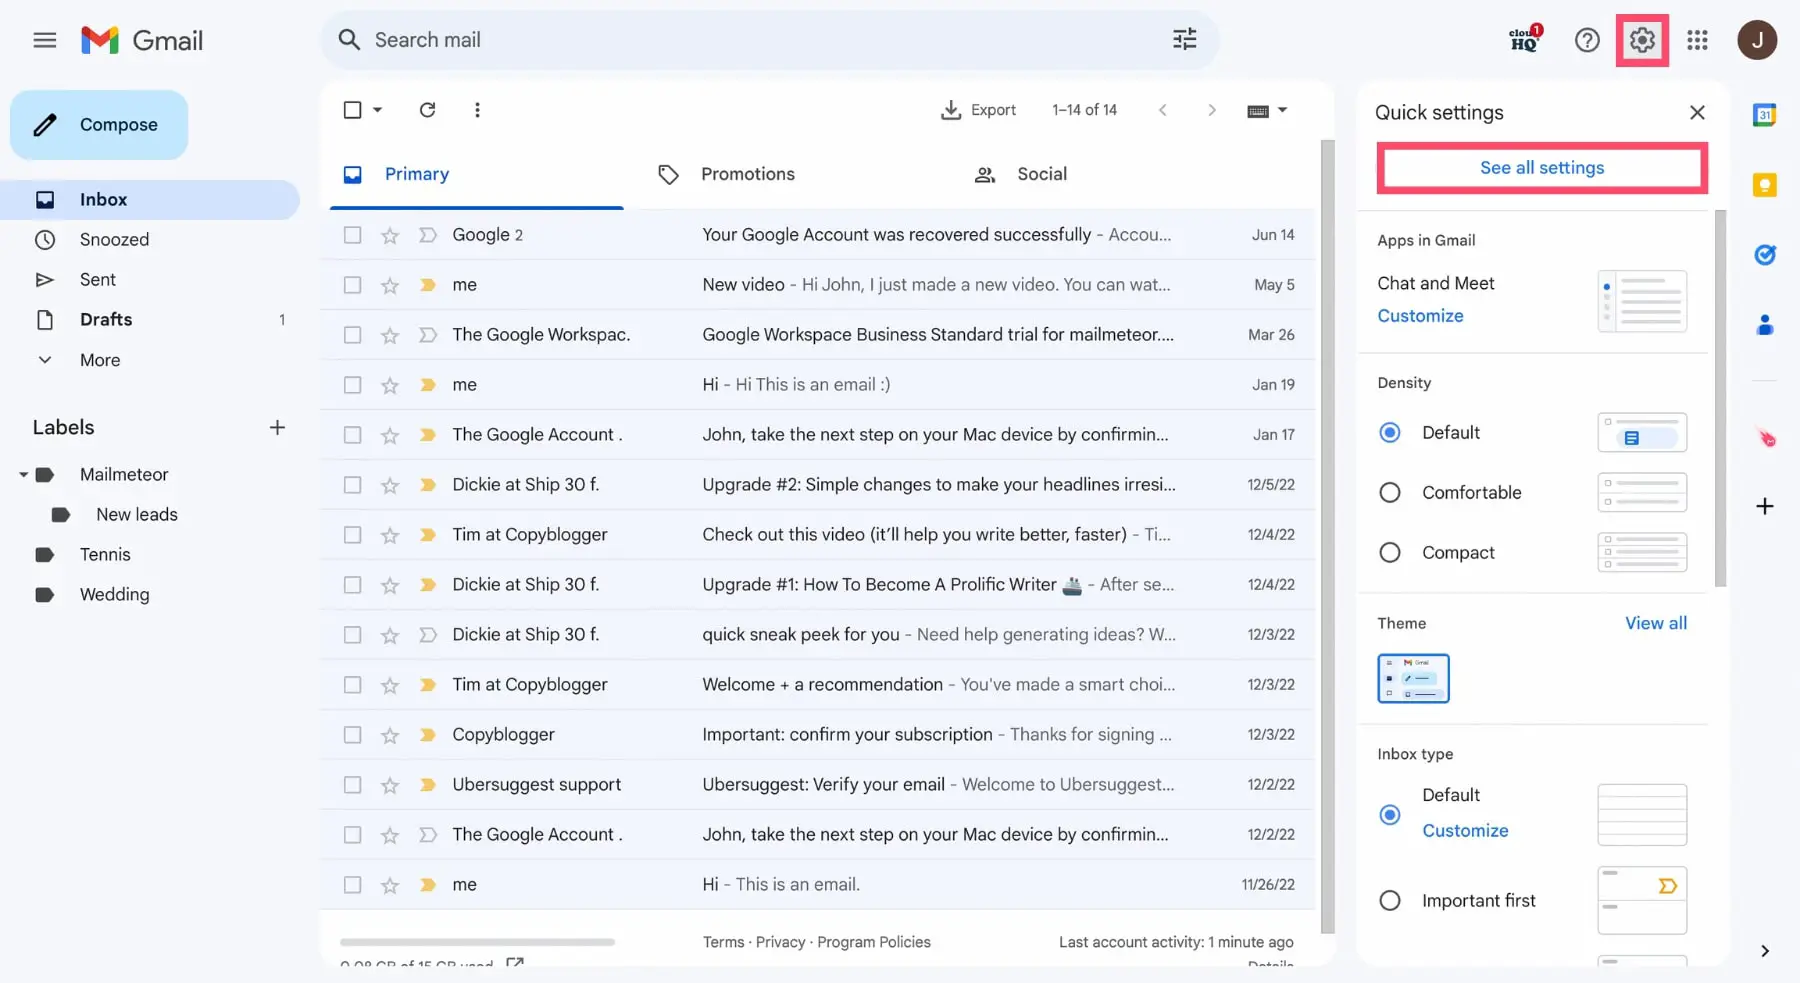
- Log in to Gmail.
- Access Settings > See all settings.
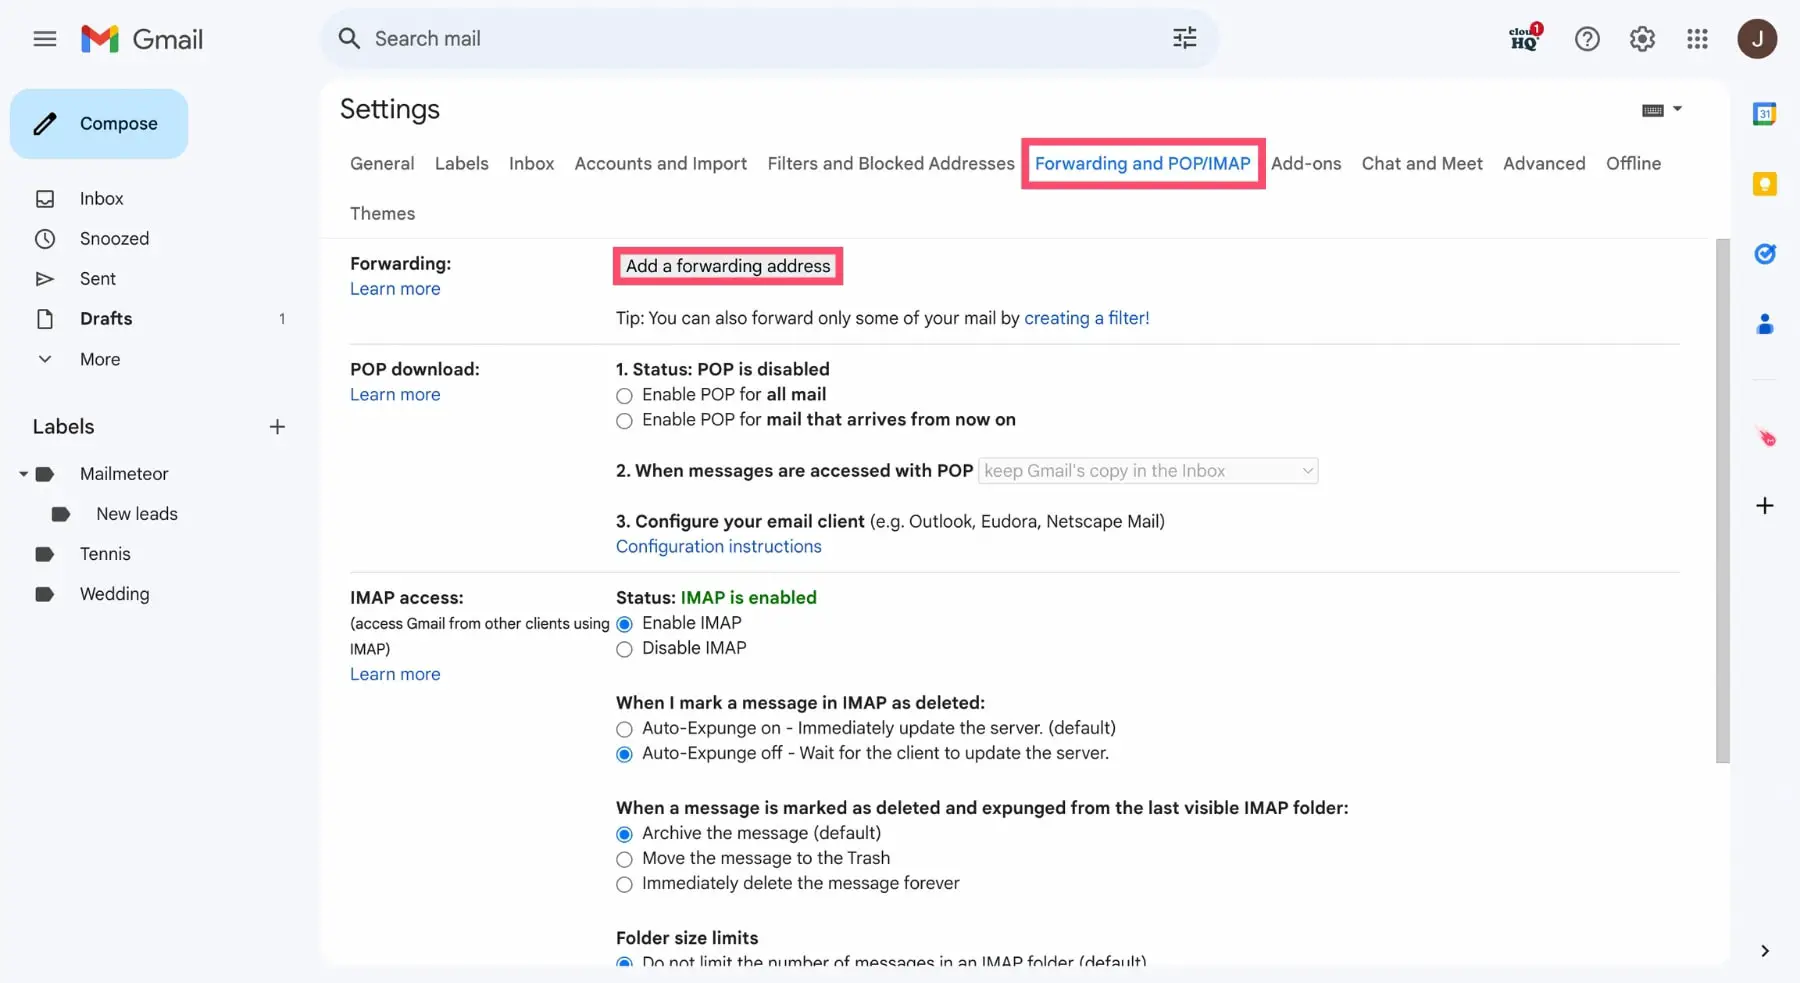
- Go to Forwarding and POP/IMAP, click Add forwarding address.
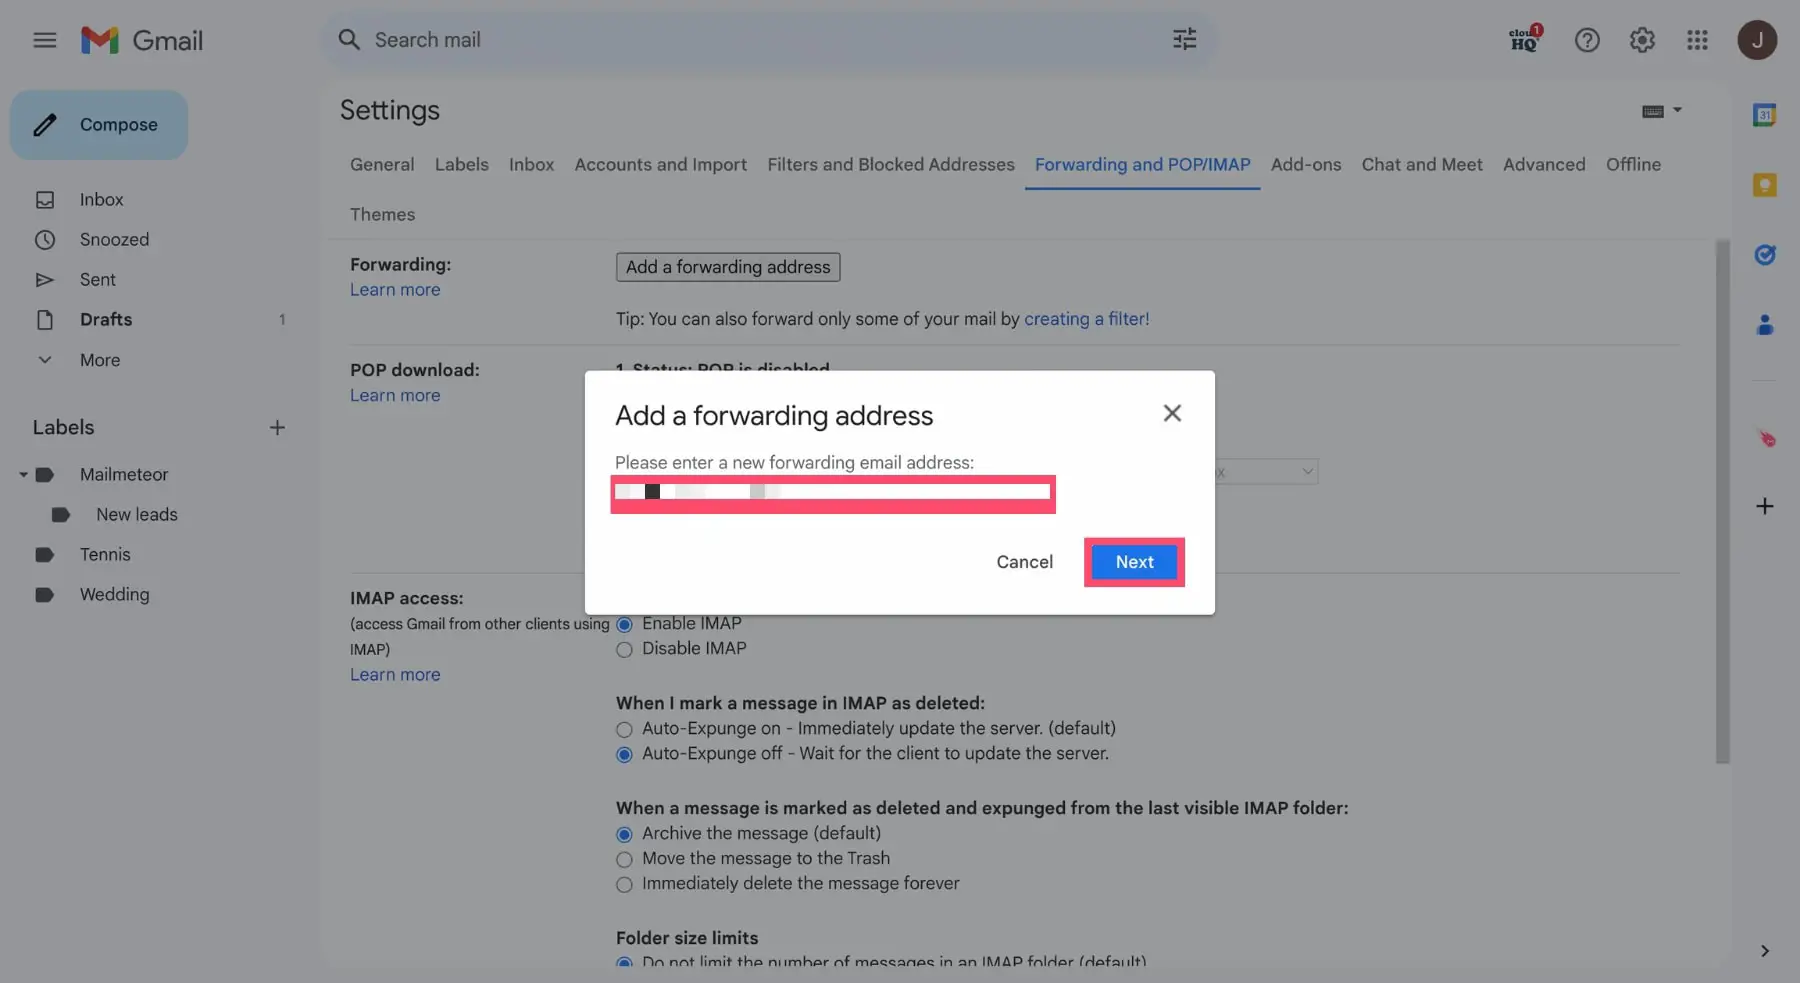
- Enter forwarding email, click Next.
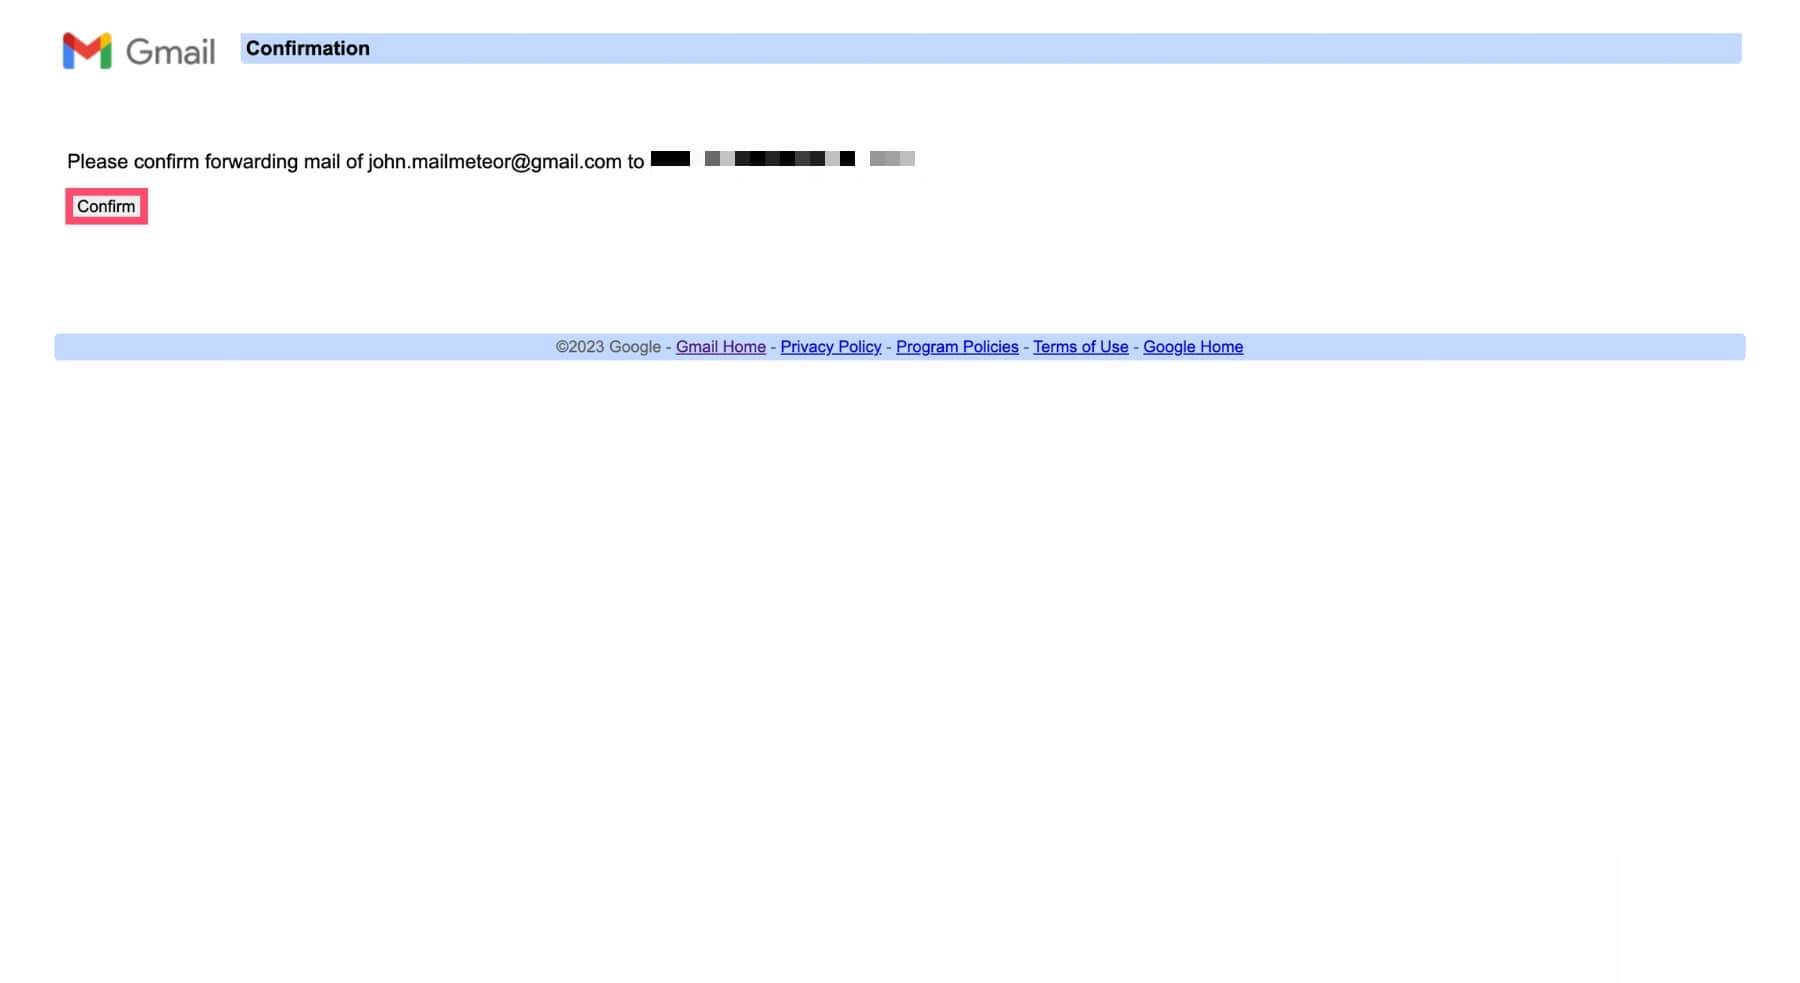
- Verify by opening Google’s email, clicking link, and confirming.
- Return to Gmail, go to Settings > See all settings > Forwarding and POP/IMAP. Choose forwarding email. Note: Gmail allows one forwarding address. Choose options like keeping a copy in inbox. We recommend keeping Gmail’s copy.
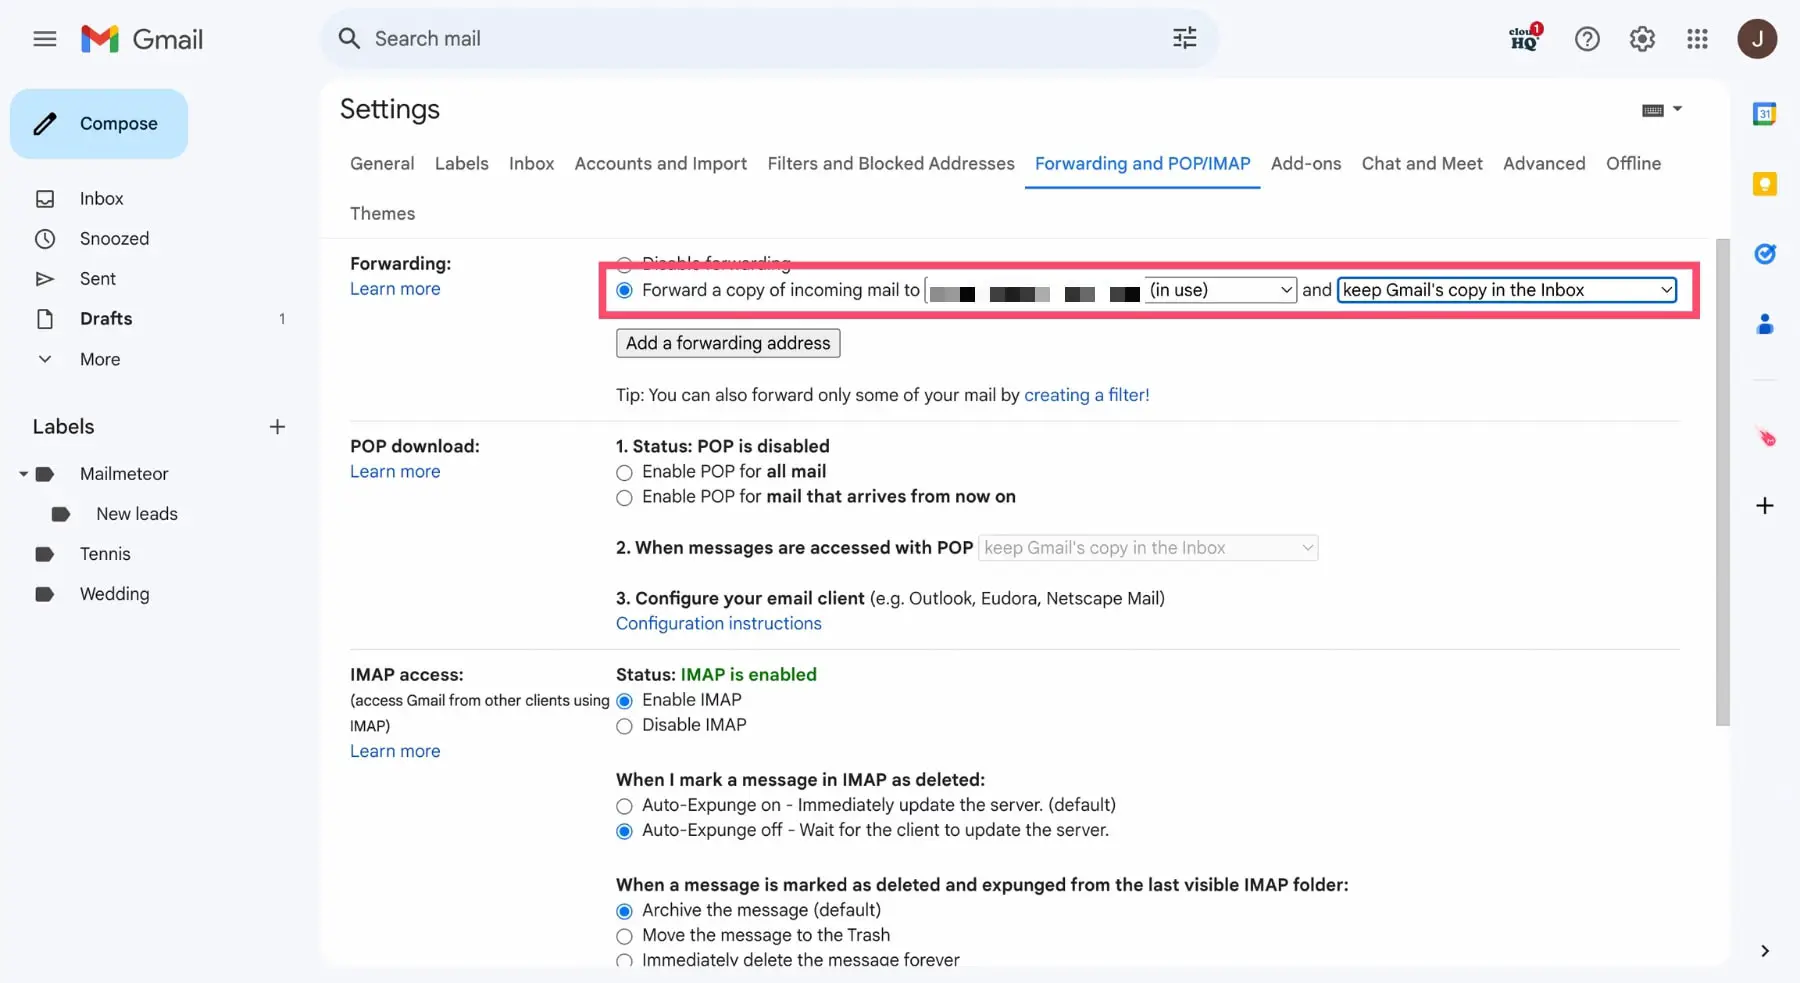
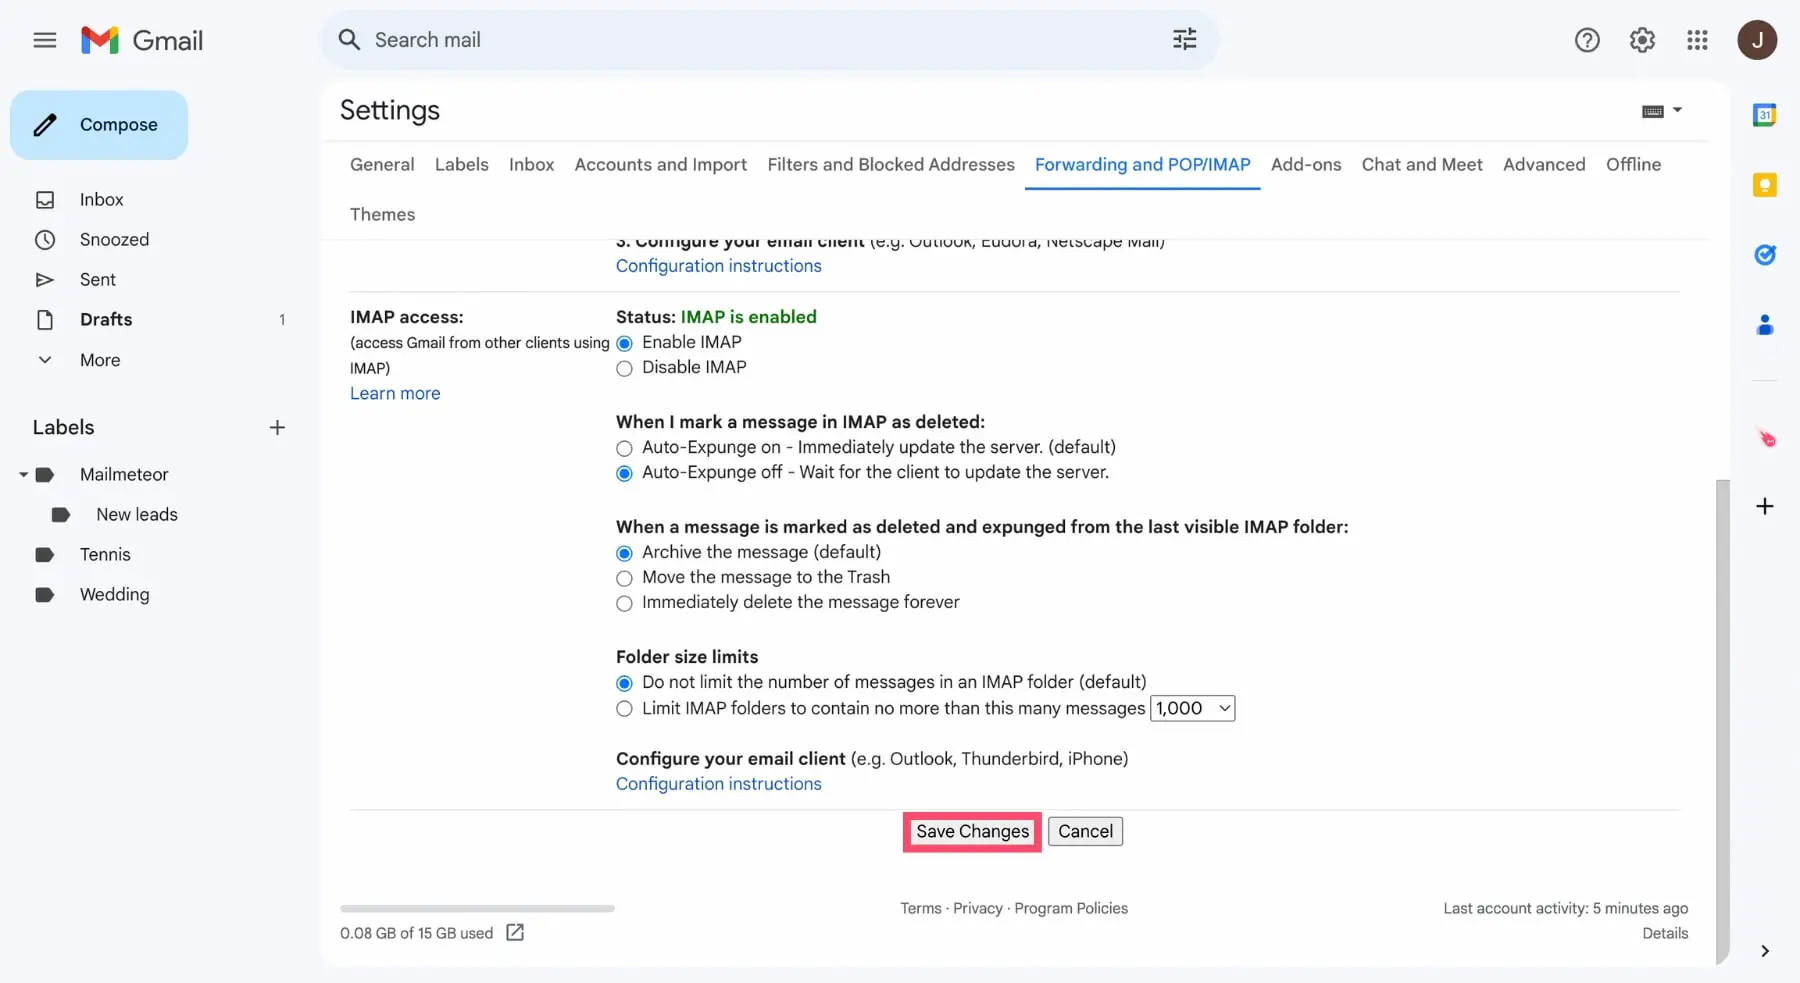
- Save changes.
How to create a forward filter in Gmail
- Log in to your Gmail.
- Click “Show search options” near the search bar.
- Customize your filter by recipients, subject, size, etc. For instance, filter emails with specific keywords or attachments. Then, click “Create filter.”
- Enable “Forward it to” and choose the email address for forwarding.
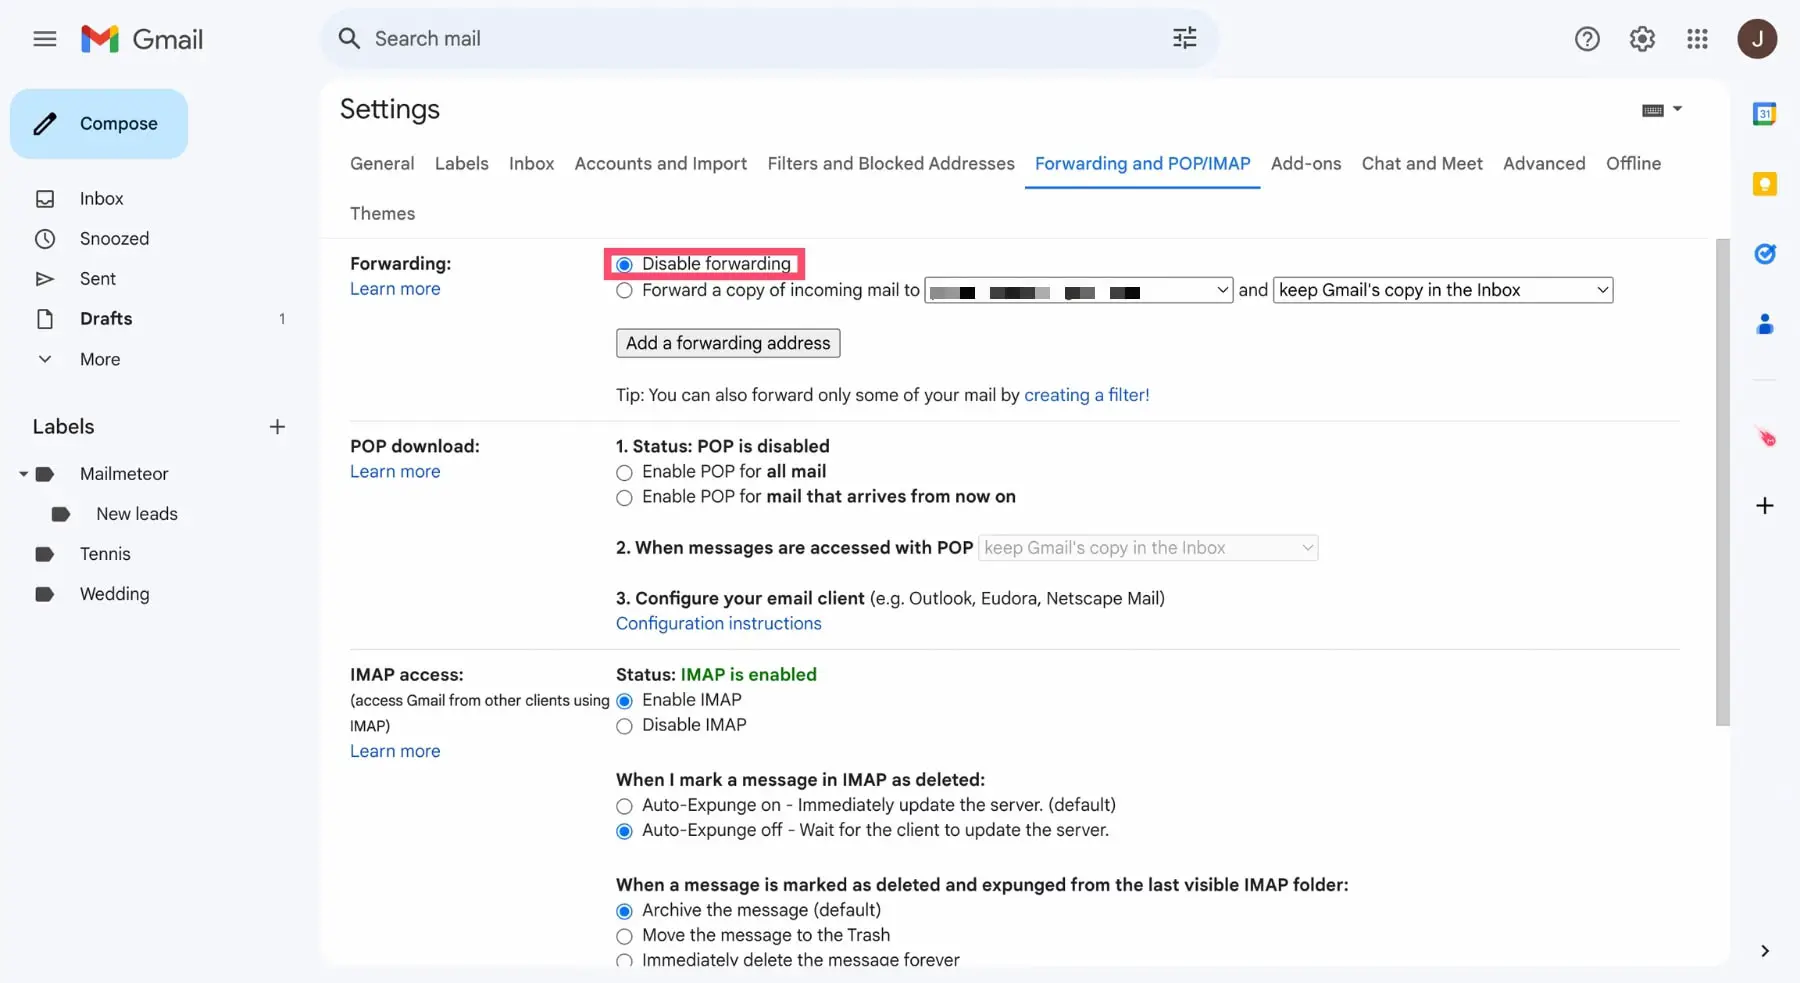
How to disable automatic email forwarding in Gmail
- Log in to your Gmail.
- Access Settings and choose “See all settings.”
- Navigate to the “Forwarding and POP/IMAP” tab.
- Disable forwarding in the “Forwarding” section.
Conclusion
In conclusion, to streamline email forwarding in Gmail, users can employ various methods. They can install the “Multi Email Forward” extension from the Chrome Web Store, set up forwarding addresses through Gmail settings, or create filters to automatically forward specific emails.
Whether through browser extensions or native Gmail features, forwarding emails efficiently enhances productivity and communication management.