
Uploading files to the server would be easier using an HTML form and a PHP script.
At first, the files are uploaded to a temporary directory, and then a PHP script moves them to the intended destination.
Configure The “php.ini” File
For file uploads to work, you’ll need to check a couple of PHP configuration settings first.
In this section, we’ll go over all of the important PHP file upload options. The php.ini file can be used to change these settings.
You can use the php_ini_loaded_file() function to find your php.ini file if you don’t know where it is.
Just put the following line in a PHP file on your server and open it in the browser.
<?php
echo php_ini_loaded_file();
?>
Here is an example from a setup file with some useful default settings.
; Whether to allow HTTP file uploads.
file_uploads = On

; Temporary directory for HTTP uploaded files.
; Will use system default if not set.
;upload_tmp_dir =

; Maximum allowed size for uploaded files.
upload_max_filesize = 16M

; Maximum number of files that can be uploaded via a single request
max_file_uploads = 20

; Maximum size of POST data that PHP will accept.
post_max_size = 20M

max_input_time = 60
memory_limit = 128M
max_execution_time = 30
The Key Settings
The following are the key settings in php.ini:
1. file_uploads
To enable file uploads, the file_uploads directive should be set to On. By default, this directive is enabled.
2. upload_tmp_dir
Sets the temporary directory where uploaded files will be stored. In the majority of instances, you do not need to adjust this parameter. If not specified, the system’s default temporary directory is used.
3. upload_max_filesize
The upload_max_filesize directive allows you to choose the maximum file size that can be uploaded.
This value is set to 2M (two megabytes) by default, however you can change it using the .htaccess file.
By today’s standards, two megabytes is insufficient, therefore you may need to raise this.
If you are unable to upload a file because its size exceeds upload max filesize, you must increase this number.
If so, you should also raise the post_max_size (see below).
4. max_file_uploads
You can define the maximum number of files that can be uploaded simultaneously. The default value is 20, which is reasonable.
5. post_max_size
The post_max_size directive lets you set the maximum data size for POST requests. Given that files are uploaded via POST requests, this value must be greater than the upload_max_filesize directive.
For instance, if upload max filesize is 16M (16 megabytes), post_max_size should be set to 20M.
6. max_input_time
It is the maximum time permitted for a script to parse the incoming data. It should be set to a sensible value if you are dealing with massive file uploads. 60 (60 seconds) is a good value for the majority of applications.
7. memory_limit
The memory limit directive specifies the maximum amount of memory a script is permitted to use.
If you’re experiencing problems with huge file uploads, you must ensure that the value of this directive is greater than that of the post_max_size directive.
The default value is 128M (128 megabytes), thus unless your post_max_size and upload_max_filesize are really huge, you don’t need to worry about this setting.
8. max_execution_time
It is the maximum amount of time a script is permitted to execute.
If you encounter problems when uploading huge files, consider raising this amount. 30 (30 seconds) should suffice for most applications.
Create the HTML Form
Once the PHP settings have been established, we can test the PHP file upload capabilities.
We will create two PHP files: index.php and upload.php.
The code responsible for showing the file upload form is contained in the index.php file. Uploading a file to the server is the responsibility of the upload.php file.
Additionally, a file will be uploaded to the uploaded files directory; so, this folder must exist and be writable by the web-server user.
In this part, we’ll look at the most important key parts of the index.php file.
<?php
session_start();
?>

  <?php
    if (isset($_SESSION['message']) && $_SESSION['message'])
    {
      echo '<p class="notification">'.$_SESSION['message'].'</p>';
      unset($_SESSION['message']);
    }
  ?>

  <form method="POST" action="upload.php" enctype="multipart/form-data">
    <div class="upload-wrapper">
      <span class="file-name">Choose a file: </span>
      <label for="file-upload"><input type="file" id="file-upload" name="uploadedFile"></label>
    </div>

    <input type="submit" name="uploadBtn" value="Upload" />
  </form>
By adding Bootstrap CSS, the form will look better. So, here is the entire code that makes up index.php.
<?php
session_start();
?>

<!DOCTYPE html>
<html>
<head>
  <title>PHP Tutorial</title>
  <meta content="width=device-width, initial-scale=1.0" name="viewport" >
  <link rel="stylesheet" href="css/bootstrap.css" type="text/css" />
</head>
<body>

<div class="container mt-5">
  <div class="row">
	<div class="col-md-8 offset-2">
	  <div class="card">
		<!-- This is a card header -->
		<div class="card-header">
		  <h3 class="text-center">PHP File Upload</h3>
		</div>
		<!-- End of card header -->

		<!-- This is a card body -->
		<div class="card-body">
		  <?php
			if (isset($_SESSION['message']) && $_SESSION['message'])
			{
			  echo '<p class="notification">'.$_SESSION['message'].'</p>';
			  unset($_SESSION['message']);
			}
		  ?>
		  <form method="POST" action="upload.php" enctype="multipart/form-data">

			<div class="form-group">
			  <div class="upload-wrapper">
				<label for="file-upload"><input type="file" id="file-upload" name="uploadedFile"></label>
			  </div>
			</div>

			<input class="btn btn-primary btn-lg btn-block" type="submit" name="uploadBtn" value="Upload" />
		  </form>
		</div>
		<!-- End of card body -->

	  </div>
	</div>
  </div>
</div>

</body>
</html>
The enctype attribute of the <form> tag has a significant difference. It must be set to multipart/form-data because the form includes a file field.
The enctype parameter indicates the type of encoding to be used when the form is submitted, and it can take one of the following three values: utf-8, utf-16, or utf-32.
application/x-www-form-urlencoded: This is the default value for theenctypeproperty when it is not specifically set. In this instance, characters are encoded prior to being transmitted to the server. If your form does not contain a file field, you should use this value for theenctypeattribute.
multipart/form-data: When you set theenctypeattribute tomultipart/form-data, you can use the POST method to upload files. It also makes sure that when the form is sent, the characters are not encoded.
text/plain: This isn’t used very often. In this setting, the data is sent without being encrypted.
Next, we sent out the file field, which lets you choose a file from your computer.
<input type="file" id="file-upload" name="uploadedFile">A message was also written at the top of the form.
This message tells you how the file upload is going, and the upload.php script will store it in a session variable. We will talk more about this in the next part.
<?php
    if (isset($_SESSION['message']) && $_SESSION['message'])
    {
      echo '<p class="notification">'.$_SESSION['message']).'</p>';
      unset($_SESSION['message']);
    }
  ?>
That’s all there is to the index.php file. In the next section, we’ll look at how the server should handle the file that was uploaded.
Create the upload logic
In the last section, we made the HTML form that lets you upload a file from your computer and is shown on the client side.
In this part, we’ll look at the server-side equivalent, which lets you work with the file that was uploaded.
Use the code in the file upload.php on GitHub. We’ll go through that file and look at the important parts.
In the upload.php file, we’ve checked whether it’s a valid POST request in the first place.
if (isset($_POST['uploadBtn']) && $_POST['uploadBtn'] == 'Upload') {
...
}
When a file is uploaded in PHP, all the information about it is put into the $_FILES superglobal variable.
It starts out as an array and could have the following information for a file upload to go well.
tmp_name: This variable stores the temporary path where the file is uploaded.
name: This variable stores the real name of the file.
size: Shows the size of the file that was uploaded in bytes.
type: The mime type of the uploaded file is stored in this field.
error: If an error occurs during file upload, the corresponding error message is stored in this variable. In the event of a successful file upload, this variable holds0, which may be compared with theUPLOAD_ERR_OKconstant.
After making sure the POST request is correct, we check to see if the file upload worked.
if (isset($_FILES['uploadedFile']) && $_FILES['uploadedFile']['error'] === UPLOAD_ERR_OK) {
...
}
The $_FILES variable is a multidimensional array, with the first element being the name of the file field and the second element containing information about the uploaded file.
If the file upload works, we put some information about the uploaded file into a few variables.
$fileTmpPath = $_FILES['uploadedFile']['tmp_name'];
$fileName = $_FILES['uploadedFile']['name'];
$fileSize = $_FILES['uploadedFile']['size'];
$fileType = $_FILES['uploadedFile']['type'];
$fileNameCmps = explode(".", $fileName);
$fileExtension = strtolower(end($fileNameCmps));
In the code above, we also found the file’s extension and put it into the $fileExtension variable.
Since the uploaded file could have spaces or other special characters, it is best to clean up the filename, which is what we have done in the code below.
$newFileName = md5($fileName . time()) . '.' . $fileExtension;It is important to limit the types of files that can be uploaded to certain extensions and not let anyone upload anything.
We did this by comparing the file’s extension to a list of extensions that we wanted to let people upload.
$allowedfileExtensions = array('jpg', 'jpeg', 'gif', 'png', 'pdf', 'zip', 'txt', 'xls', 'xlsx', 'doc', 'docx');
if (in_array($fileExtension, $allowedfileExtensions)) {
...
}
Lastly, we use the move_uploaded_file function to move the uploaded file to a specific location of our choosing.
$uploadFileDir = './files/';
$dest_path = $uploadFileDir . $newFileName;

if(move_uploaded_file($fileTmpPath, $dest_path))
{
  $message ='Successfully Uploaded.';
}
else
{
  $message = 'Error uploading file. Check your server\'s upload directory.';
}
The function move_uploaded_file needs two arguments. The first argument is the name of the file that was uploaded, and the second is the path where you want the file to go.
Last but not least, we send the user to the index.php file. Also, we put the right message in the session variable, which will be shown to users in the index.php file after the redirection.
How it all works together?
Remember to create the files directory and provide the web-server user permission to write to it.
Next, execute the index.php file, which should display the following file upload form:
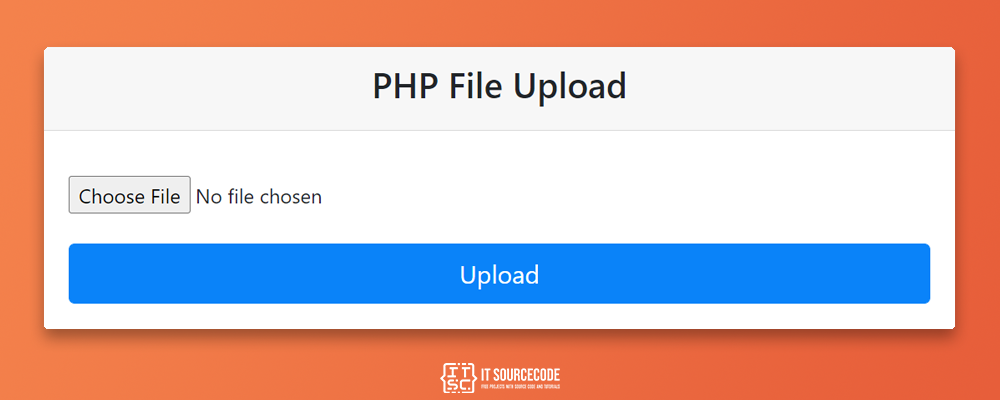
Clicking the Choose File button should bring up a dialog window where you can choose a file from your computer.
Select a file with one of the supported file extensions and click the Upload button.
That should send the form, and if everything works, you should see the uploaded file in the files directory.
You could also try uploading other files with extensions that are not allowed to see if our script stops those uploads.
Resolving Common Errors
During a file upload, many things can go wrong, leading to an error.
Using $_FILES['uploadedFile']['error'], you can find out what went wrong during the upload. Here is why those mistakes were made:
1. File Is Too Large
The error codes UPLOAD_ERR_INI_SIZE and UPLOAD_ERR_FORM_SIZE show up when the size of a file uploaded is bigger than the size set in php.ini or the HTML form.
You can fix this error by letting users know about the upload size limits or by making them bigger.
2. Temporary Folder Is Missing
When there is no temporary folder to upload the file to, UPLOAD_ERR_NO_TMP_DIR is shown.
When there is no file to upload, the UPLOAD_ERR_NO_FILE code is shown.
3. Partial Upload or Can’t Write to Disk
If the file can only be uploaded partially, you will receive UPLOAD_ERR_PARTIAL.
If the file cannot be written to the disk, you will receive UPLOAD_ERR_CANT_WRITE.
4. A PHP Extension Stopped the File Upload
Oftentimes, you will receive the error UPLOAD_ERR_EXTENSION as a result of a file upload being halted by an extension.
To determine which extension created this issue, you will need to conduct additional research.
The complete code
Below is the complete code of index.php and upload.php that will display a message on the upload page regardless of whether the upload was successful or unsuccessful. $_SESSION['message'] stores the information on the success or failure of the upload.
index.php:
<?php
session_start();
?>

<!DOCTYPE html>
<html>
<head>
  <title>PHP Tutorial</title>
  <meta content="width=device-width, initial-scale=1.0" name="viewport" >
  <link rel="stylesheet" href="css/bootstrap.css" type="text/css" />
</head>
<body>

<div class="container mt-5">
  <div class="row">
	<div class="col-md-8 offset-2">
	  <div class="card">
		<!-- This is a card header -->
		<div class="card-header">
		  <h3 class="text-center">PHP File Upload</h3>
		</div>
		<!-- End of card header -->

		<!-- This is a card body -->
		<div class="card-body">
		  <?php
			if (isset($_SESSION['message']) && $_SESSION['message'])
			{
			  echo '<p class="notification">'.$_SESSION['message'].'</p>';
			  unset($_SESSION['message']);
			}
		  ?>
		  <form method="POST" action="upload.php" enctype="multipart/form-data">

			<div class="form-group">
			  <div class="upload-wrapper">
				<label for="file-upload"><input type="file" id="file-upload" name="uploadedFile"></label>
			  </div>
			</div>

			<input class="btn btn-primary btn-lg btn-block" type="submit" name="uploadBtn" value="Upload" />
		  </form>
		</div>
		<!-- End of card body -->

	  </div>
	</div>
  </div>
</div>

</body>
</html>
upload.php:
<?php
session_start();

$message = '';
if (isset($_POST['uploadBtn']) && $_POST['uploadBtn'] == 'Upload')
{
  if (isset($_FILES['uploadedFile']) && $_FILES['uploadedFile']['error'] === UPLOAD_ERR_OK)
  {
    $fileTmpPath = $_FILES['uploadedFile']['tmp_name'];
    $fileName = $_FILES['uploadedFile']['name'];
    $fileSize = $_FILES['uploadedFile']['size'];
    $fileType = $_FILES['uploadedFile']['type'];
    $fileNameCmps = explode(".", $fileName);
    $fileExtension = strtolower(end($fileNameCmps));

    $newFileName = md5($fileName . time()) . '.' . $fileExtension;

    $allowedfileExtensions = array('jpg', 'jpeg', 'gif', 'png', 'pdf', 'zip', 'txt', 'xls', 'xlsx', 'doc', 'docx');

    if (in_array($fileExtension, $allowedfileExtensions))
    {
      $uploadFileDir = './files/';
      $dest_path = $uploadFileDir . $newFileName;

      if(move_uploaded_file($fileTmpPath, $dest_path))
      {
        $message ='Successfully Uploaded';
      }
      else
      {
        $message = 'Error uploading file. Check your server\'s upload directory.';
      }
    }
    else
    {
      $message = 'Upload failed. Allowed file types: ' . implode(', ', $allowedfileExtensions);
    }
  }
  else
  {
    $message = 'Error uploading file. Check the following error.<br>';
    $message .= 'Error: ' . $_FILES['uploadedFile']['error'];
  }
}
$_SESSION['message'] = $message;
header("Location: index.php");
Frequently Ask Questions (FAQs)
What is $_ files in PHP?
$_FILES is an associative array containing files uploaded via the HTTP POST technique.
Uploading a file requires HTTP POST method form with multipart/form-data enctype attribute.
How do I upload a file to a server?
The function move_uploaded file() transfers the uploaded file to a new location.
The move_uploaded file() function verifies internally whether the file was uploaded through a POST request.
If the file is uploaded via a POST request, it gets relocated.
This function checks to ensure that the file designated by from is a valid upload file (meaning that it was uploaded via PHP’s HTTP POST upload mechanism).
If the file is valid, it will be moved to the filename given by to.
How does PHP file upload work?
Users can upload files to the server using a PHP script in combination with an HTML form.
A PHP script uploads files to a temporary directory before relocating them to the desired location.
The user accesses the HTML page containing a text file, a browse button, and a submit button.
Related Articles
- How to Upload file using PHP with Advanced Example
- File Upload In PHP With Source Code
- Upload Multiple Files in PHP /MYSQL
- Uploading File Without Refreshing Page in PHP
- Creating a file in PHP With Examples
Summary
This tutorial has taught us how to upload files using PHP. Additionally, we have learned the location of the php.ini file and how to configure it.
Lastly, if you want to learn more about PHP Arrays, please leave a comment below. We’ll be happy to hear it!