Do you want to group objects in your presentation, so it’s clean and easy to arrange elements? This guide will walk you through the steps to group and ungroup shapes in PowerPoint, as well as provide tips and tricks for maximizing the use of this feature.
Grouping and ungrouping shapes in PowerPoint is a useful technique for organizing and rearranging the elements in your presentations.
What is Grouping in PowerPoint?
Grouping shapes in PowerPoint is a simple process that involves selecting two or more shapes and combining them into a single object. The grouped shapes behave as a single unit, and any changes you make to the group (such as moving or resizing) will affect all of the shapes within the group.
Particularly, Grouping is useful when you have several shapes that are related to each other, such as a flowchart, a diagram, or a picture with multiple elements.
How to group in PowerPoint using Ribbon
To group objects using the Ribbon follow the simple steps below.
- Select objects to group.
In your presentation slides, Hold Shift or Hold Ctrl while clicking the pictures or shapes, or other objects you want to group.
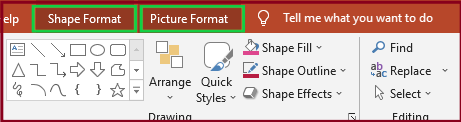
- Click the format tab.
After selecting your objects a format tab will appear Click it on either the Drawing Tools Format, Drawing Format, Shape Format, Picture Tools Format, or Picture Format tab in the Ribbon.

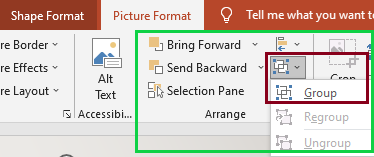
- Find Arrange group.
In the Arrange group, click Group. A drop-down menu appears.

- Select group button.
Select Group. The selected objects will be grouped together and have a single set of selection and rotation handles

how To Group objects using the context menu
To group objects using the context menu follow the given steps below:
- Either on Normal View or Slide Master View of your PowerPoint presentations click the shapes or images or objects you want to group.
- Right-click your selected objects then a context menu will appear.
- Select Group then on the sub-menu click Group.
This will group together the pictures, shapes, or objects you selected.
How to Group objects using a keyboard shortcut
One simple easiest way to group items in PowerPoint is using the keyboard shortcut. This is an edge if you want to have an efficient way of completing your task.
- In your presentation slides, select the shapes or items you want to group.
- Press Ctrl + G. The chosen objects will be grouped together and will share a single set of selection and rotation handles.

How to Ungroup in PowerPoint
Ungrouping objects is the opposite of grouping. It breaks apart your grouped set objects down into individual pieces so you can format or rearrange them in any way you would like.
- To ungroup a group of objects, simply select your group of objects (only grouped objects can be ungrouped) and hit CTRL + SHIFT + G on your keyboard
You can also Ungroup your objects using your mouse. To do that, simply:
- Right-Click a set of grouped pictures or shapes or other objects you have
- Select the Group command
- Select Ungroup
As a result, your group of objects will be converted back into individual objects or a smaller subset of groups.
Note: You might need to ungroup your set of objects multiple times to get back to the individual pieces.
In addition to this, after the objects are ungrouped you can regroup objects which previously part of the group.
To do this:
- Right-click any of the objects which are previously part of the group.
- Select the group Option on the context menu and click Regroup on the sub-menu.
- or Simply press CTRL + SHIFT + J.
This will regroup the selected objects. However, It is more common to use group and ungroup commands.
Conclusion
In conclusion, this tutorial on how to group objects in Powerpoint is a simple process but can contribute to an efficient and organized object in your presentations.
By following the guide we provided above I’m sure you can now have multiple items in a group.
I think we already covered all we need to know in this tutorial. I hope you have learned something new today. For more educational tutorials like this feel free to visit our website.
Thank you for reading 🙂

Glay Eliver
Programmer & Technical Writer at PIES IT Solution
Glay Eliver is a programmer and writer at PIES IT Solution, author of over 600 tutorials at itsourcecode.com. Specializes in JavaScript tutorials, Microsoft Office how-tos (Excel, Word, PowerPoint), and Python error debugging covering ImportError, TypeError, AttributeError, ModuleNotFoundError, and JavaScript ReferenceError. Authored several of the site’s highest-traffic Excel and MS Office reference articles.
Expertise: JavaScript · MS Excel · MS Word · MS PowerPoint · Python · Python ImportError · Python TypeError · Python AttributeError · ModuleNotFoundError · JavaScript ReferenceError · Pygame · View all posts by Glay Eliver →