In this article, we will discuss how to curve text in PPT (PowerPoint) in a step-by-step manner. We will also cover various techniques to curve text.
Texts play a crucial role in any presentation, and adding curves to them can make it even more engaging and eye-catching.
Now, let’s get started…
What is curve text in ppt?
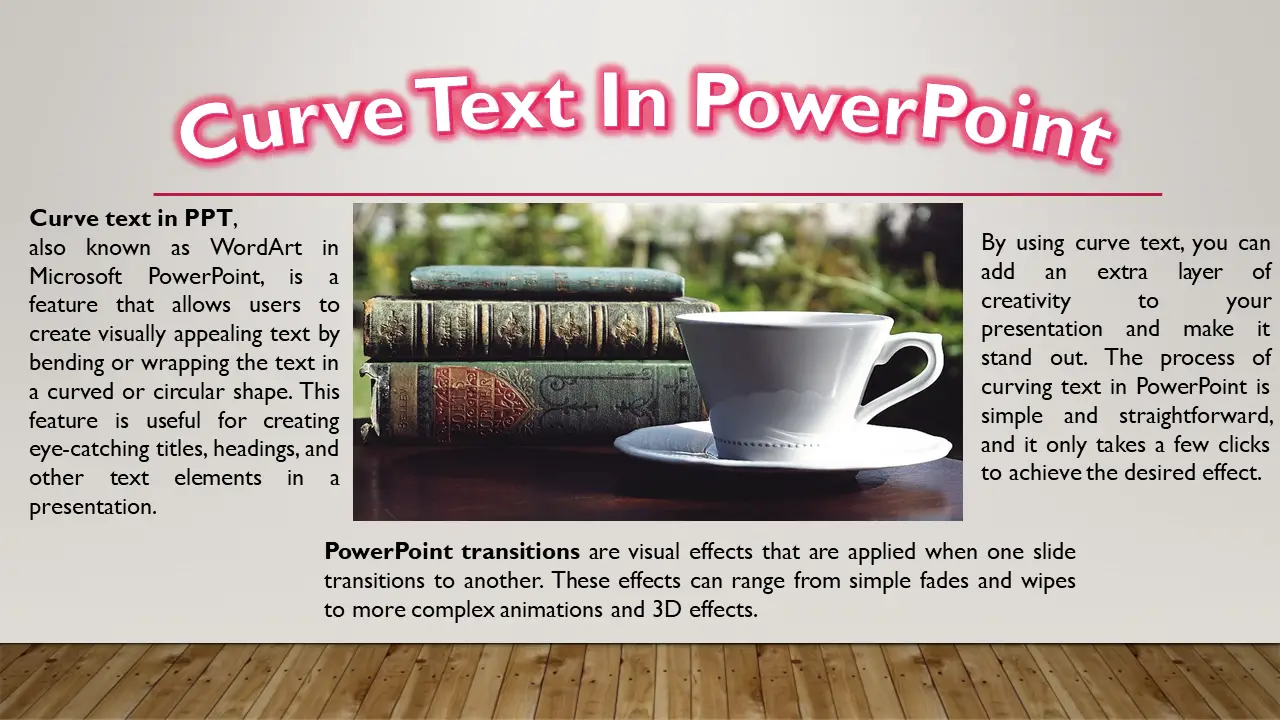
Curve text in PPT, also known as WordArt in Microsoft PowerPoint, is a feature that allows users to create visually appealing text by bending or wrapping the text in a curved or circular shape. This feature is useful for creating eye-catching titles, headings, and other text elements in a presentation.
By using curve text, you can add an extra layer of creativity to your presentation and make it stand out. The process of curving text in PowerPoint is simple and straightforward, and it only takes a few clicks to achieve the desired effect.
When to use curved text in Powerpoint
Curved text in PPT can be used in a variety of ways to enhance the visual appeal of your presentations. Here are some common uses for curved text in PowerPoint:
- Titles and headings: Curved text can be used to create unique and visually appealing headings and titles for your presentation slides.
- Infographics: If you want to create an infographic that stands out, curved text can help you achieve this by adding a creative touch to your data visualizations.
- Shapes and logos: You can use curved text to create custom shapes or logos for your presentation. This can help you create a consistent visual style for your brand or company.
- Call-to-action text: By using curved text, you can create a call-to-action that is both eye-catching and attention-grabbing, encouraging your audience to take a specific action.
- Decorative elements: You can use curved text to add decorative elements to your slides, such as borders, dividers, or text boxes.
- Attention-grabbing text: Curved text can be used to create text elements that draw the viewer’s attention, such as pull quotes or key messages.
Curved text in PPT is a versatile tool that can be used in a variety of ways to enhance the visual appeal of your presentations.
Moving on we will walk through how to curve text…
How to Curve Text in PPT
In this guide, we will show you step-by-step how to curve text in PowerPoint, so that you can add a unique touch to your presentations.
- Insert Text Box
To do this, you can go to the “Insert” tab and insert a “Text Box“. You can then draw a text box by clicking and dragging the cursor. Once you have created the text box, you can type the text that you want to curve.

- Format Text Box
To do this, you need to select the text box and then go to the “Shape Format” tab. From here, you can access the text box properties and change the shape, size, and color of the text box.

- Curve Text
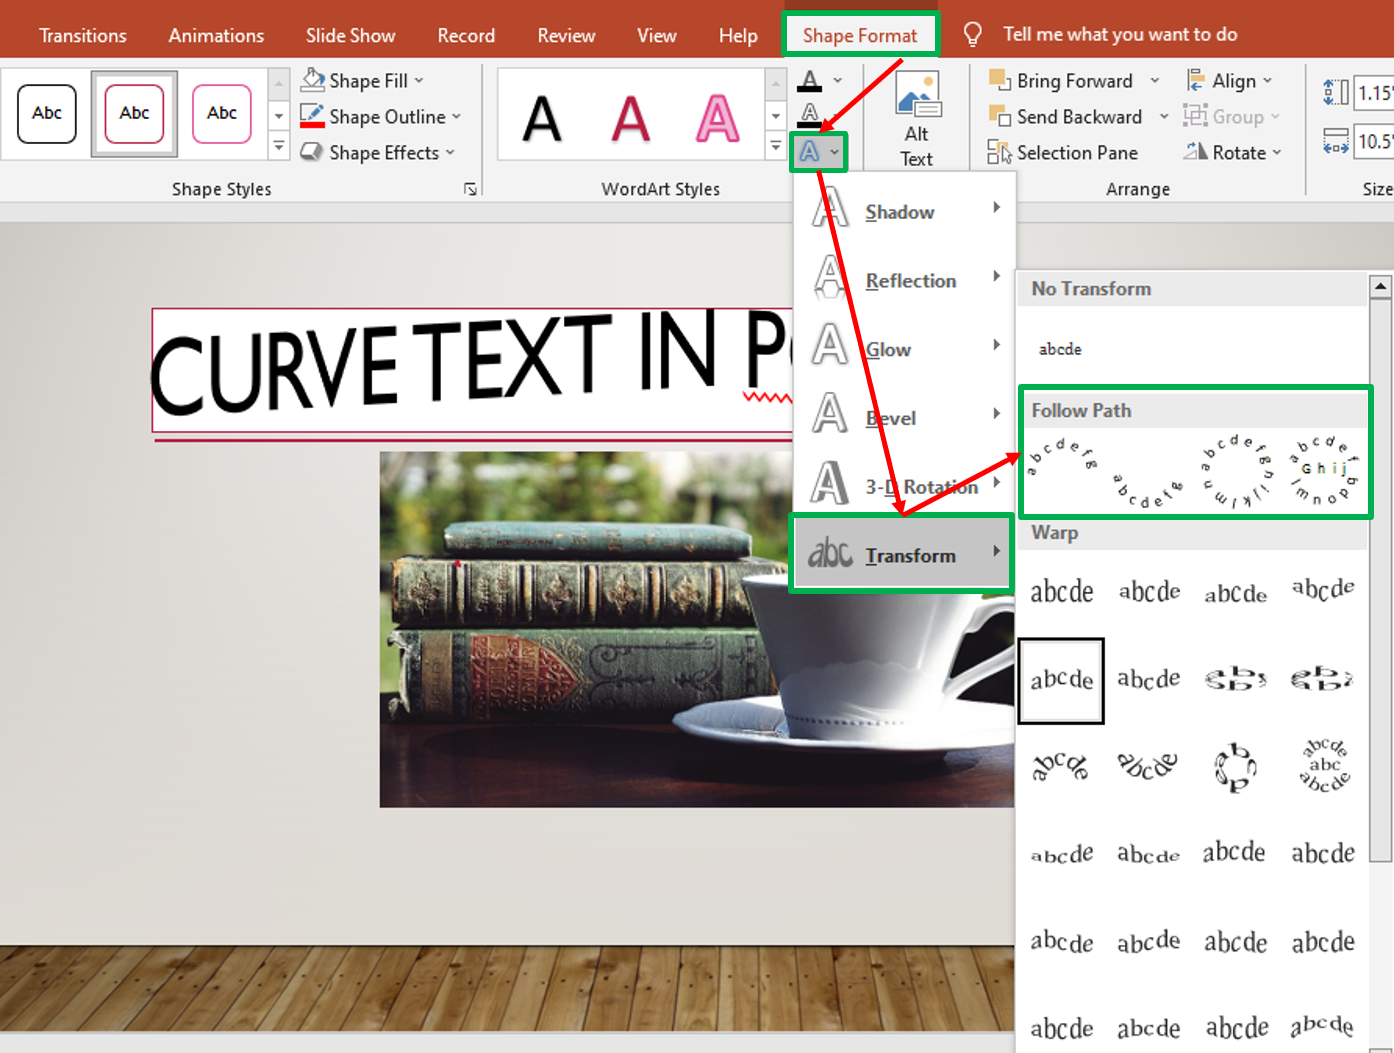
It’s time to curve the text. To do this, go to the “Shape Format” tab and select “Text Effects.” From the drop-down menu, select “Transform.” Then, select the “Follow Path” option and choose the curved path that you want the text to follow.

- Adjust Text
You can add a text style to your curved text. To do this, go to the “Shape Format” tab and select “Text Effects” and WordArt styles as you can see below. From the drop-down menu, choose a text style that you like. For example, we chose the glow text effects.

- Add more text content and adjust the text.
Finally, we have created a Curve text slide title in our presentation.


Alternatively, we can also use another technique in curving text by using…
Using WordArt To Curve text
Curving text using WordArt in Powerpoint is easy and convenient to use. You just need to complete the steps below.
- Go to the “Insert” tab on the ribbon and select “WordArt” button in the “Text” group.
- Choose the style of WordArt you want to use.
- Type in the text you want to curve.
- With the WordArt text selected, go to the “Shape Format” tab on the ribbon.
- In the “Text Effects” group, click on the “Transform” option.
- Select “Follow Path” and choose the desired path shape, such as a curved line.
- Adjust the placement and size of the curved text as needed.
Note: The exact steps may vary depending on the version of PowerPoint you’re using.
Best Practices for Curving Text in PowerPoint
Here are a few best practices to keep in mind when curving text in PowerPoint:
1. Keep it Simple
When curving text in PowerPoint, it’s best to keep things simple. Avoid using too many curves or too many different types of curves, as this can make your presentation look cluttered and confusing.
2. Use Contrasting Colors
To make your curved text stand out, use contrasting colors. For example, if you have a light background, use a darker color for your text.
3. Use Appropriate Fonts
When choosing a font for your curved text, make sure that it’s appropriate for the context of your presentation. For example, if you’re creating a professional presentation, avoid using whimsical or playful fonts.
4. Balance Your Design
When curving text in PowerPoint, it’s important to balance your design. Make sure that your text doesn’t take up too much space on the slide and that it doesn’t overpower other elements of your design.
Conclusion
In conclusion, curving text in PowerPoint can add an extra touch of creativity to your presentations and help you create engaging and professional-looking slides.
By following the steps outlined in this guide and keeping the best practice in curving text will definitely add a professional touch to your presentations and make your text stand out.
If you want this kind of tutorial we also have MS Word and Excel tutorials, feel free to visit our website.
Thank you for reading!

Glay Eliver
Programmer & Technical Writer at PIES IT Solution
Glay Eliver is a programmer and writer at PIES IT Solution, author of over 600 tutorials at itsourcecode.com. Specializes in JavaScript tutorials, Microsoft Office how-tos (Excel, Word, PowerPoint), and Python error debugging covering ImportError, TypeError, AttributeError, ModuleNotFoundError, and JavaScript ReferenceError. Authored several of the site’s highest-traffic Excel and MS Office reference articles.
Expertise: JavaScript · MS Excel · MS Word · MS PowerPoint · Python · Python ImportError · Python TypeError · Python AttributeError · ModuleNotFoundError · JavaScript ReferenceError · Pygame · View all posts by Glay Eliver →