
Do you have any image or object that you want to surround with text? In this tutorial, we will learn PowerPoint text wrapping, several steps, and alternatives mimicking wrap text.
So, let’s get started…
What is Text Wrapping in PowerPoint?
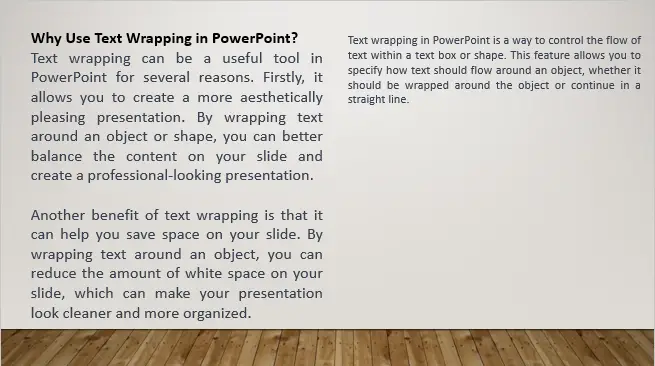
Wrapping Text in PowerPoint is a formatting function which positioned around other objects, such as images, shapes, or charts, on a slide.
The text can be wrapped around the object, over the object, or behind the object. This allows you to place objects and text on a slide in a way that is aesthetically pleasing and makes the best use of the available space.
The Different Types of Text Wrapping
There are several types of text wrapping in PowerPoint, each with its own specific use case. The three most common types of text wrapping are:
Square Wrapping
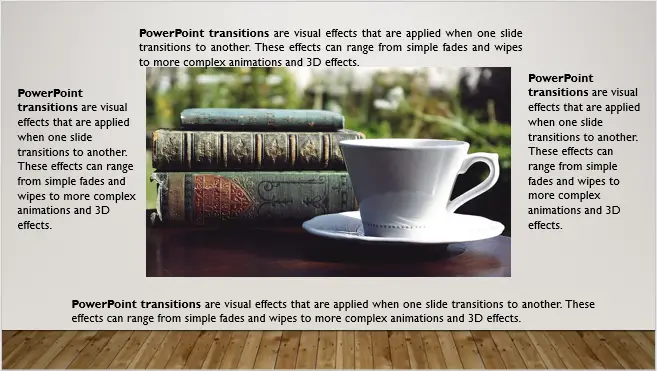
It is the default text wrapping option in PowerPoint. With square wrapping, the text appears in a rectangle around the object, with the edges of the text box touching the edges of the object.
Tight Wrapping
It is similar to square wrapping, but the text is wrapped more closely around the object. This type of text wrapping is useful when you want to make text and images appear as if they’re part of the same object.
Behind Text Wrapping
It is a unique text wrapping option that allows text to appear behind an object, rather than in front of it. This type of wrapping is ideal when you want to create a subtle background effect with text, or when you want to make an image appear to be a part of the text.
Why Wrap Text in PowerPoint?
You may consider using Wrap text in Powerpoint for the following reasons:
- This helps create a visually appealing and organized layout for your presentation.
- Additionally, wrapping text around objects can help draw attention to specific parts of a slide and provide context for the content being presented.
- By using text wrapping, you can create dynamic and engaging presentations that effectively communicate your message.
Now we’ll walk through how to wrap text…
How to wrap text in PowerPoint
Text wrapping is not directly supported in PowerPoint, but you can accomplish it with these techniques. Each is only a workaround solution, you may need to experiment to get just the right look.
So the following methods are alternatives to accomplished text wrapping in PowerPoint.
How to wrap text in a text box
The simplest way to wrap text in PowerPoint is to create a text box and then format your text in that box. To wrap text in a text box on a PowerPoint slide, complete the following steps:
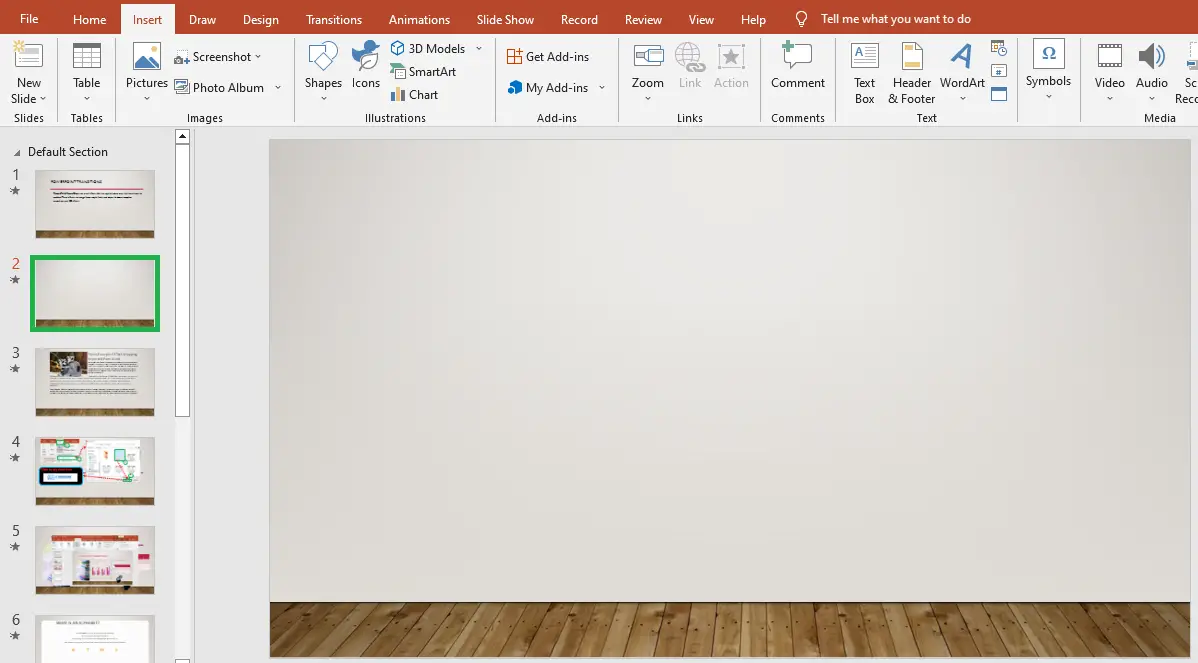
- Construct a blank slide in Microsoft PowerPoint.
Create a blank slide by clicking Insert, New Slide, and select “Blank” in the menu that appears.
- Click Insert and then Text Box.
Go to the Insert tab within the top menu, and then click Text Box. To draw a text box, click your mouse in the upper left corner, hold the button down, and drag the box to the bottom right corner.

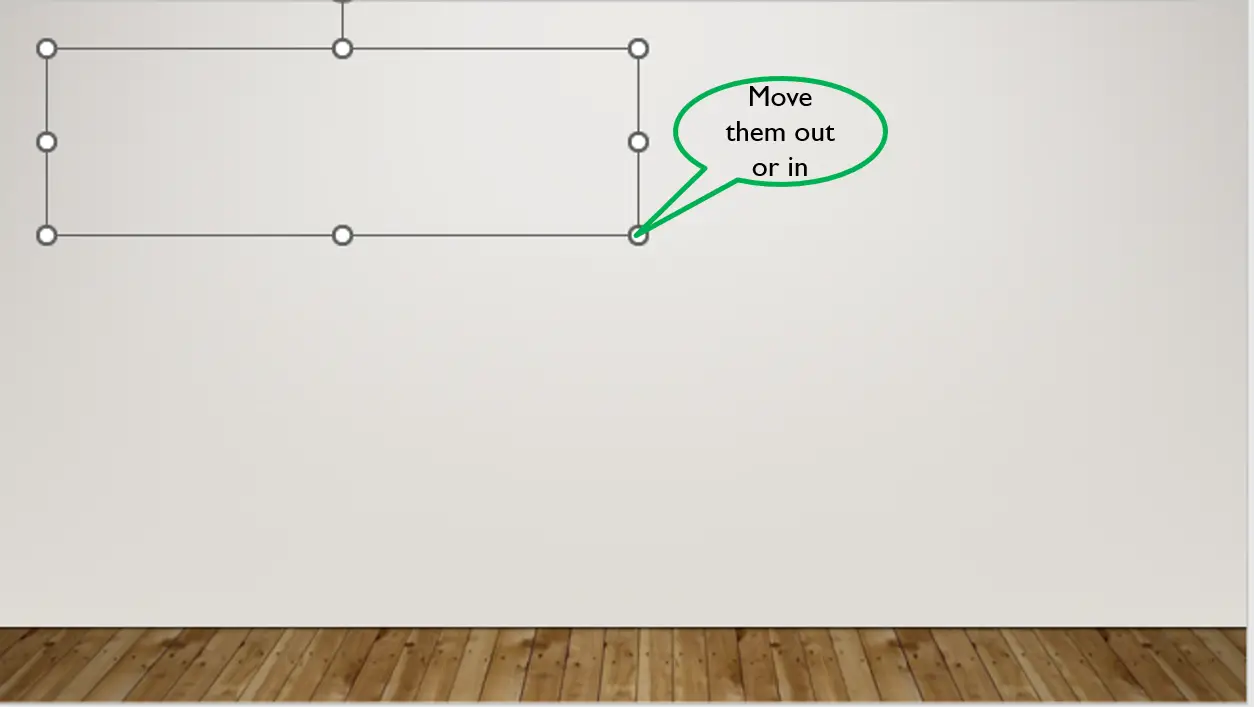
- Resize your textbox.
Select one of the corner circles and drag it in or out to enlarge or reduce the size of your text box.

- Enter text on the text box.
Enter your text in the text box. Then, click anywhere in the box and press CTRL + A to select all text. On the main menu, select the Justify option (an icon with four lines of equal length under the Home menu). Your text is now wrapped to fit within the text box’s borders.


How to wrap text around an image in PowerPoint
This method will work in every version of PowerPoint. You can paste text boxes all around a rectangular image to simulate text wrapping.
Here’s a step-by-step plan for this technique …
- Insert an image onto a slide.
- Select the image by clicking on it.
- Go to the “Picture Format” tab in the “Picture Tools” section.
- In the “Arrange” group, click on the “Send to Back” option.
- Next, draw a text box over the image and type or paste text into it.
- Place a Text Box on each side, as well as at the top and bottom, to create the illusion that the text wraps around the image.
- You can do this by going to the Insert tab and then click Text Box. Copy and paste your text into the text boxes, then drag it around the slide to where you want it.
Note: The steps may vary slightly depending on the version of PowerPoint you are using.
Wrap Text in PowerPoint From Microsoft Word
When you are using PowerPoint 2019, 2016 or 2013 import wrapped text from Word to Powerpoint.
1. First, open the Powerpoint slide where you want to do text wrapping.
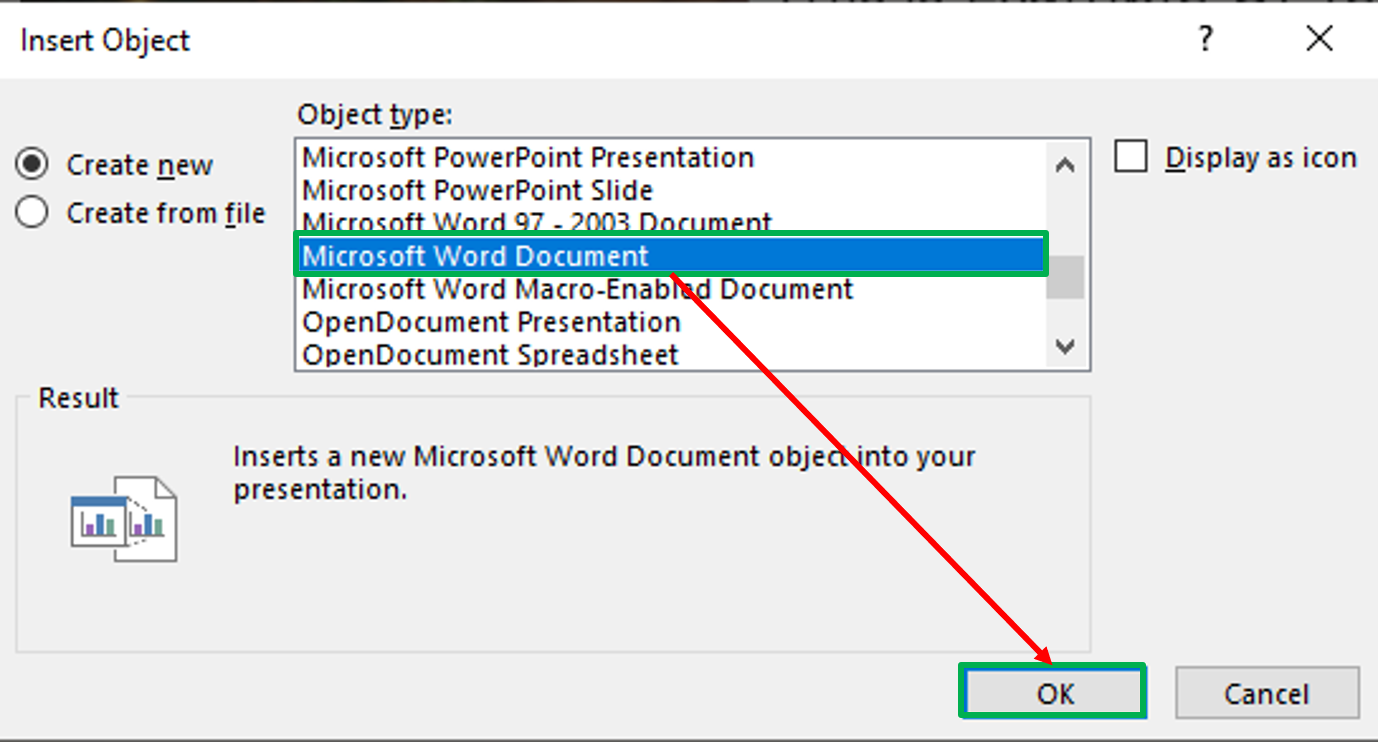
2. Go to Insert tab and select Object.

3. When the dialog box appears, choose Microsoft Word Document from the Object type list and click OK to launch Word.
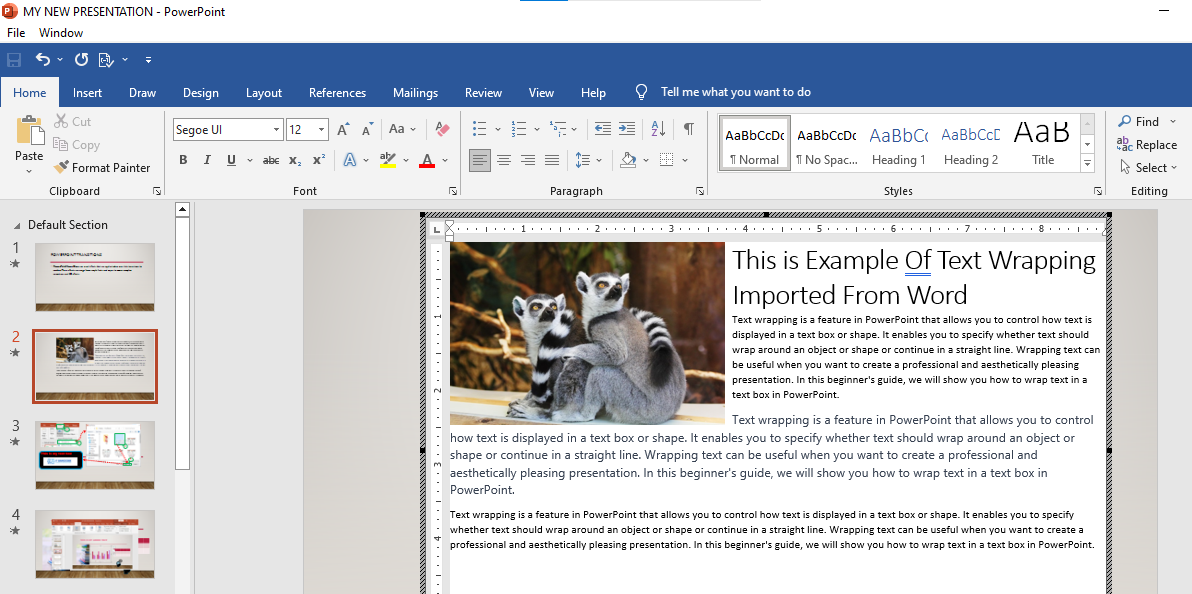
4. In the Word window, insert an image and type or paste your content.
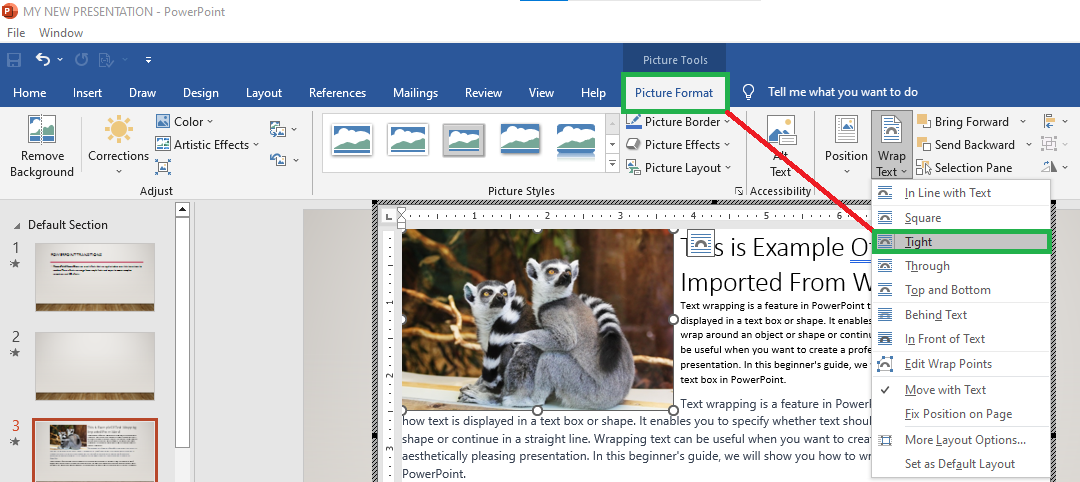
5. Then to go to Picture Tools Format, select the image by clicking it. Click Wrap Text, and the drop-down list will appear, choose Tight. Or, you can just right-click on the image, point to Wrap Text and choose Tight.
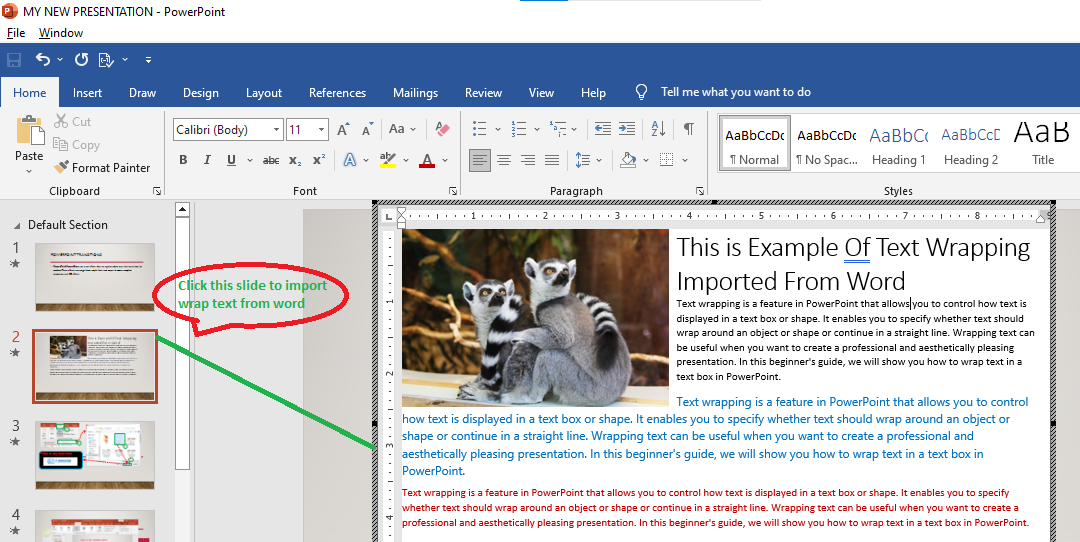
6. To see the wrapped text, select the PowerPoint slide. In PowerPoint, the image and wrapped text are in a single box that can be moved and resized.
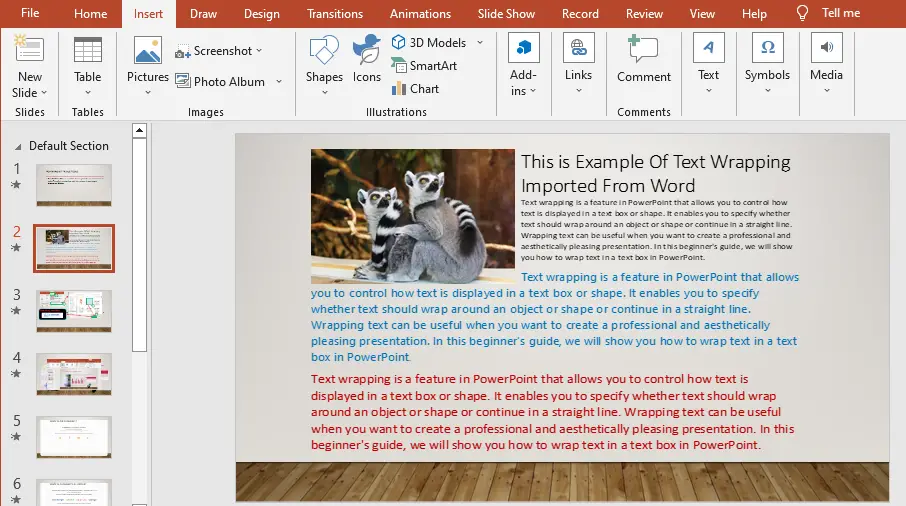
The result is shown below:
7. To make an update in wrapped text, double-click the text box and the Word will reopen.
If you want to learn more about Microsoft Word tutorials for beginners to advance feel free to visit our website.
Conclusion
In conclusion, we learned several ways how to wrap text in PowerPoint. The strategies we tackled in Text wrapping is an essential aspect of creating effective presentations.
By understanding the different types of text wrapping and how to use them, you can create visually appealing presentations that effectively communicate your message.
So, get started today and take your presentations to the next level with text wrapping.
Thank you for reading 🙂

Glay Eliver
Programmer & Technical Writer at PIES IT Solution
Glay Eliver is a programmer and writer at PIES IT Solution, author of over 600 tutorials at itsourcecode.com. Specializes in JavaScript tutorials, Microsoft Office how-tos (Excel, Word, PowerPoint), and Python error debugging covering ImportError, TypeError, AttributeError, ModuleNotFoundError, and JavaScript ReferenceError. Authored several of the site’s highest-traffic Excel and MS Office reference articles.
Expertise: JavaScript · MS Excel · MS Word · MS PowerPoint · Python · Python ImportError · Python TypeError · Python AttributeError · ModuleNotFoundError · JavaScript ReferenceError · Pygame · View all posts by Glay Eliver →