
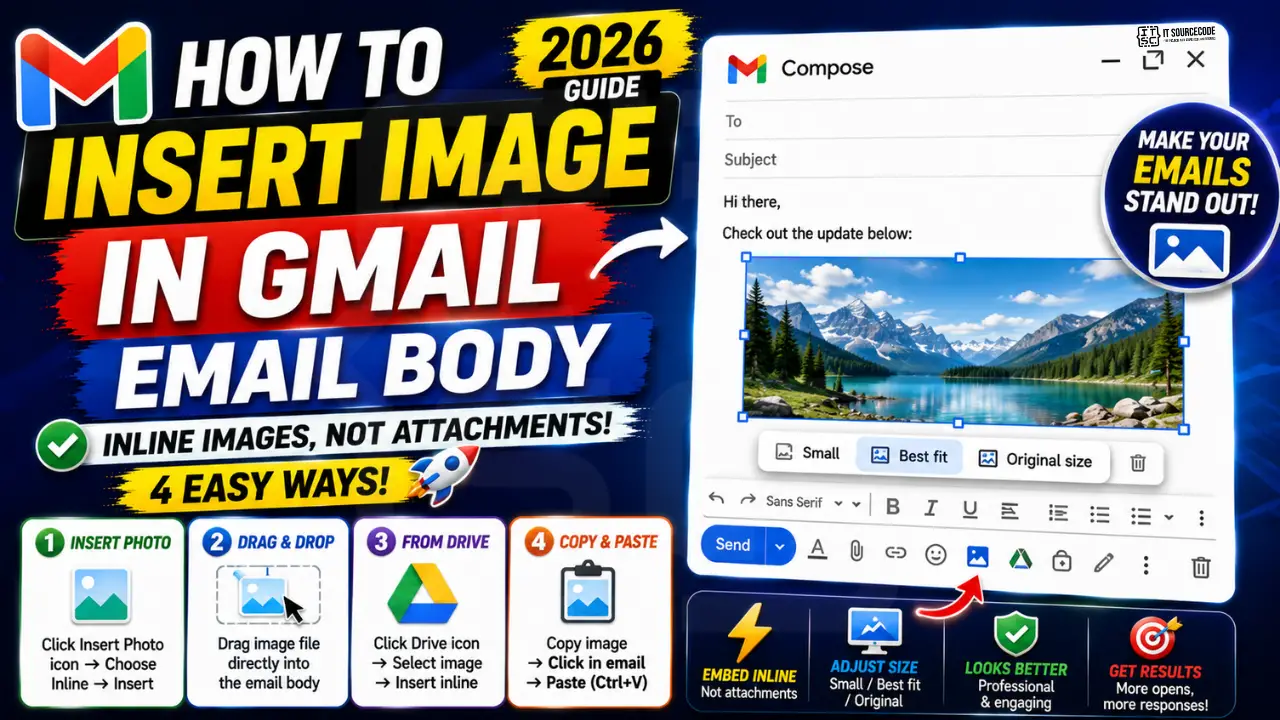
Inserting an image inline in a Gmail email makes it part of the message body instead of an attachment. Recipients see the image right where you placed it, not as a separate download. This 2026 guide covers four ways to insert images: the Insert Photo button, drag-and-drop, Google Drive picker, and copy-paste from clipboard.
Each method has slightly different tradeoffs on image size and quality. Pick the one that fits your workflow.
Method 1: Use the Insert Photo icon in the compose toolbar
The most straightforward path. The Insert Photo icon supports Photos, uploaded files, and web URLs.
- Click Compose to open a new email.
- Click in the body where you want the image.
- Click the Insert Photo icon in the compose toolbar (a mountain-and-sun icon).
- Choose one of the tabs: Photos, Album, Upload, or Web address (URL).
- Select or upload your image.
- Choose Inline at the bottom of the dialog (this is what makes it embedded in the body, not an attachment).
- Click Insert.
Method 2: Drag and drop images directly into the compose window
The fastest path if the image file is on your desktop or in a file explorer.
- Open your file explorer (Finder on Mac, File Explorer on Windows).
- Navigate to the image file.
- Drag the file directly into the Gmail compose window body area.
- Gmail embeds the image inline at your cursor position.
- The image uploads while you continue composing.
Method 3: Insert from Google Drive
If your image is stored in Drive, embed it without downloading first.
- Click the Google Drive icon in the compose toolbar (a triangle).
- Browse to the image in your Drive folders.
- Select the image.
- Choose Insert as inline (not as a Drive link).
- Click Insert.
- Gmail embeds the image using the Drive-hosted URL, which keeps your email size small.
Method 4: Copy-paste from clipboard
Works for screenshots or images from any web page.
- Take a screenshot or copy an image from a website (right-click, Copy image).
- In Gmail compose, click in the body where you want the image.
- Press Ctrl+V (or Cmd+V on Mac) to paste.
- Gmail embeds the image inline at your cursor.
- Screenshots from macOS or Windows paste directly. Screenshots from tools like Greenshot or Snagit work the same way.
Adjust image size after insertion
Every inserted image can be resized after placement.
- Click the image to select it.
- Gmail displays a size popup with three options: Small, Best fit, Original size.
- Choose Best fit for most emails (fits the compose window width).
- Choose Small for icons or thumbnails.
- Choose Original size for high-quality product shots or photos.
- Delete an image by selecting it and pressing Delete.
Common image insertion mistakes to avoid
- Inserting as attachment when you meant inline. The Insert Photo dialog has an Inline vs Attachment toggle. Choose Inline for images embedded in the body.
- Exceeding the 25 MB email limit. Total email size (body + inline images + attachments) cannot exceed 25 MB. Large photos may be auto-converted to Drive links.
- Using unsupported image formats. PNG, JPG, GIF, and WebP work inline. BMP or TIFF get attached instead. Convert to a web-friendly format first.
- Assuming recipients see inline images automatically. Most email clients render inline images correctly, but some old Outlook versions may show them as attachments.
- Not resizing large images. Original size photos can be 4-8 MB each. Resize to Best fit for standard emails to reduce load time and bandwidth.
When inline images are the right choice
Inline images work best for content where the image is part of the message, such as marketing emails with a header banner, product screenshots in a feature announcement, or infographics in a report. The image displays inline immediately without a click to download.
For sharing large photos or documents, use attachments (or Drive links for very large files). Attachments do not clutter the message flow and give recipients a download option.
For heavy image email (newsletters with 10+ images), Gmail’s compose is not ideal. Use a dedicated email service provider like Mailchimp, ConvertKit, or SendGrid which handle image hosting, responsive layouts, and delivery reliability.
For business communication, consider hosting your header banner externally (on your website) and using an image URL in the Insert Photo dialog. This keeps email size small and lets you update the banner globally without editing every past email.
Power-user tips for image-rich Gmail emails
Beyond simple inline insertion, a few practices make your image emails render consistently and load fast.
- Host images externally. For emails with the same logo or header in every message, upload the image to your website and reference by URL in Insert Photo > Web address. Reduces email size and lets you update the image globally later.
- Compress before upload. A 4 MB photo can compress to 400 KB with almost no visible quality loss using tools like
tinypng.comorsquoosh.app. Fast to load, easier on the recipient. - Use the alt attribute. Screen readers announce alt text instead of showing the image. Right-click an inserted image and add descriptive alt text so accessibility is preserved.
- Test in different clients. Gmail, Outlook, Apple Mail, and Yahoo Mail render images slightly differently. Send test emails to catch layout issues before real recipients see them.
- Consider mobile-first sizing. Roughly half of all email is opened on mobile. Design your header images at 600px wide for mobile, and they scale up to desktop naturally.
For business communications with heavy image content, invest in a proper email service provider (Mailchimp, ConvertKit, SendGrid) that handles image hosting, responsive layouts, and delivery reliability. Gmail native is fine for occasional images but not for daily image-rich campaigns.
Official documentation
Recommended email productivity resources
The links below are affiliate links. We may earn a commission at no extra cost to you when you buy or sign up. See our affiliate disclosure.
Insert images in Gmail on mobile (Sep 2026 update)
The desktop flow in this article works the same in Sep 2026, but the mobile Gmail app got redesigned in the July 2026 v2026.28 release. The paperclip icon moved, and iOS added a HEIC auto-convert step that trips up some users. Here is the current mobile flow on both platforms.
Android (Gmail app v2026.28+)
- Tap the compose (pencil) icon, bottom right.
- Tap the paperclip icon in the top action bar (it moved from the three-dot menu in the July update).
- Choose “Insert from Photos” or “Insert from Drive.” Photos gives inline embed; Drive gives a share link.
- To embed the image inline in the body rather than as an attachment, long-press the image thumbnail and pick “Insert inline.”
iOS (Gmail app v2026.28+)
- Tap compose, then the plus icon (Apple’s design guideline swap; not the paperclip on iOS anymore).
- Pick “Photo Library” or iCloud Drive.
- HEIC gotcha: if the photo is HEIC (default on iPhone since 2017), Gmail iOS now shows a “Convert to JPEG for compatibility” prompt. Tap yes; the recipient’s device may not decode HEIC otherwise.
- Choose “Insert as inline image” from the format toolbar to embed rather than attach.
Drag and drop from Photos on iPad
New in Sep 2026: iPadOS 18 supports true drag-drop between the Photos app and Gmail compose. Split-screen Photos on the left, Gmail compose on the right, then drag the photo across. Gmail auto-inserts inline. This is the fastest workflow for anyone doing a lot of visual email on iPad.
If the image is too large to send
Gmail’s 25 MB attachment cap did not change in 2026, but inline images now auto-compress to under 5 MB by default in the mobile apps. If you need the full-resolution original, tap the image after insertion and pick “Send original size (larger).” That switches to a Google Drive share link instead of embedding.
Frequently Asked Questions
What image formats does Gmail support inline?
PNG, JPG (JPEG), GIF, and WebP work inline. Non-web formats like BMP or TIFF get attached instead. If your image is in an unsupported format, convert it first.
How large can inline images be in Gmail?
Total email including inline images cannot exceed 25 MB. Larger emails auto-convert attachments to Drive links. Individual inline images typically render best under 1 MB each.
Will inline images show for all recipients?
Most modern email clients (Gmail, Apple Mail, Outlook 2016+) render inline images correctly. Very old Outlook clients (Outlook 2007) may show them as attachments instead of inline.
Can I resize the image after inserting?
Yes. Click the image and choose Small, Best fit, or Original size. This is a Gmail-native resize that does not modify the original file.
Are inline images faster to send than attachments?
Same upload speed. Both count against the 25 MB email size limit. Inline just displays in the body flow while attachments show as separate downloads.
Can recipients save my inline image?
Yes. Right-click the inline image and Save image as. Most email clients support this. The file downloads at the original resolution you inserted.

Glay Eliver
Programmer & Technical Writer at PIES IT Solution
Glay Eliver is a programmer and writer at PIES IT Solution, author of over 600 tutorials at itsourcecode.com. Specializes in JavaScript tutorials, Microsoft Office how-tos (Excel, Word, PowerPoint), and Python error debugging covering ImportError, TypeError, AttributeError, ModuleNotFoundError, and JavaScript ReferenceError. Authored several of the site’s highest-traffic Excel and MS Office reference articles.
Expertise: JavaScript · MS Excel · MS Word · MS PowerPoint · Python · Python ImportError · View all posts by Glay Eliver →
Gmail image insertion in 2026: what changed
Google updated the inline image experience in Gmail’s web interface in April 2026 to support drag and drop from your operating system’s file browser directly into the compose window. Previously you had to click the image icon in the toolbar and browse to your file. Now you can drag a JPG or PNG from your desktop or Finder window right into the compose area, and Gmail treats it as an inline image automatically.
For screenshots, Gmail now recognizes the standard clipboard format from Snipping Tool (Windows) and Screenshot (Mac). Take a screenshot, then paste (Ctrl+V or Cmd+V) directly into your compose window. Gmail inlines it without asking. This works with the built in Snipping Tool on Windows 11 and Screenshot on macOS 15 as of the 2026 versions.
The maximum inline image size Gmail supports in 2026 is still 25 MB total per message (attachments plus inline images combined). If you have several large screenshots, either use JPG format (much smaller than PNG), compress each image, or split across multiple messages. There is no way around this limit on personal Gmail.
One 2026 pitfall: Outlook recipients see inline images as attachments, not embedded in the body, if you use Gmail’s default HTML compose mode. If you email a lot of Outlook users, switch to “Plain text” mode temporarily and use links to images hosted on Google Drive instead. This gives them a preview link they can click without the “download attachment” friction.