HOW TO BLOCK ADS AND SPONSORED LINKS IN GMAIL – In the digital landscape of interconnected services, maintaining control over our online experience is essential.
This guide explores the advantages of installing an ad blocker extension for Gmail, offering insights into enhanced privacy, improved productivity, and a streamlined email interface by customizing settings and blocking unwanted content.

How to Block Ads in Gmail? A Step-by-step Guide
Step 1: Install an Ad Blocker Extension
- Open your browser, go to the extension store.
- Install an ad blocker like uBlock Origin or AdBlock.
- Follow on-screen instructions.
Step 2: Configure Ad Blocker for Gmail
- Sign in to Gmail after installation.
- Find the ad blocker icon in the toolbar.
- Access settings, customize filters for Gmail.
Step 3: Refresh Gmail
- Refresh or reopen Gmail after configuring.
Step 4: Update Filters:
- Periodically check and update ad blocker filters.
How to Block Sponsored Links in Gmail?
Step 1 Open Gmail Settings:
- In Gmail, click on the gear icon in the top right.
- Select “See all settings” from the dropdown.
Step 2 Go to “Inbox” Settings:
- In the settings menu, click on the “Inbox” tab.
Step 3 Deselect “Sponsored” under Categories:
- Locate the “Categories” section.
- Uncheck the box next to “Sponsored.”
Step 4 Save Changes:
- Scroll down and click “Save Changes” at the bottom.
3 Methods to Block Ads in Gmail
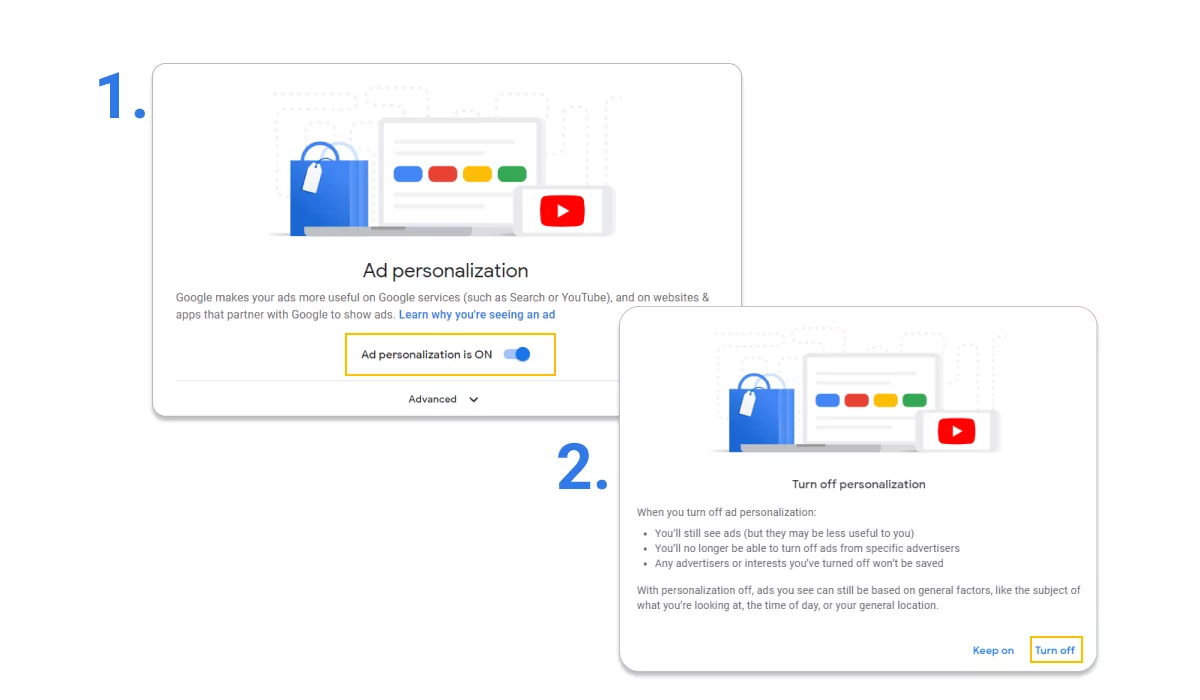
Method 1. Turn off Ads Personalization
To begin, it’s crucial to note that Gmail showcases ads based on Google account parameters. Google’s services are interconnected, creating a cloud-based software ecosystem with numerous benefits.
Unified login for all tools, synchronization across multiple devices, and seamless integration of various tools are some advantages.
This connectivity extends to ad settings, meaning that to disable ads in Gmail, adjustments must be made in the personalization settings.
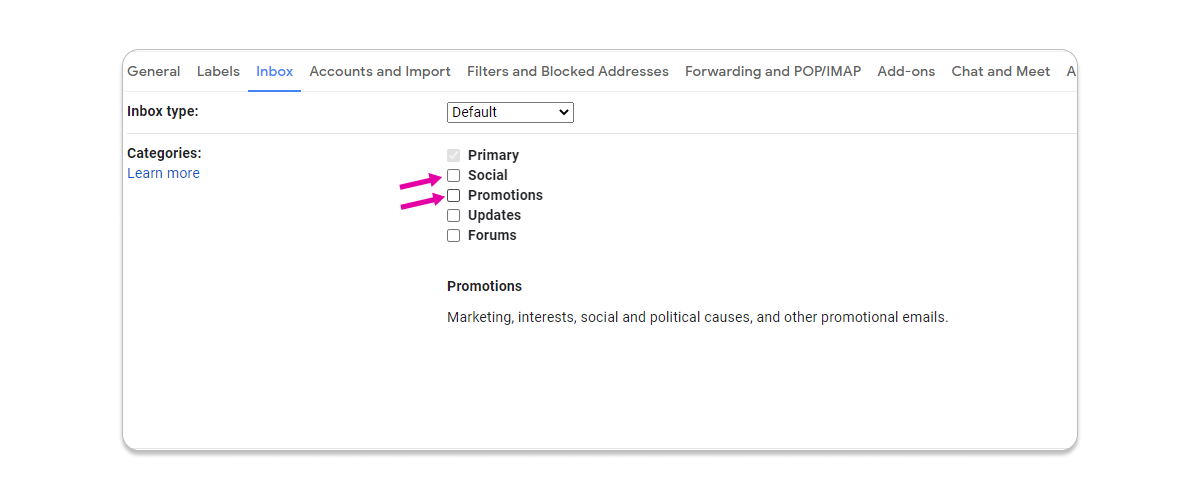
Method 2. Remove Social and Promotions Tabs
Time needed: 2 minutes
- Access Gmail on your internet browser.
- Locate the gear Settings icon (⚙) beside the search bar.
- Choose “See all settings” from the dropdown menu.

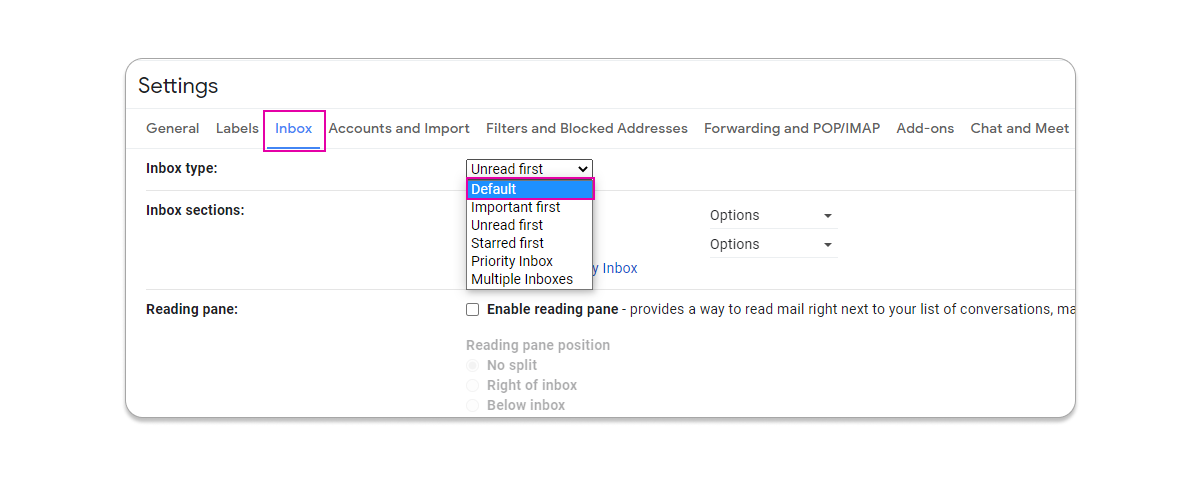
- Navigate to the Inbox tab.
- In the Inbox type section, opt for Default.
- Within the Categories section, deselect the checkboxes for Social and Promotions.
- Scroll down and click Save Changes.

Methos 3. Block Email Addresses from Advertisers
- Open Gmail: Access your Gmail account.
- Find Advertiser’s Email: Locate an email from the advertiser.
- Open Email: Open the email.
- Click Three Dots: In the toolbar, click the three dots.
- Select “Block [Sender]”: Choose “Block [Sender’s Name].”
- Confirm Block: Confirm to block emails from the selected sender.
Why We Should Block Ads in Gmail?
Enhanced Privacy:
- Blocking ads in Gmail enhances privacy by minimizing advertisers’ access to personalized information. Advertisements typically rely on user data for targeting, and by preventing ads, you restrict the exposure of your personal details.
Improved Focus and Productivity:
- Ads can be distracting and disrupt your email focus. Blocking ads results in a cleaner interface, enabling concentrated attention on essential emails without visual interruptions. This contributes to heightened productivity.
Faster Loading Times:
- Gmail’s loading times can be slowed by ad-heavy content. Blocking ads reduces unnecessary data, accelerating email loading. This is especially advantageous for users with slower internet connections or those accessing Gmail on bandwidth-limited mobile devices.
Conclusion
In conclusion, installing an ad blocker extension and configuring it for Gmail provides several benefits.
It enhances privacy by limiting advertisers’ access to personal information, improves focus and productivity by eliminating distractions, and contributes to faster loading times, particularly in regions with slower internet connections.
Additionally, adjusting Gmail settings to disable sponsored categories further refines the email experience, creating a cleaner and more efficient inbox.
Overall, these steps empower users to customize their Gmail environment according to their preferences, promoting a more streamlined and enjoyable email experience.