
Excel Sheet in VB.net – VB.net makes it possible for the COM object model of Microsoft Excel 2010 to work with your application.
To use this interoperability in your application, you need to add the namespace Microsoft.Office.Interop.Excel to your Windows Form Application.
What is Visual Basic’s purpose?
The third-generation programming language was created to aid developers in the creation of Windows applications.
It has a programming environment that allows programmers to write code in.exe or executable files.
They can also utilize it to create in-house front-end solutions for interacting with huge databases.
It is because the language allows for continuing changes, you can keep coding and revising your work as needed.
However, there are some limits to the Microsoft Visual Basic download.
If you want to make applications that take a long time to process, this software isn’t for you.
That implies you won’t be able to use VB to create games or large apps because the system’s graphic interface requires a lot of memory and space.
Furthermore, the language is limited to Microsoft and does not support other operating systems.
What is an Excel Sheet in VB.net?
In Excel documents, a Worksheet is a group of cells that are set up in rows and columns. It is the part of the computer you use to enter data.
Each worksheet has 1048576 rows and 16384 columns, making it a big table that you can use to organize information.
So let’s get started:
How to Create an Excel File Using VB.net
Steps in Creating an Excel Application from VB.net.
Time needed: 5 minutes
Creating an Excel Application from VB.net
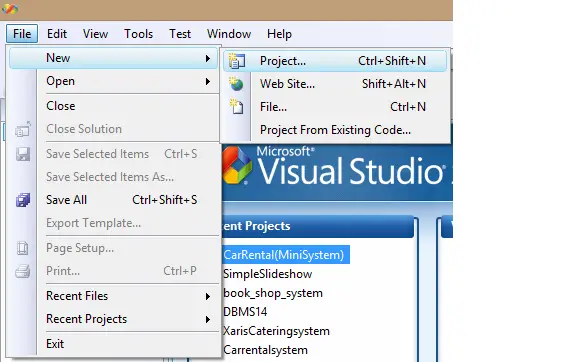
- Step 1: Create New Project
First is open the Visual Basic, Select File on the menu, then click New and create a new project.
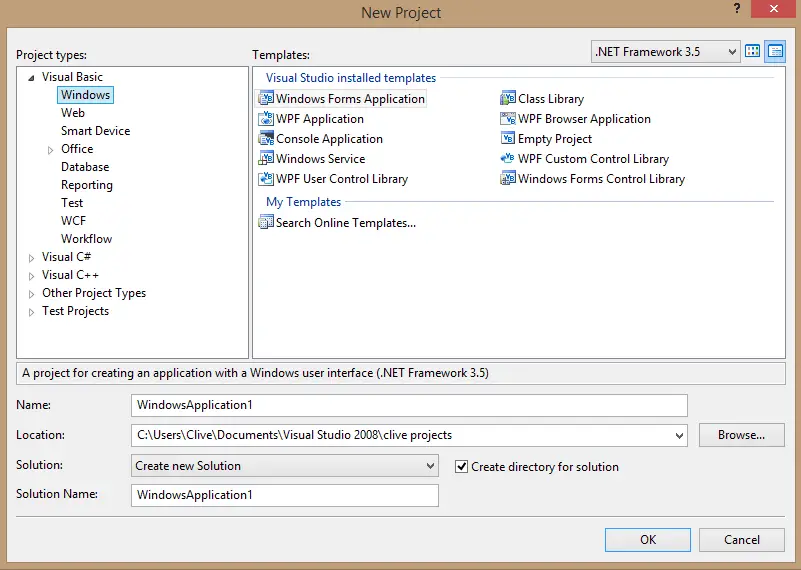
- Step 2: Name your Project
Then a New Project Dialog will appear. You can rename your project, depending on what you like to name it. After that click OK
- Step 3: Design your Windows Form
Then design your form like this just like what I’ve shown you below
Add a Button from the toolbox.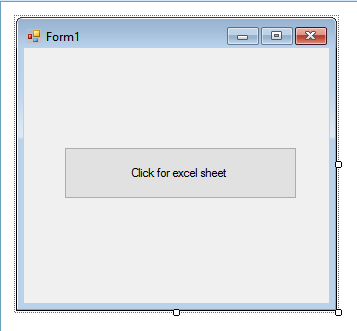
- Step 4: Add Reference
After that, Add a Reference to Microsoft Excel Object Library to your project.
To do this:
*Select Add reference from the project menu.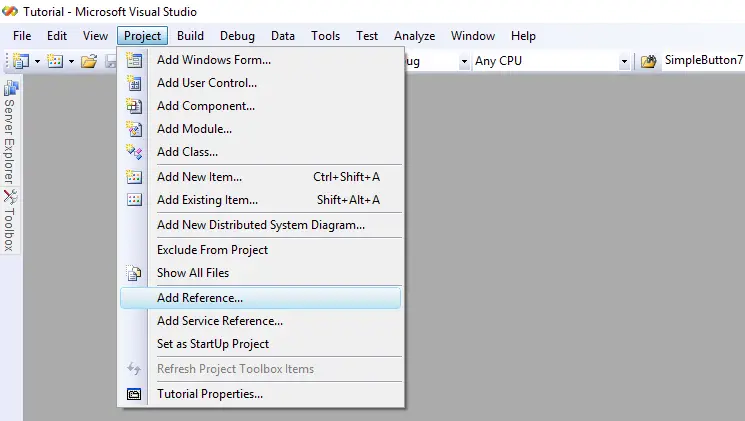
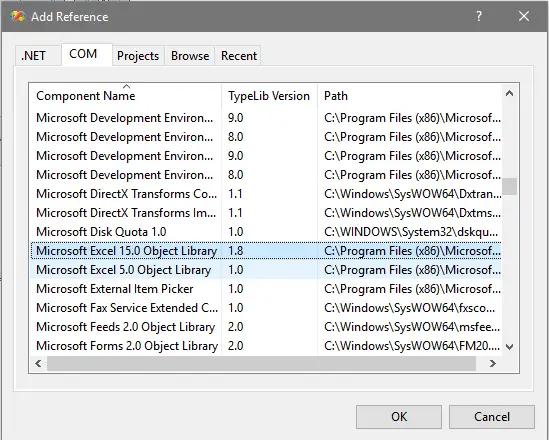
- Step 5: Locate the Microsoft Excel Object Library
On the COM tab, Locate Microsoft Excel Object Library and then click Select.
- Step 6: Add Following Code
Double-click the code window and add the following code to the top of Public Class Form1.
Imports Excel = Microsoft.Office.Interop.Excel - Step 7: Double-click the Button and add the following code
Then, Go back to Design View and double-click the Button, and add the following code.
Private Sub Button1_Click(ByVal sender As System.Object, ByVal e As System.EventArgs) Handles Button1.Click
Dim appXL As Excel.Application
Dim wbXl As Excel.Workbook
Dim shXL As Excel.Worksheet
Dim raXL As Excel.Range
appXL = CreateObject(“Excel.Application”)
appXL.Visible = True
wbXl = appXL.Workbooks.Add
shXL = wbXl.ActiveSheet
shXL.Cells(1, 1).Value = “FIRST NAME”
shXL.Cells(1, 2).Value = “LAST NAME”
shXL.Cells(1, 3).Value = “FULL NAME”
shXL.Cells(1, 4).Value = “SUBJECTS”
With shXL.Range(“A1”, “D1”)
.Font.Bold = True
.VerticalAlignment = Excel.XlVAlign.xlVAlignCenter
End With
Dim pupils(5, 2) As String
pupils(0, 0) = “Markfil”
pupils(0, 1) = “Baldomero”
pupils(1, 0) = “Juvy”
pupils(1, 1) = “Aral”
pupils(2, 0) = “Andrew”
pupils(2, 1) = “Braza”
pupils(3, 0) = “Carlie”
pupils(3, 1) = “Golez”
pupils(4, 0) = “Jesriel”
pupils(4, 1) = “Agita”
shXL.Range(“A2”, “B6”).Value = pupils
raXL = shXL.Range(“C2”, “C6”)
raXL.Formula = “=A2 & “” “” & B2″
With shXL
.Cells(2, 4).Value = “English”
.Cells(3, 4).Value = “Algebra”
.Cells(4, 4).Value = “Physics”
.Cells(5, 4).Value = “Trigonometry”
.Cells(6, 4).Value = “Theology”
End With
raXL = shXL.Range(“A1”, “D1”)
raXL.EntireColumn.AutoFit()
appXL.Visible = True
appXL.UserControl = True
raXL = Nothing
shXL = Nothing
wbXl = Nothing
appXL.Quit()
appXL = Nothing
Exit Sub
Err_Handler:
MsgBox(Err.Description, vbCritical, “Error: ” & Err.Number)
End Sub - Step 8: Click F5 to run the program.
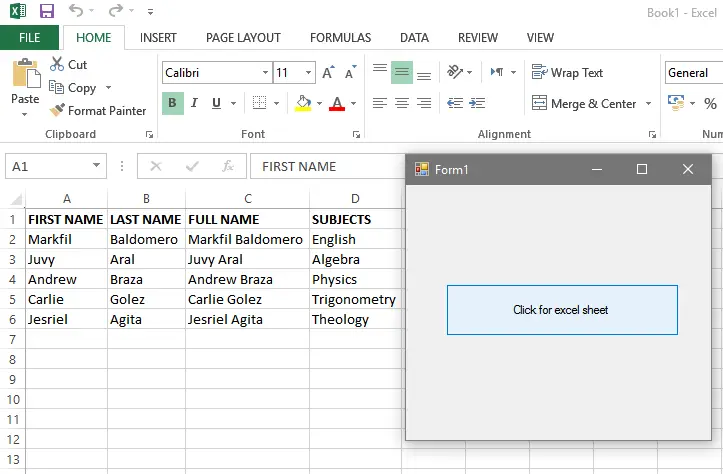
Finally, Click F5 to run the program.
Program Output:
Download the Source Code:
Summary
This article shows how to make an Excel sheet and how to fill a range of cells with a number of different values.
This article also shows how to get a range of cells as an array of cells.
Readers might read also:
- How to Get Total Value in DataGridview Using VB.Net
- How to Connect Visual Basic.Net to MS Access Database
Inquiries
If you have any questions or suggestions about this Excel Sheet in VB.NET, please let me know just drop a comment below or send me a message on our contact page.
PREVIOUS


I am trying to do this on windows 7 visual studio 2019, and only microsoft excel 16.0 object library is available under the COM section.
After I do this, the source editor says the line:
Imports Excel = Microsoft.Office.Interop.Excel
is unnecessary. What do i do?