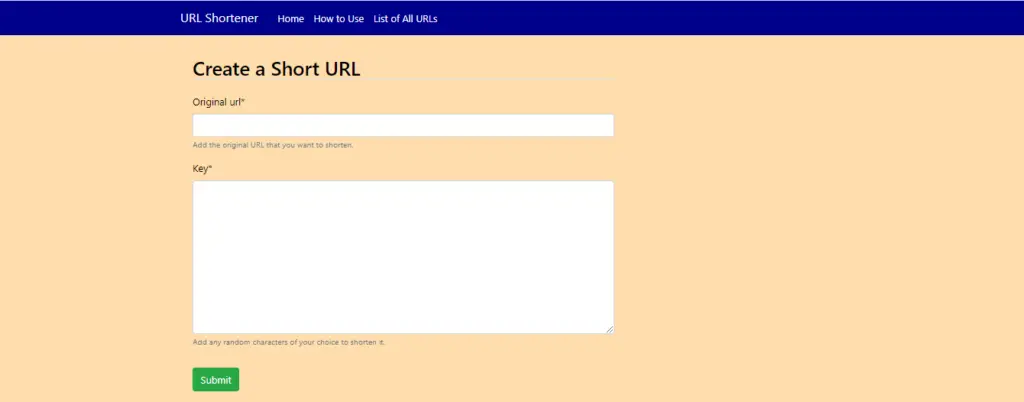
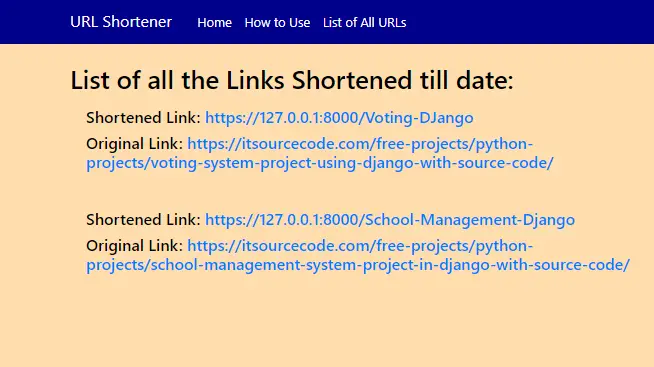
This URL Shortener Django can customize the abbreviate URL code or generate random slugs. This system project also provides an admin panel from which, along with its redirected links, all shortened URLs can be monitored.
Install PyCharm Professional IDE to create a URL shortener project with Django source code. This URL Shortener using Django includes free Download Source Code; click Download Now.
| About Project | Project Details |
|---|---|
| Project Name | URL Shortener Project using Django |
| Python version (Recommended) | 3.8 Version |
| Programming Language Used | Python Django Language |
| IDE Tool (Recommended) | Sublime, Visual Studio, PyCharm |
| Database | SQLite |
What is URL shortener in Django?
In this article, we’ll construct a Django URL shortener. This program shortens long URLs. We’ll use a Python library, not a Django specific library, thus this code can be used in any Python project. Create a Django app and project.
What is URL shortening used for?
URL shorteners shorten URLs (Uniform Resource Locator). It’s easier to remember and track a shorter web page address. Bit.ly, Google, and Tinyurl.com are URL shorteners.
How to Create a URL Shortener Django
Time needed: 5 minutes
Here are the steps on how to create the URL Shortener Django with Source Code.
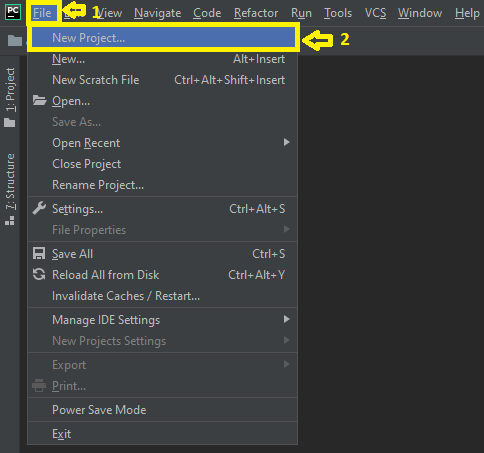
- Step 1: Open file.
First , open “pycharm professional” after that click “file” and click “new project”.

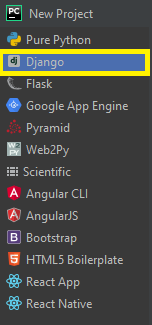
- Step 2: Choose Django.
Second, after click “new project“, choose “Django” and click.

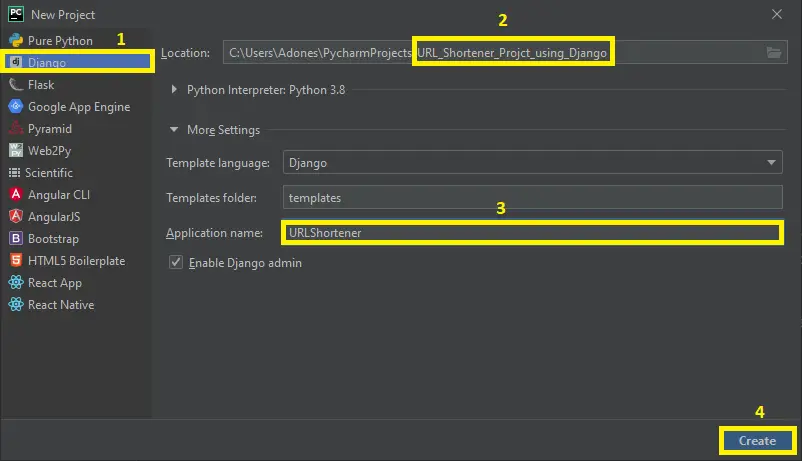
- Step 3: Select file location.
Third, select a file location wherever you want.

- Step 4: Create application name.
Fourth, name your application.

- Step 6: Start Coding.
In this final step, we will now start adding functionality to our Django Framework by adding some functional codes.

Output of the system
Downloadable Source Code Below.
If you want to learn more about programming, especially Python, read The Best Python Projects with Source Code for Beginners.
If you want to use Django for web development, check out our list of top django projects.
How to run the URL shortener Django?
Step 1: Extract/unzip the file
Step 2: Go inside the project folder, open cmd and type the following commands to install Django Framework and run the webserver:
• pip install -r requirements.txt
• python manage.py runserver
Step 3: Finally, open the browser and go to localhost:8000 or type http 127.0.0.1
Summary
This URL Shortener Django with Source Code can help Python beginners. This project can also be modified to fit your personal requirements. Hope this project will help you to improve your skills.
Post csrf token to import url and create a django project in django admin to import render and return the render request url to the short url. The installed apps and pip installer can return and redirect to virtual environments.
Happy Coding!
Inquiries
Please post questions or comments regarding the Django URL Shortener with Source Code below.
Technology stack and requirements
To run this Python project on your development machine, you need:
- Python 3.10 or higher. Download from python.org or install via Anaconda if you prefer bundled packages.
- pip package manager. Comes with Python. Used to install project dependencies from requirements.txt.
- Virtual environment. Use venv or conda to isolate project dependencies from your global Python install.
- VS Code or PyCharm. Free code editors with Python syntax highlighting, IntelliSense, and debugging.
- Git. For version control and cloning source code repositories.
Installing the source code
- Download or clone the repository. Get the ZIP archive from the download link on this page and extract it.
- Create a virtual environment. Open a terminal in the project folder and run: python -m venv venv, then activate it (venv\Scripts\activate on Windows or source venv/bin/activate on Mac/Linux).
- Install dependencies. Run pip install -r requirements.txt to install all libraries the project needs.
- Configure environment variables. If the project uses API keys (OpenAI, Anthropic, database), create a .env file and set the required keys.
- Run the project. Follow the run command in the README (usually python main.py or streamlit run app.py).
Using this project for your BSIT capstone
- Chapter 1 (Introduction). Discuss the real-world problem this system solves. Cite Philippine or international use cases where the manual process could be automated.
- Chapter 2 (RRL). Compare your project against 5-10 similar published works. Cite ACM, IEEE, or arXiv papers for academic-standard sources.
- Chapter 3 (Methodology). Document the model architecture, training data, hyperparameters, and evaluation metrics used.
- Chapter 4 (Results). Report accuracy, precision, recall, F1-score, and confusion matrix. Screenshot the running app on real inputs.
- Chapter 5 (Conclusion). Identify features for Version 2: better model, larger dataset, mobile deployment, or REST API.
Modules typical of Django URL Shortener
- Text preprocessing. Tokenization, lowercasing, stop-word removal, lemmatization with NLTK or spaCy.
- Feature extraction. TF-IDF, word embeddings (GloVe), or transformer embeddings (BERT).
- Model training. scikit-learn baseline (Naive Bayes, SVM) or HuggingFace fine-tuned transformer.
- Evaluation. Accuracy, precision, recall, F1 for classification; BLEU/ROUGE for generation.
- Inference API. Flask or FastAPI endpoint for real-time predictions.
- UI or demo. Streamlit dashboard for interactive testing.
Common enhancements for capstone review
- Multilingual support. Extend to Filipino, Cebuano, or other Philippine languages with translation preprocessing.
- Real-time streaming. Add WebSocket support for continuous input classification.
- Explainability. Use LIME or SHAP to visualize why the model made a specific prediction.
- Batch mode. Add CSV upload for bulk classification, useful for research analysis.
Official documentation
Frequently Asked Questions
How does this Django project work?
Built with Django framework (Python MVT), Django ORM, Django Templates, MySQL/PostgreSQL/SQLite. Standard structure: urls → views → models → templates. Django auth handles users. Ready to extend for BSIT capstone scope.
What Django and Python versions does this project require?
Most projects in this batch run on Django 4.x or 5.x with Python 3.8+. A few older projects need Django 3.2 with Python 3.7. Check the requirements.txt file for exact versions. To run any: install Python, create a virtualenv (python -m venv venv), activate it, pip install -r requirements.txt, run python manage.py migrate, then python manage.py runserver.
How do I set up the database for this Django project?
Most projects use SQLite (zero setup, auto-creates db.sqlite3 in project root on first migrate). For projects using MySQL or PostgreSQL: install the database server, create an empty database, edit settings.py DATABASES[‘default’] with your credentials, run python manage.py migrate. For sample data: python manage.py loaddata fixtures.json (if a fixture file is included) or create a superuser via python manage.py createsuperuser.
Can I use this Django project for a BSIT capstone or thesis?
Yes, but extend it. A bare CRUD app is too narrow for full capstone scope. Add: user roles via Django Groups, dashboards (Chart.js + AJAX endpoints), PDF exports (ReportLab or WeasyPrint), email notifications (Django send_mail), real domain extension (analytics, audit log, multi-branch). Pair with Chapter 1-5 documentation matching your panel’s rubric.
Why am I getting ModuleNotFoundError, OperationalError, or ‘No such table’ errors?
Three common Django startup issues: (1) ModuleNotFoundError: virtualenv not activated OR pip install -r requirements.txt skipped. (2) OperationalError: database credentials in settings.py don’t match your local MySQL/PostgreSQL. (3) ‘No such table’: you skipped python manage.py migrate. Also: if settings.py imports fail, check Python version compatibility (Django 5 needs Python 3.10+).
Where can I find more Django projects with source code?
Browse the Django Projects hub for the full library. For broader Python capstones see Python Projects (Tkinter desktop, Pygame games, OpenCV vision, ML). For PHP MVC alternatives see Laravel Projects. For BSIT capstone idea lists see 150 Best Capstone Project Ideas.

Adones Evangelista
Programmer & Technical Writer at PIES IT Solution
Adones Evangelista is a programmer and writer at PIES IT Solution, author of over 900 tutorials and error-fix guides at itsourcecode.com. Specializes in JavaScript, Django, Laravel, and Python error debugging covering ValueError, TypeError, AttributeError, ModuleNotFoundError, and RuntimeError, plus C/C++ and PHP capstone projects for BSIT students.
Expertise: JavaScript · Python · Django · Laravel · Error Debugging · C/C++
· View all posts by Adones Evangelista →