How to Add Columns and Rows in the Datagridview in C#
 This time, I’m going to teach you how to add columns and rows in the Datagridview programmatically using C#.Net. This is a step by step guide and easy to follow for adding columns and rows in the Datgridview. I will use Microsoft Visual Studio 2008 for my IDE
So, let gets started.
Step 1. Open Microsoft Visual Studio 2008 and Create a new windows form application.
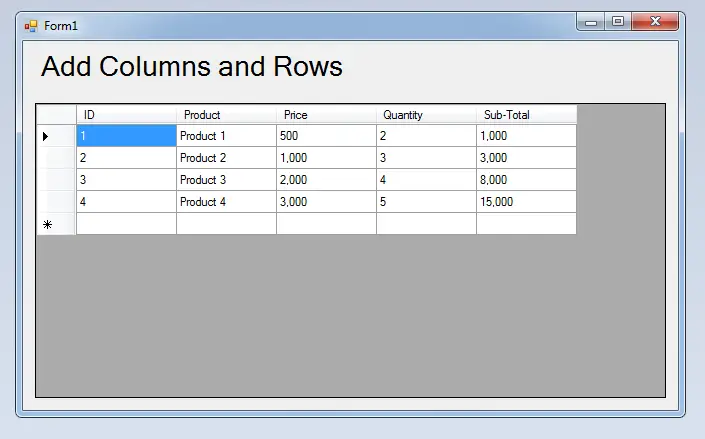
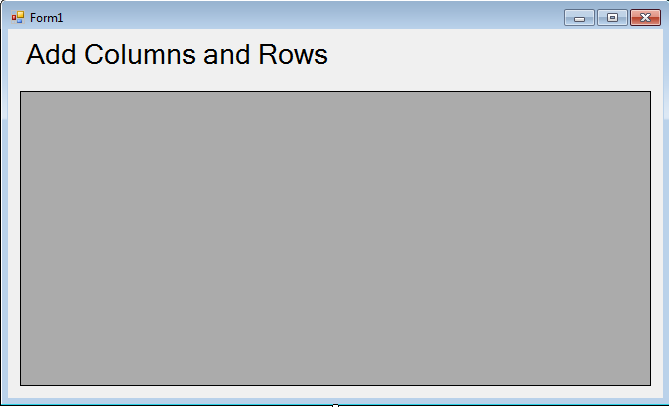
Step 2. Add a Label and a Datagridview in the Form. See the figure1 as follows.
Step 3. Double-click the Form and do the following codes for adding Columns and Rows in the Datagridview.
 //Setting up columns to be added.
 dataGridView1.ColumnCount = 5;
 //Set the columns name
 dataGridView1.Columns[0].Name = "ID";
 dataGridView1.Columns[1].Name = "Product";
 dataGridView1.Columns[2].Name = "Price";
 dataGridView1.Columns[3].Name = "Quantity";
 dataGridView1.Columns[4].Name = "Sub-Total";

 //Set a value to be added in a row
 string[] row = new string[] { "1", "Product 1", "500", "2", "1,000" };
 //adding row
 dataGridView1.Rows.Add(row);
 //Set a value to be added in a row
 row = new string[] { "2", "Product 2", "1,000", "3", "3,000" };
 //adding row
 dataGridView1.Rows.Add(row);
 //Set a value to be added in a row
 row = new string[] { "3", "Product 3", "2,000", "4", "8,000" };
 //adding row
 dataGridView1.Rows.Add(row);
 //Set a value to be added in a row
 row = new string[] { "4", "Product 4", "3,000", "5", "15,000" };
 //adding row
 dataGridView1.Rows.Add(row);
Output :
| ABOUT PROJECT | PROJECT DETAILS |
|---|---|
| Project Name : | How to Add Columns and Rows in the Datagridview |
| Project Platform : | C# |
| Programming Language Used: | C# Programming Language |
| Developer Name : | itsourcecode.com |
| IDE Tool (Recommended): | Visual Studio 2019 |
| Project Type : | Desktop Application |
| Database: | None |
| Upload Date and Time: | August 5, 2016- 10:21 am |
Frequently Asked Questions
How does this C# DataGridView example work?
Demonstrates binding a DataGridView control to a DataTable / List
What .NET and SQL Server versions does this project require?
Most projects in this batch use C# WinForms on .NET Framework 4.5+ (the dominant stack for tutorial sites) with SQL Server 2012 Express or higher. A few newer projects use .NET 6/7/8. To run: install Visual Studio 2019 / 2022 (Community edition is free), install SQL Server Express + SSMS, open the .sln file, build, run.
How do I set up the database for this C# project?
Open SQL Server Management Studio (SSMS) and connect to your SQL Server instance (e.g. localhost\SQLEXPRESS). Right-click Databases > Restore Database OR > New Database then import the included .sql script. Update the connection string in App.config (or in code-behind) with your server name + credentials. Rebuild and run.
Can I use this C# project for a BSIT capstone or thesis?
Yes, but extend it. A bare CRUD form is too narrow for full capstone scope. Add: role-based access (admin/staff/customer login redirect), Crystal Reports or RDLC reports, dashboard with Chart controls, audit log, multi-branch support. Pair with Chapter 1-5 documentation matching your panel’s rubric.
Why am I getting ‘connection error’ or ‘object reference not set’?
Three common C# issues: (1) Connection error: SQL Server isn’t running OR connection string in App.config has wrong server name. Open SQL Server Configuration Manager + verify SQL Server (SQLEXPRESS) service is running. (2) NullReferenceException: a control reference or DB column returned NULL, add a check or use ?? operator. (3) Build error ‘The type or namespace could not be found’: missing assembly reference, add via Project > Add Reference.
Where can I find more C# projects with source code?
Browse the C# Projects hub for the full library. For other .NET stacks see VB.NET Projects (300+ Windows Forms systems). For ASP.NET WebForms see ASP.NET Projects. For BSIT capstone idea lists see 150 Best Capstone Project Ideas.