
In this tutorial, we will know what is Excel solver add-in, and how to add it in Excel. Along with a sample on how to use it with a few examples and images.
Microsoft Excel has a lot of features that can make it easier and one of these is the Excel Solver Add-in. This creative feature allows us to find solutions to problems that have several constraints that somehow simple formulas cannot solve.
What is Excel Solver?
The Excel Solver is a special command in the What-if analysis tools. Apparently, this add-in is a third party however Microsoft Excel included it. Meanwhile, this add-in is disabled by default.
Further, the purpose of this is for simulating and optimizing various business and engineering models.
Apart from that, the solver add-in is useful in linear programming problems and optimizing problems of aka linear. Thus this is known as the linear programming solver. The good thing about this however it can operate problems like smooth linear and non-smooth linear.
Despite the solver can’t unravel possible problems, it is still useful in optimizing and dealing with all kinds of problems. Which apparently a helper in decision making.
For instance, this can helps in selecting the budget for optimal advertising campaigns, maximizing the return of investment and even making the best scheduling of employees and so on.
How to add Solver to Excel
Technically, the Solver is available in all versions of Microsoft Excel since 2003, obviously it is disabled by default.
Therefore, to add this to your Excel worksheet, follow the following steps:
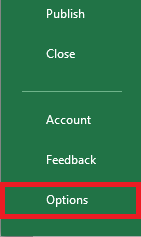
1. Open your Microsft Excel, if you are using Excel 2010-Excel 365 version, click File Tab > Options>. Meanwhile, in Excel 2007 click the Microsoft Office button > Click Options.
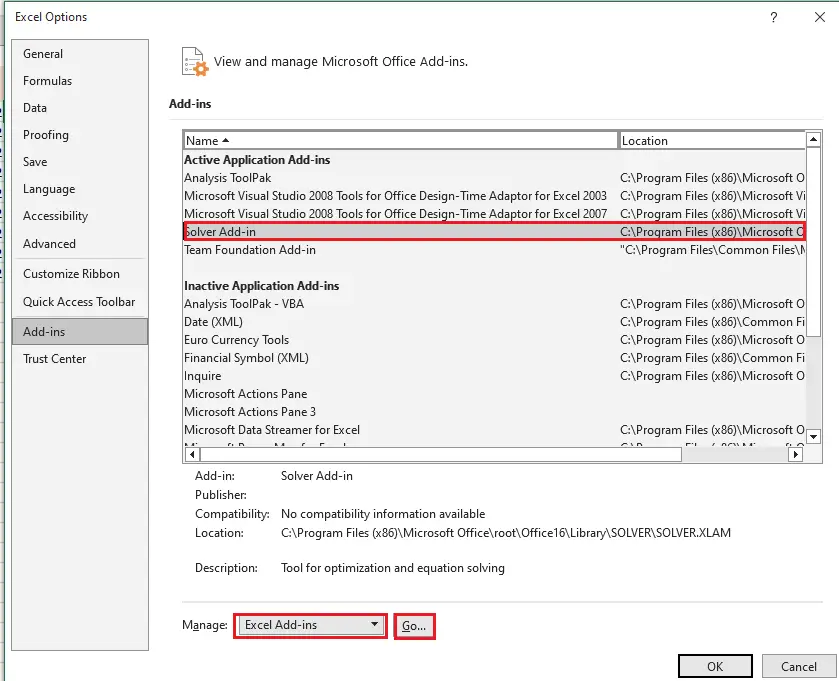
2. When the Excel Option dialog box display, click Add-ins you will see at the left bar. Make sure to select Solver Add-in of Excel on the Manage dropdown at the bottom of the window. Click the Go button.
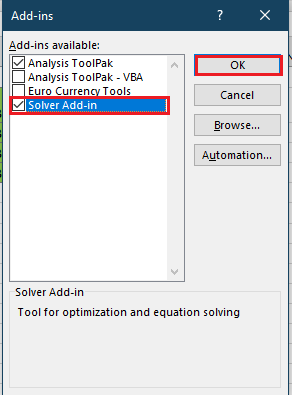
3. The Add-Ins dialog box will appear, check the Solver Add-in checkbox, and click OK. This will load the solver add-in.
Using Excel 2003, to Solver go to Tools menu then click Add-ins. On the available list of Add–ins, check the Solver Add-in box and click OK.
Reminder: When Excel shows a message that tells there is no currently installed Solver in the computer, click Yes and install it.
Where is Solver in Excel?
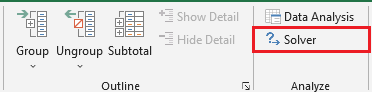
The Excel Solver can be found in the Data tab under the Analysis group of the modern version of Excel.
And now let’s see where Solver is located in Excel 2003…
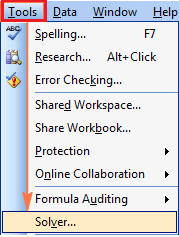
Apparently, after the Solver Add-in is loaded in Excel 2003, the command is now available in Tools menu:
Since you know already where the Solver add-in can be found in all versions let’s start working out in our worksheet.
How to use Solver in Excel
Basically, before using Solver of Excel, you need to have come up with a scenario or concept of the problem to solve. This will help to have a better understanding of conflicts, constraints and objectives.
So let’s see the case below…
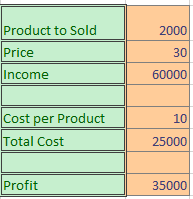
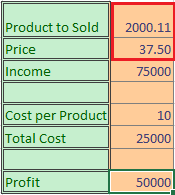
Our case is we have a business which is selling a product and we trying to calculate the profit of the sale based on the product sold and its price. Then, we cost that is constant and can not be changed.
So, let’s say we present it to the manager but unfortunately, he tells aim to make a profit of around $50,000. Therefore…
In building certain Excel Solver, keep in mind the following three things:
- Decision variables: These are the variables that need to be adjusted to reach the goal.
- Constraints: This is the regulator, of the problem. This could possibly be fixing the cost or variable cost.
- Objective: It is the goal or desired outcome.
And now it’s the time Solver will help with this problem.
- Select the Data Tab in the Analysis group and click Solver.
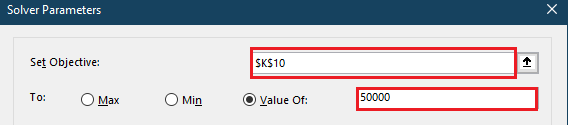
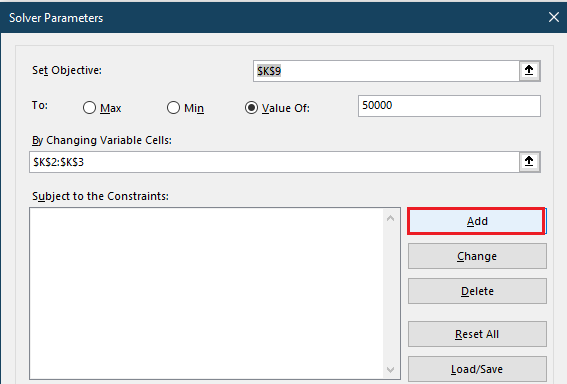
So the first thing is to set our objective. Which in our case our current profit must raise to $50, 000.
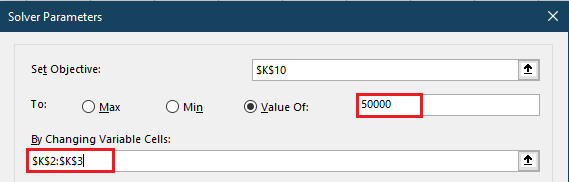
The next we should do is to tell Solver which cells must change when the calculation is processed. Therefore “Profit“, “Income“, and “Total cost” change when other values are changed. On the other hand, the “cost per product” cell will not change since it is the fixed price.
Technically, the “Product Sold” and “Price Per product” are the cells which only can change.
- Then Click Solve
As you observe Solver had calculated what is possible sales to achieve $50,000, so we need to sell more than 2000 products at $37.50 each.
Excel Solver examples
We will use the scenario above in this example, and let’s continue the problem above.
Supposedly we present it again but unfortunately, the price should not be changed and cannot be charged over $30 per product.
This time we will use Solver again to calculate added constraint.
- Again go to the Data tab, under the Analyze group, click Solver
- Then, Click the Add button
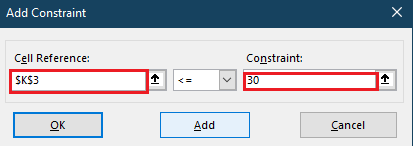
So here we will add a constraint which is on the cell K3 along with less than or equal to $30.
Hence, the constraint we add prevents the Excel from altering the value of the cell anything with $30 dollar during the calculation process.
- Then Click Solve.
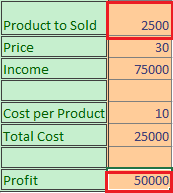
Solver shows that in order to achieve $50, 000 with fix price of $30, it needs to sell products of more than 2500.
Conclusion
In conclusion, this quick guide of Solver Add-in of Excel is a starter. This provides simple example which helps you solve more complex problems in the future.
As you learned how to add more constraints into Solver, you can achieve now the goal you are looking for.
I hope you learned on this topic and ready to solve linear programming problems.
Thank you for reading 🙂

Glay Eliver
Programmer & Technical Writer at PIES IT Solution
Glay Eliver is a programmer and writer at PIES IT Solution, author of over 600 tutorials at itsourcecode.com. Specializes in JavaScript tutorials, Microsoft Office how-tos (Excel, Word, PowerPoint), and Python error debugging covering ImportError, TypeError, AttributeError, ModuleNotFoundError, and JavaScript ReferenceError. Authored several of the site’s highest-traffic Excel and MS Office reference articles.
Expertise: JavaScript · MS Excel · MS Word · MS PowerPoint · Python · Python ImportError · Python TypeError · Python AttributeError · ModuleNotFoundError · JavaScript ReferenceError · Pygame · View all posts by Glay Eliver →