
In this tutorial, we will discover the shortcut for Excel’s Autofill feature. This feature is invaluable, especially when we are working with a large quantity of data.
Knowing the shortcuts in Excel allows us to work quickly and efficiently, saving us time and increasing our productivity. If you are a beginner in Excel, you may visit our website to learn a lot about Excel shortcuts and functions.
Back to the topic. Manually typing data in Excel can be time-consuming, especially when we have a large quantity of data to input. Fortunately, the autofill shortcut saves the day, as it’ll help us save time.
What is Autofill in Excel?
Autofill is a feature in Excel that allows us to rapidly fill in data based on a pattern we have established.
For example, we are working with the student’s information. We have columns of the student’s first name, last name, and full name. Isn’t it a hassle to repeatedly type the first and last name of the student in the full name column? That is why this feature is invaluable, as it does not just save us time; it also makes our work easier.
Without prolonging the discussion, here’s a simple tutorial for the autofill shortcut.
Shortcut for Autofill in Excel (Tutorial)
Time needed: 1 minute
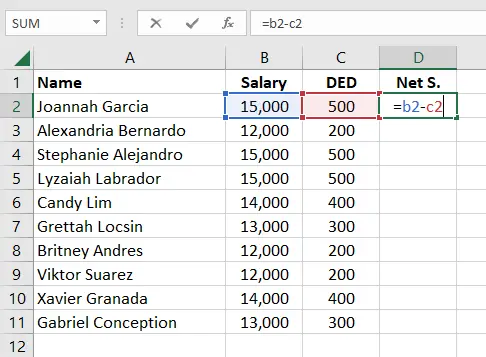
The following is the shortcut for the Excel autofill. In this example, we subtract the deduction from the employee’s salary.
- Input your formula.
The first thing we do is input the formula in the adjacent cell of our data. In this example, we input the formula in D2 and subtract the data in B2 and C2.
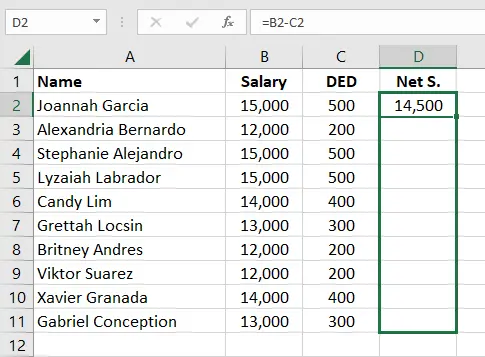
- Drag the fill handle.
Once we have our formula, drag the fill handle down to the cells we want to fill.
- Result.


Tip: You can also use the autofill function without using a mouse. Simply select the cell beneath the cell containing the formula. Then press CTRL + D. Use the down arrow key to slide the selection lower. Then press CTRL + D in each cell to make the same change in all of them.Flash Fill Feature
The full name column will be filled in this example by combining the first name and last name columns. Can you imagine manually typing it all when you have a large quantity of data? It sounds very laborious and tiresome.
Thankfully, we can no longer do that. And the magic is that we can do that now in just a flash by using the flash fill feature.
Now, save your effort and time and learn with us how to combine data from two columns into a single column. Here are the steps of what you have to do:
Step 1: Input the first name and last name into the full name column.
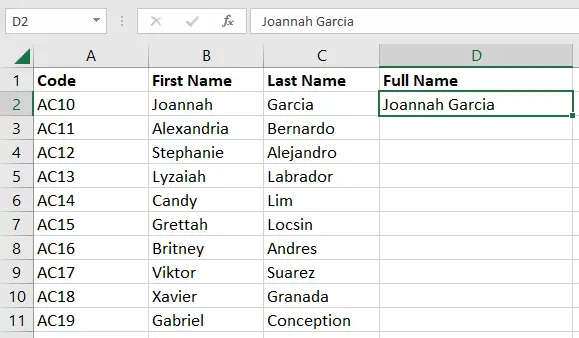
Step 2: In the next row, beneath the full name you input, press ctrl + E. Then, the names of the other rows will automatically combine.
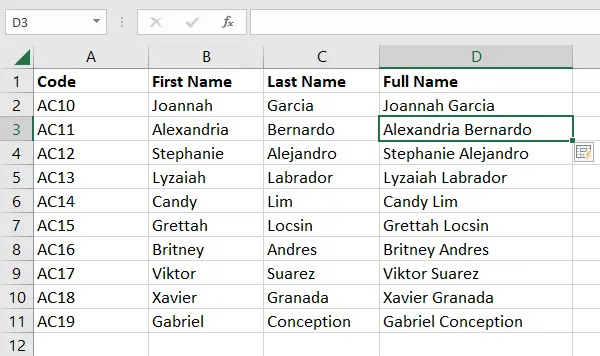
Note: After typing or inputting the first name, you can also directly type the second name. And Excel will show suggestions for the full names of all the rest. When that suggestion appears, all you have to do is press the ENTER key (see the sample below).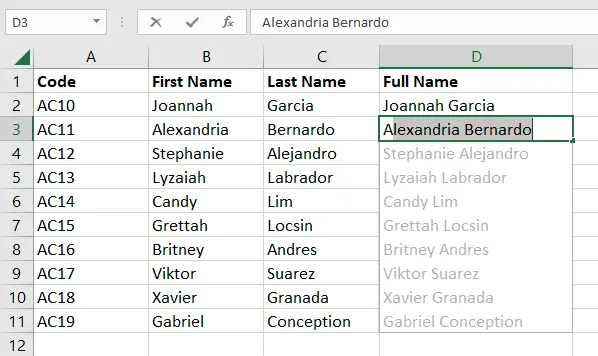
Conclusion
In conclusion, the autofill feature in Excel is a time-saving tool for combining or inputting a large quantity of data. This feature is very useful and essential for making Excel work more efficient and productive.
Whether you’re a beginner or an advanced user of Excel, this feature is a must-have. It allows us to work swiftly and efficiently.
I believe that we’re done with our tutorial. I hope you’ve learned something from this. If you have any questions or suggestions, please leave a comment below, and for more educational content, visit our website.
Thank you for reading!

Elijah Galero
Programmer & Technical Writer at PIES IT Solution
Elijah Galero is a programmer and writer at PIES IT Solution, author of 175+ tutorials at itsourcecode.com. Specializes in Python error debugging (AttributeError, TypeError, ModuleNotFoundError), Python programming tutorials, and Microsoft Excel how-to guides for BSIT students and productivity learners.
Expertise: Python · Python Errors · Python AttributeError · Python TypeError · ModuleNotFoundError · MS Excel · MS PowerPoint · View all posts by Elijah Galero →