[SOLVED] How To Import Database To MySQL?
This article is a step by step process on How To Import Database To MySQL using phpMyAdmin, If you want to restore a backup of your database, you can follow this guide to import it to phpMyAdmin.
Before we start importing database to your phpMyAdmin make sure that you already installed Xampp in your computer.
Import SQL File into MySQL Command Line
Importing a file to a MySQL database is possible using phpMyAdmin, although it takes time depending on the file size.
If a file is too huge, it will generate a Timeout error if the time limit is exceeded.
You may quickly import your SQL file in less time by using the Command-Line.
I’m using XAMPP in Windows for this tutorial.
Steps on How To Import Database into MySQL Command Line
| # | How To Import Database into MySQL Command Line |
| Step 1: | Open Xampp |
| Step 2: | Open CMD (Command Prompt) |
| Step 3: | Type the syntax given |
| Step 4: | Output |
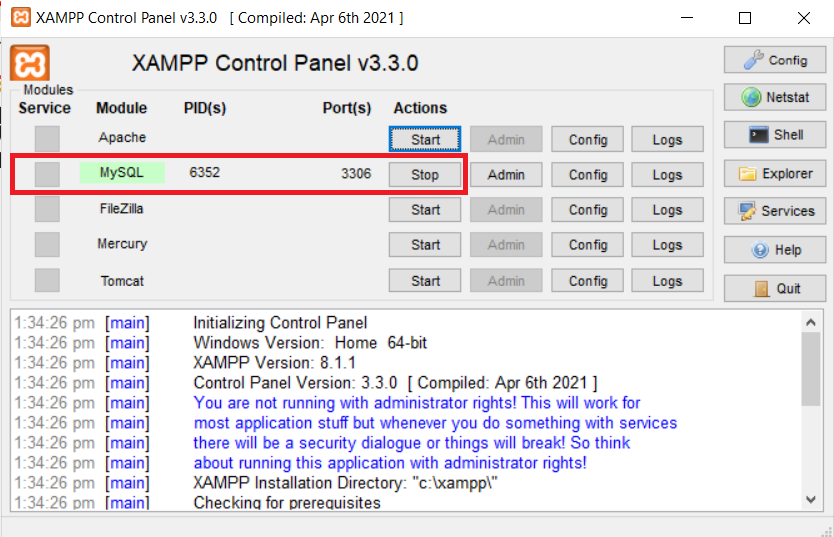
Step 1: Open Xampp
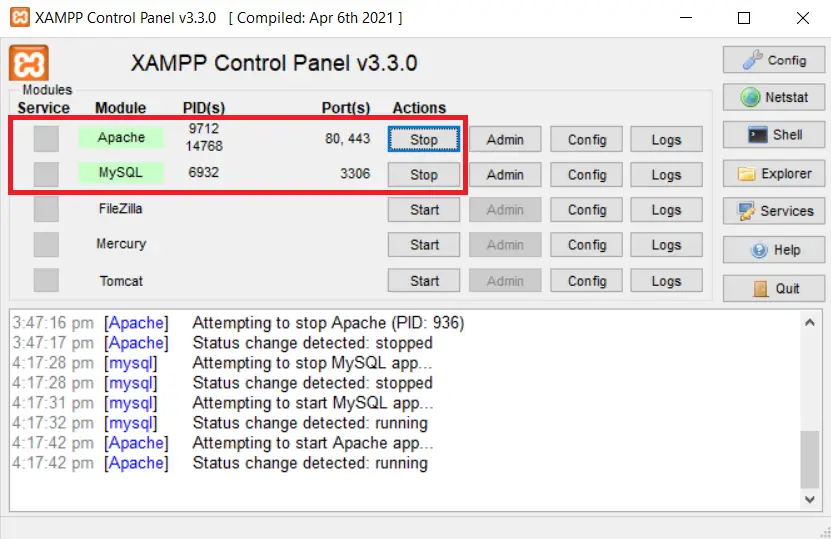
First, open “Xampp” and click the start button of “MySQL“.
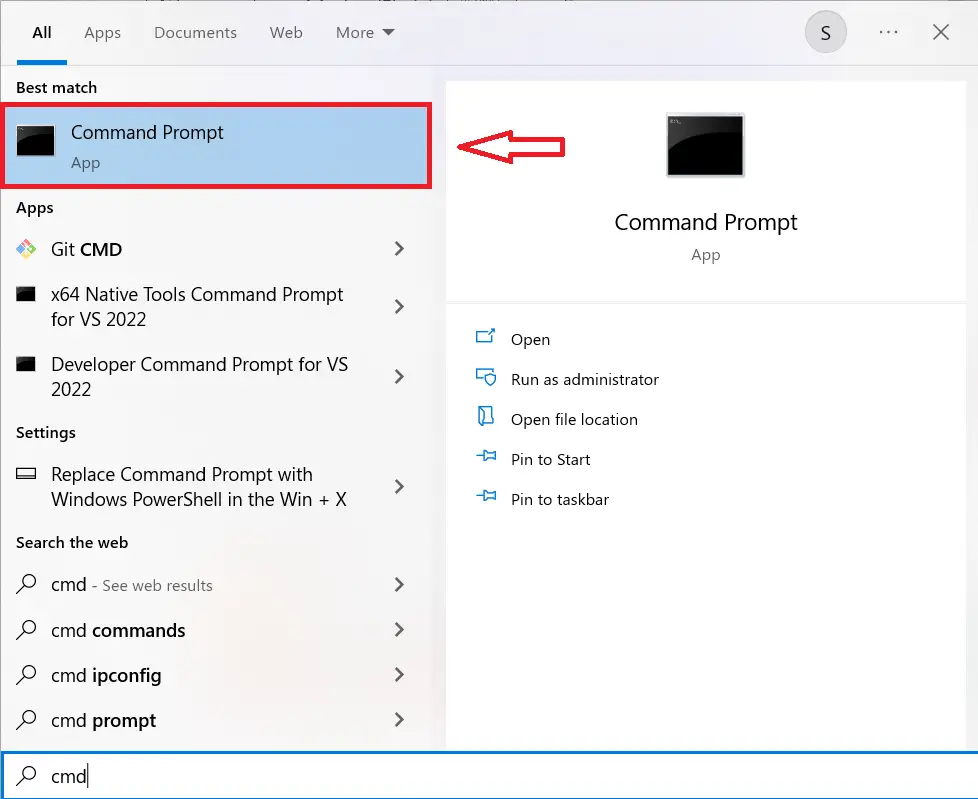
Step 2: Open CMD (Command Prompt)
Next, Open CMD ( Command Prompt )
Step 3: Type the syntax given
Next, follow the given steps and type to your CMD.
Syntax:
cd..
cd..
cd xampp
cd mysql
cd bin
mysql -u root -p

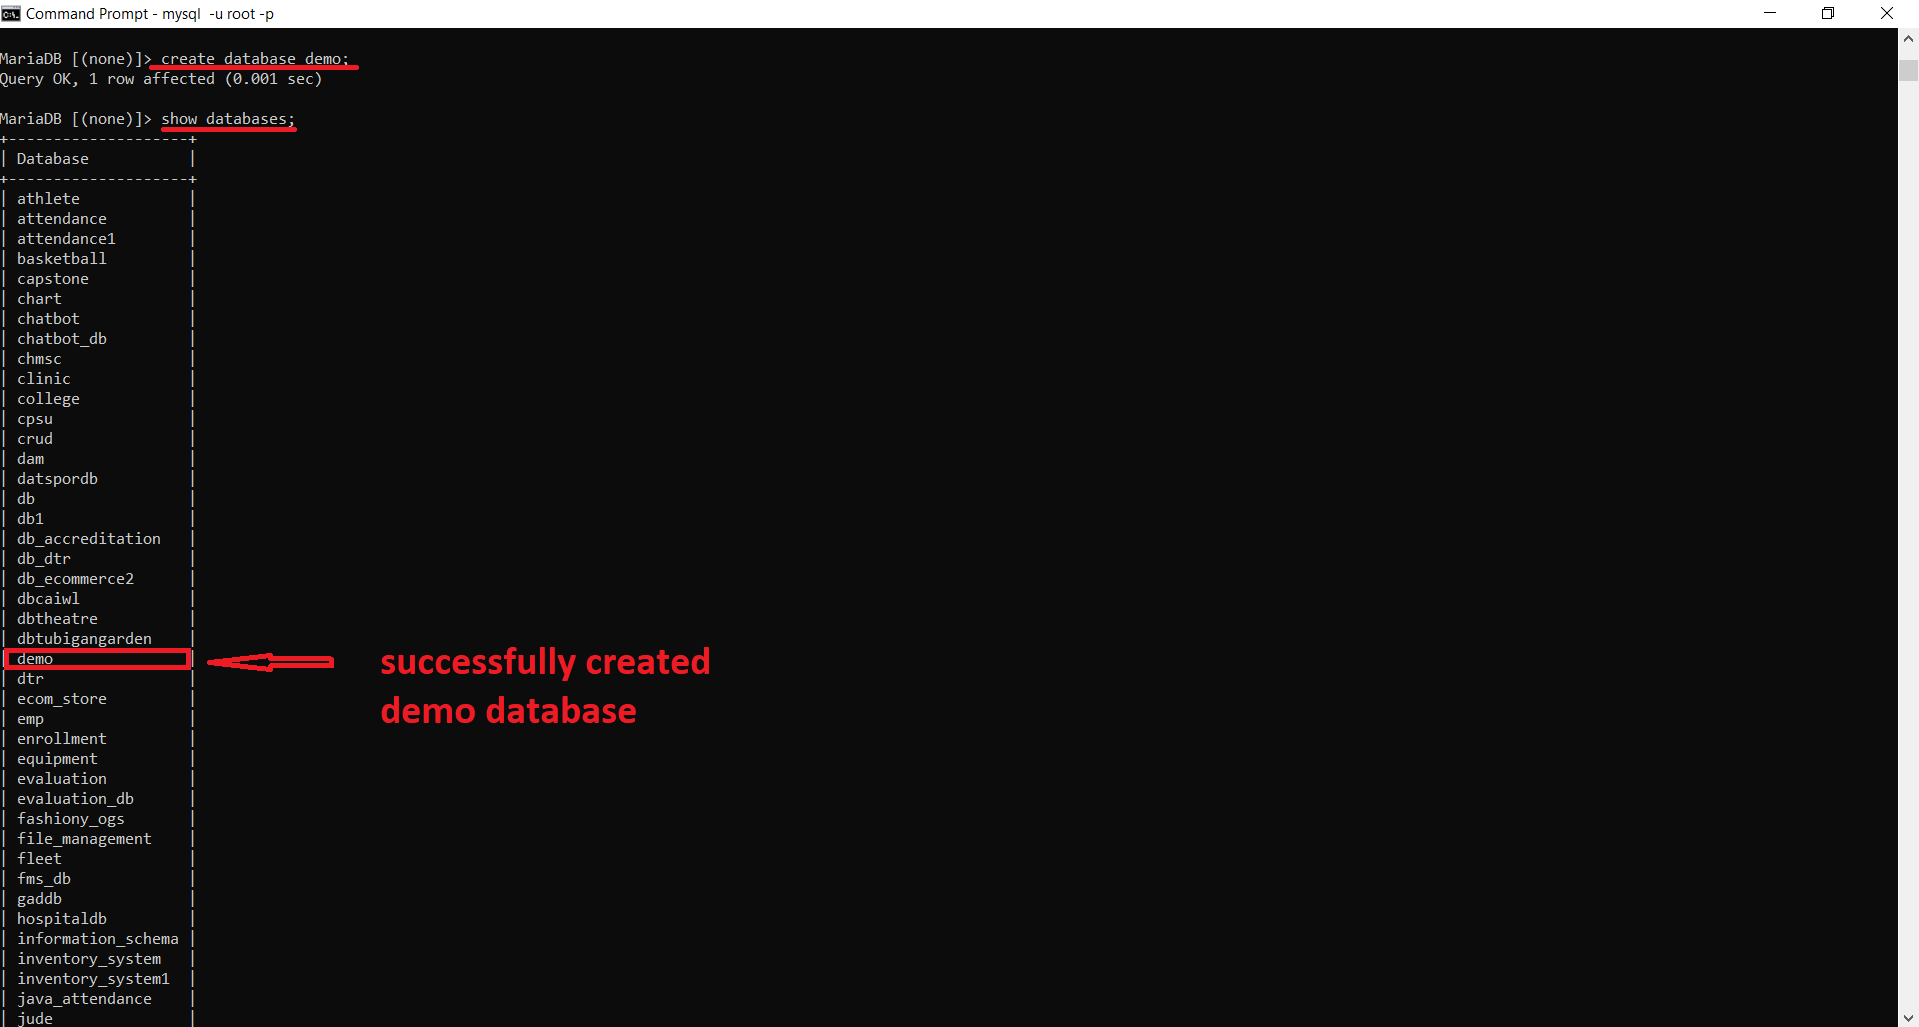
Show Databases
show databases;

Create Database
create database demo;
Import SQL File
mysql -u root -p demo < C:\Users\Lenovo\Downloads\demo.sql

Step 4 : Output
you have successfully import the database!
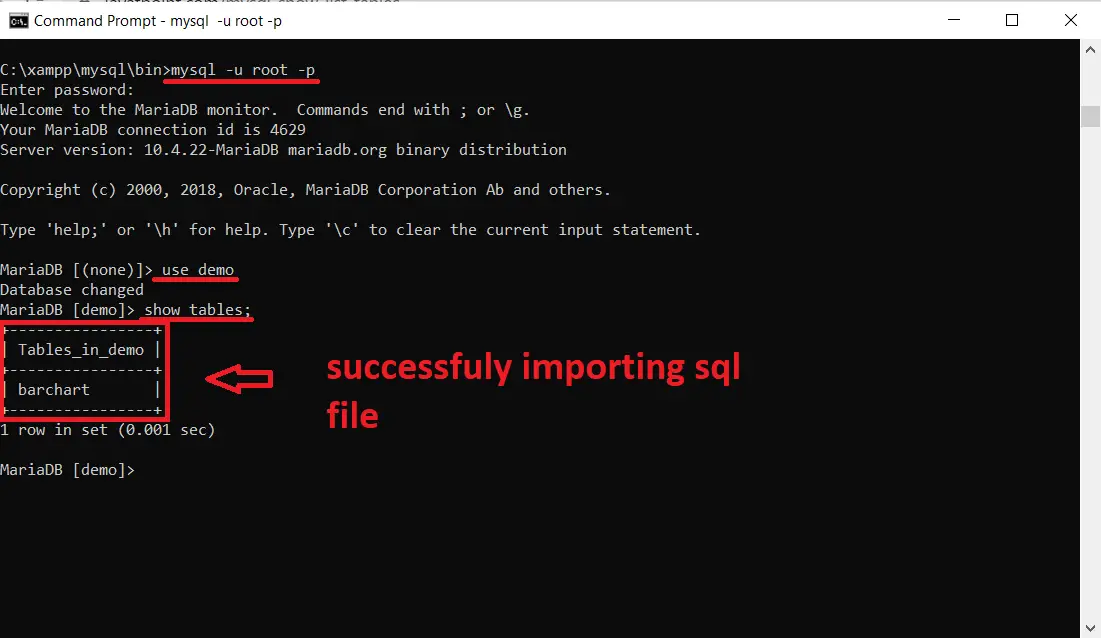
We have successfully import the database file using CMD (Command Prompt).
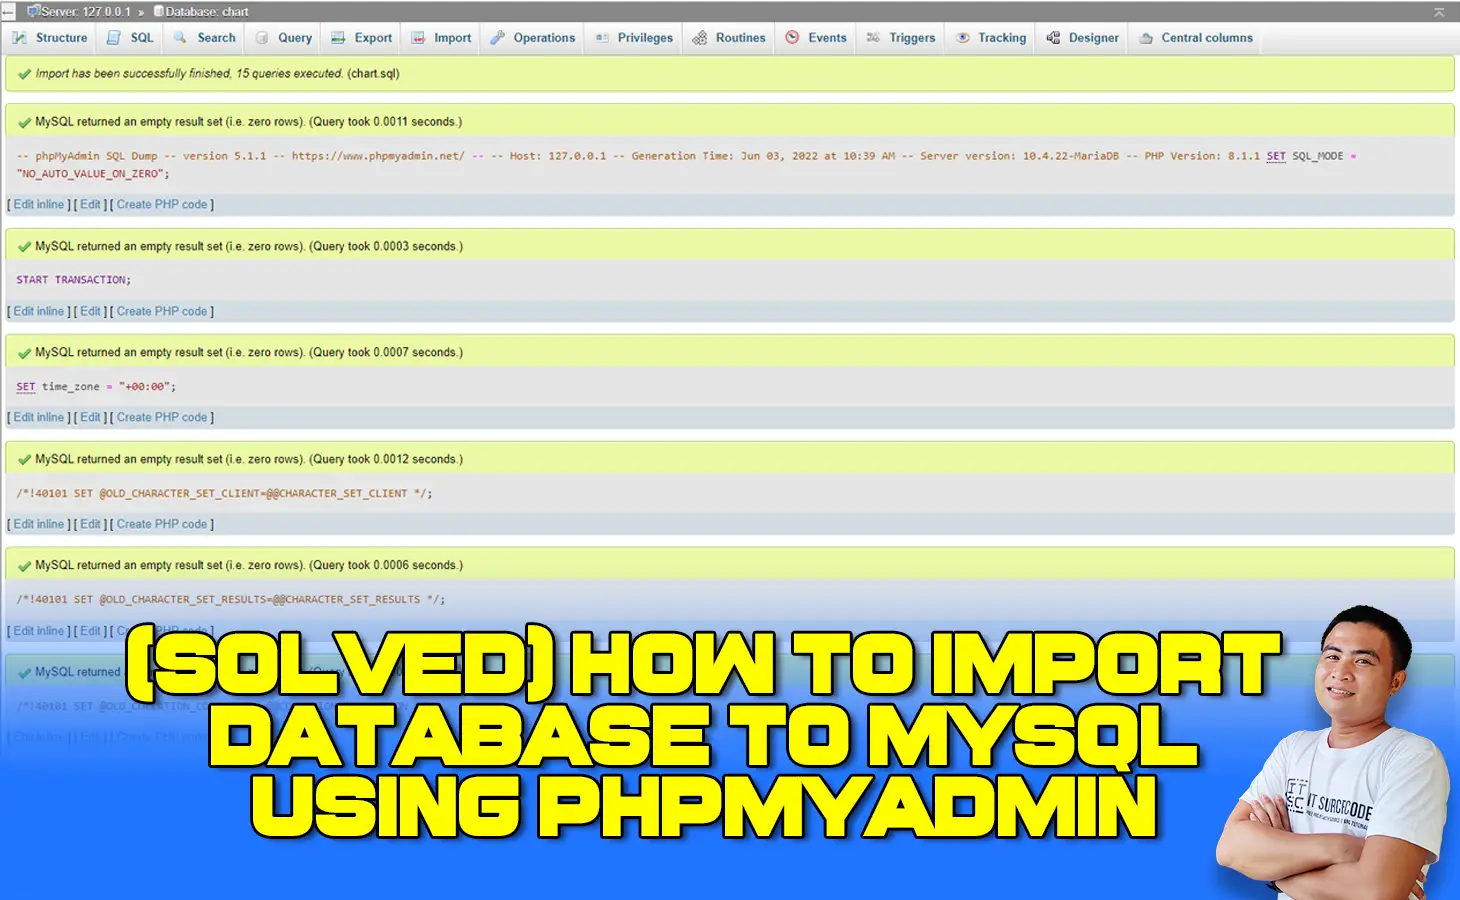
Steps on How To Import a Database into phpMyAdmin
Time needed: 5 minutes
How To Import Database into MySQL using phpMyAdmin
- Step 1 : Open Xampp
First, open “Xampp” and click the start button of “Apache” and “MySQL“.

- Step 2: Open phpMyAdmin
Next, open any browser and type to the URL : “localhost/phpmyadmin“

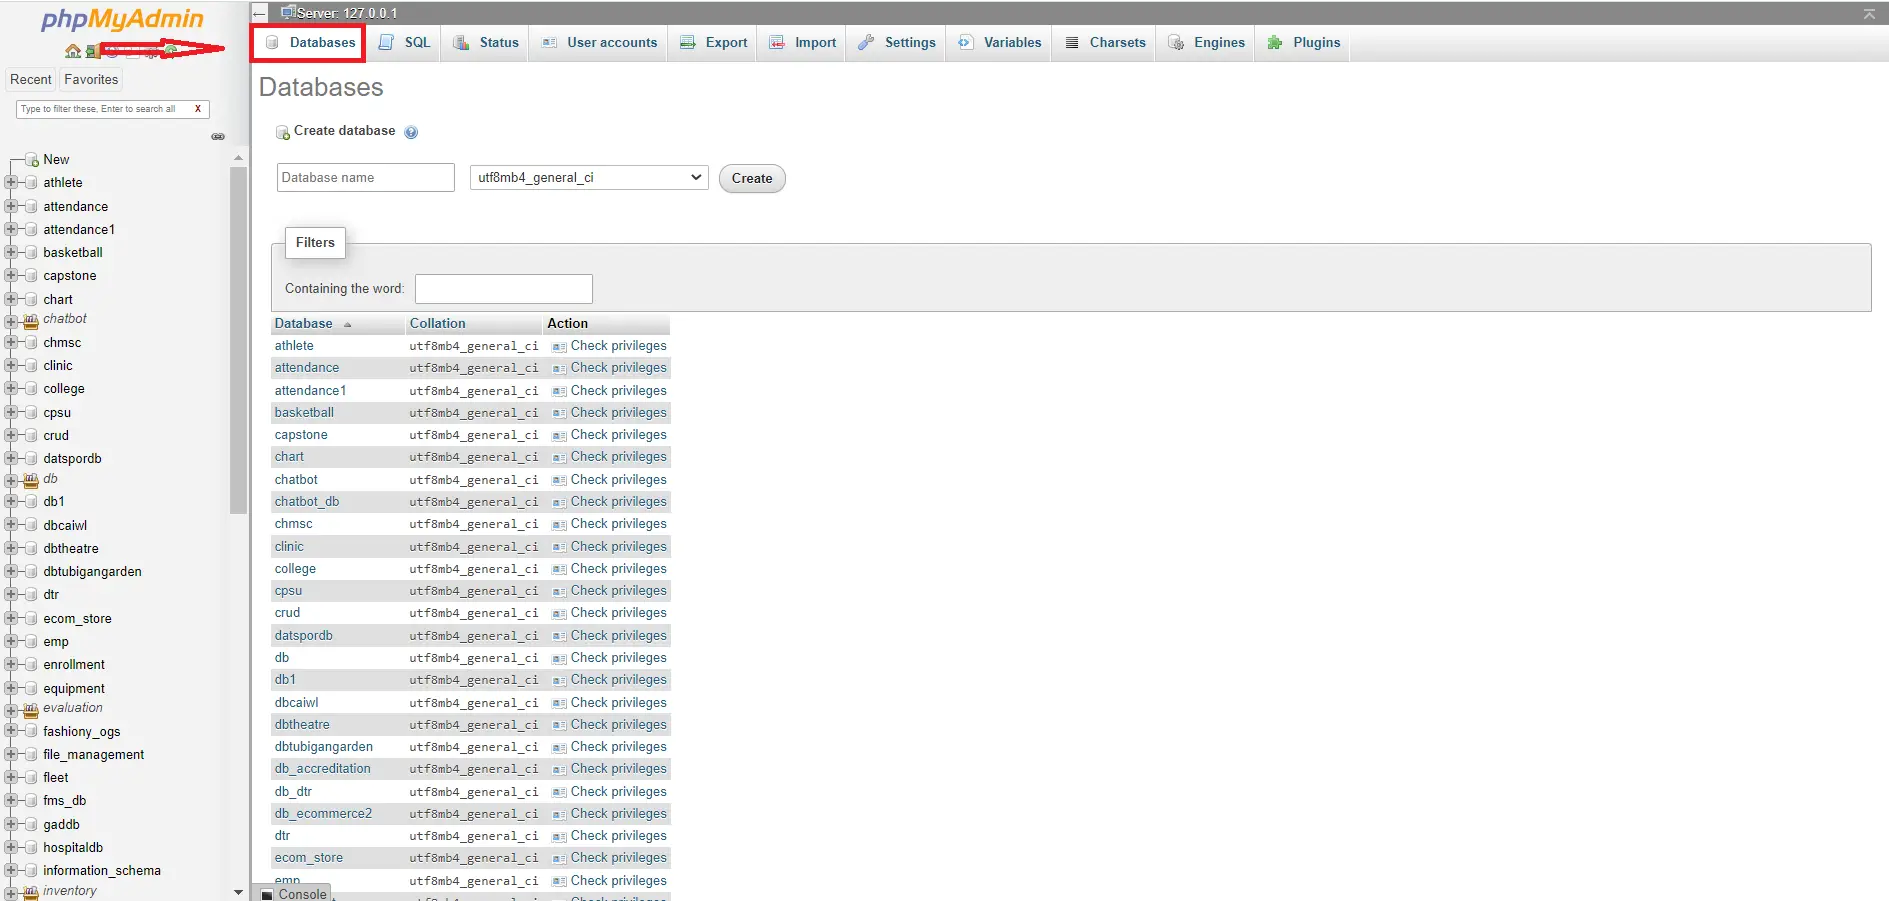
- Step 3: Click Databases in the top-menu
Next, click the “Databases” in the top-menu.

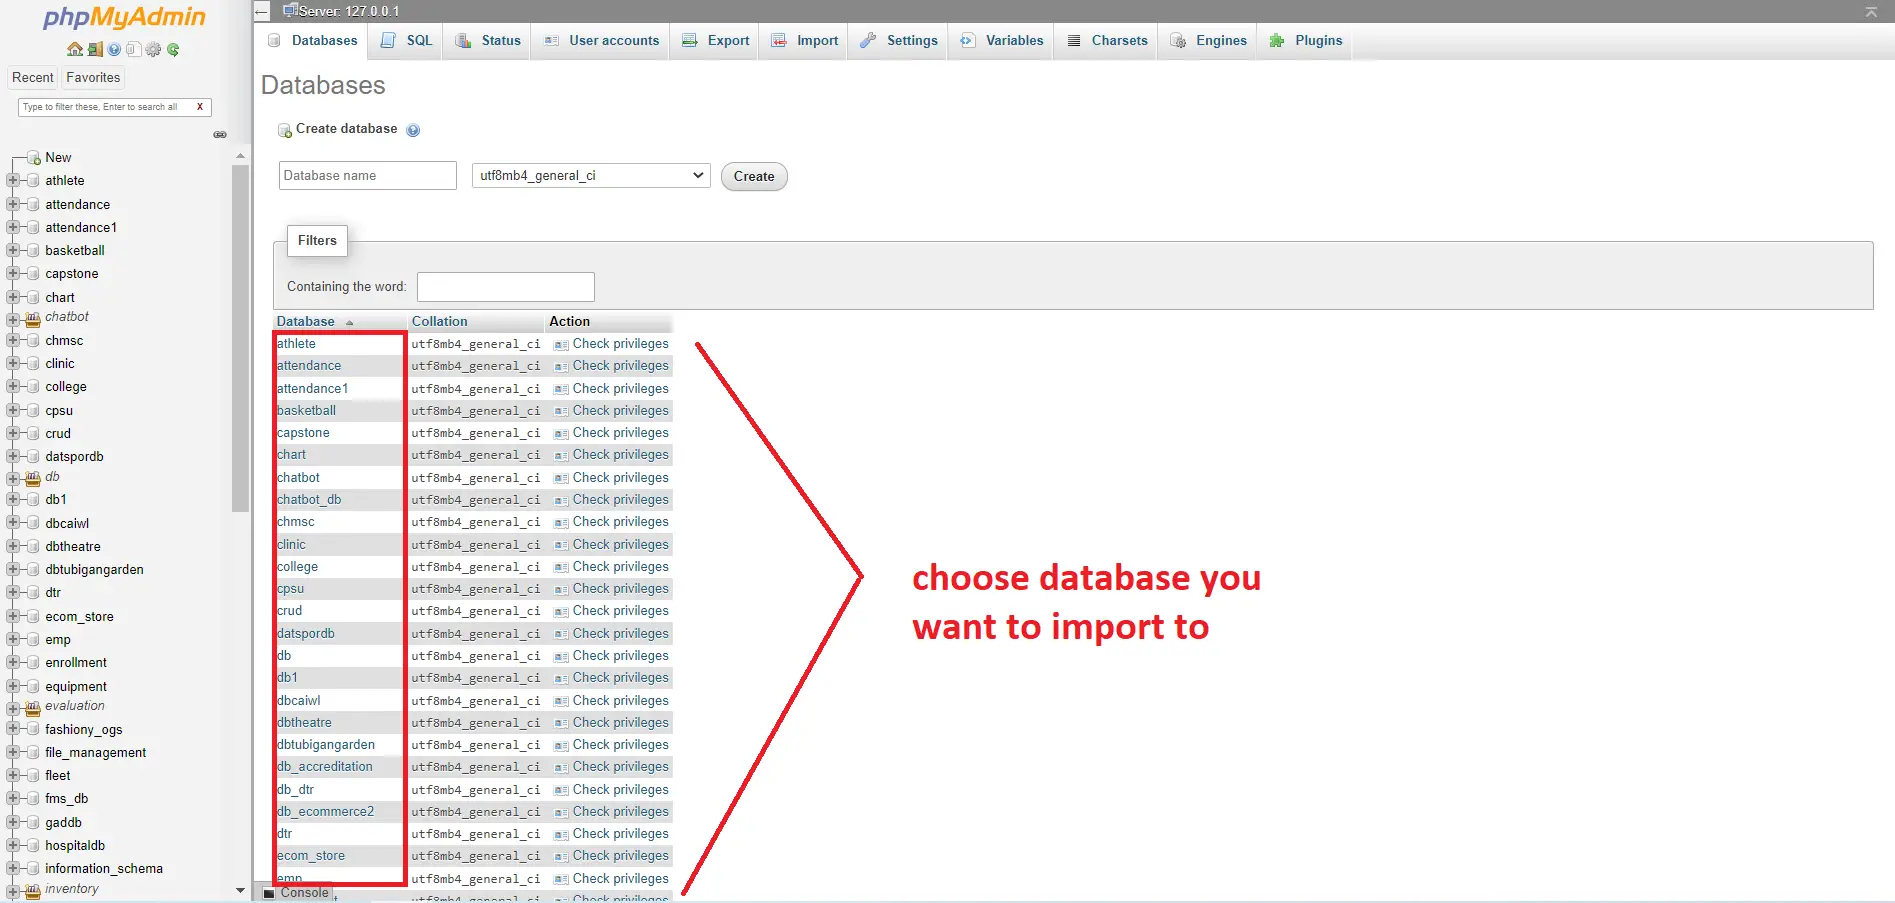
- Step 4: Click the name of the database you want to import to
Next, choose the database name you want to import to.

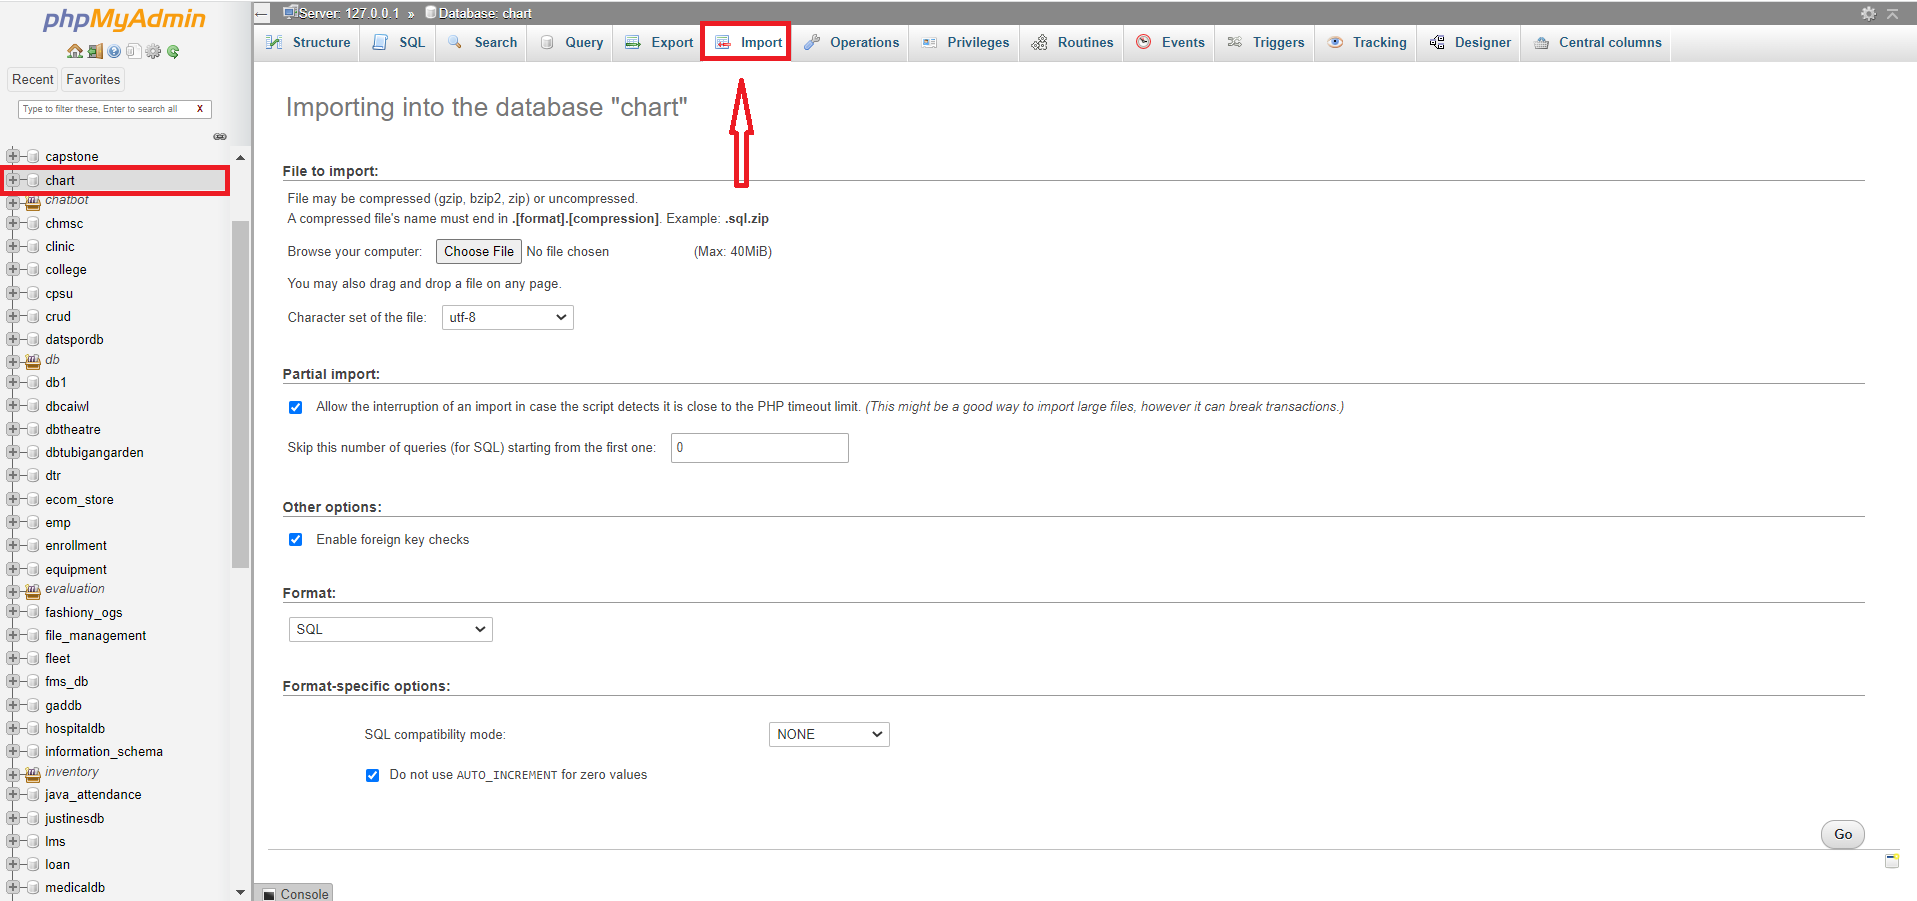
- Step 5: Click Import
Next, click the “Import” in the top-menu.

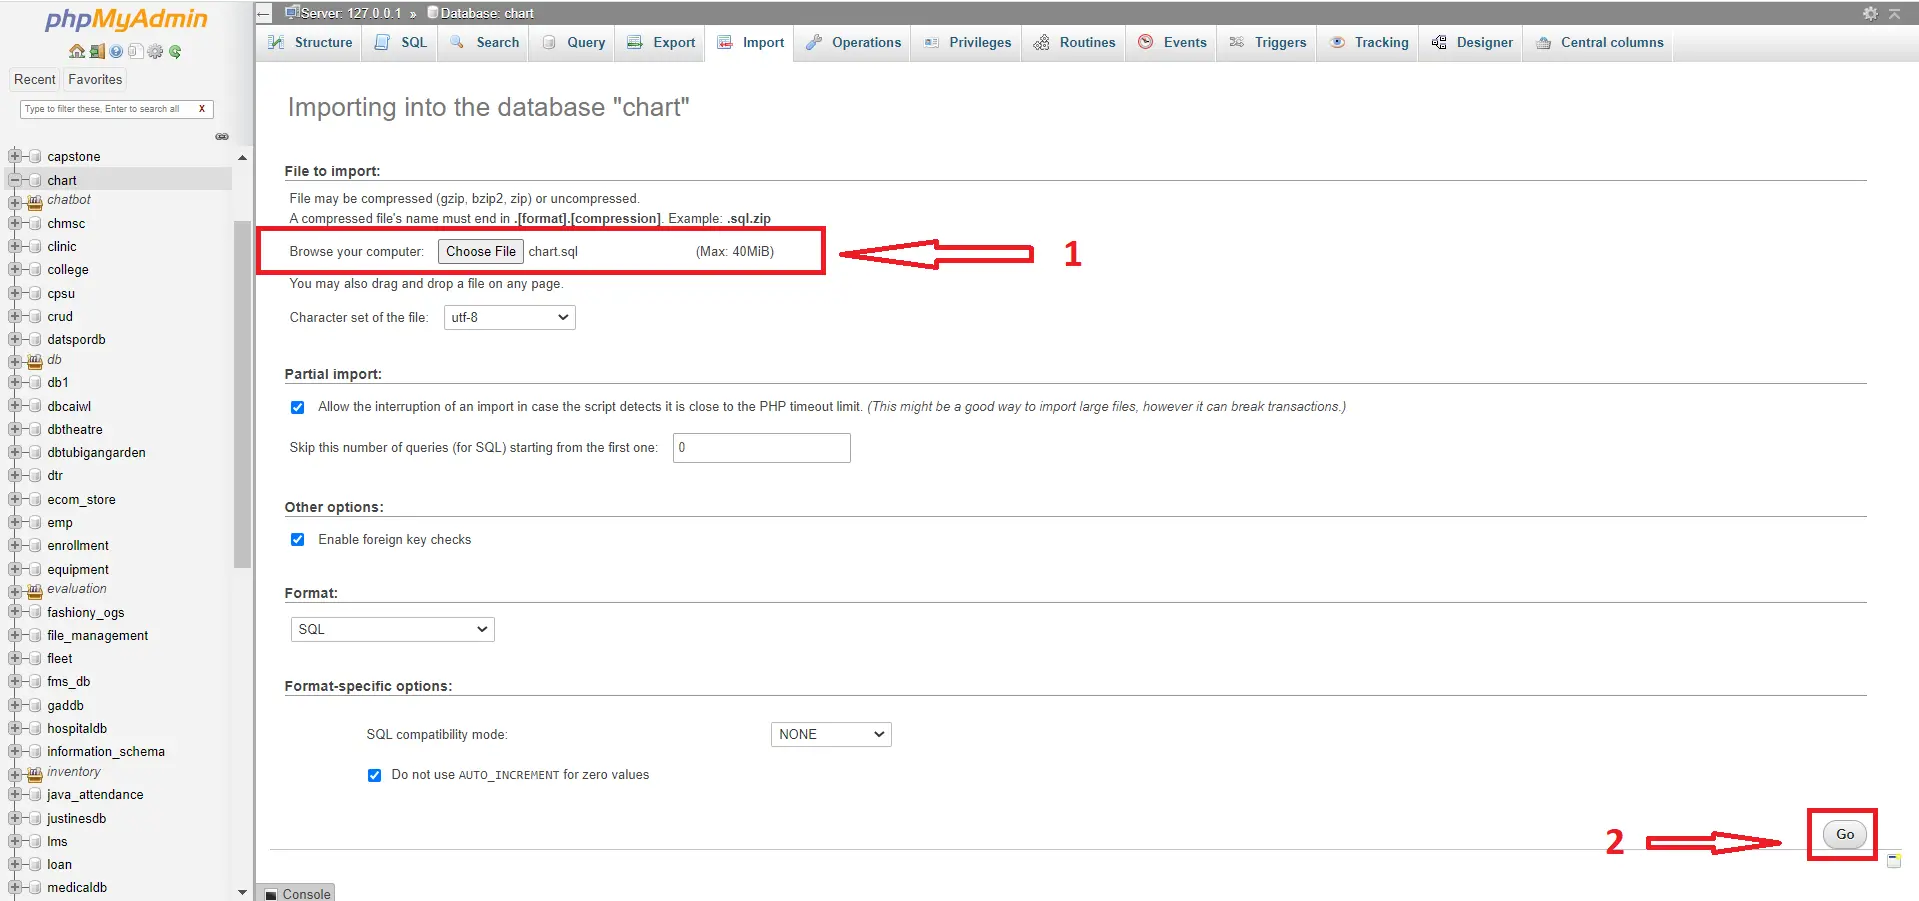
- Step 6: Choose file and click Go
Next , choose you database “file” you want to import and click “Go“

- Step 7 : You’re done
Last, it will display the list of tables in your database.


Summary
This tutorial will show you on how to import database into MySQL using phpMyAdmin, This article has a step by step process on importing database into phpMyAdmin.
Related Articles
Inquiries
If you have any questions or suggestions about on How To Import Database To MySQL using phpMyAdmin, please feel free to leave a comment below.