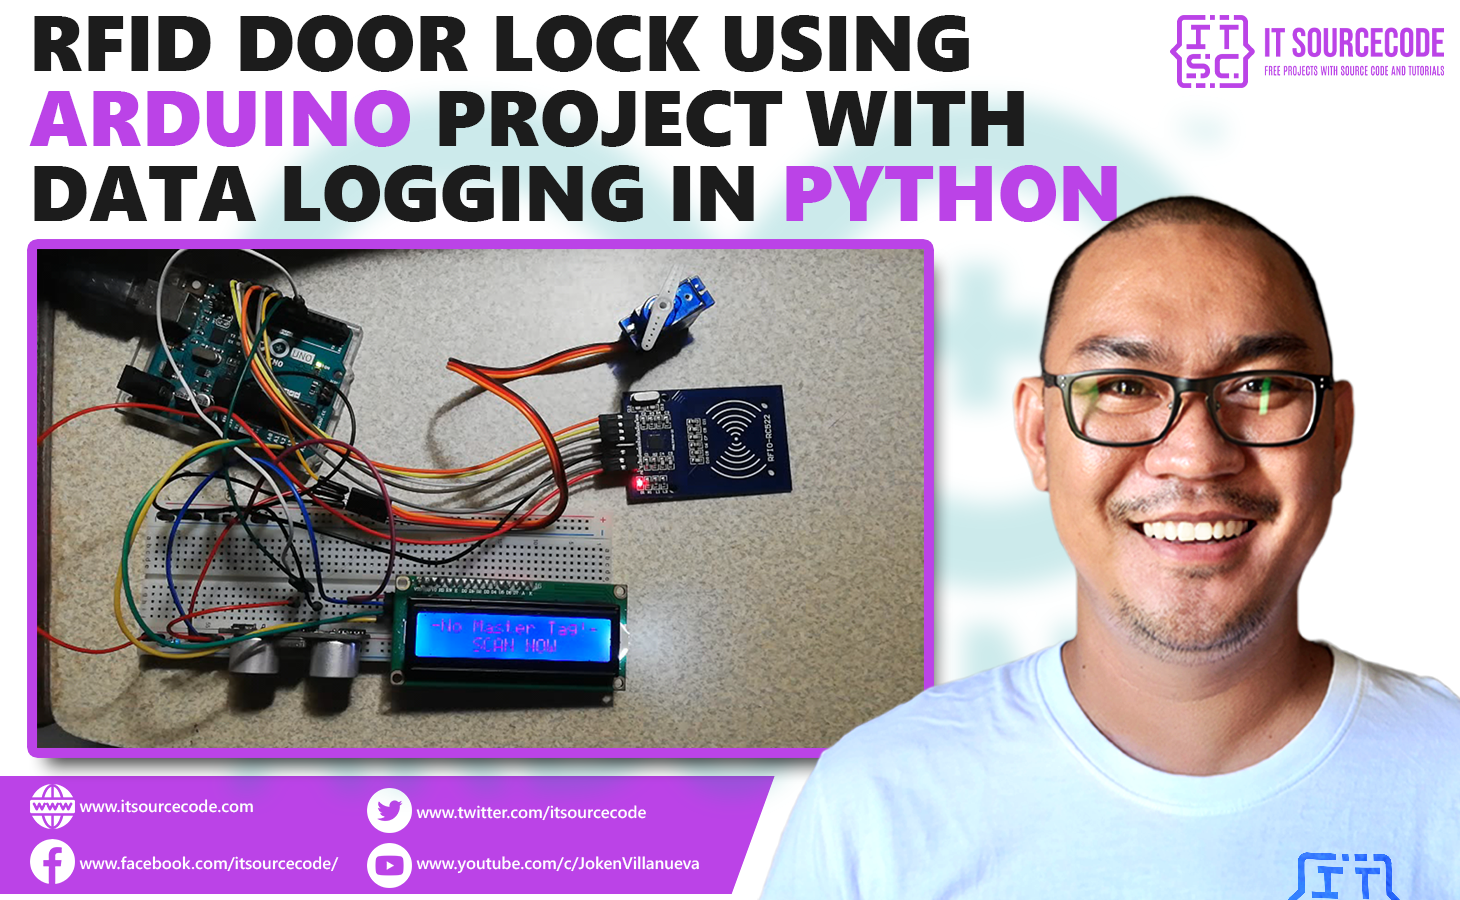
RFID Door Lock Using Arduino Project are common security measures for granting access to persons in authority. But without any means of security log, you cannot trace the persons who accessed a secured area.
We will solve that in this project. You will learn how to create an RFID Door Lock Using Arduino Project with Data Logging in Python. This device can enroll RFID cards to grant it access and creates a CSV file to log all who have swiped an RFID.
RFID Door Lock Arduino Project with Data Logging in Python: Steps in Creating the Device
Here are the steps in creating RFID Door Lock Arduino Project with Data Logging in Python.
- Gathering the Components
The first thing to do is to collect the hardware components for the Arduino device.
Arduino Uno
RFID – RC522 Module
HC-SR04 Ultrasonic Sensor
LCD with I2C interface
Mini Servo - Connecting the Components
Connect the components to the Arduino Uno. Please refer to the wiring diagram below.
- Coding the Arduino
Third step is about coding the Arduino device.
- Python Coding
Final step is creating a Python project that can communicate with the Arduino device.
RFID Door Lock Arduino Project with Data Logging in Python: Detailed Explanation
To understand the steps above, here is the detailed explanation of the project.
| Quantity | Components |
| 1 | Arduino Uno |
| 1 | RFID – RC522 Module |
| 1 | HC-SR04 Ultrasonic Sensor |
| 1 | LCD with I2C interface |
| 1 | Mini Servo |
Arduino UNO
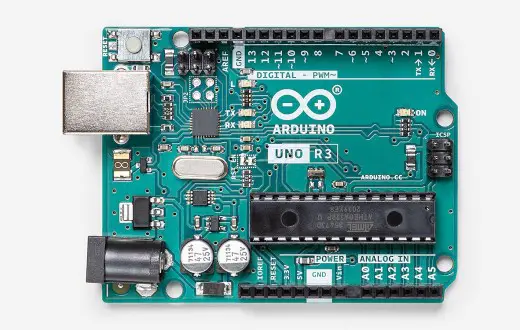
You will be using Arduino Uno for this project. It is an easy to use microprocessor board. Arduino Uno is suitable for any projects and is the cheapest and widely used microprocessor board in the Arduino family. This is great for all kinds of IoT projects.
RFID – RC522 Module
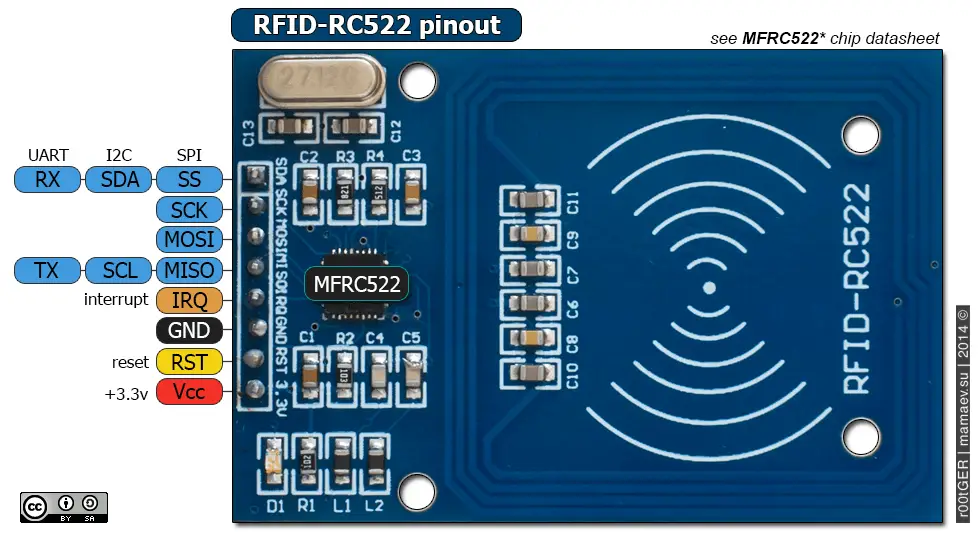
This is the RFID module you will be using. it will be powered using the 3.3V output pin of the Arduino while other sensors for this project will be powered by the 5V pin.
HC-SR04 Ultrasonic Sensor
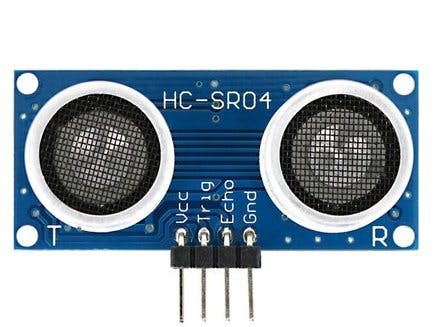
Next component is the ultrasonic sensor. The role of this sensor is to detect if there is someone in front of the RFID. it uses sound to measure the distance of an object.
16×2 Liquid Crystal Display with I2C
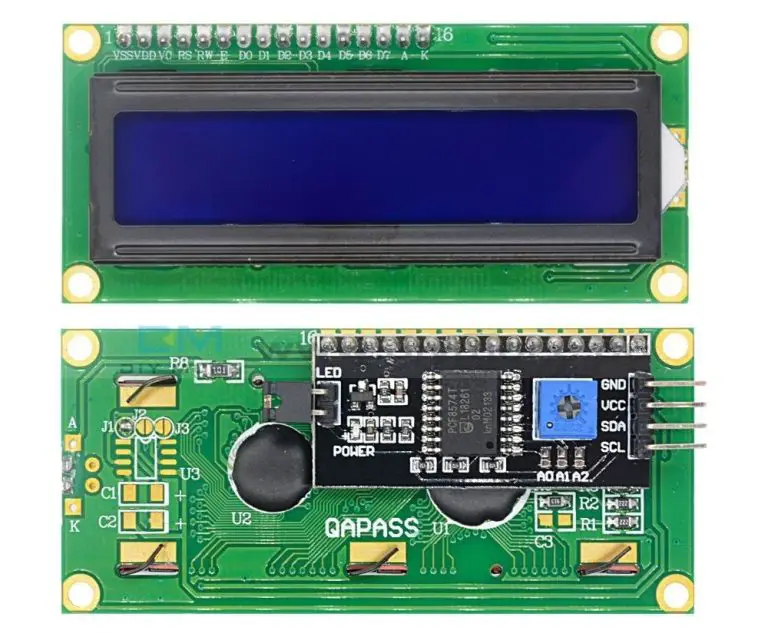
This is where we will display our readings. The LCD that we are using has 16 columns and 2 rows. Also, it comes with an I2C interface. This means we will only need 4 connections for the power and display. This type of LCD is great if you are planning to connect more modules to the Arduino.
Mini Servo
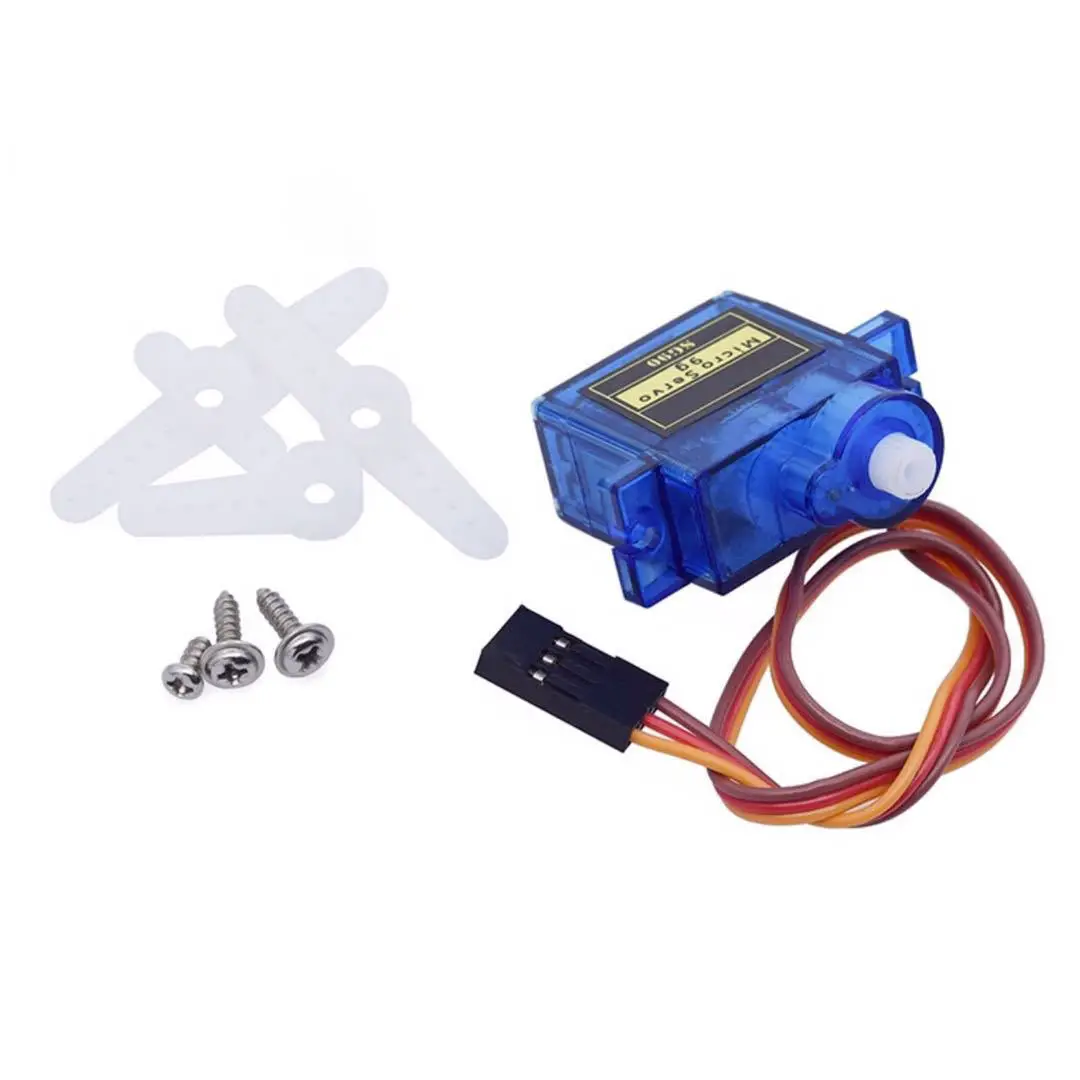
Our last component is the Servo. This will act as our locking mechanism for our device.
Connecting the Arduino Components
Now you are ready to connect the components to the Arduino Uno. All components are connected to the 5V pin of the Arduino excepts for the RFID. SDA and SCL pins of the LCD is connected to pins A4 and A5 respectively. The trigger pin and echo pin of the ultrasonic sensor is attached to digital pins 6 and 5. Meanwhile, the data pin of the servo is attached to digital pin 8.
Lastly for the RFID, the first 4 pins starting from the right are connected to 10, 13, 11, and 12. The Reset pin is connected to digital pin 9.

The Arduino Code
Copy the code below to a new sketch in the Arduino IDE. Once done, you can upload it to the Arduino Uno.
Now the device can operate on its own. You can add RFID cards or tokens to the device using a master card. Let us proceed to the next step – connecting our device to Python.
Python Code
In this project, you can interface your newly created device to Python using PyCharm 2021 IDE. It is important to download the latest version of PyCharm to avoid problems that can occur while installing the package you need.
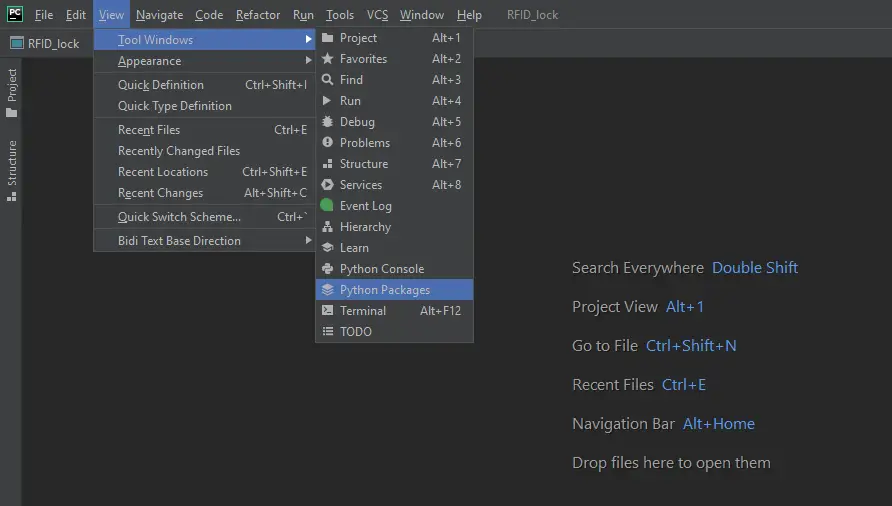
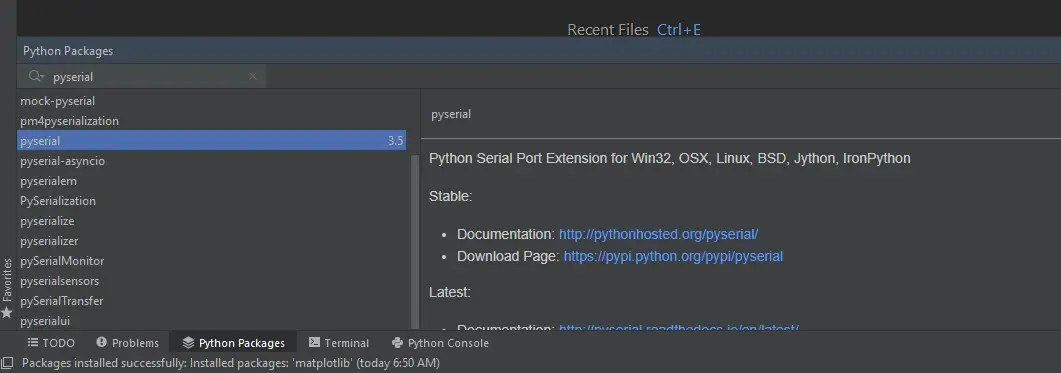
After installing the new version of PyCharm, open the Python Packages in View>Tool Windows. Search for “pyserial” and click “install”.
PySerial is the package that lets you communicate from the Arduino serial monitor. This is why we display on the serial monitor though we have an LCD.
Now go ahead and create an new project in Python and copy the code below.
import serial
import time
import csv
ser = serial.Serial('COM5') #Change to the COM port identified by the Arduino IDE.
ser.flushInput()
while True:
try:
ser_bytes = ser.readline()
decoded_bytes = ser_bytes[0:len(ser_bytes)-2].decode("utf-8")
print(decoded_bytes)
with open("RFID_data_log.csv", "a") as f: #Filename of the CSV file
writer = csv.writer(f, delimiter=",")
writer.writerow([time.time(), decoded_bytes])
except:
print("ERROR")
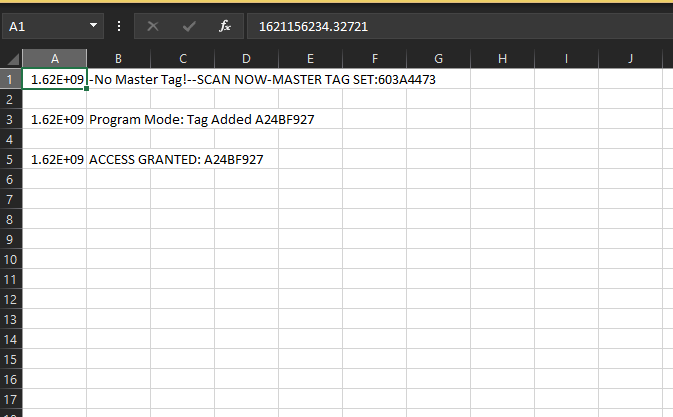
breakThe code above will get the data passed to the serial monitor of the Arduino and saves it to a .CSV file. Connect the Arduino to your computer and once you run the program, the device will also restart. The CSV file will be saved inside your Python project folder. The saved data will look like this:
Conclusion
So there you have it! RFID Door Lock Arduino Project with Data Logging in Python. This project is intimidating at first but you will see that it is fairly easy to do. You can combine this to other Python or Arduino projects and build an awesome system!
Click the button below to download the entire project.
Download
Related Articles
Inquiries
Feel free to write your questions about the RFID Door Lock Arduino Project with Data Logging in Python in the comments below.