
Python is a well-known high-level programming language that has been around since 1991.
It is thought to be one of the server-side programming languages with the most flexibility.
Unlike most Linux distributions, Windows does not come with Python installed. However, you can easily install it in just a few steps.
How to get and set environment variables in Python: Python 3 Installation on Windows
It’s not hard to install and setup Python environment variables on your personal computer. It will only take a few easy steps:
Step 1: Download the Python Installer
Option 1: Download using the Microsoft Store
Did you know that the Microsoft Store may also be used to install Python on your computer?
To install Python using Microsoft Store do the following:
- In the start menu, type or search for “Microsoft Store”.
- Once the Microsoft Store is open, search for the word “Python”
The Microsoft Store has several versions of Python. If you are unsure of what you are doing, it is best to use the most recent version.
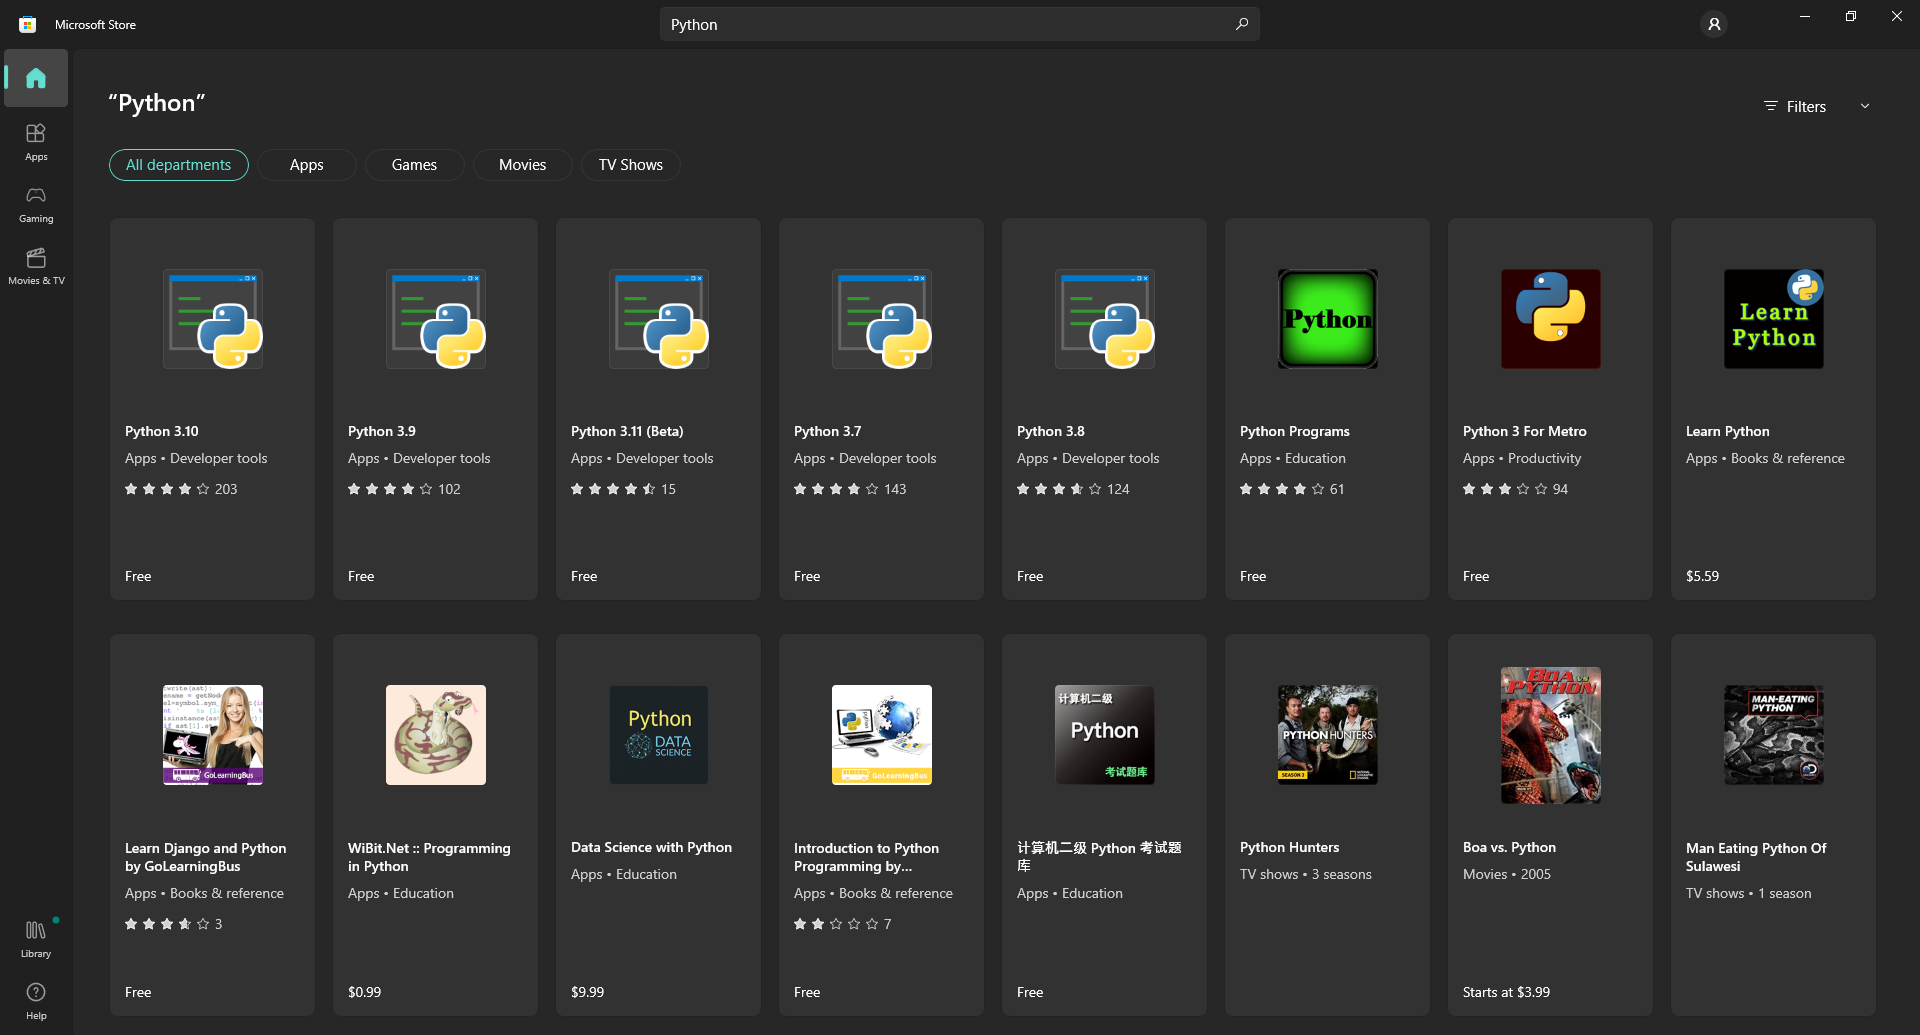
You can access and choose a different version of Python inside the Store and it is free to download software.
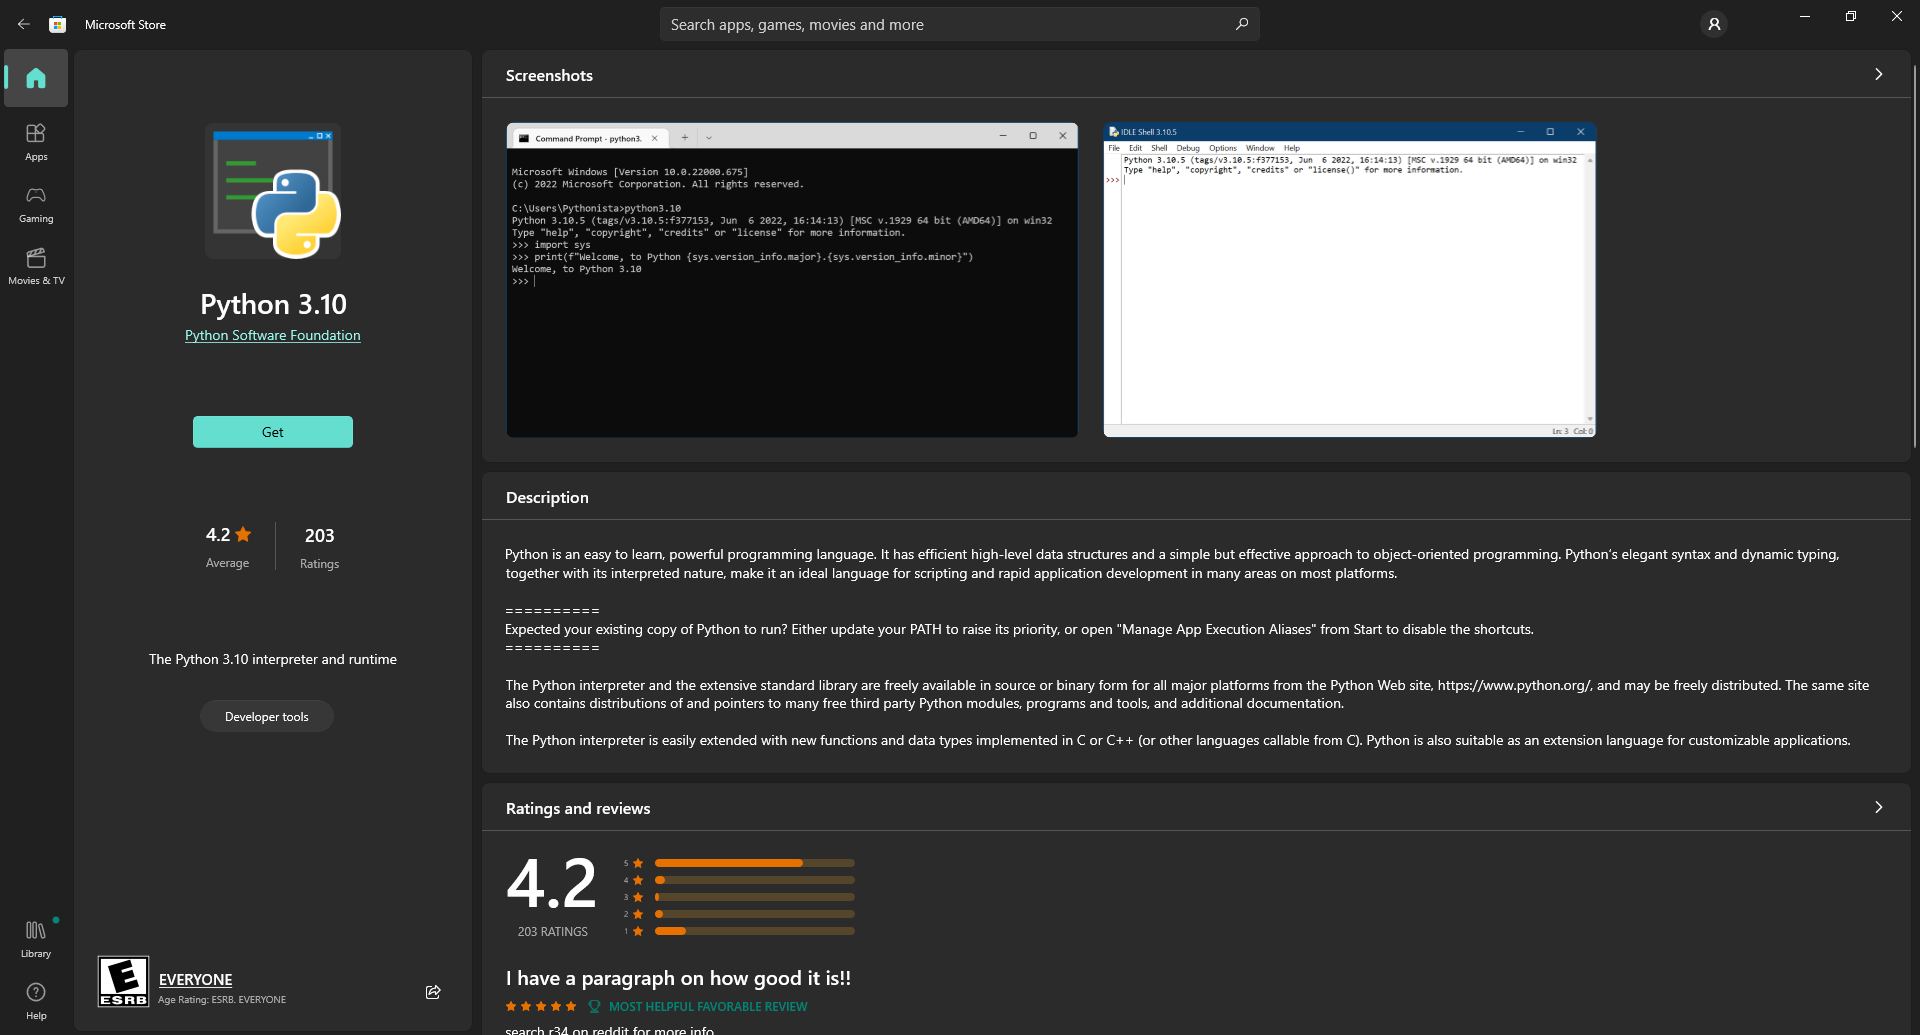
- Click the desired version of Python, then click “Get“, your Windows computer will now have Python installed.
When the installation is done, click the Start button and you should see that Python and IDLE have been added to your list of recently installed programs.
The Microsoft Store package for Python 3.10 is published by the Python Software Foundation and is easy to install. It is mainly intended for interactive use, such as by students.
Warning: If you are asked to pay for Python, you have not selected the correct package.
Option 2: Download using Windows Installer
The installation procedure involves downloading the official Python .exe installer and running it on your system.
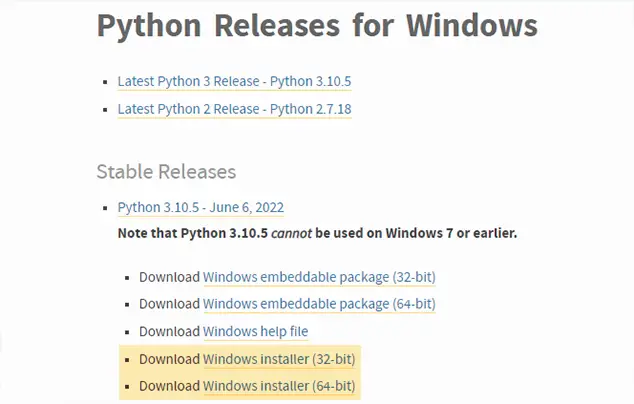
- Go to the official Python website and find the Downloads tab for Windows.
- Then choose to download the Windows installer that corresponds to your system type (32-bit or 64-bit).
Step 2: Run the Executable Installer
After downloading the installer, execute the Python installer.
- Make sure to check the “Install launcher for all users” check box. Additionally, you may check the Add Python 3.10 to path check box to include the interpreter in the execution path.
- Select “Customize Installation” to continue.
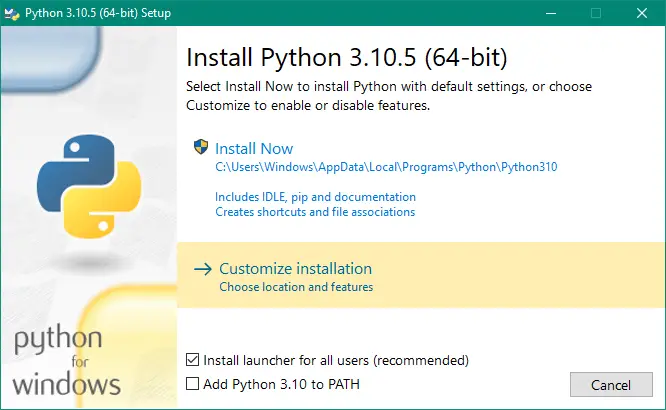
- By selecting the checkboxes below you will be redirected to the Optional Features:
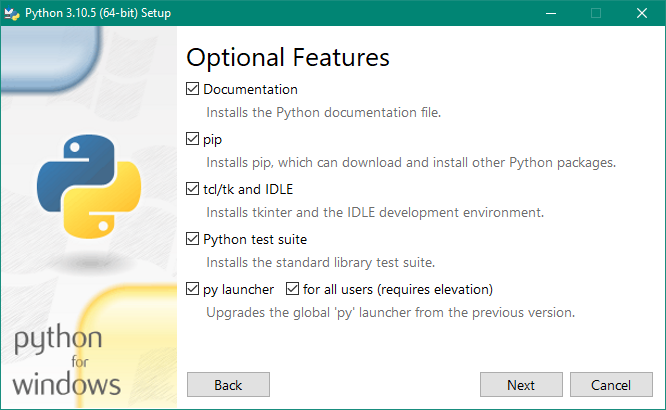
- Select Next.
- You will see Advanced Options and select the Install for all users and Add Python to environment variables checkboxes.
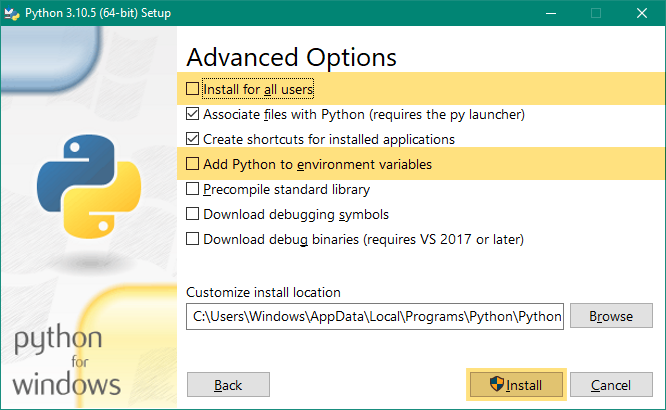
- Click Install to start the installation.
- After the installation, you’ll see a Python Setup successful
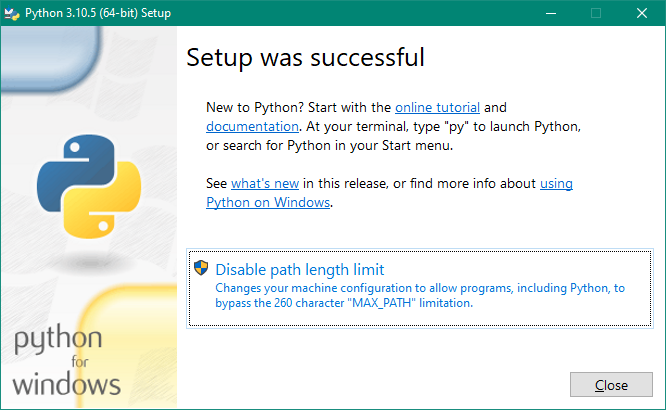
Step 3: Add Python to environmental variables
In setting up Python, you must take this step to use Python from the command line.
If you set the Advanced options and added Python to the environment variables during installation, you can skip this step.
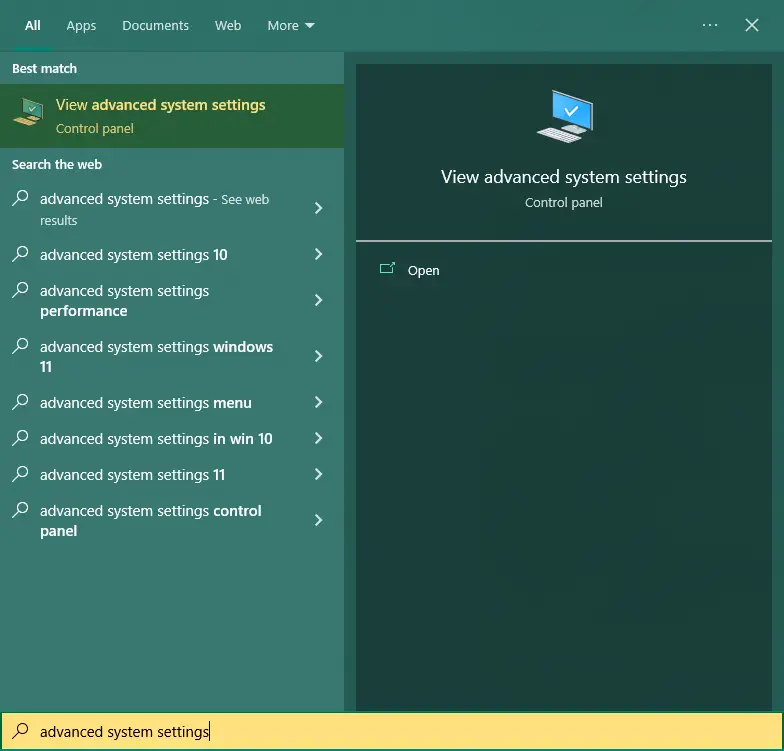
- Search for “Advanced System Settings” in the start menu and select “View Advanced System Settings”.
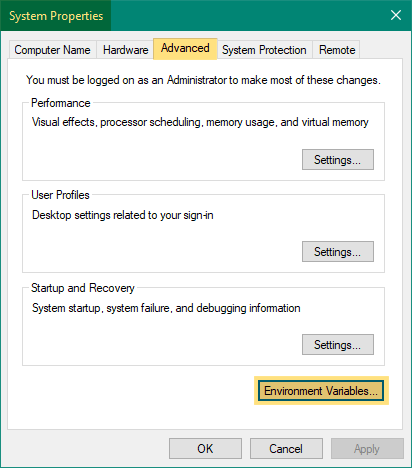
Inside the “System Properties“, select the “Environmental Variables” button.
- Next is to locate the Python installation directory. If you follow our previous step above, you will locate your Python directory in this location:
C:\Users\Computer_Name\AppData\Local\Programs\Python\Python310
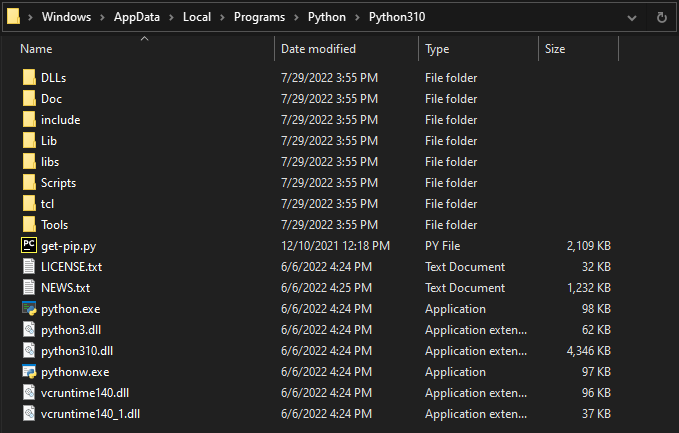
The folder name of the Python location may be different if you installed a different version of Python.
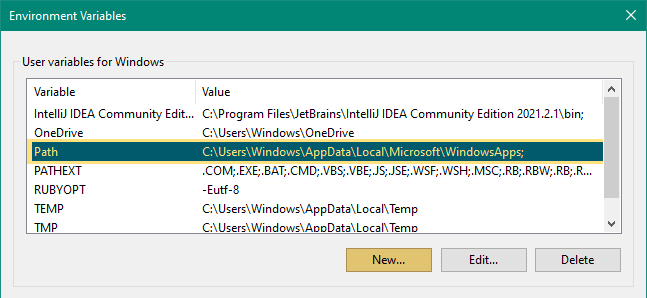
- Add the location of the Python installation directory to the Path Variable.
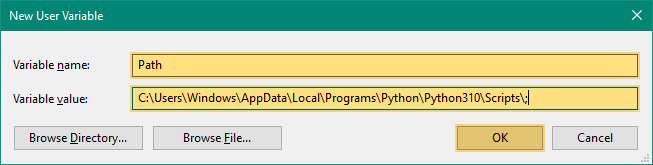
Step 4: Verify the Python Installation
You have now installed Python 3.10.5 on Windows 10. To verify the installation, you can use the command line or the IDLE app.
- In the start menu, search for the cmd or command prompt.
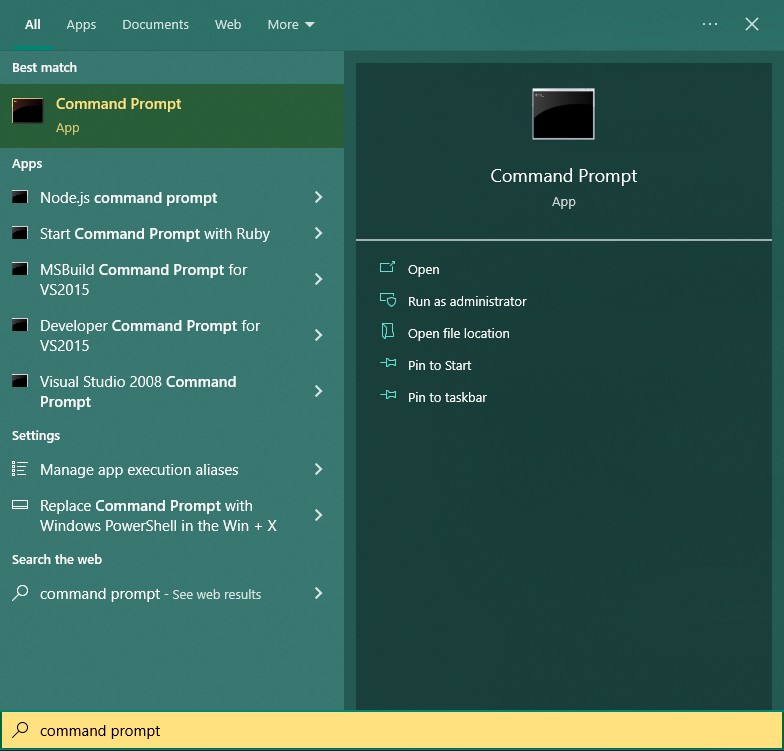
- Once the Windows Command Prompt is open, type py and you will see this:
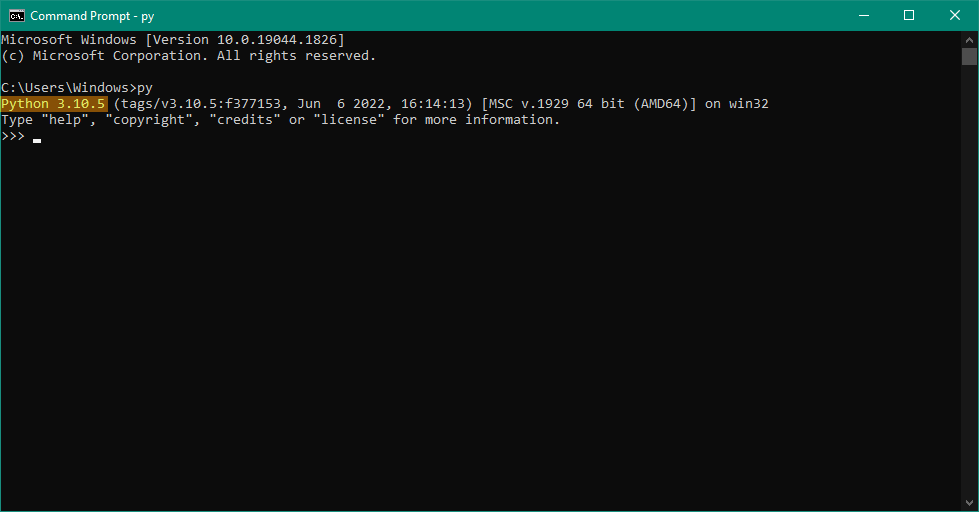
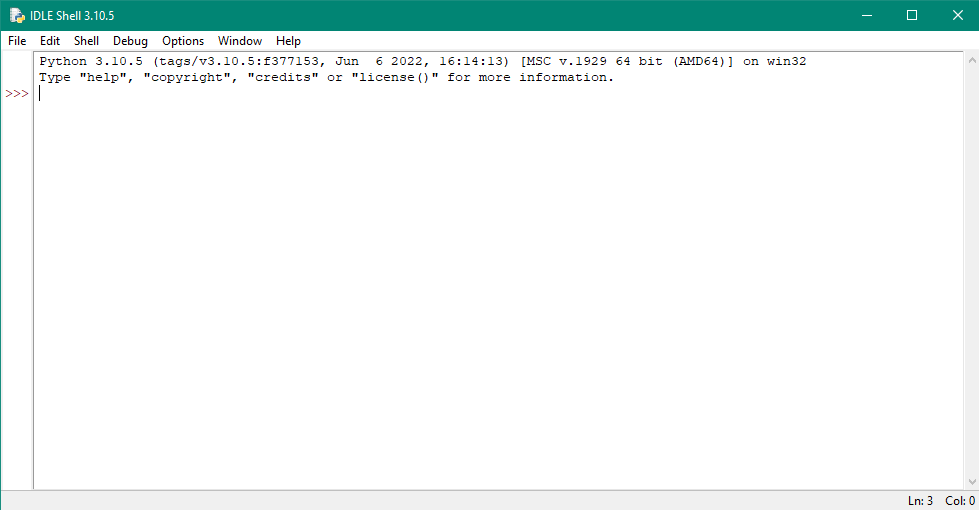
- You can also use the IDLE (Python 3.10 64-bit)
- In the start menu, search Python and select the IDLE (Python 3.10 64-bit)
Step 5: Verify Pip Was Installed
Most Python packages should be installed with Pip, especially when working in virtual environments. To verify whether Pip was installed follow the steps below:
- In the Start menu type “cmd“.
- After you have opened the Windows Command Prompt, type
pip -Vinto it.

Step 6: Install Virtual Environment (Optional)
In order to create isolated virtual environments for your Python projects, you will need to install virtualenv.
Why use virtualenv?
By default, Python software packages are installed on the whole system. So, when you change a project-specific package, all of your Python projects are affected.
You would want to avoid this, and the best way to do so is to have virtual environments for each project that are different from the others.
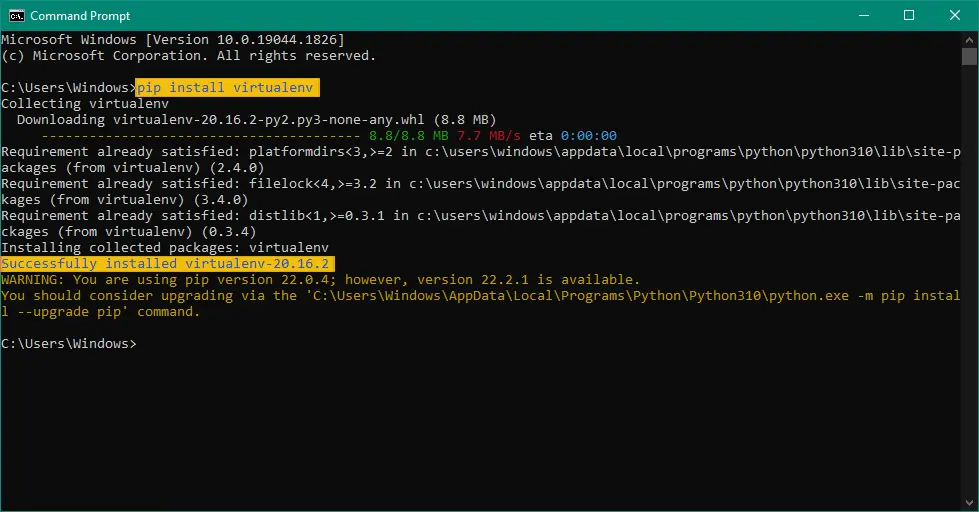
To install virtualenv:
- In the Start menu type “cmd“.
- Once the Windows Command Prompt is open, type the following pip command:
C:\Users\Computer_Name> pip install virtualenv
Summary
In summary, we have learned how to install Python setup environment variables on Windows. Python works with many different operating systems, including Mac OS X and Linux.
Setting up PATH for Python Environment on operating systems offers a list of directories where the OS searches for executables.
Make certain that the Python environment has been correctly installed, setup, and is operating normally.
Related Python Tutorials
- Python Get Environment Variable With Example
- Python Compiler
- Jupyter Notebook Modulenotfounderror Fixed
- Modulenotfounderror No Module Named Sklearn Jupyter Solved
- How To Use Python If Not Statement With Example
- How To Check Python Version
Python Overview
Python Basic Syntax
Common use cases for How to Setup Python Environment Variables In Windows 10
- Data pipelines. Python is the standard for ETL, data analysis, and ML workflows.
- Web development. Django and FastAPI power modern web backends and APIs.
- Automation and scripting. System administration, file processing, web scraping, and cron jobs.
- Machine learning. scikit-learn, PyTorch, TensorFlow, Hugging Face for AI/ML projects.
- Educational tools. Python’s readability makes it the go-to teaching language.
Working code example
from typing import Optional

def process_data(items: list[dict]) -> Optional[dict]:
    """Process a list of items and return summary stats."""
    if not items:
        return None
    return {
        "count": len(items),
        "total": sum(item.get("value", 0) for item in items),
        "avg": sum(item.get("value", 0) for item in items) / len(items),
    }

# Usage
data = [{"value": 10}, {"value": 20}, {"value": 30}]
summary = process_data(data)
print(summary)  # {'count': 3, 'total': 60, 'avg': 20.0}
Best practices
- Use type hints. list[dict], Optional[str], and TypedDict make code self-documenting and enable static analysis.
- Follow PEP 8. Consistent style improves readability. Use black or ruff to auto-format.
- Prefer f-strings. f”{value}” is cleaner than str.format() or % formatting.
- Write tests with pytest. Aim for 70%+ coverage on business-critical modules.
- Use ruff or pylint. Static analysis catches many bugs before code runs.
Common pitfalls
- Mutable default arguments. def f(x=[]) reuses the same list across calls. Use x=None then check.
- Integer division. 5/2 gives 2.5 in Python 3. Use // for floor division.
- Missing self on methods. Class methods need self as first parameter.
- Late binding closures. Loops that create lambdas can capture variables late.