Backstage View Commands in Word
In this tutorial, we’ll learn about the Backstage View Commands in Word 2019. This is the primary location for keeping track of your documents. The backstage view will assist you in creating new documents, saving and opening them, printing and sharing them, and so on. Furthermore, you’ll learn the commands and when to use them as you go along.
Table of contents
What is Backstage View in MS Word?
The Backstage view in MS Word appears when you launch a Microsoft Office program or click the File tab. Backstage is the place to go if you need to create a new file, open an existing file, print, save, change options, or do anything else. In brief, it is everything that is done to a file that is not done in the file itself.
Furthermore, it’s easy to get to the Backstage View: Just click the File tab on the Word Ribbon, which is in the upper left corner. If you don’t already have any documents open, you’ll see a window with a list of all the documents you’ve opened recently.
What commands are found in the Backstage view?
The Backstage view commands include saving, opening, getting information about the currently open file, creating a new file, printing, and recently opened files. Backstage View can be accessed by clicking the “File” tab in the upper-left corner of the application window.
Word Backstage View Commands and Uses
Here’s are the Back Stage View in MS Word commands and uses.
| Option & Description | |
| 1 | New This new option is used to open a new document. |
| 2 | Open This open option is used to open an existing word document. |
| 3 | Info This info option displays information about the opened document. |
| 4 | Save If an existing document is opened, it will be saved as is, otherwise it will display a dialogue box asking for the document name. |
| 5 | Save As A dialogue box will be displayed asking for document name and document type, by default it will save in word 209 format with extension .docx |
| 6 | Print This option is used to print an open document |
| 7 | Share This option will save an open document and will display options to send the document using email, etc. |
| 8 | Export This option is used to print an open document. |
| 9 | Close This option is used to close an open document. |
| 10 | Account Allows you to add or remove cloud service accounts, such as OneDrive or SharePoint, so that you may conveniently store or open files from these services. |
| 11 | Feedback This method is the greatest method to let us know if there’s a feature in your Office application that you particularly like or dislike. |
| 12 | Option This option is used to configure various Word 2019 options. |
Identifying Backstage View Command in MS Word
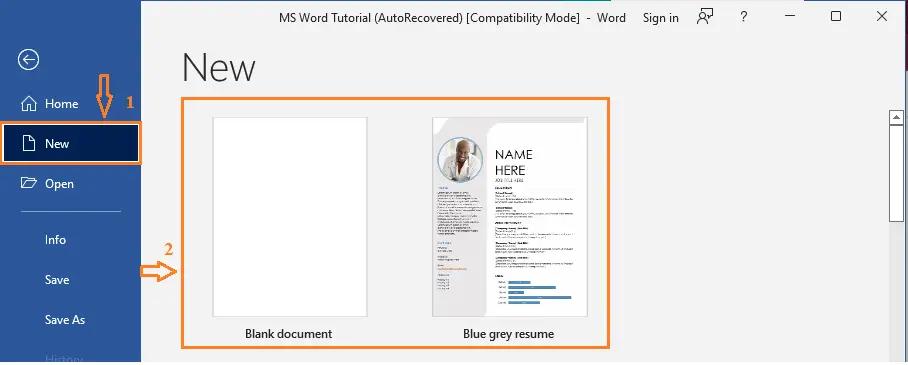
1. Creating new files
To create a new file, select a blank document or template from the list at the top or click the New button to view a larger selection of available templates.
2. Open an existing file
The Backstage screen shows you quite a few of the most recent files that you’ve worked on. If the file you want isn’t on the Recent files list, click the Open button on the left navigation pane to see file locations you can browse to find the file.
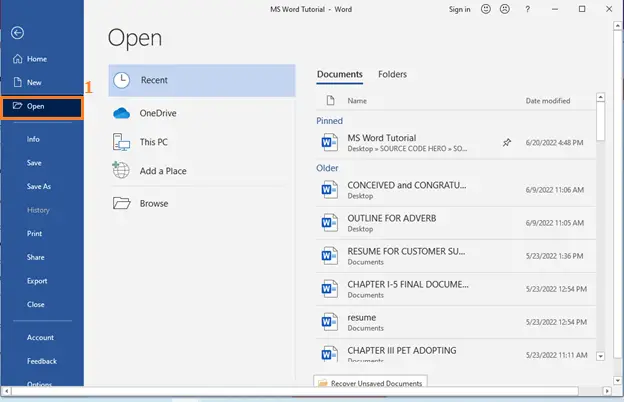
If you have a file that you want to make sure is always on the recent list you can pin that file to the list. Hover your cursor over the file name and you should see a pin icon appear towards the right side of the file name. Click that to pin the file so that it always appears on the list. Click the pin again to unpin a pinned item.
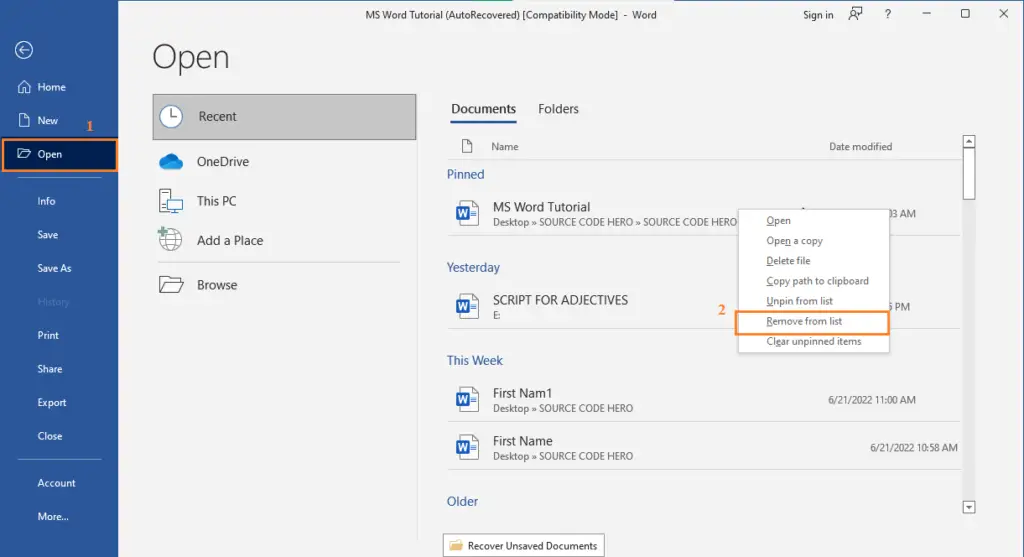
If you’d like to remove an item from the recent list just right-click that file and choose Remove from list.
The information pane will appear whenever you access Backstage view. It contains information on the current document. You can also inspect the document to remove personal info and protect it to keep others from making further changes.
3. Save a Copy
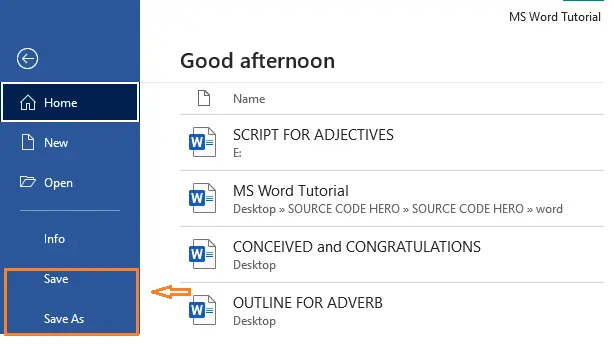
A Save a Copy option is a function in Backstage that allows you to instantly duplicate the current file. This is useful if you need a second copy in a different location or if you want to make a copy of this file so that you can edit it without impacting the original. This command is located in the left navigation pane.
4. Print or print preview
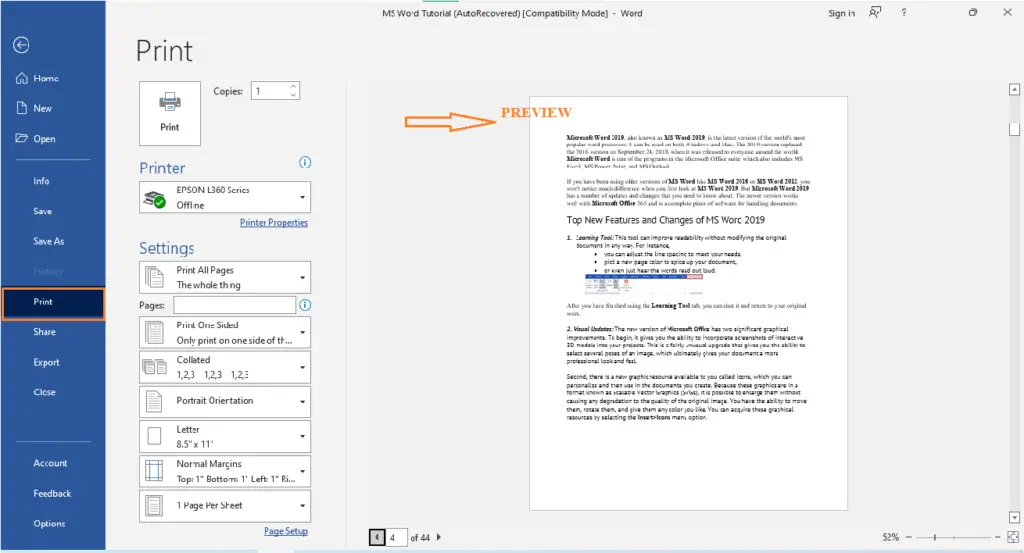
The Print or print preview command is also in the Backstage navigation pane, whether you want to send this file to a printer or just use Print Preview to see how it would look if you did.
5. Share and collaborate
If you want to collaborate on a file, you can use the Share command. Click Share, input the email addresses of the individuals with whom you wish to share the file, then click Send.
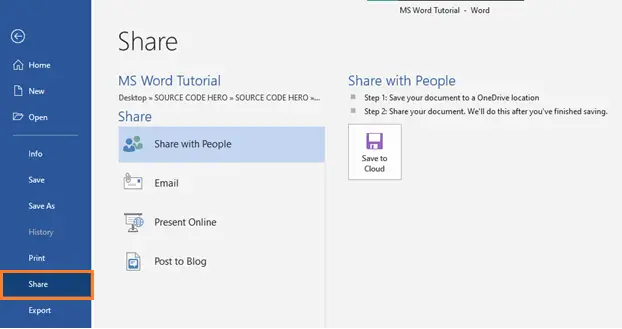
For more information on file collaboration, please see Collaborate in real-time on Word documents.
6. Manage Office
The Manage Office command is at the bottom left corner of the Backstage screen you’ll find three items to help you manage how Office works for you.

- Account – Allows you to add or remove cloud service accounts, such as OneDrive or SharePoint, so that you may conveniently store or open files from these services.
- Feedback – Is the greatest method to let us know if there’s a feature in your Office application that you particularly like…or dislike. The feedback we receive from consumers using this tool is sent directly to our product teams and is used to inform future product modifications and enhancements. Refer to How do I provide feedback on Microsoft Office for additional information.
- Options – Here is where you may configure your application. Everything from the Office color scheme to the spelling check choices, editing languages, and default file locations.
7. Getting back to your document
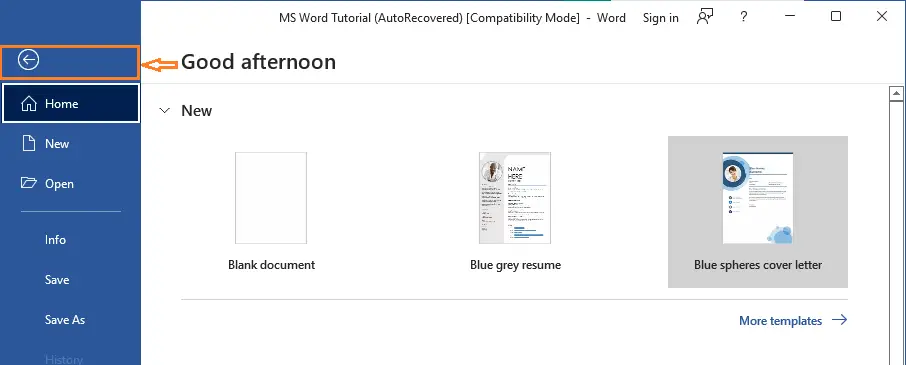
If you want to getting back to your document, click the Back arrow at the top left of the navigation pane or press the Escape key on your keyboard to leave Backstage and go back to the document you were working on.
Summary
In this tutorial, we discussed the backstage view in Microsoft Word. We discovered that it aids in the creation of new documents, the saving and opening of documents, the printing and sharing of documents, and so on. We also talked about the various commands that can be found backstage. These commands will assist you as you create your document in Microsoft Word.
PREVIOUS

