
In this tutorial, we will know how to create Powerpoint presentation with step by step guide. Asides from that, we cover different elements we see in creating a presentation.
In today’s fast-paced world, presentations have become an essential part of our daily lives. From business presentations to academic lectures, presentations have become a tool for conveying ideas and thoughts. With the latest advancements in technology, creating a presentation has become easier than ever before.
One of the most popular tools for creating presentations is Microsoft PowerPoint. In this article, we will walk you through the steps of creating and opening presentations in PowerPoint.
Getting Started with PowerPoint
To get started with PowerPoint, you need to have the software installed on your computer. If you do not already have it installed, you can download it from the Microsoft website.
Once you have installed the software, you can launch it by clicking on the Start menu, typing “PowerPoint” in the search box, and then clicking on the PowerPoint icon.
How to Create a Powerpoint Presentation Step by Step
To create a new presentation in PowerPoint, follow these steps:
- Open PowerPoint.
To open the Powerpoint, click start menu, type “powerpoint” in the search bar and press Enter.
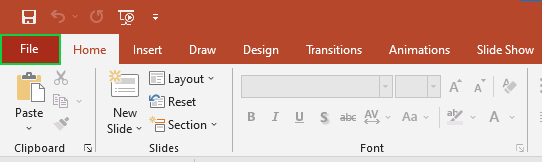
- Click on the “File” menu.
On the interface locate the File Tab and Click it then it will proceed to Backstage View of Powerpoint.

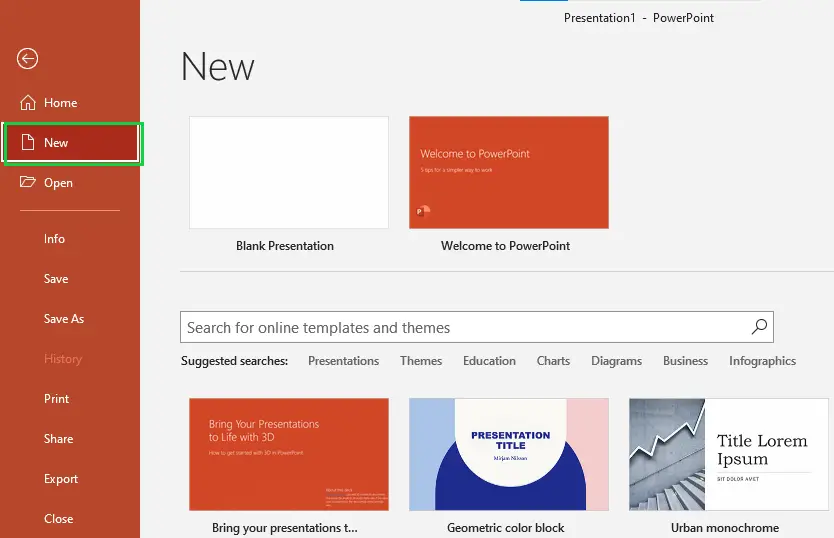
- Select “New” from the list of options.
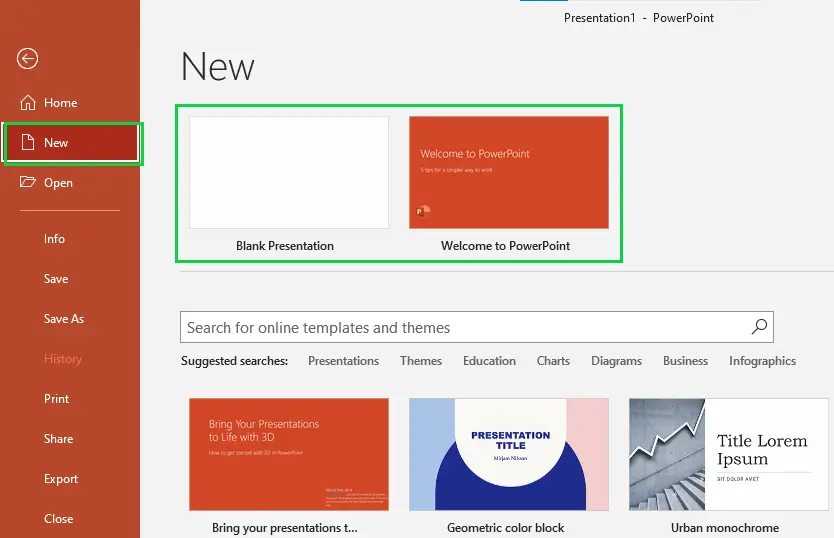
Click New Option and Blank Presentation along with a List of templates will appear.

- Choose a presentation template from the list of options or click on “Blank Presentation.”
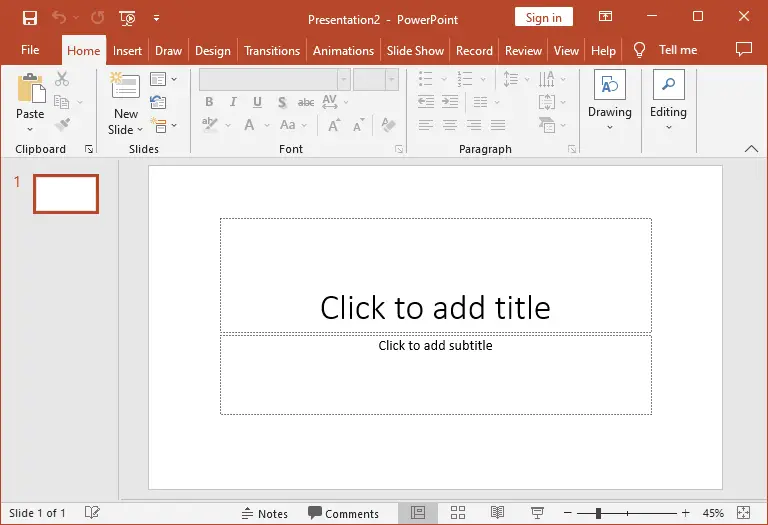
Either of the option you choose will create a presentation. In our case, we select Blank Presentation.
- Once you have chosen a template or selected “Blank Presentation,” the PowerPoint presentation will open and you can start adding content to your slides.
Apparently in blank presentation, you are free to manipulate and add content you desired.

- Customize the look and feel of the presentation
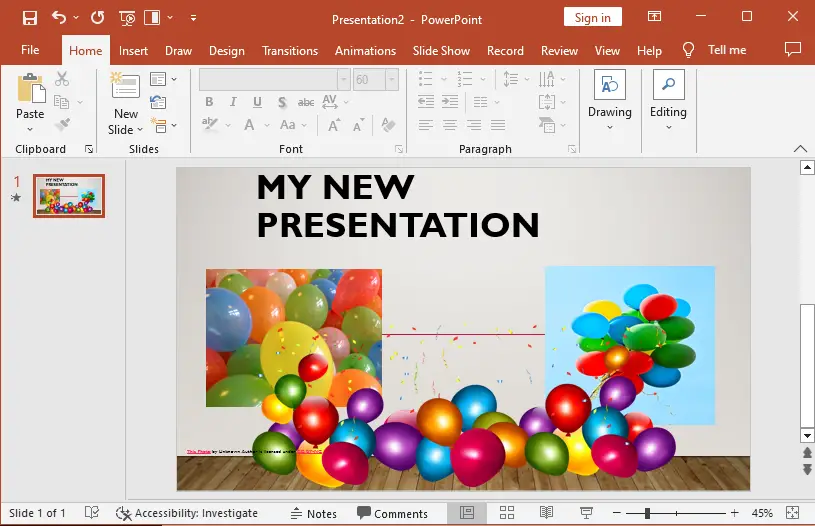
In our example, we change the title and Add text, and images. Along with shapes, and themes of the presentation.

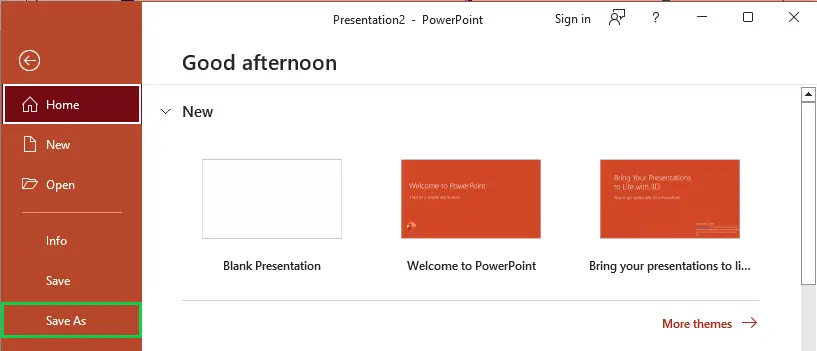
- Save the presentation by clicking “File” then “Save As.
Once you are done customizing the slides, it’s better to save it properly.

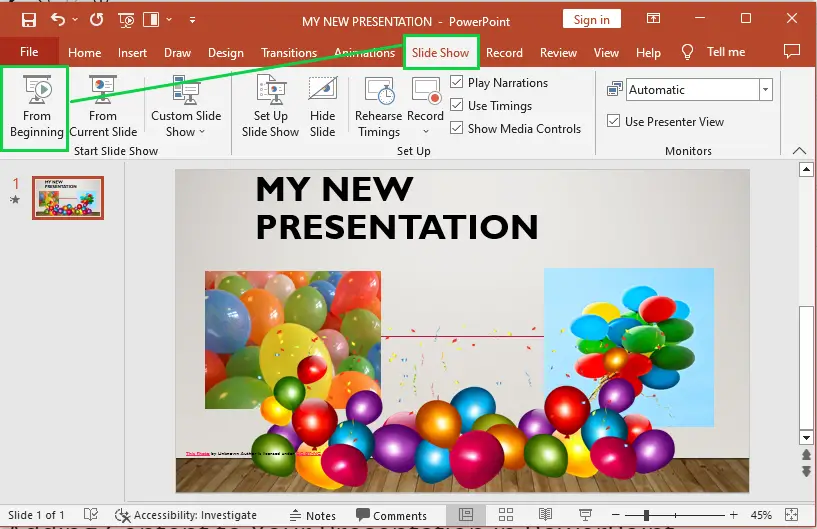
- Preview the presentation by clicking “Slide Show” then “From Beginning.”
This time to see what your presentation looks like, cliclk slideshow from the beginning or Press F5 and Esc on your keyboard to exit.

- Repeat steps 5-8 to edit and refine your presentation as needed.
Opening an Existing Presentation in PowerPoint
If you already have a presentation saved on your computer, you can open it in PowerPoint by following these steps:
Step 1. Open PowerPoint.
Step 2. Click on the “File” menu.
Step 3. Select “Open” from the list of options.
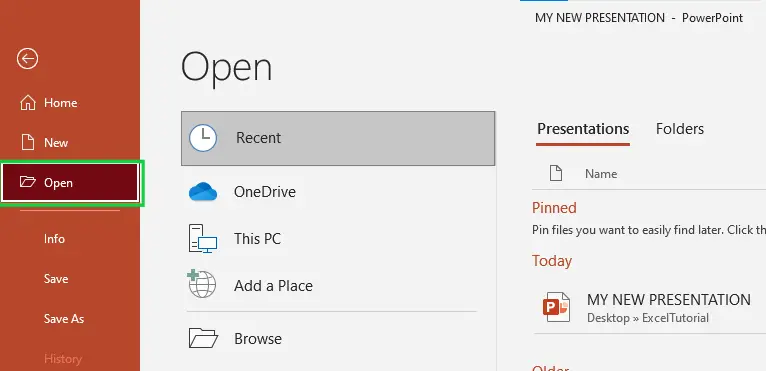
Step 4. Locate the presentation you want to open and click on it.
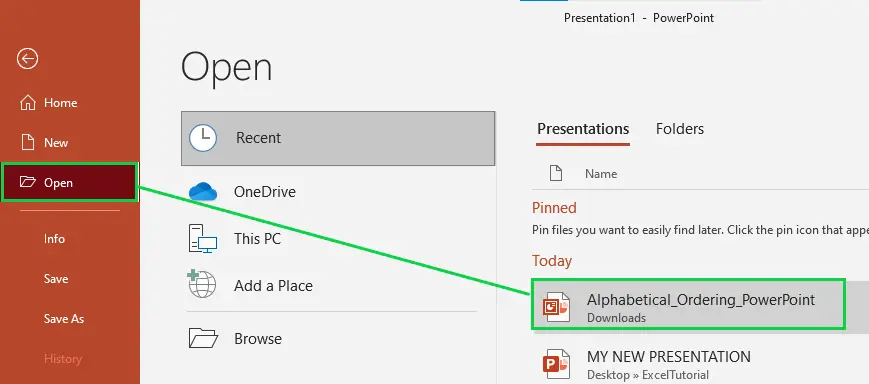
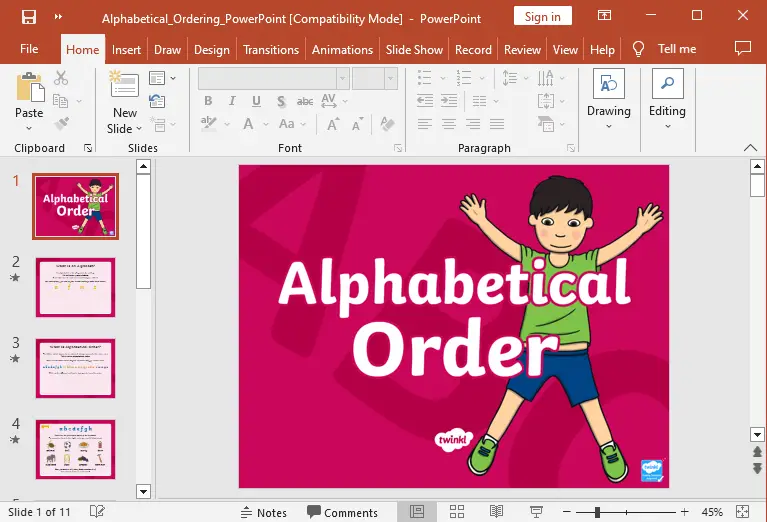
Step 5. The presentation will open in PowerPoint and you can start editing it.
Adding Content to Your Presentation in PowerPoint
Once you have created or opened a presentation in PowerPoint, you can start adding content to your slides. To add content to a slide, follow these steps:
- Select the slide you want to add content to.
- Click on the “Home” tab in the ribbon.
- Choose the type of content you want to add, such as text, images, charts, or tables.

- Enter or insert the content into the slide.
- Repeat this process for each slide in your presentation.



Saving Your Presentation in PowerPoint
When you are finished adding content to your presentation, you need to save it. To save your presentation in PowerPoint, follow these steps:
- Click on the “File” menu.
- Select “Save As” from the list of options.

- Choose the location where you want to save the presentation.
- Enter a name for the presentation.
- Click on “Save.”
Conclusion
Creating and opening presentations in PowerPoint is a straightforward process that can be easily completed by anyone. By following the steps outlined in the article, you can create professional-looking presentations in no time.
Whether you are creating a presentation for work or for personal use, PowerPoint is a powerful tool that can help you achieve your goals.
Thank you for reading.
2026 update: PowerPoint Designer + Copilot for AI-generated slides
PowerPoint Designer (available since 2019) got a major upgrade in 2024-2026 by folding into Microsoft 365 Copilot. In 2026 you can create a full slide deck from a prompt.
Two workflows that speed up presentation creation in 2026:
- “Create a 10-slide presentation about [topic] for [audience]”: Copilot generates title slide, agenda, content slides with placeholder graphics, and a closing slide. Great starting point for capstone defense presentations. Then you customize with your real content.
- Designer suggestions on any slide: every time you paste text or an image into a slide, Designer offers 3-6 layout variations in a right-side pane. Click one to apply. Much faster than manually resizing text boxes.
The Designer pane also proposes color palettes and font pairings that match your slide content. For BSIT capstone panels who care about visual consistency, Designer alone can save 2 to 3 hours per deck. This tutorial’s step-by-step manual approach still works for older PowerPoint versions or when Copilot is not available; the Designer path is the 2026 shortcut on top of the manual foundation.

Glay Eliver
Programmer & Technical Writer at PIES IT Solution
Glay Eliver is a programmer and writer at PIES IT Solution, author of over 600 tutorials at itsourcecode.com. Specializes in JavaScript tutorials, Microsoft Office how-tos (Excel, Word, PowerPoint), and Python error debugging covering ImportError, TypeError, AttributeError, ModuleNotFoundError, and JavaScript ReferenceError. Authored several of the site’s highest-traffic Excel and MS Office reference articles.
Expertise: JavaScript · MS Excel · MS Word · MS PowerPoint · Python · Python ImportError · Python TypeError · Python AttributeError · ModuleNotFoundError · JavaScript ReferenceError · Pygame · View all posts by Glay Eliver →