In this comprehensive guide, we will delve deep into the art of JavaScript image cropping, exploring various techniques and insights to help you master this skill.
So, without further ado, let’s embark on a journey to uncover the secrets of crop image.
What is JavaScript Crop Image?
JavaScript Crop Image refers to the process of using the JavaScript programming language to manipulate and cut a portion of an image. This can be done dynamically on a web page to allow users to select a specific area or aspect of an image they want to keep while discarding the rest.
How to Crop Image in JavaScript?
Cropping an image involves several steps, including loading the image, allowing the user to select a cropping area, performing the cropping operation, and displaying or saving the cropped result.
Here’s a basic outline of how to crop an image using JavaScript:
1. Create HTML Structure
Create an HTML structure whin an <input> element for image upload and an <img> element to display the selected image. You may also need UI elements for selecting the cropping area.
<input type="file" id="imageInput" accept="image/*">
    <div id="cropContainer">
        <canvas id="cropCanvas"></canvas>
        <button id="cropButton">Crop Image</button>
    </div>
    <img id="croppedImage" alt="Cropped Image">
2. Add JavaScript Logic
Add JavaScript code to handle image cropping. You’ll need to use the HTML5 <canvas> element to perform the actual cropping.
Here’s a simplified example using pure JavaScript:
 const imageInput = document.getElementById('imageInput');
        const cropCanvas = document.getElementById('cropCanvas');
        const cropButton = document.getElementById('cropButton');
        const croppedImage = document.getElementById('croppedImage');
        const ctx = cropCanvas.getContext('2d');
        let image;

        // Handle image selection
        imageInput.addEventListener('change', function () {
            const file = this.files[0];
            if (file) {
                const reader = new FileReader();

                reader.onload = function (e) {
                    // Load the selected image
                    image = new Image();
                    image.src = e.target.result;

                    image.onload = function () {
                        // Set canvas dimensions to the image dimensions
                        cropCanvas.width = image.width;
                        cropCanvas.height = image.height;

                        // Draw the image on the canvas
                        ctx.drawImage(image, 0, 0);
                    };
                };

                reader.readAsDataURL(file);
            }
        });

        // Handle cropping
        cropButton.addEventListener('click', function () {
            if (image) {
                // Define the cropping dimensions (e.g., 100x100 starting from top-left)
                const cropX = 0;
                const cropY = 0;
                const cropWidth = 100;
                const cropHeight = 100;

                // Create a new canvas for the cropped image
                const croppedCanvas = document.createElement('canvas');
                const croppedCtx = croppedCanvas.getContext('2d');
                croppedCanvas.width = cropWidth;
                croppedCanvas.height = cropHeight;

                // Crop the image
                croppedCtx.drawImage(image, cropX, cropY, cropWidth, cropHeight, 0, 0, cropWidth, cropHeight);

                // Display the cropped image
                croppedImage.src = croppedCanvas.toDataURL('image/png');
            }
        });
3. Make a Style
You want also to add CSS styles to control the appearance and positioning of the image and cropping UI elements.
4. Adjust Cropping Logic
Depending on your requirements you may need to enhance the cropping logic to allow users to select the cropping area interactively, specify custom crop dimensions or handle additional user interactions.
This is a basic example of how to crop an image using JavaScript. In practice, you may want to use libraries like Cropper.js for more advanced and user-friendly cropping features.
Herre’s the complete code along with the output:
<!DOCTYPE html>
<html lang="en">
<head>
    <meta charset="UTF-8">
    <meta name="viewport" content="width=device-width, initial-scale=1.0">
    <title>Image Cropping</title>
    <style>
        /* Add your CSS styling here */
    </style>
</head>
<body>
    <input type="file" id="imageInput" accept="image/*">
    <div id="cropContainer">
        <canvas id="cropCanvas"></canvas>
        <button id="cropButton">Crop Image</button>
    </div>
    <img id="croppedImage" alt="Cropped Image">

    <script>
        const imageInput = document.getElementById('imageInput');
        const cropCanvas = document.getElementById('cropCanvas');
        const cropButton = document.getElementById('cropButton');
        const croppedImage = document.getElementById('croppedImage');
        const ctx = cropCanvas.getContext('2d');
        let image;

        // Handle image selection
        imageInput.addEventListener('change', function () {
            const file = this.files[0];
            if (file) {
                const reader = new FileReader();

                reader.onload = function (e) {
                    // Load the selected image
                    image = new Image();
                    image.src = e.target.result;

                    image.onload = function () {
                        // Set canvas dimensions to the image dimensions
                        cropCanvas.width = image.width;
                        cropCanvas.height = image.height;

                        // Draw the image on the canvas
                        ctx.drawImage(image, 0, 0);
                    };
                };

                reader.readAsDataURL(file);
            }
        });

        // Handle cropping
        cropButton.addEventListener('click', function () {
            if (image) {
                // Define the cropping dimensions (e.g., 100x100 starting from top-left)
                const cropX = 0;
                const cropY = 0;
                const cropWidth = 100;
                const cropHeight = 100;

                // Create a new canvas for the cropped image
                const croppedCanvas = document.createElement('canvas');
                const croppedCtx = croppedCanvas.getContext('2d');
                croppedCanvas.width = cropWidth;
                croppedCanvas.height = cropHeight;

                // Crop the image
                croppedCtx.drawImage(image, cropX, cropY, cropWidth, cropHeight, 0, 0, cropWidth, cropHeight);

                // Display the cropped image
                croppedImage.src = croppedCanvas.toDataURL('image/png');
            }
        });
    </script>
</body>
</html>
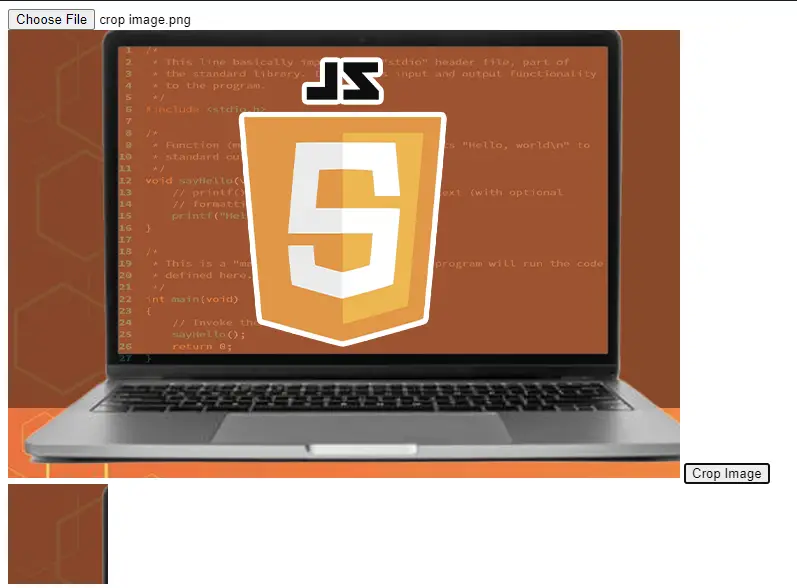
Output:
Tips And Best Practices
As you delve deeper into image cropping, keep these tips and best practices in mind:
- Always provide clear instructions or hints to users on how to use the cropping feature.
- Optimize the cropped images to reduce file size and improve loading times.
- Test your image cropping functionality across different devices and browsers to ensure compatibility.
- Keep an eye on updates and improvements in JavaScript cropping libraries to stay up-to-date with the latest features.
Conclusion
JavaScript image cropping is a valuable skill for web developers looking to enhance their websites and provide a better user experience. By mastering the techniques and best practices outlined in this guide, you’ll be well-equipped to implement image cropping with precision and creativity.
Official documentation
Frequently Asked Questions
Is JavaScript still worth learning in 2026?
What is the difference between var, let, and const?
Which JavaScript version should I target in 2026?
What is the best free editor for JavaScript?
How do I run JavaScript locally vs in the browser?
What can I build with JavaScript for my BSIT capstone?

Glay Eliver
Programmer & Technical Writer at PIES IT Solution
Glay Eliver is a programmer and writer at PIES IT Solution, author of over 600 tutorials at itsourcecode.com. Specializes in JavaScript tutorials, Microsoft Office how-tos (Excel, Word, PowerPoint), and Python error debugging covering ImportError, TypeError, AttributeError, ModuleNotFoundError, and JavaScript ReferenceError. Authored several of the site’s highest-traffic Excel and MS Office reference articles.
Expertise: JavaScript · MS Excel · MS Word · MS PowerPoint · Python · Python ImportError · Python TypeError · Python AttributeError · ModuleNotFoundError · JavaScript ReferenceError · Pygame
· View all posts by Glay Eliver →