If you’re finding yourself puzzled over how to fix an HTTP 304 Not Modified Status Code, rest assured, this article is here to alleviate your concerns.
It provides comprehensive solutions and detailed explanations to help you understand and effectively tackle this issue.
So, no need to worry, I’ve got you back!

What are HTTP status codes?
HTTP status codes serve as a communication tool during information exchange.
They provide feedback on whether your request was processed successfully or encountered an error.
What does “HTTP 304 not modified Status Code” mean?
HTTP 304, also called HTTP 304 Not Modified is a service response code that indicates that the website you’re trying to visit hasn’t changed since your last visit.
This can happen on both the server side and the client side.
So, instead of sending you the same information again, the server sends this status code to let your browser know it can use the version of the page it has already stored.
The HTTP 304 not modified status code signifies a communication issue between a user’s browser and a website’s server.
Root causes of the “304 Not Modified Status Code”
Encountering this status code on your site can potentially hinder you or your users from accessing your content completely.
This status code can be caused by a few things. It could be a problem with the following:
- The server where the website is hosted.
- Corrupted applications
- The software installation
- An issue with the DNS
- Or even a virus or malware affecting your browser.
How to fix “304 not modified”?
If you’re experiencing this issue, here are a few things you can try:
Clear your browsing data:
This can help clear out any old or corrupted data that might be causing the problem.
When you clear them, you get new info from the website’s server.
If you use Google Chrome, here’s how to clear its cache:
- Click the three dots in the top-right corner of your window. You can also use the keyboard shortcut (Ctrl + H).
- Go to History History.
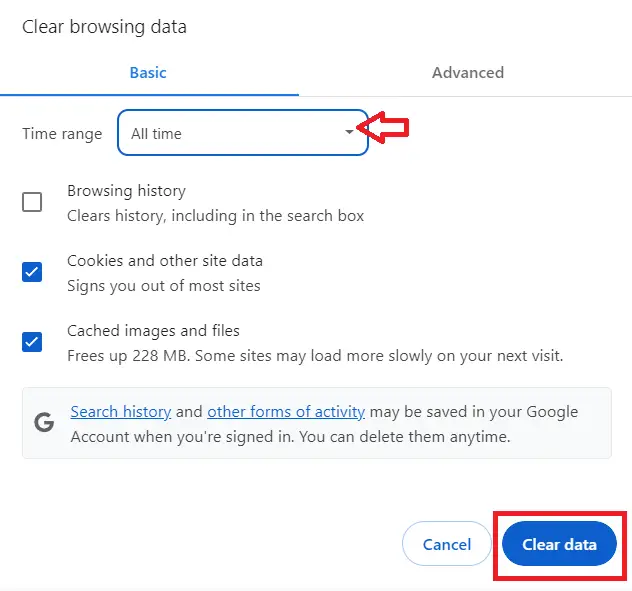
- Click on Clear Browsing Data.

- A new window will appear. Choose the Time range, if you wish to erase all data, select All Time.

- Select what you’d like to clear- this could be browsing history, cookies, and other site data, or cached images and files.
- Then, hit the Clear Data button.
Run a virus/malware scan:
If a virus or malware is causing the issue, this can help remove it.
An additional potential reason for the HTTP 304 Not Modified status could be a browser that’s been compromised by a virus or malware.
If you’re utilizing Google Chrome on a Windows system, you can execute this by using the integrated Malware Scanner and Cleanup Tool.
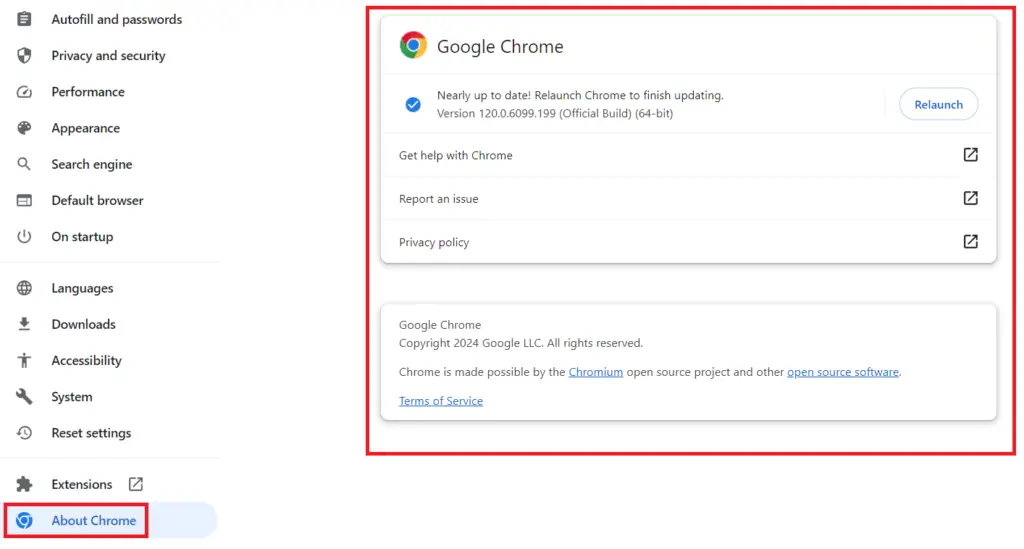
Initially, ensure that your Chrome is current.
- Click on the trio of vertical dots located at the top-right corner of the Chrome window
- Then proceed to Settings -> About Chrome.

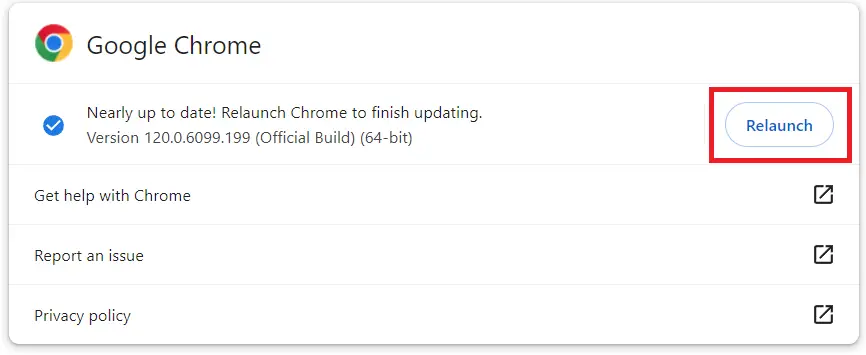
If your browser is not upgraded to the latest version, you can address this in the same location.
On the other hand, you can update it by clicking “relaunch”.

Subsequently, launch a new Chrome tab and input “chrome://settings/cleanup” into the URL bar.

The scan will quickly start on your computer and then give you a report.
Please note that other browsers, including Mozilla Firefox and Microsoft Edge, do not possess an integrated malware scanner.
This is also applicable to other operating systems such as Mac and Linux
Disable browser extensions:
Some extensions can interfere with how your browser caches web pages.
To address this issue, you should deactivate your browser’s extensions.
The procedure differs for each browser, so here’s a guide for four primary browsers – Google Chrome, Mozilla Firefox, Safari, and Microsoft Edge.
Chrome Extensions:
- Proceed to Settings

- Then click -> Extensions.
- On the Extensions page, deactivate each extension by clicking on their respective toggle switches.
For instance:

If you wish to get rid of unused or old extensions, press the “Remove” button.
Mozilla Firefox Extensions
If Firefox is your preferred browser, here’s how you can disable and re-enable extensions:
- Click the trio of lines in the top right corner of the browser.
- Select “Add-ons.”
- Choose “Extensions” from the left-hand menu.
- In the “Enabled” section, click the three dots next to a browser extension and select “Disable.”
- Repeat this for all browser extensions.
- To reactivate browser extensions, navigate to the “Disabled” section. Click on the three dots next to a browser extension and select “Enable.”
- To delete extensions, click on the three dots and choose “Remove.”
- Confirm the deletion by clicking “Remove” in the pop-up box.
Internet Explorer Extensions:
If you’re an Internet Explorer user, here’s how you can disable and re-enable extensions:
- Click the gear symbol in the top right corner of the browser.
- Choose “Manage add-ons.”
- Select “Toolbars and Extensions” from the left-hand menu.
- Click on a browser extension, select “Disable” in the bottom right corner, and confirm by clicking “Disable” in the pop-up box. Repeat this for all browser extensions.
- To reactivate an extension, click on it, select “Enable” and confirm by selecting “Enable” again.
- To remove faulty extensions, go to your computer’s “Control Panel” > “Programs” > “Programs and Features.”
- Right-click on the extension you want to delete, click “Uninstall” and confirm by clicking “Yes.”
Safari Extensions:
If you’re a Safari user, here’s how you can disable and re-enable extensions:
- Click “Safari” in your toolbar.
- Select “Preferences.”
- Navigate to the “Extensions” tab.
- Deselect the boxes next to all extensions to disable them.
- To reactivate extensions, select the boxes next to each one.
- To delete a faulty extension, click on the extension and select “Uninstall.” Choose “Show in Finder,” right-click on the extension, select “Move to Bin” and empty your computer’s trash folder.
Check the server and DNS settings:
If the problem is on the server side, you might need to check the server configuration and DNS settings.
Frequently clearing your DNS can enhance the security of your operating system and hinder the tracking of search behavior, making it challenging for hackers to anticipate your browsing history.
Additionally, it can address technical issues, like connectivity problems or the HTTP 304 Not Modified response codes.
For Google Chrome users, you can flush your DNS by typing chrome://net-internals/#dns into the URL bar.
A new page will open and then click on the Clear host cache button:

Conclusion
Encountering the HTTP 304 Not Modified status code indicates that the website you’re trying to visit hasn’t changed since your last visit.
Additionally, the HTTP 304 Not Modified status code signifies a communication issue between a user’s browser and a website’s server.
By following the provided solutions above, you can rest assured that you’ll be able to resolve this issue.
For further learning, you can also check the following resources:

