Python PIP Command Set-up / Fix: Step by Step Guide in Python Packages
PIP is the package manager of Python. This will install everything you need in Python using the command line or CMD. In this article, we will set-up the Python PIP command line so you can use it directly in Windows CMD.
How to Set-up Python PIP Command Line
- Install Python
The first thing to do for setting this is to install Python. I recommend going to their official website. Download the current version and install it.
- Find its location in your PC
Now that you finished installing Python, let’s locate its address. To do this, you can simply search for it in the search bar and click “Open file location”. You’ll see a Python shortcut here. Right-click and open its file location.
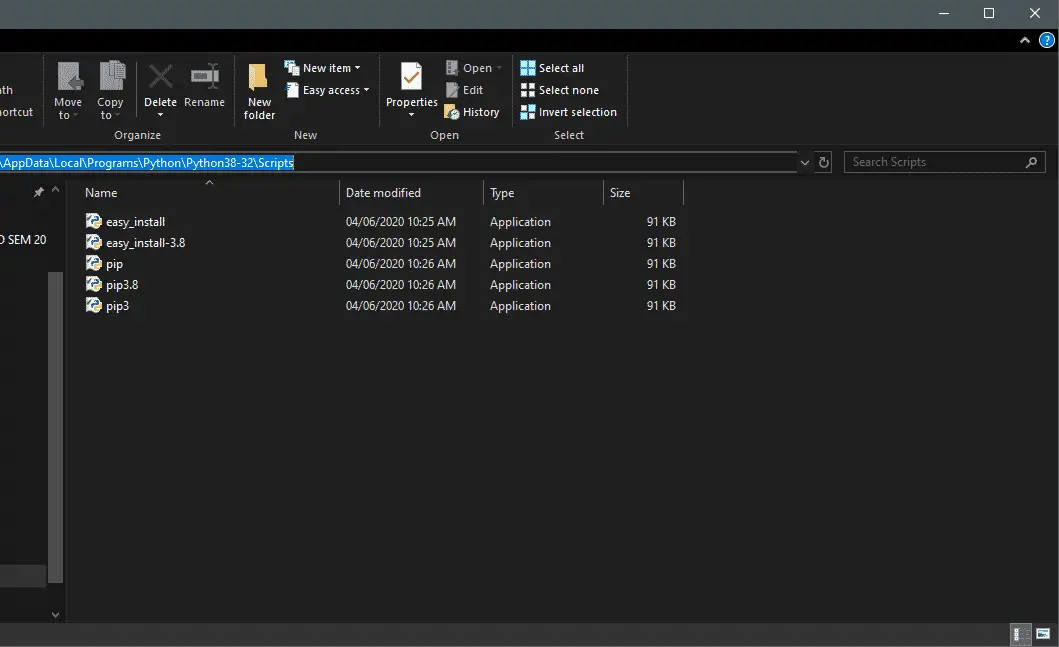
- Copy the location of the Scripts folder
Open the Scripts folder where you can see the Python PIP applications. This is the location we want to copy. Click the address bar and copy.

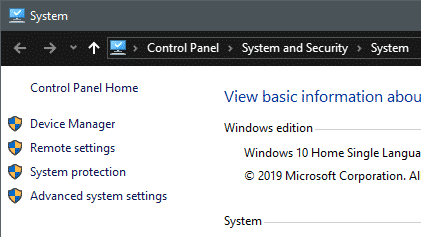
- Go to your System properties and click Advanced System Settings
Go to your PC properties. Just right-click “This PC” and click Properties or you can navigate to your Control Panel\System and Security\System. On the left side, you will see a number of administrator options. Click Advanced System Settings.

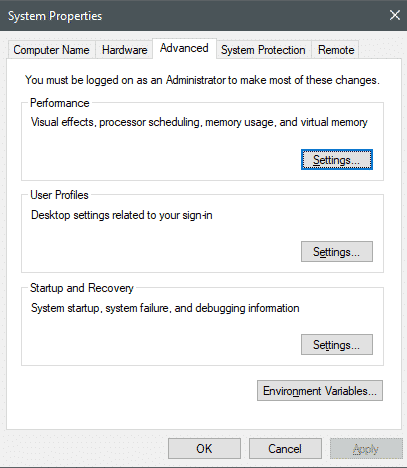
- Click Environment Variables
After you clicked the Advanced System Settings, a window will appear. Here, click Environment Variables where it will open another window.

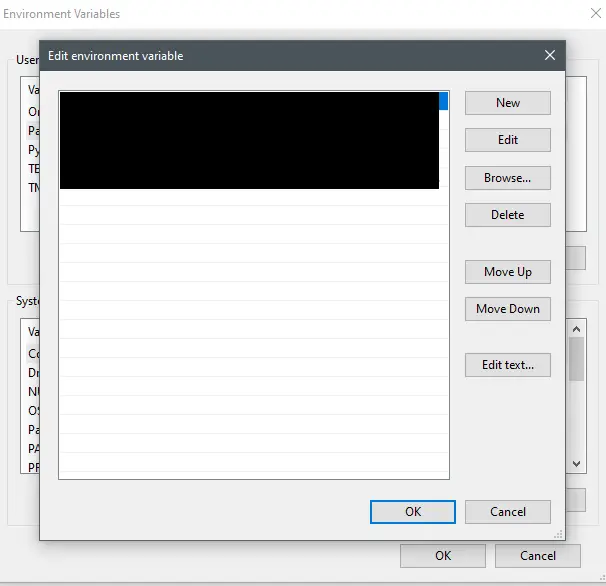
- Edit Path and Add New
Select the Path variable and it will open a window. This where we will add the copied Python Script location. Now, click Add New and paste the location of the Script location.

- Click OK and refresh
Click OK and apply. Refresh your system and open your command prompt. Your command line is now Python PIP command ready!
Conclusion
So there you have it! Now you can use Python PIP Command line directly in your CMD terminal. I hope this guide saved you from headaches and confusions while setting up Python. Click the link below for other tutorials.
Technology stack and requirements
To run this Python project on your development machine, you need:
- Python 3.10 or higher. Download from python.org or install via Anaconda if you prefer bundled packages.
- pip package manager. Comes with Python. Used to install project dependencies from requirements.txt.
- Virtual environment. Use venv or conda to isolate project dependencies from your global Python install.
- VS Code or PyCharm. Free code editors with Python syntax highlighting, IntelliSense, and debugging.
- Git. For version control and cloning source code repositories.
Installing the source code
- Download or clone the repository. Get the ZIP archive from the download link on this page and extract it.
- Create a virtual environment. Open a terminal in the project folder and run: python -m venv venv, then activate it (venv\Scripts\activate on Windows or source venv/bin/activate on Mac/Linux).
- Install dependencies. Run pip install -r requirements.txt to install all libraries the project needs.
- Configure environment variables. If the project uses API keys (OpenAI, Anthropic, database), create a .env file and set the required keys.
- Run the project. Follow the run command in the README (usually python main.py or streamlit run app.py).
Using this project for your BSIT capstone
- Chapter 1 (Introduction). Discuss the real-world problem this system solves. Cite Philippine or international use cases where the manual process could be automated.
- Chapter 2 (RRL). Compare your project against 5-10 similar published works. Cite ACM, IEEE, or arXiv papers for academic-standard sources.
- Chapter 3 (Methodology). Document the model architecture, training data, hyperparameters, and evaluation metrics used.
- Chapter 4 (Results). Report accuracy, precision, recall, F1-score, and confusion matrix. Screenshot the running app on real inputs.
- Chapter 5 (Conclusion). Identify features for Version 2: better model, larger dataset, mobile deployment, or REST API.
Modules typical of Python PIP Command Set-up / Fix: Step by Step Guide
- Core Python logic. Main functions implementing the business logic of the system.
- Data storage. SQLite for simple projects, PostgreSQL or MongoDB for larger data.
- User interface. Tkinter for desktop, Streamlit for data dashboards, or Flask/FastAPI for web.
- Input validation. Type checking and range validation before processing user data.
- Reports. CSV or PDF export using pandas.to_csv() or ReportLab.
- Testing. pytest unit tests covering core functions.
Common enhancements for capstone review
- Add REST API. Convert desktop app to FastAPI service for mobile or web front-ends.
- Multi-user support. Add login, roles, and per-user data isolation.
- Cloud deployment. Deploy to Render, Railway, or Fly.io for public access.
- Docker containerization. Package the app in Docker for portable deployment.
Where to get help while building this Python project
- itsourcecode.com free downloads. Browse other Python projects for similar patterns and code examples.
- Python 3 official documentation. The canonical reference for language syntax and standard library.
- Stack Overflow Python tag. Fastest place to get unstuck on a specific error message.
- Kaggle notebooks. Real-world ML project examples with datasets and code you can adapt.
- HuggingFace model hub. Free pre-trained models for NLP, vision, and audio tasks.
- Your adviser. Regular check-ins keep the project on track.
Common defense pitfalls to avoid
- Empty dataset. Pre-populate 200-1000 realistic sample records so demos are meaningful and the model actually learns.
- Missing error handling. Wrap risky calls (file I/O, API calls, model loading) in try/except with user-friendly messages.
- Model overfitting. If validation accuracy is much lower than training accuracy, add regularization or more data.
- No deployment plan. Panel expects to see the app running, not just Jupyter notebooks. Deploy to Streamlit Cloud or HuggingFace Spaces.
- Untested edge cases. Test with empty input, malformed input, and very long input before demo day.
Official documentation
Frequently Asked Questions
How does this Python project work?
Built with Python 3.10+ and either Tkinter (desktop GUI), Django (web), or Flask (lightweight web). Standard structure: main.py launches the app, modules organized by feature, SQLite/MySQL for persistence.
What Python version and libraries does this project require?
Most projects in this batch use Python 3.10, 3.11, or 3.12 (avoid 3.13 until library wheels catch up). Standard libs: tkinter (built-in), sqlite3 (built-in). External: pip install pillow opencv-python pygame mysql-connector-python reportlab requests beautifulsoup4. Check the requirements.txt file (if included) for exact versions.
How do I set up the database for this Python project?
For SQLite (most common, no setup needed): the .db file auto-creates on first run. For MySQL: install MySQL Server + MySQL Workbench, create an empty database, import the included .sql file, edit the connection string in db.py (or db_connect.py) with your host, user, password, database name.
Can I use this Python project for a BSIT capstone or thesis?
Yes. Python is rising fast in Philippine BSIT panels. Extend it: add user roles via auth module, dashboards (matplotlib charts), PDF reports (reportlab), email notifications (smtplib), real domain extension (analytics, audit log, multi-branch support). Pair with Chapter 1-5 documentation matching your panel’s rubric.
Why am I getting ‘ModuleNotFoundError’ or ‘No module named X’?
Three common Python issues: (1) Module not installed: pip install
Where can I find more Python projects with source code?
Browse the Python Projects hub for the full library. For computer vision specifically see OpenCV Projects (46 vision systems). For ML / AI capstones see Machine Learning Projects. For BSIT capstone idea lists see 150 Best Capstone Project Ideas.