The Bank Management System Project in Django allow users to create new account and get a unique account number on sign-in, store and edit your details for savings accounts.
The user can Transfer money from one bank account type to another. The bank system has a CSS framework, a virtual environment, and Tailwind CSS.
To start creating a Bank Management System Project in Python Django, makes sure that you have PyCharm Professional IDE Installed in your computer.
This simple bank management system project in python Django framework, Also includes a Download Source Code for free, just find the downloadable source code below and click download button.
Project Information and Recommended Tools
| About Project | Project Details |
|---|---|
| Project Name | Bank Management System Project in Django |
| Python version (Recommended) | 3.8 Version |
| Programming Language Used | Python Django Language |
| IDE Tool (Recommended) | Sublime, Visual Studio, PyCharm |
| Database | SQLite |
About Project
Moving on, this banking management system project in Python Django focuses mainly on dealing with personal transactions.
Also, the system displays all the transactions reports. In addition, the system allows managing deposits and withdrawals.
However, this project is divided into two categories: User, and Admin Panel. In an overview of this web application, a user can simply register and start using it.
Here, the system provides an account number for each after registration.
Anyway, the user has to register under various available account types. After setting up, the user can simply deposit and withdraw amounts.
Also, the user can view his/her total transaction report displaying the remaining balance with each personal transaction detail. This detail includes account activities.
Admin Information
By entering admin credentials, the user can access the Django administrator panel.
All system management is done using the Django administrator panel. Management of account types, user groups, users, and other things is part of it.
The administrator must supply account type names, a limit number of withdrawals, and annual interest when managing account types.
The management of system users and customers is covered in another area, where the user can control access to each.
Managing account types is a crucial step in the user registration process.
To improved user experience when utilizing this Python Django Framework project for an online banking system, a clear and straightforward dashboard is offered.
Tailwind CSS, a CSS framework, is used for its user interface elements.
I’d like to introduce you to a brand-new Simple Banking Management System Project in Python Django, which includes an admin panel with a user that has all the functionality you need to keep track of things and a helpful learning resource.
User Features
- Create Account – The user needs to create new account first to get a unique account number to login.
- Login – After creating an account, The user need to login first to enable to access the system.
- Manage Account – The user can view his/her account status such account number, current balance in your account, and the account type.
- Money Transfer – The user can transfer money from one bank account to another bank account.
- Loan application – The user can request a loan to the bank.
- Manage Profile – The user can edit details information and can change password.
How to Create a Bank Management System in Django Project?
Time needed: 5 minutes
Here are the steps on how to create a Bank Management System in Django.
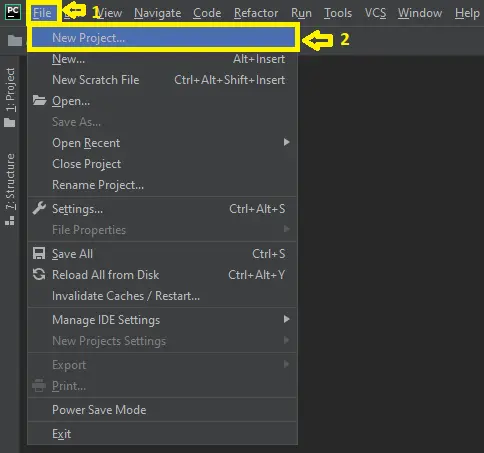
- Step 1: Open file.
First , open “pycharm professional” after that click “file” and click “new project”.

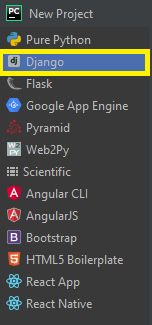
- Step 2: Choose Django.
Next, after click “new project“, choose “Django” and click.

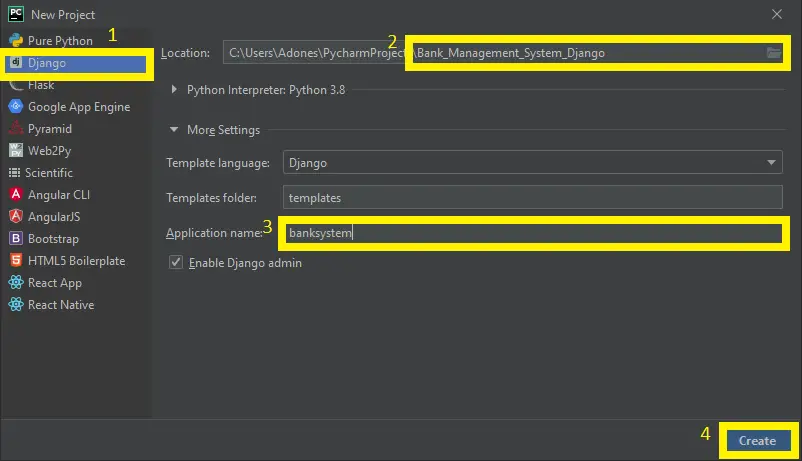
- Step 3: Select file location.
Then, select a file location wherever you want.

- Step 4: Create application name.
After that, name your application.

- Step 5: Click create.
Lastly, finish creating project by clicking “create” button.

- Step 6: Start Coding.
Finally, we will now start adding functionality to our Django Framework by adding some functional codes.
Downloadable Source Code Below.
Anyway, if you want to level up your programming knowledge, especially python, try this new article I’ve made for you Best Python Projects with source code for Beginners.
But If you’re going to focus on web development using Django, you can download here from our list of Best Django Projects with source code based on real-world projects.
How To Run The Bank Management System in Django?
- Step 1: Extract/unzip the file
- Step 2: Go inside the project folder, open cmd and type the following commands to install Django Framework and run the webserver:
- python manage.py runserver
- Step 3: Finally, open the browser and go to http://127.0.0.1:8000/
Summary
In summary, the Bank Management System in Django with Source Code can be useful to students or professional who wants to learn python programming language.
This project can also be modified to fit your personal requirements. Hope this project will help you to improve your skills. Happy Coding!
Inquiries
If you have any questions or suggestions about Bank Management System in Django with Source Code, please feel free to leave a comment below.
can you please provide the credentials for admin panel?
Follow this steps to completely run the Bank Management System DJANGO.
Step 1: pip install virtualenv
Step 2: virtualenv env
Step 3: cd env/Scripts
Step 4: activate
Step 5: cd ../..
Step 6: pip install django
Step 7: python manage.py makemigrations
Step 8: python manage.py migrate –run-syncdb
Step 9: python manage.py createsuperuser
Step 10: python manage.py runserver
Note: The username and password isn’t working because you need to create first the superuser. Follow the steps above to run the system smoothly.
Can the bank app be used legitimately for financial transactions?