A Shopping Cart In CodeIgniter is an important part of an online store that makes it easier for customers to shop.
It’s software that lets people use an eCommerce interface to choose, reserve, and buy a product or service.
About The Project
The Shopping Cart In CodeIgniter Source Code was developed using PHP CodeIgniter and MySQL Database as Back-End, for This article I will show you Shopping Cart In CodeIgniter Source Code.
Also in this simple article you can learn on How To Make Shopping Cart In CodeIgniter.
A The CodeIgniter framework is used to create this CodeIgniter Shopping Cart Checkout, which allows you to add, update, and delete products from the cart.
This CodeIgniter Shopping Cart Project Download is good for the beginners or the students who wants to learn web development for free.
Project Information
| Project Name: | Shopping Cart in CodeIgniter Source Code |
| Language/s Used: | PHP with CodeIgniter Web Framework |
| PHP version (Recommended): | 5.6.3, 7.4.12 |
| Database: | MySQL |
| Type: | Website, Web Application |
| Developer: | IT SOURCECODE |
| Updates: | 0 |
What is CodeIgniter?
CodeIgniter is an Application Development Framework – a toolset – for PHP web site developers. Its purpose is to let you construct projects much faster than if you were programming code from start by providing a rich set of libraries for common activities, as well as a simple interface and logical structure to access these libraries.
By reducing the amount of code required for a given operation, CodeIgniter allows you to focus more creatively on your project.
Shopping Cart CodeIgniter AJAX Features
- Add To Cart
- Update Cart
- Delete Cart
- Cart List
- Product Management
- Check out
This CodeIgniter Project With Source Code also includes a downloadable CodeIgniter Source Code for free, just find the downloadable source code below and click to start downloading.
I have here a suggested list of CodeIgniter Projects with Source Code free Download and I’m sure this can help you to improve your skills in CodeIgniter under PHP programming and web development as a whole.
To start executing this project, makes sure that you have any platform in creating a JavaScript, CSS, bootstrap, and HTML installed in your computer, in my case I will use Sublime Text.
Steps On How To Run The Shopping Cart In CodeIgniter With Source Code
Time needed: 5 minutes
These are the steps on how to run Shopping Cart In CodeIgniter With Source Code.
- Download Source Code
First, find the downloadable source code below and click to start downloading the source code file.

- Extract File
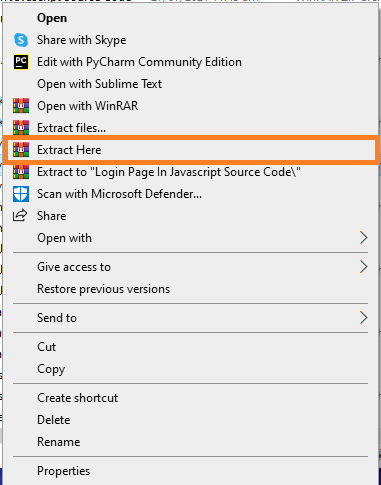
Next, after finished to download the file, go to file location and right click the file and click extract.

- Copy Project Folder
Next, copy the project folder and paste it to C:\xampp\htdocs.

- Open Xampp
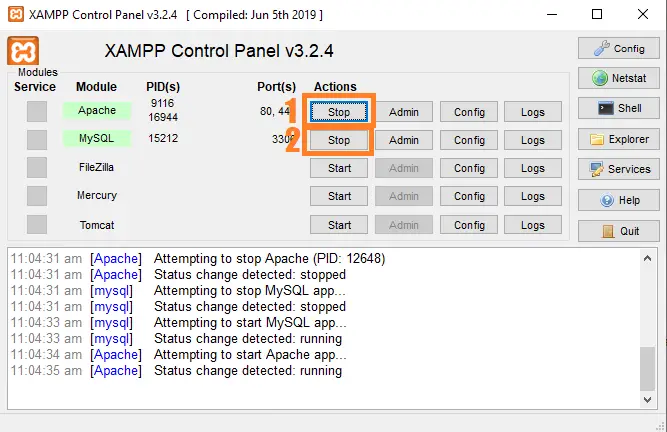
Next, open xampp and start the apache and mysql

- Create Database
Next, click any browser and type to the URL localhost/phpmyadmin and create database.

- Import Database
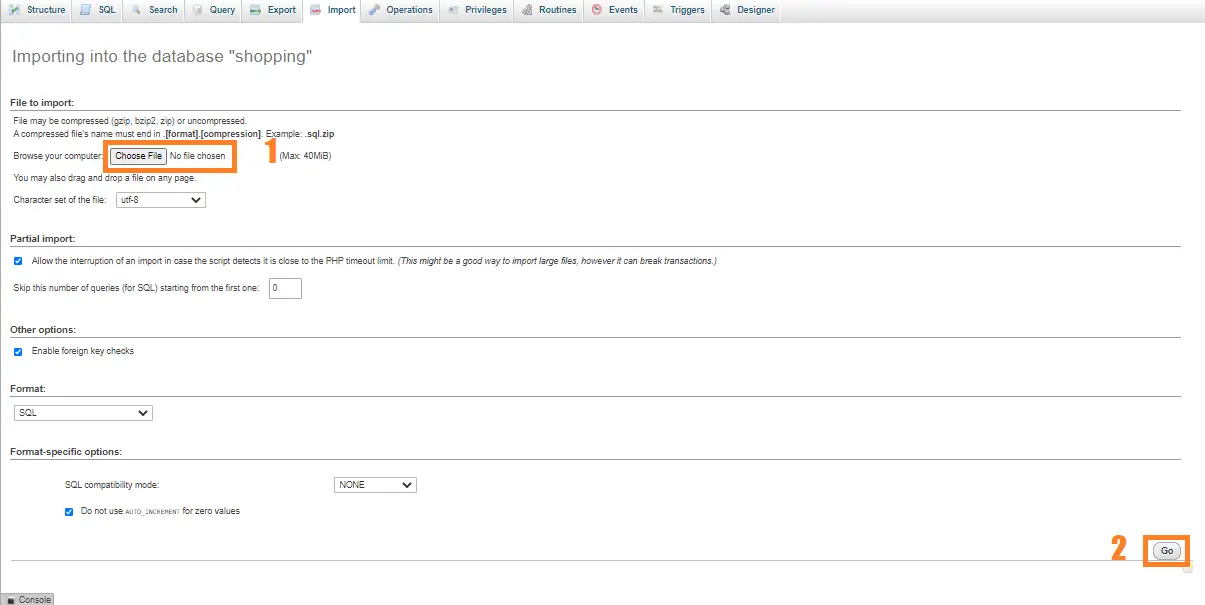
Next, click the created database and click import to the right tab and click choose file and import the sql file inside the download folder.

- Execute Project
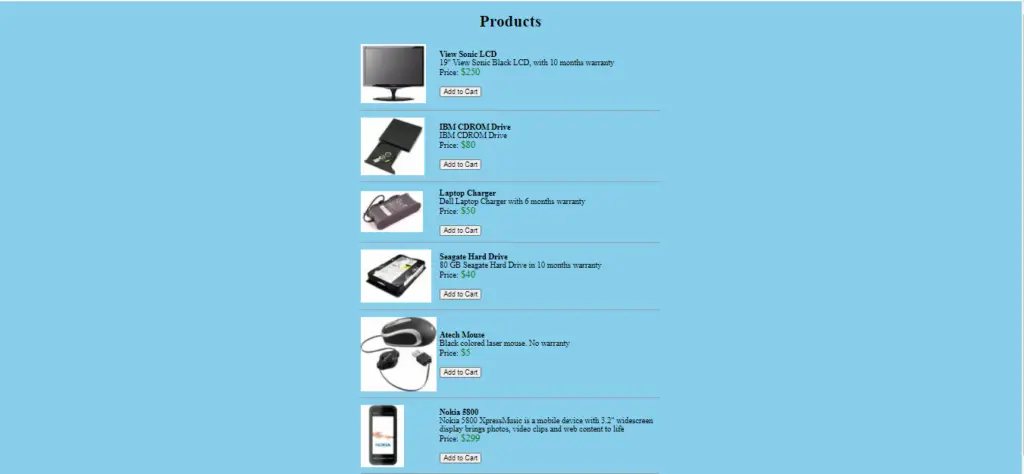
Final, type to the URL localhost/CI

Project Output
Download Source Code below
Anyway, if you want to level up your programming knowledge, especially PHP, try this new article I’ve made for you Best PHP Projects With Source Code Free Download.
Summary
As a result, this System is a basic project for all beginning and intermediate CodeIgniter users who want to broaden their understanding of PHP web applications.
Finally, the entire PHP project with open source code is an absolute project and a valuable way for users to understand and explore more about it.
I hope this Shopping Cart With Check-Out using PHP MySQL will help you with what you are looking for and hope that you will learn something with this project that is useful for your future projects.
Inquiries
If you have any questions or suggestions about Shopping Cart In CodeIgniter With Source Code, please feel free to leave a comment below.


hi,
Hope you are doing fine!
I am trying to unzip one of these projects but a password is required and I was unable to find any in your step by step tutorial.
Would appreciate it if I get a feedbacksoon