In this article, you will learn how to use an Temperature Alarm in Arduino.
This project will let you identify the room temperature. After that, it will sound an alarm if it gets too hot.
This is very useful if you are monitoring room temperatures and can be combined with other Arduino projects.
Arduino Temperature Alarm: Code and Wiring: Steps in Creating the Device
Here are the steps in creating Arduino Temperature Alarm.
- Gathering the Components
The first thing to do is to collect the hardware components for the Arduino device.
Arduino Uno
DHT22 Humidity and Temperature Sensor - Connecting the Components
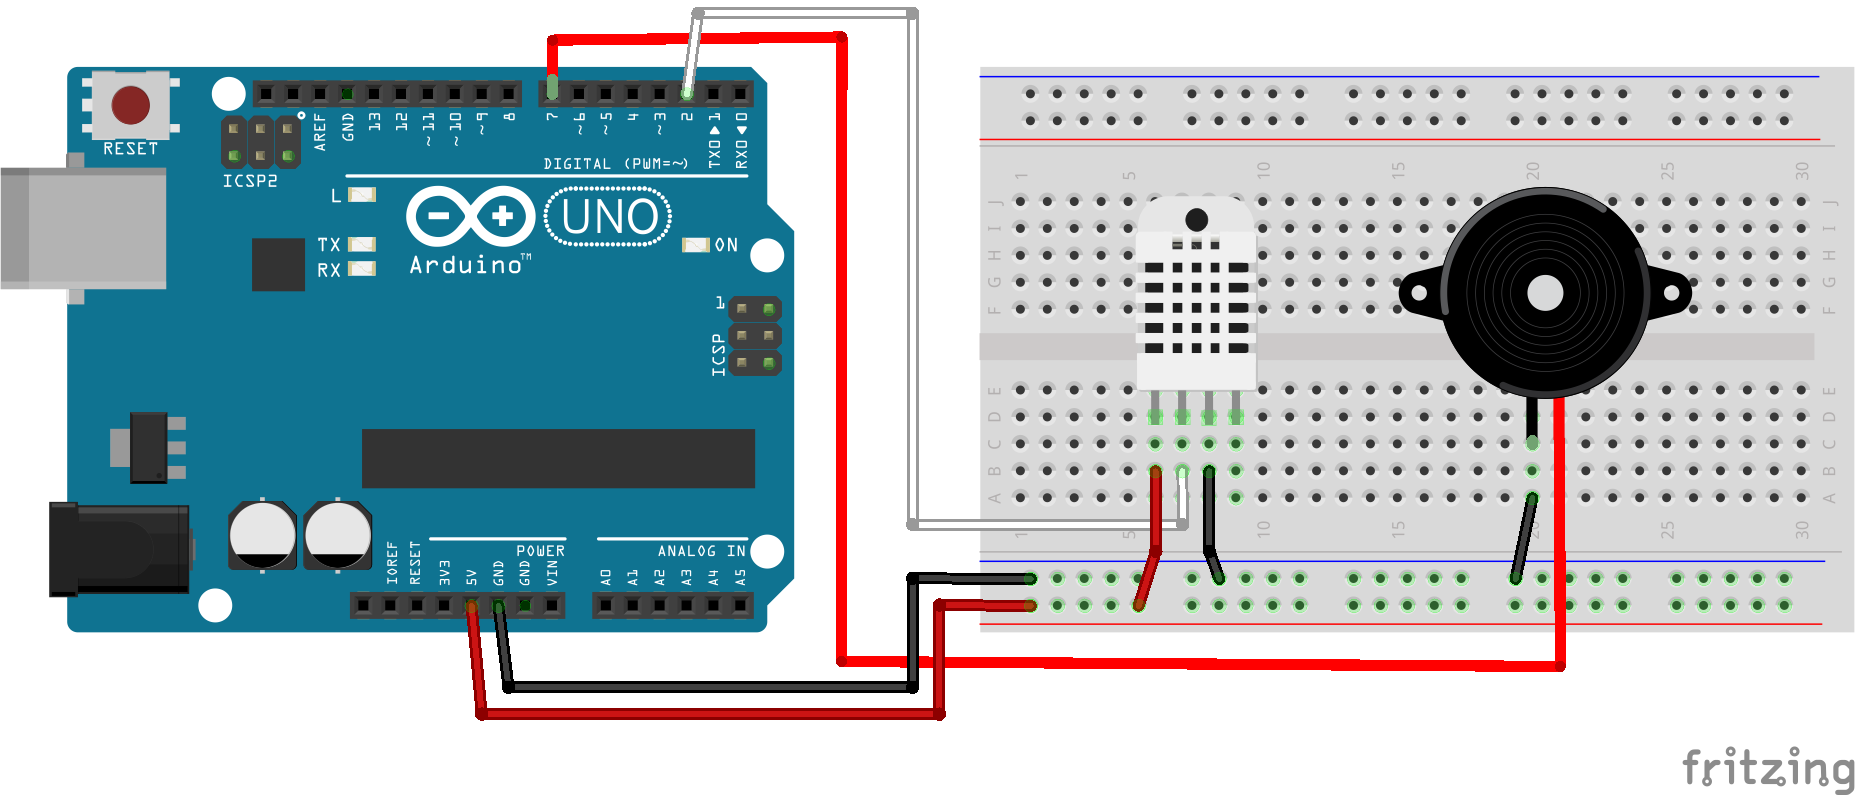
Connect the components to the Arduino Uno. Please refer to the wiring diagram below.
- Coding the Arduino
Third step is about coding the Arduino device to work with the components.
- Upload the Sketch
Lastly, upload the sketch to the Arduino.
Arduino Temperature Alarm: Detailed Explanation
To start this project, you need the following:
| Qty | Component |
| 1 | Arduino UNO |
| 1 | DHT22 Humidity and Temperature Sensor |
| 1 | Piezoelectric Buzzer |
Arduino UNO
We will be using an Arduino Uno microprocessor board. Arduino Uno is suitable for any projects and is the cheapest and widely used microprocessor board in the Arduino family. This is great for all kinds of IoT projects.

Digital Humidity and Temperature Module
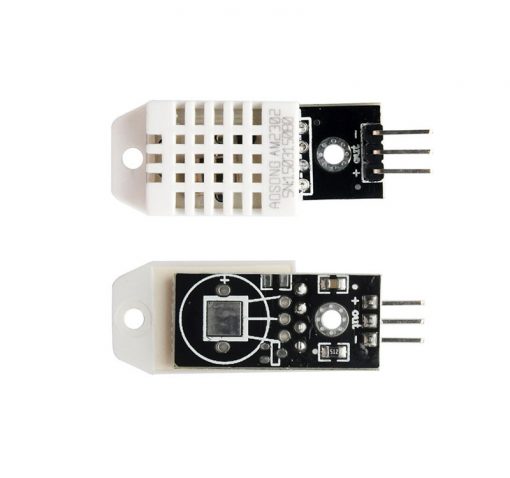
This project uses a DHT22 sensor. You can also use the DHT11 sensor module which is cheaper. Take note that the latter is less accurate.
DHT22 will read every 2 seconds for it to detect temperatures accurately. Be careful with the timing in the code.
Piezoelectric Buzzer

A piezo buzzer is an electronic device that can produce sound.
They are widely used in electronic products. The speaker only has 2 pins. To control it, attach the positive wire to the digital pin of the Arduino.
Schematic Diagram
The components of this project are powered using the 5v pin of the Arduino. The DHT22 is attached to digital pin 2 while the speaker is attached to the digital pin 7.
Code
First is to download the library needed for the project. TinyDHT is used for this project. Every time that the sensor detects temperatures above 29 degrees Celsius, the buzzer will beep.
#include "TinyDHT.h" //if it doesn't turn orange like the others below, enclose it using double quotation
#define DHTPIN 2
#define DHTTYPE DHT22
#define buzzer 7

DHT dht (DHTPIN, DHTTYPE);

int tempMode = 0;
int t;


void setup() {

  Serial.begin(9600);
  pinMode(buzzer, OUTPUT);
  dht.begin();

}

void loop() {

  t = dht.readTemperature(tempMode);
  Serial.println(t);
  if(t>29){
     tone(buzzer, 4000);
     delay(1000);
  }
  noTone(buzzer);
  delay(2000);
}
Upload
Now, it’s upload time. To upload your code to the Arduino Uno, attach the USB cord to your computer. Let your computer detect the Arduino Uno.
After that, go to Tools>Board and make sure to select Arduino Uno. Also, make sure to select the COM port that is listed on Tools>Port. The COM Port should say Arduino Uno beside it.
Click the “Upload” button to upload your sketch to the board.
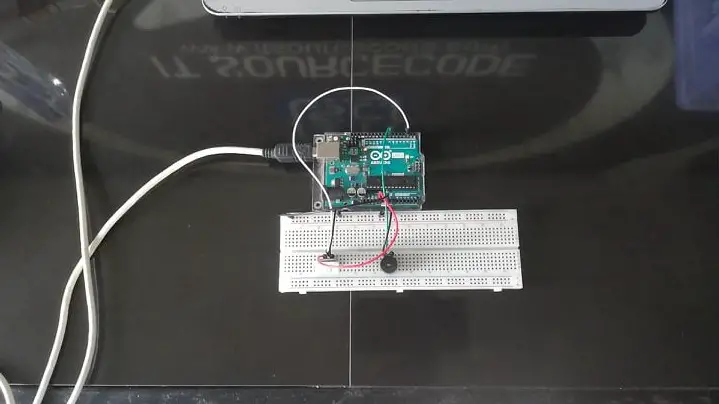
Output
Summary
So there you have it – Arduino Temperature Alarm. This device is simple to create and can be used in other projects as well.
You can always add more sensors to the device, upgrading it to a much-sophisticated device.
Download
Click the button below to download the source code.
Related Articles
Inquiries
Feel free to write your questions about the Arduino Temperature Alarm at the comments below.