
In this article, we will know how to sort data in excel, and how it is beneficial in organizing and analyzing of data. Along with we will know the types of sorting including the way to sort the data.
Sorting and filtering of data is the two feature of excel wherein helps in data analysis. Apart from it being popular, it is widely used in arranging, analyzing and organizing data based on a specific condition.
What is Sorting in Excel?
Excel Sort feature in Excel helps to analyze and organize data. Sorting can be done in numerical data value of a column in smallest to largest or largest to smallest. Along with the text value of data in a column can be sorted in alphabetical order from A to Z or Z to A.
Further, you can customize the sorting list of data by its format, cell or font color or icon set.
Type of Sorting
In Excel, you can decide if you want to apply to sort on the entire worksheet or just a cell range.
Sort Sheet
This sorting organizes data in a worksheet by one column. Then the relevant information in each row is kept together when the sorting is applied.
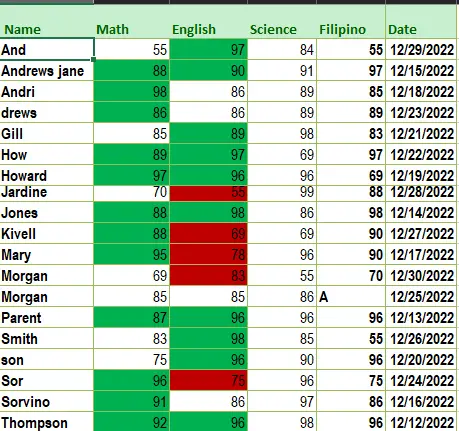
In our example, we’ll sort names alphabetically on a cell in the column H.
- Select the first column or cell you want to sort.
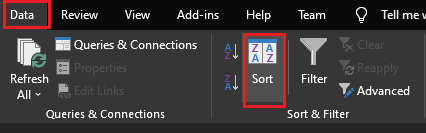
- On the Data tab select and click sort command.
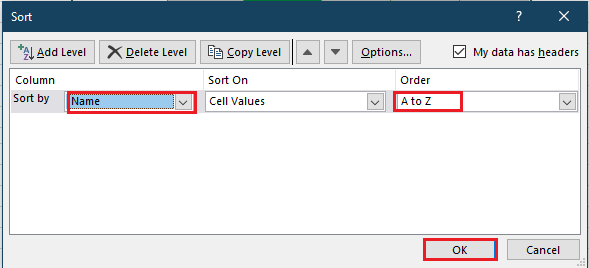
- The dialog box will appear, select the cell you want to sort. Then click the A-Z command to sort A to Z, or the Z-A command to sort Z to A.
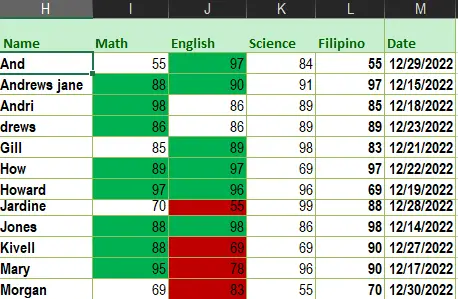
- As a result, the worksheet will sort your selected column.
Sort Range
Sorting in a worksheet with a range of cells can be helpful with a worksheet containing several tables. This sorting will not affect other content in excel.
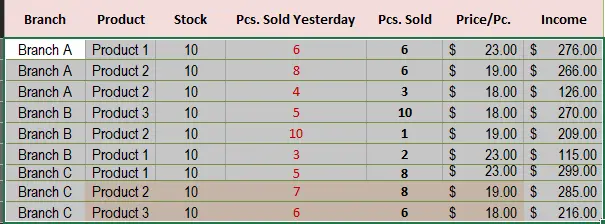
In our given example we will select data in other tables, which is the product and sort the number of products sold.
- Select the range you want to sort. In our example, we’ll select cell range A3:G11.
- On the Data tab, then select and select the sort filter group, click Sort command.
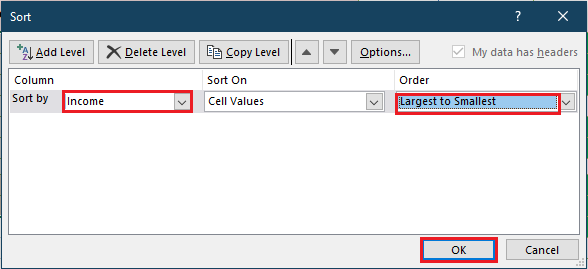
- Then the sort dialog box will pop up. Select the column to sort by. In our example, we will sort data on the product.
- Decide the sorting order it could be in descending or ascending order. In our example, we’ll use Largest to Smallest.
- If you are fine with your range of data, click OK.
- As a result, the selected column should be sorted. In our example, the income will be sorted from largest to smallest.
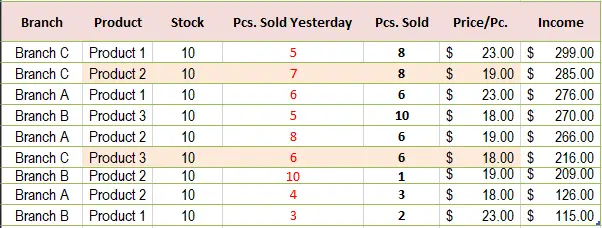
If the sorted data did not work as expected, kindly double-check cell values to make sure the value input in the worksheet is correct.
How to Custom Sorting Data in Excel
Custom sorting in Excel is an alternative if the default sorting tool in excel can not do the sorting you need. Therefore Excel provides a feature in creating your own custom list to determine sorting order of your own.
To do this follow these ways.
- Select the cell in the column you want to sort.
- On the Data Tab in your ribbon. Then look for Sort options and click it.
- As you click the Sort command. You will see the custom lists dialog box, if you have headers, don’t forget to check “My list has headers”.
- Then you see three columns containing. Under “Column,” select the column you want to sort from the dropdown. In this case, it is “Branch.”
- On the “Order” column, click on the dropdown next to “A to Z.” Select the option for “Custom List.”
- You will see a couple of options (month and day), as well as the option to create your own custom order. Select the month list where the months are abbreviate, as that matches the data. Then Click “OK.”
- Then, click on “Add Level” at the top left of the pop-up. Under “Column,” select “Product” from the dropdown.
- Click on the “Add Level” button at the top left of the pop-up again. Under “Column,” select “Branch” from the dropdown.
- Check the “Order” column to make sure “Branch” and “Product” say A to Z. Then click “OK.”
- Explore your amazing organized list
Sort Multiple Columns
In sorting multiple columns to the following steps:
- Click the Data tab, choose the sort filter group, click Sort.
- Select the column you want from the ‘Sort by’ drop-down list.
- Click on Add Level.
- Select another column from the ‘Then by’ drop-down list.
- Click OK.
Conclusion
In conclusion, this tutorial about how to sort in excel is a great help in organizing data. Apart from various ways to sort the data in worksheet, it can able to custom the sorting of data that meets the sorting you need.
Thank you for reading 😉

Glay Eliver
Programmer & Technical Writer at PIES IT Solution
Glay Eliver is a programmer and writer at PIES IT Solution, author of over 600 tutorials at itsourcecode.com. Specializes in JavaScript tutorials, Microsoft Office how-tos (Excel, Word, PowerPoint), and Python error debugging covering ImportError, TypeError, AttributeError, ModuleNotFoundError, and JavaScript ReferenceError. Authored several of the site’s highest-traffic Excel and MS Office reference articles.
Expertise: JavaScript · MS Excel · MS Word · MS PowerPoint · Python · Python ImportError · Python TypeError · Python AttributeError · ModuleNotFoundError · JavaScript ReferenceError · Pygame · View all posts by Glay Eliver →