HOW TO SCHEDULE OR SET TIME TO SEND EMAIL IN GMAIL – In this article, we will explore the valuable capabilities of Gmail’s email scheduling feature, which proves to be an indispensable tool for optimizing communication in various contexts.
From enhancing timing and efficiency to preserving content, Gmail’s scheduling feature offers a range of benefits worth delving into.

What are the reasons to schedule or set the time to send an Email in Gmail?
Scheduling emails in Gmail is a versatile tool. It optimizes send times, respects time zones, streamlines batch work, aids follow-ups, and reduces email clutter.
It’s ideal for email marketing, personal reminders, and better organization, enhancing control and efficiency in communication.
How to set time to send Email in Gmai? A step-by-step Guide
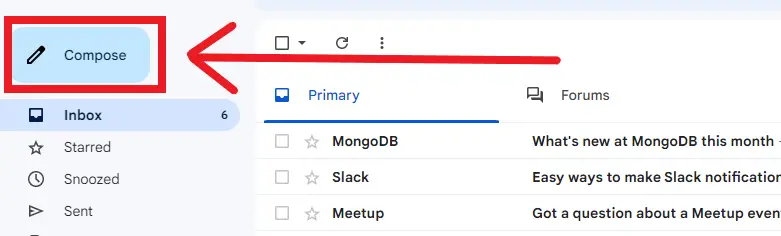
Step 1: Access your Gmail account by logging in.

Step 2: Click on “Compose” to initiate the email creation process.
Step 3: Create the email content you wish to schedule.

Step 4: Press the arrow icon located beside the “Send” button.
Step 5: Select “Schedule send“ from the available choices.

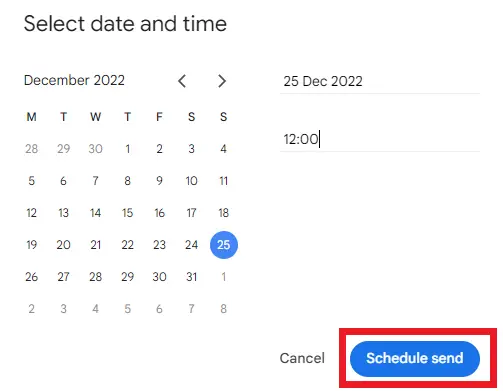
Step 6: Within the popup modal, explore scheduling choices. You can opt for a predefined option or set a custom date and time by clicking “Select date and time.”

Step 7: Conclude the scheduling process by clicking the “Schedule send” button.
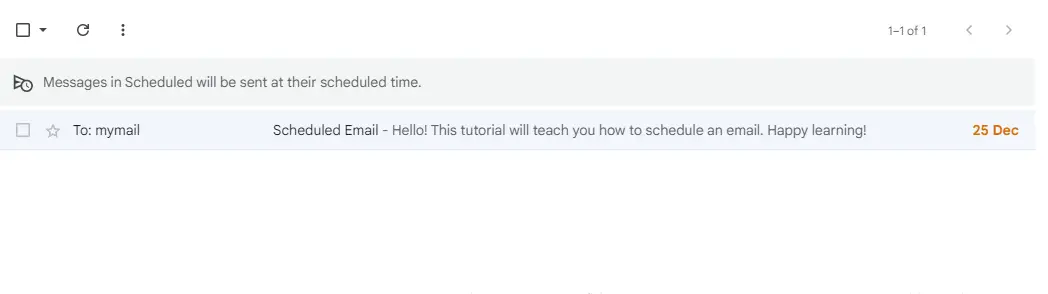
How to update scheduled Email in Gmail?
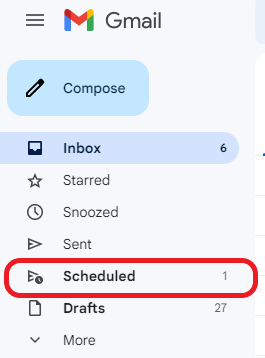
Step 1: To make changes to a scheduled email, navigate to the “Scheduled” section found on the left-hand panel.
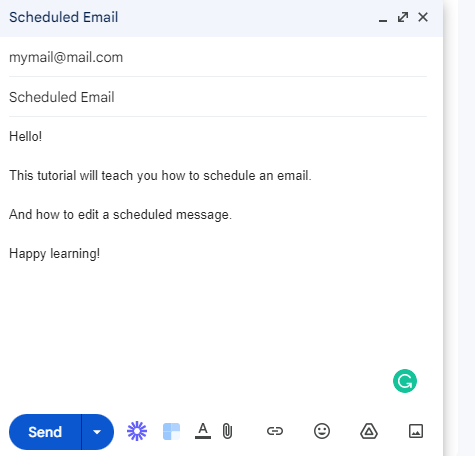
Step 2: You will see a list of your scheduled emails, from which you can select the specific email you want to make changes to.

Step 3: To begin the editing process, click on “Cancel send” positioned at the upper right corner of the email.

Step 4: If you want to edit the email’s content, go ahead and make the necessary alterations. If your goal is to change the scheduled time alone, continue to Step 5.
Step 5: Next, employ the identical method you used when originally scheduling the email.
This entails clicking the downward arrow adjacent to the “Send” button, then selecting “Schedule send,” and specifying a new date and time.
How to cancel scheduled Email in Gmail?
Step 1: To undo the scheduling of an email, go to the “Scheduled” section found in the left panel.

Step 2: A list containing your scheduled emails will appear, allowing you to choose the specific email you wish to revoke.
Step 3: To cancel the scheduled email, click the “Cancel send” option located in the top-right corner of the email.
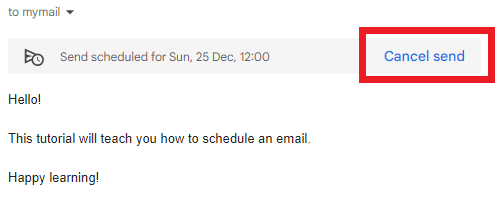
Please take note that when you cancel a scheduled email in Gmail, it doesn’t get deleted; instead, Gmail treats it as a draft and places it in the drafts folder. Refer to the Gmail notification provided below for reference.
Conclusion
In conclusion, Gmail’s email scheduling offers versatile benefits, enhancing timing, productivity, and organization.
Whether for marketing campaigns or personal reminders, it empowers users to optimize communication efficiently.
Additionally, its feature to treat canceled emails as drafts ensures content preservation and convenience.