This tutorial is all about How to add watermark to a picture using vb.net.
Watermark is a faint design made in some paper during manufacture, which is visible when held against the light and typically identifies the maker.
What is Visual Basic’s purpose?
The third-generation programming language was created to aid developers in the creation of Windows applications.
It has a programming environment that allows programmers to write code in.exe or executable files.
They can also utilize it to create in-house front-end solutions for interacting with huge databases.
It is because the language allows for continuing changes, you can keep coding and revising your work as needed.
However, there are some limits to the Microsoft Visual Basic download. If you want to make applications that take a long time to process, this software isn’t for you.
That implies you won’t be able to use VB to create games or large apps because the system’s graphic interface requires a lot of memory and space.
Furthermore, the language is limited to Microsoft and does not support other operating systems.
So let’s get Started:
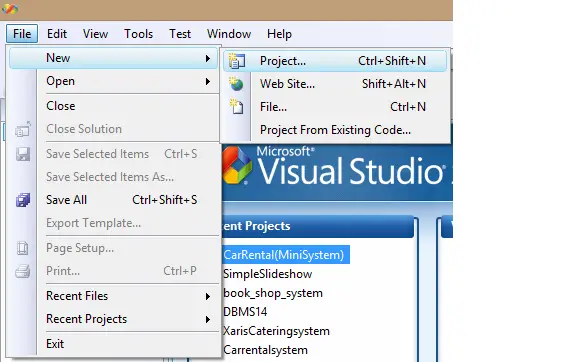
- First is open the Visual Basic, Select File on the menu, then click New and create a new project.
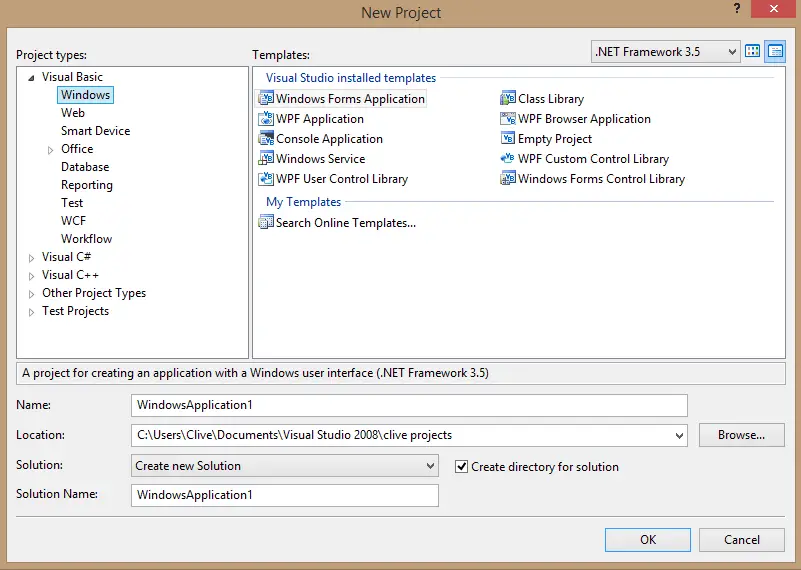
- Then a New Project Dialog will appear. You can rename your project, depending on what you like to name it. After that click OK
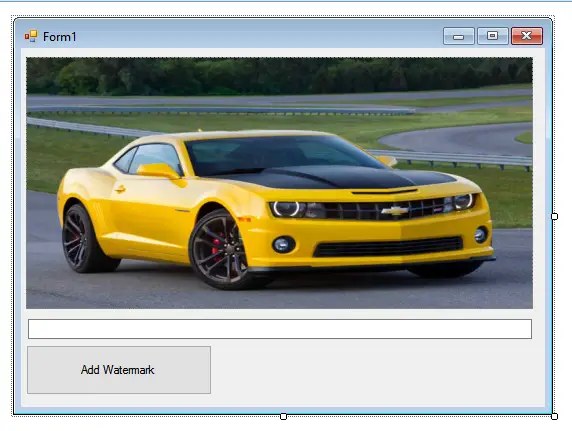
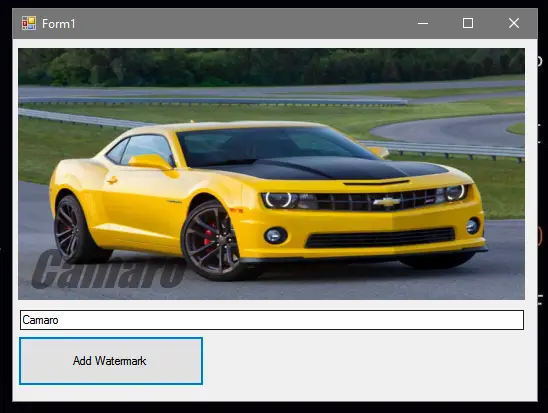
- Then design your form like this just like what I’ve shown you below.
For this design add a Picturebox, Button, and a Textbox from the toolbox.
The Textbox will be used to a text that will displayed as a watermark on image displayed in the PictureBox.
- After Designing your form, Add this following Code to the “Add Watermark” Button.
[vbnet]Private Sub Button1_Click(ByVal sender As System.Object, ByVal e As System.EventArgs) Handles Button1.Click
Dim NF As New Font("Impact", 36, FontStyle.Italic)
Dim NB As New SolidBrush(Color.FromArgb(64, 192, 255, 255))
NB.Color = Color.FromArgb(128, 0, 0, 0)
PictureBox1.CreateGraphics.DrawString(TextBox1.Text, NF, NB, 1, 190)
End Sub[/vbnet]
<li>Finally, Click F5 to run your Program.</li>Output:
Download How to Add Watermark to a Picture using VB.Net Code Here
If you have any comments or suggestion about on How to Add Watermark to a Picture using VB.Net, Please Feel Free to contact our webpage.
Readers might read also:
‘Add Watermark to a Picture’ implies that a saved file with the WATERMARK is created on your computer… your code don’t, it’s just like an overlay, nothing more
check this link
https://www.youtube.com/watch?v=4vI6SJ71m6Q&t=11s