How to Connect MySQL To Visual Studio 2019
This is a Complete Guide on How to Connect MySQL To Visual Studio 2019 where you will learn how to manipulate MySQL Database using different VS versions.
MySQL for Visual Studio makes use of and extends Visual Studio’s connection capabilities to create and store MySQL connections. Install the most recent version of MySQL Connector/NET on the client computer to ensure access to the full set of connection options.
In this tutorial on how to connect MySQL Database to visual studio .NET you will be introduced to the best practices on how to manipulate MySQL data using VB.NET.
Before we begin, watch here first the video on how to connect access database to vb.net application to get some ideas on the foregoing paragraph.
Anyway if you have not yet installed visual studio 2013, 2015, 2017 or 2019 version, you can download the visual studio here.
How to Connect MySQL to Visual Studio 2019
- Open Visual Studio
You can you use visual studio 2015, 2017 or 2019 for this tutorial.
- Create a VB.Net Project.
File New Project->Under Templates Select Visual Basic or Visual C#. as shown in the image below.

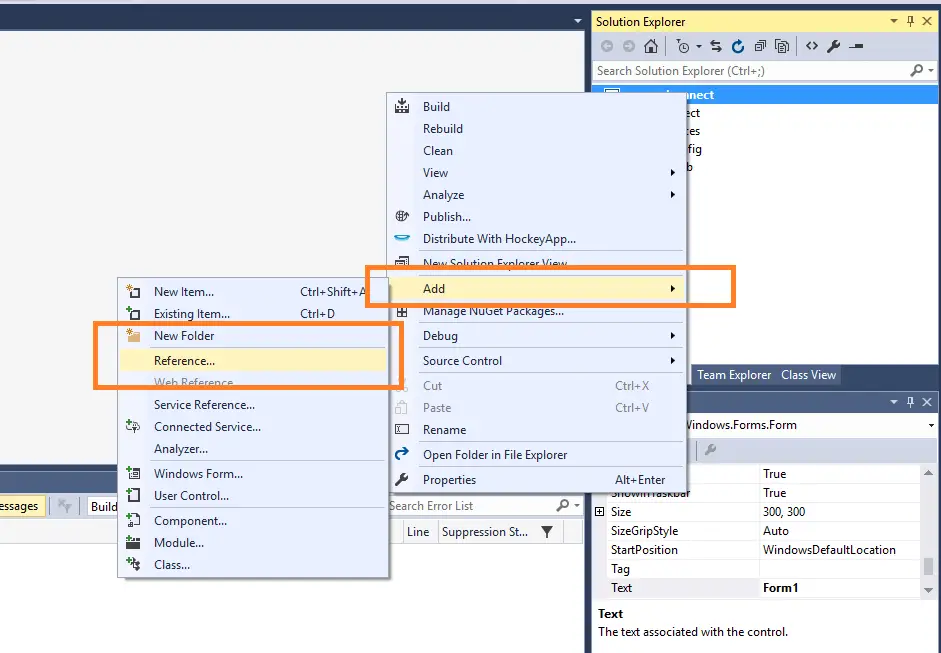
- Add mysq.data.dll Reference
Right Click Solution Explorer ->Click Add -> Select Reference.
- Select MySQL.data.dll from your recent Tab.
On the reference Manager, Click Browse / Recent the Select the MySql.data.dll.
See the complete guide here on how to add mysql.data.dll in visual studio.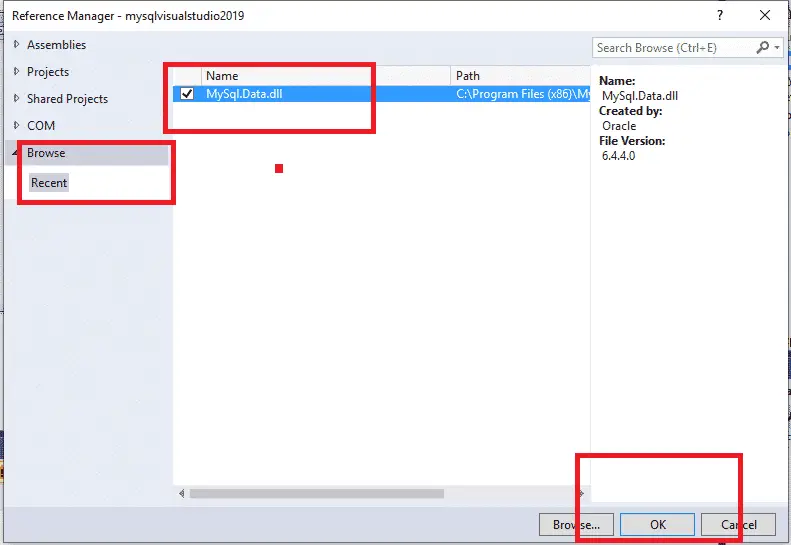
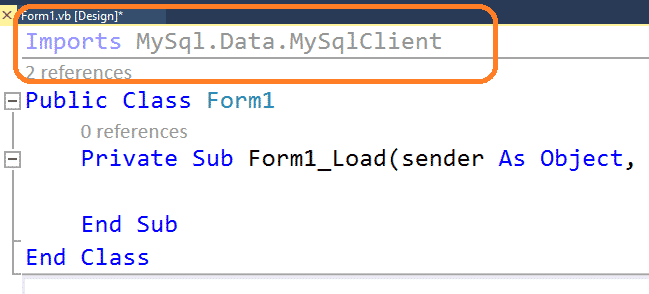
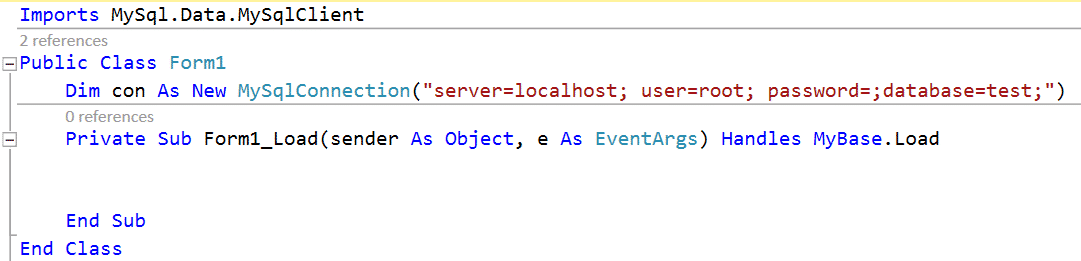
- Add Import above Public Class.
- Setup Connection String
Under public class Form1, Add the following declaration and Connectionstring.
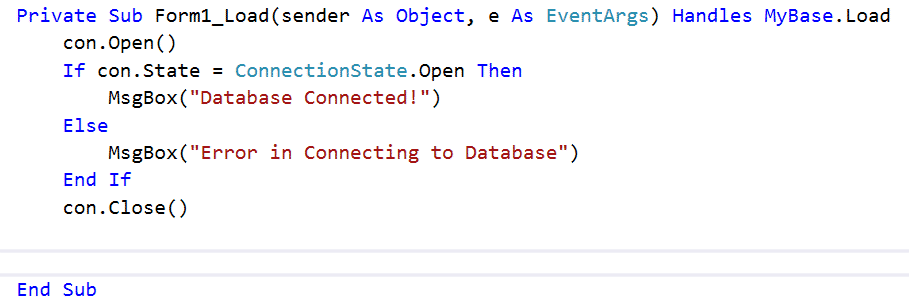
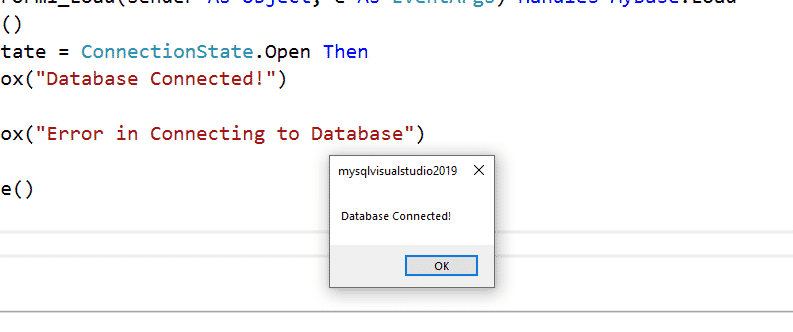
- Test the connection String.
- Run your Project.
Press F5 or simply click the Start Debugging.
VB.Net Code to Connect MySQL to Visual Studio.
Imports MySql.Data.MySqlClient
Public Class Form1
    Dim con As New MySqlConnection("server=localhost; user=root; password=;database=test;")
    Private Sub Form1_Load(sender As Object, e As EventArgs) Handles MyBase.Load
        con.Open()
        If con.State = ConnectionState.Open Then
            MsgBox("Database Connected!")
        Else
            MsgBox("Error in Connecting to Database")
        End If
        con.Close()


    End Sub
End Class
Load MySQL record in Visual Studio 2019
In this section, we are going to load a record from MySQL Database in VB.Net Application using Visual Studio 2019.
Step by step instructions on how to Load MySQL Record in VB.Net
Step 1: Create a table in the MySQL database. To do this, execute the SQL code below.
--
-- Table structure for table `tblpeople`
--
CREATE TABLE `tblpeople` (
`PEOPLEID` int(11) NOT NULL,
`LNAME` varchar(30) NOT NULL,
`FNAME` varchar(30) NOT NULL,
`ADDRESS` varchar(50) NOT NULL
) ENGINE=InnoDB DEFAULT CHARSET=latin1;
--
-- Dumping data for table `tblpeople`
--
INSERT INTO `tblpeople` (`PEOPLEID`, `LNAME`, `FNAME`, `ADDRESS`) VALUES
(1, 'tes', 'gf', 'hfc'),
(2, 'khg', 'uyg', 'f');
--
-- Indexes for dumped tables
--
--
-- Indexes for table `tblpeople`
--
ALTER TABLE `tblpeople`
ADD PRIMARY KEY (`PEOPLEID`);
--
-- AUTO_INCREMENT for dumped tables
--
--
-- AUTO_INCREMENT for table `tblpeople`
--
ALTER TABLE `tblpeople`
MODIFY `PEOPLEID` int(11) NOT NULL AUTO_INCREMENT, AUTO_INCREMENT=3;
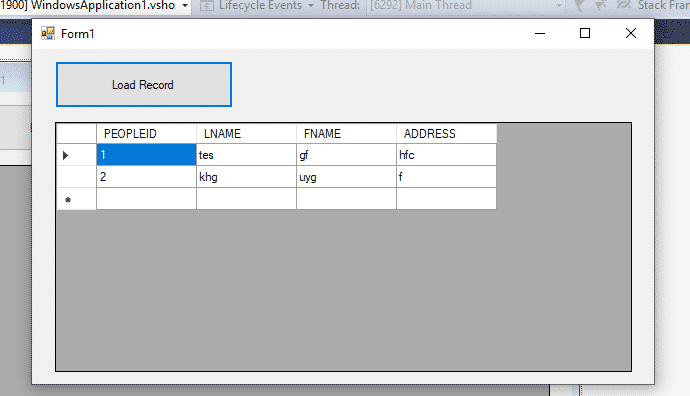
COMMIT;Step 2: Add 1 button to Form1 and 1 Datagridview1. Then Arrange it similar in the image below.
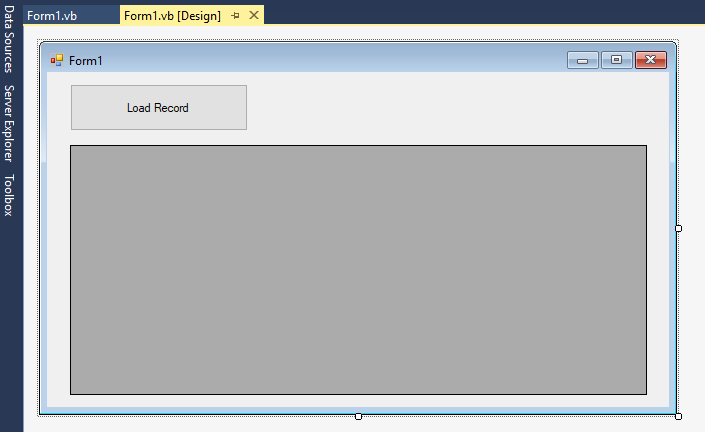
Step 3: Then Double click the “Load Record” Button and add the following code.
        Dim cmd As New MySqlCommand
        Dim dt As New DataTable
        Dim da As New MySqlDataAdapter

        Dim sql As String
        Try
            con.Open()

            sql = "Select * from tblpeople"
            With cmd
                .Connection = con
                .CommandText = sql
            End With
            da.SelectCommand = cmd

            da.Fill(dt)
            DataGridView1.DataSource = dt

            con.Close()

        Catch ex As Exception
            MsgBox(ex.Message)


        End Try
Step 5: Press F5 to test the project. When you execute the program and click the Load record button. You will see a result that looks as shown below.
Here’s a sample Code on how to Insert Record in MySQL using VB.Net using Visual Studio 2019.
 Dim result As Integer

        Try
            con.Open()
            With cmd
                .Connection = con
                .CommandText = "INSERT INTO `tblpeople` (`LNAME`, `FNAME`, `ADDRESS`) VALUES ( 'testLastname', 'TestFirstName', 'TestAddress');"
                result = .ExecuteNonQuery()

                If result > 0 Then
                    MsgBox("New record has been added Successfully!")
                    Me.Close()

                Else
                    MsgBox("No record has been added Successfully!")
                End If
            End With
        Catch ex As Exception
            MsgBox(ex.Message)
        Finally
            con.Close()

        End Try
You check here on how to add multiple records in vb.net to MySQL Database.
Updating of Records
Here’s a sample Code on how to Update MySQL Database in VB.Net using Visual Studio 2019.
  Dim result As Integer
        Try
            con.Open()
            With cmd
                .Connection = con
                .CommandText = "Update tblpeople set LNAME='newLastname', FNAME='NewFirstname', ADDRESS='NewAddress'  where ID ='SpecificIDofRecordtoUpdate'"
                result = .ExecuteNonQuery
                If result > 0 Then
                    MsgBox("New Record has been updated successfully!")
                Else
                    MsgBox("No Record has been updated successfully!")
                End If

            End With
        Catch ex As Exception
            MsgBox(ex.Message)
        Finally
            con.Close()

        End Try
Deleting of Records from MySQL Database
Here’s a sample Code on how to Delete Record in MySQL using VB.Net using Visual Studio 2019.
 Dim result As Integer
        Try
            con.Open()
            With cmd
                .Connection = con
                .CommandText = "DELETE FROM tblpeople where PEOPLEID =3"
                result = .ExecuteNonQuery
                If result > 0 Then
                    MsgBox("Record has been deleted successfully!")
                Else
                    MsgBox("No Record has been deleted successfully!")
                End If

            End With
        Catch ex As Exception
            MsgBox(ex.Message)
        Finally
            con.Close()

        End Try
After you complete this tutorial, you will be able to develop your own personalized vb.net projects.
You can watch here the complete video tutorial on how to master VB.Net with MySQL Database.
Summary
In summary, we have discussed here how to connect MySQL to visual studio 2019. Next, we also learn how to load the Mysql record from the database using VB.Net. Then, we have given also a code on how to Insert, Update and Delete Record from MySQL using VB.Net 2019.
Related Articles
- How To Create Login Page In ASP.NET MVC with Database
- Registration Page In ASP NET With Source Code
- CRUD Operation in ASP NET MVC With Source Code
- Login Code In C# with SQL Server Free Source Code
- How To Populate Datagridview With MySQL Database using C#
- How to Add Columns and Rows in the Datagridview in C#
- Retrieving and Deleting Data Using MySQL Database and C#.Net
- How to Retrieve and Update the Data Using C# and MySQL Database
Inquiries
If you have any questions or suggestions about this tutorial on how to connect MySQL to Visual Studio 2019 or using different versions, please leave a comment below.
Hi teacher,Do u have course video on udemy
Sorry, I don’t have a course video in udemy maybe soon. thanks for dropping by.
Please sir I don’t know how to use mysql am familiar with V.B I need help on how to start with mysql
This is a very good source of information…It is hard to research for all this info in the web…here is the more comprehensive and very much useful peice of information. It is very hard to find this in books and other tutorial sites…i dont know why…this is a very important lesson…specially if you don’t have someone to guide you and you are in your own in learning in programming and data science…thank you sir…
Thank you so much for your comment.
access denied. for webhosting remote MySQL connection. how to solve?