Python MySQL Connection: Simple Python Step by Step Guide
Python is becoming popular to students because of its simplicity. Together with a database, you can create unique and powerful projects. This article will guide you in establishing a Python MySQL connection using Pycharm and XAMPP.
Tools
For this example, you will use Pycharm IDE or you other IDEs that support Python. You will also use XAMPP.
If you are new to Pycharm, it will take time to install and to create a project for the first time. But after that, it will be smooth sailing.
Now that is out of the way, let’s get started.
How to establish Python MySQL Connection
- Setting-up your project.
If you used Pycharm before, you can skip this step. This first step is configuring your project. To do this, you need to click at the “Add Configuration” button at the upper right of Pycharm. When the “Run/Debug Configuration” window appears, click the plus icon and choose Python. Now you can name your configuration, choose the module name (which is the python mysql connection file) and choose your Python interpreter. There will be an interpreter already installed because Pycharm did it for you. Just select it and click OK.
You can skip this step if this is not your first time in Pycharm. You only need to do this once but you can also add other configurations for the future.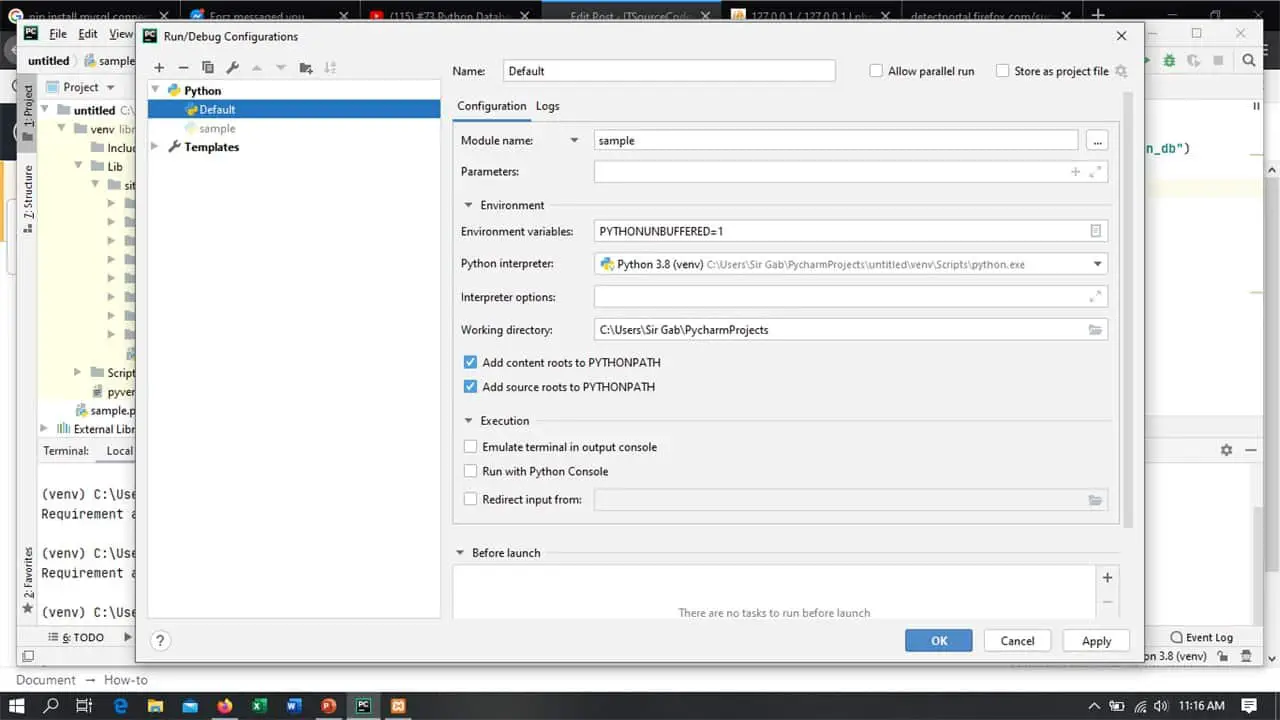
- Creating the database
Run XAMPP and create your database. For this example, I have a database called python_db with a students table. this table has 4 fields: id, fName, mName, and lName.
- MySQL pip command
Installing the python mysql connection connector is easy using the pip command. In the Pycharm terminal, just type the command pip3 install mysql-connector. This will download the connector for our database.
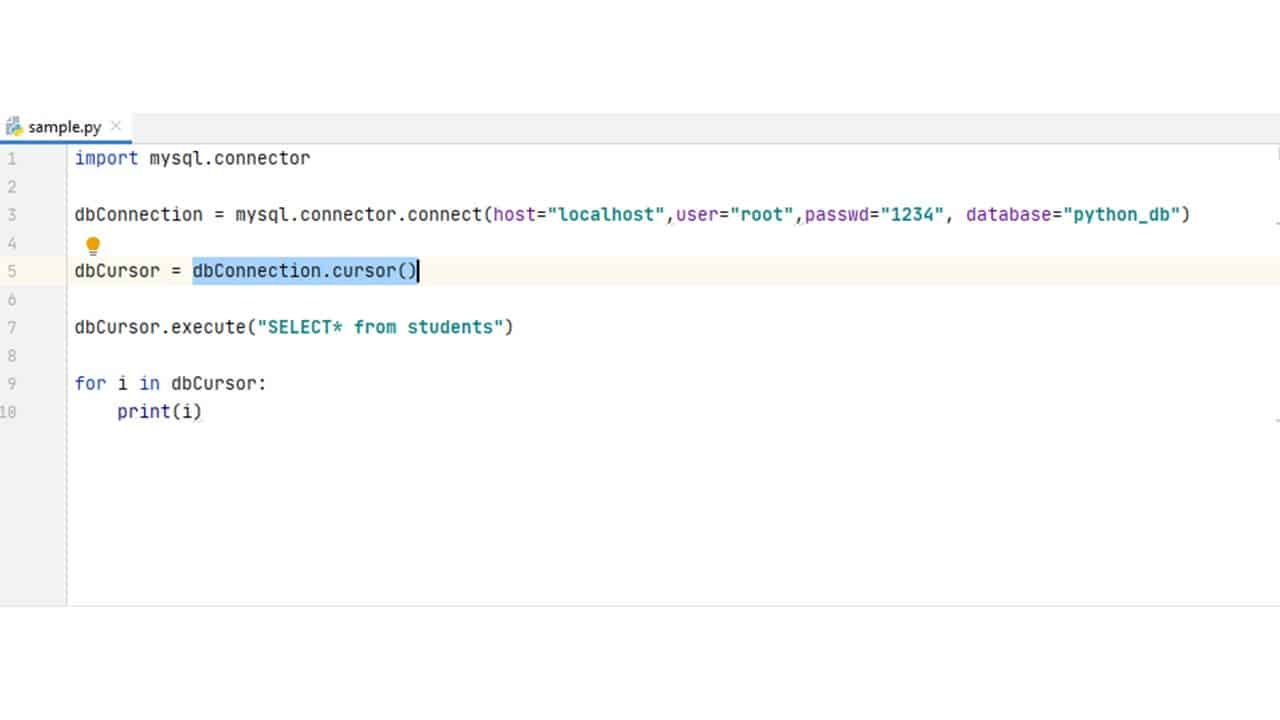
- The actual code
Now you are ready to code! First is to import the mysql connector using import mysql.connector. Then create a variable for the mysql connector and set its parameters with mysql.connector.connect(). These parameters are your usual database parameters like username, host, password, and database name. After that, you will create dbConnection.cursor() that will hold the data. Next is your SQL and your for loop to display the data. Below is the screenshot of a sample code.
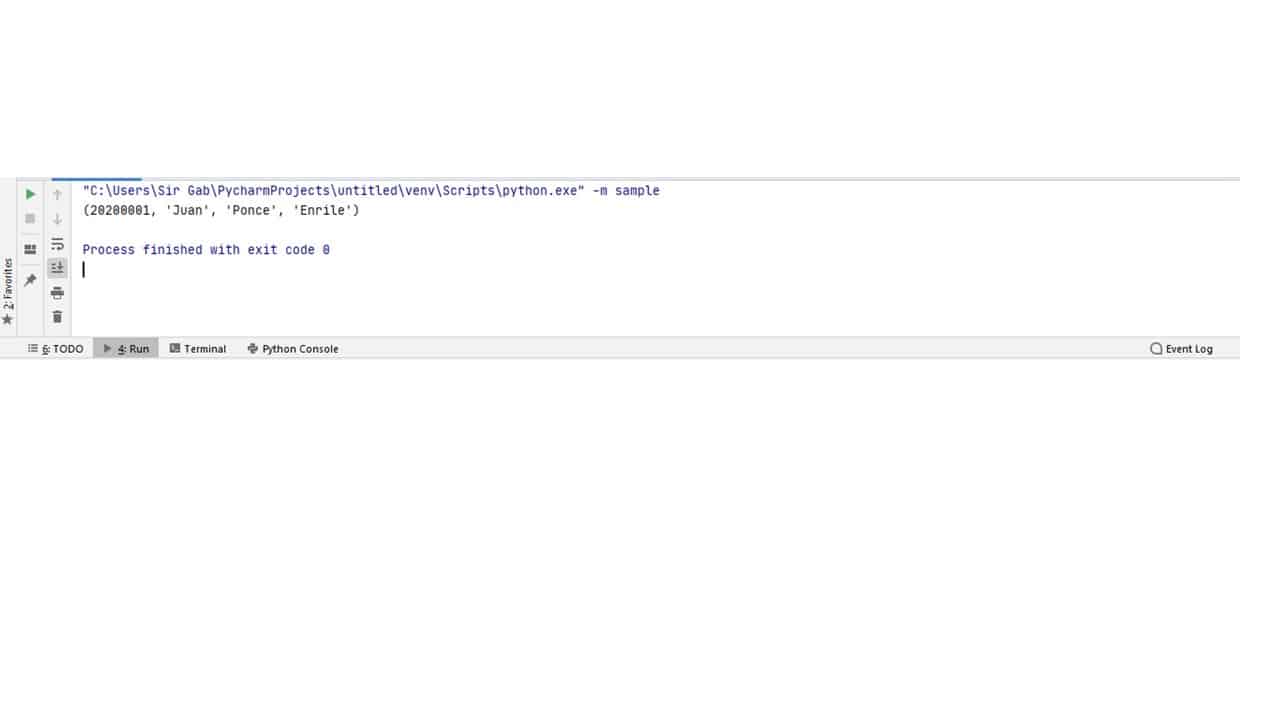
- The output
Conclusion
That’s how to establish a Python MySQL connection in Pycharm and XAMPP. Python is simple and easy to learn so why don’t you give it a try? For more Python articles, click the links below.
Inquiries
If you have any questions or suggestions about the python mysql connection example, please feel free to leave a comment below.