
In this article, I will show you how to interface a keypad to Arduino and output it to a LCD.
Keypads on devices are essential mode of input. Without it, users cannot input numbers to a device or choose and select a function. It is a burden if there are no keypads present.
But today, I will show you the ropes in using a keypad and LCD to integrate in your next project.
Arduino Keypad and LCD: Steps in Creating the Device
Step 1: Gathering the Components
To start off, this project will have two parts: the Arduino Device and the Program. First thing to do is to collect the hardware components and make the device. To do that, you will be needing the following:
| Quantity | Components |
| 1 | Arduino Uno |
| 1 | 4×4 Matrix Keypad |
| 1 | LCD with I2C Interface |
Arduino UNO
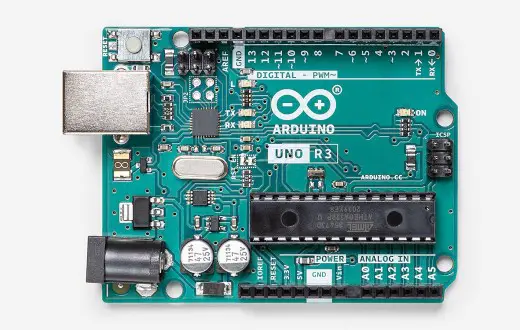
You will be using Arduino Uno for this project. It is an easy to use microprocessor board. Arduino Uno is suitable for any projects and is the cheapest and widely used microprocessor board in the Arduino family. This is great for all kinds of IoT projects.
16×2 Liquid Crystal Display with I2C
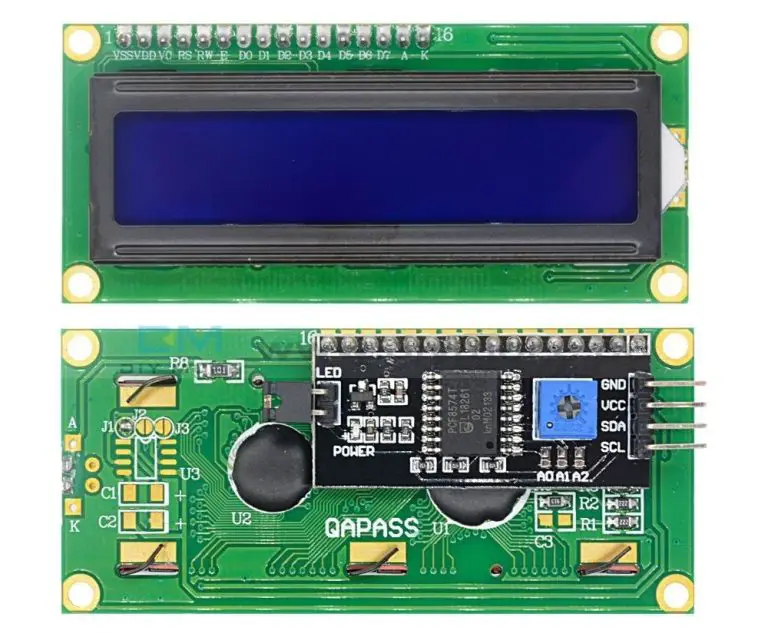
The LCD that we are using has 16 columns and 2 rows. Also, it comes with an I2C interface. This means we will only need 4 connections for the power and display. This type of LCD is great if you are planning to connect more modules to the Arduino.
4×4 Matrix Keypad
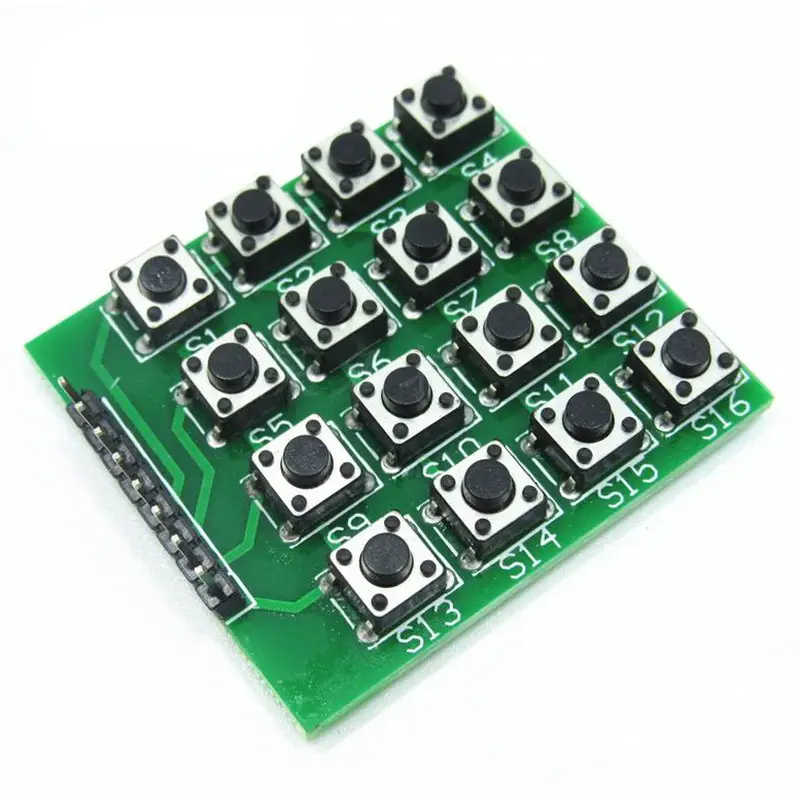
This is an example of a 4×4 Matrix keypad. It has 8 pins – 4 for the columns and 4 for the rows. It works by having the rows at HIGH and columns at LOW. So when you push the switch, that row is HIGH. This sends a signal to the Arduino which key was pressed.
Step 2: Connecting the Arduino Components

Now you are ready to connect the components to the Arduino Uno. Connect the power and the ground pin to 5V and GND for the LCD. Next is to connect the pins of the keypad to the digital pins of the Arduino.
Since it has 8 pins, 4 of it will be for the columns. Connect the first four pins, starting at Digital Pin 2. Next is to connect the LAST pin of the keypad to Digital Pin 6. Basically, you are completing the wiring procedure from both end, finishing at the middle.
Step 3: The Arduino Code
First thing to do is install the library. There are many libraries out there you can use but the Keypad libary of Nullkraft and LiquidCrystal_I2C works best for this. Download the library and install it using the library manager of the Arduino IDE.
Go to the official guide on installing libraries in Arduino for more info.
The code below works with any kind of keypad. If you have a 4 x 3 keypad, just set the columns to 3.
#include <Keypad.h>//Keypad library
#include <LiquidCrystal_I2C.h>//Liquid Crystal Display with I2C

const byte ROWS = 4; //four rows
const byte COLS = 4; //four columns
int x = 0;//variable for char count

char keys[ROWS][COLS] = {
  {'1','2','3','A'},
  {'4','5','6','B'},
  {'7','8','9','C'},
  {'*','0','#','D'}
};

byte rowPins[ROWS] = {9, 8, 7, 6}; //connect to the row pinouts of the keypad
byte colPins[COLS] = {5, 4, 3, 2}; //connect to the column pinouts of the keypad

//Create an object of keypad
Keypad keypad = Keypad( makeKeymap(keys), rowPins, colPins, ROWS, COLS );

//Create an instance of the LCD
LiquidCrystal_I2C lcd(0x27, 16, 2);

void setup(){

  lcd.init();   // initialize LCD
  lcd.backlight();
  Serial.begin(9600);
}

void loop(){

  char key = keypad.getKey();// Read the key

  // Print if key pressed
  if (key){

    lcd.setCursor(x,0);
    lcd.print(key);
    x=x+1;
  }
}
Now upload the sketch to the Arduino.
Step 4: Test Run
After you successfully upload the sketch, input some numbers. It will look like this.

Conclusion
So there you have it! Arduino Keypad and LCD. This project is intimidating at first but you will see that it is fairly easy to do. You can combine this to other Arduino projects and build an awesome system!
Related Articles
Inquiries
Feel free to write your questions about this at the comments below.